2019 TOYOTA SUPRA tow
[x] Cancel search: towPage 261 of 456
261
3
Supra Owner's Manual3-1. CONTROLS
CONTROLS
This chapter describes all standard,
country-specific and special equip-
ment available for the model series.
It may therefore describe equip-
ment and functions which are not
installed in your vehicle, for exam-
ple on account of the optional
equipment selected or the country
specification. This also applies to
safety-relevant functions and sys-
tems. Please comply with the rele-
vant laws and regulations when
using the corresponding functions
and systems. Safety note
WARNING
Fragile objects, for example glass
bottles or glasses, can break in the
event of an accident. Shards may
scatter throughout the interior. There
is a danger of injury or damage to
property. Do not use any fragile
objects while driving. Only stow fragile
objects in closed storage compart-
ments.
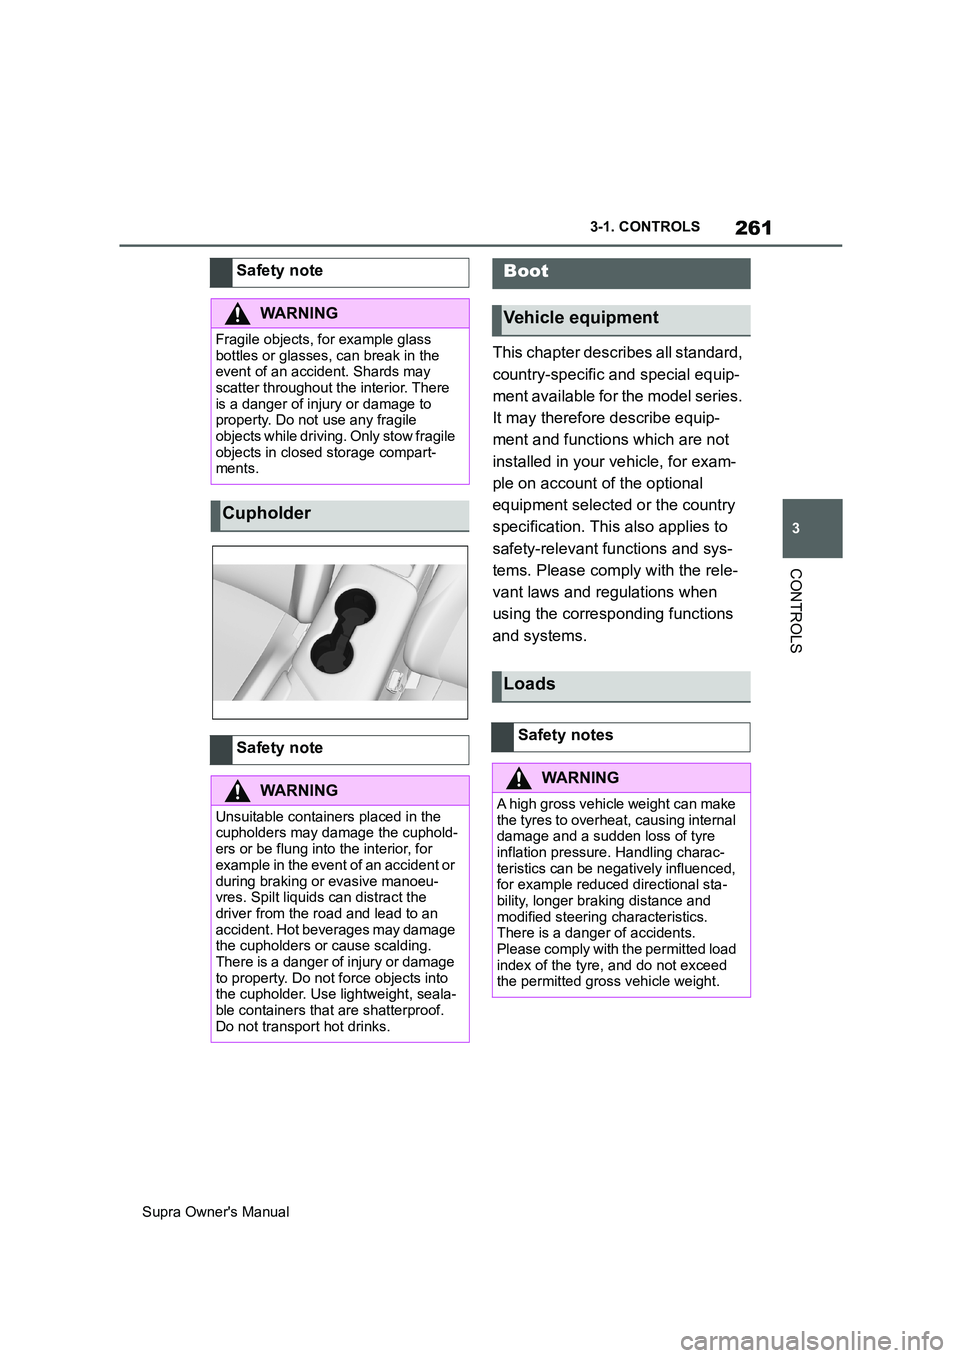
Cupholder
Safety note
WARNING
Unsuitable containers placed in the
cupholders may damage the cuphold-
ers or be flung into the interior, for
example in the event of an accident or
during braking or evasive manoeu-
vres. Spilt liquids can distract the
driver from the road and lead to an
accident. Hot beverages may damage
the cupholders or cause scalding.
There is a danger of injury or damage
to property. Do not force objects into
the cupholder. Use lightweight, seala-
ble containers that are shatterproof.
Do not transport hot drinks.
Boot
Vehicle equipment
Loads
Safety notes
WARNING
A high gross vehicle weight can make
the tyres to overheat, causing internal
damage and a sudden loss of tyre
inflation pressure. Handling charac-
teristics can be negatively influenced,
for example reduced directional sta-
bility, longer braking distance and
modified steering characteristics.
There is a danger of accidents.
Please comply with the permitted load
index of the tyre, and do not exceed
the permitted gross vehicle weight.
Page 262 of 456
262
Supra Owner's Manual3-1. CONTROLS
Wrap protective material around
any sharp corners and edges on
the load.
Heavy transported loads: stow
as far forward and as low down as possible, ideally directly
behind the boot partition.
Small and lightweight trans-
ported loads: can be secured
with retaining straps, a luggage
net or other suitable straps.
Large and heavy transported
loads: secure with lashing straps.
Equipment for securing the trans-
ported load, for example lashing
straps, tensioning straps or luggage
nets, must be secured to the lash-
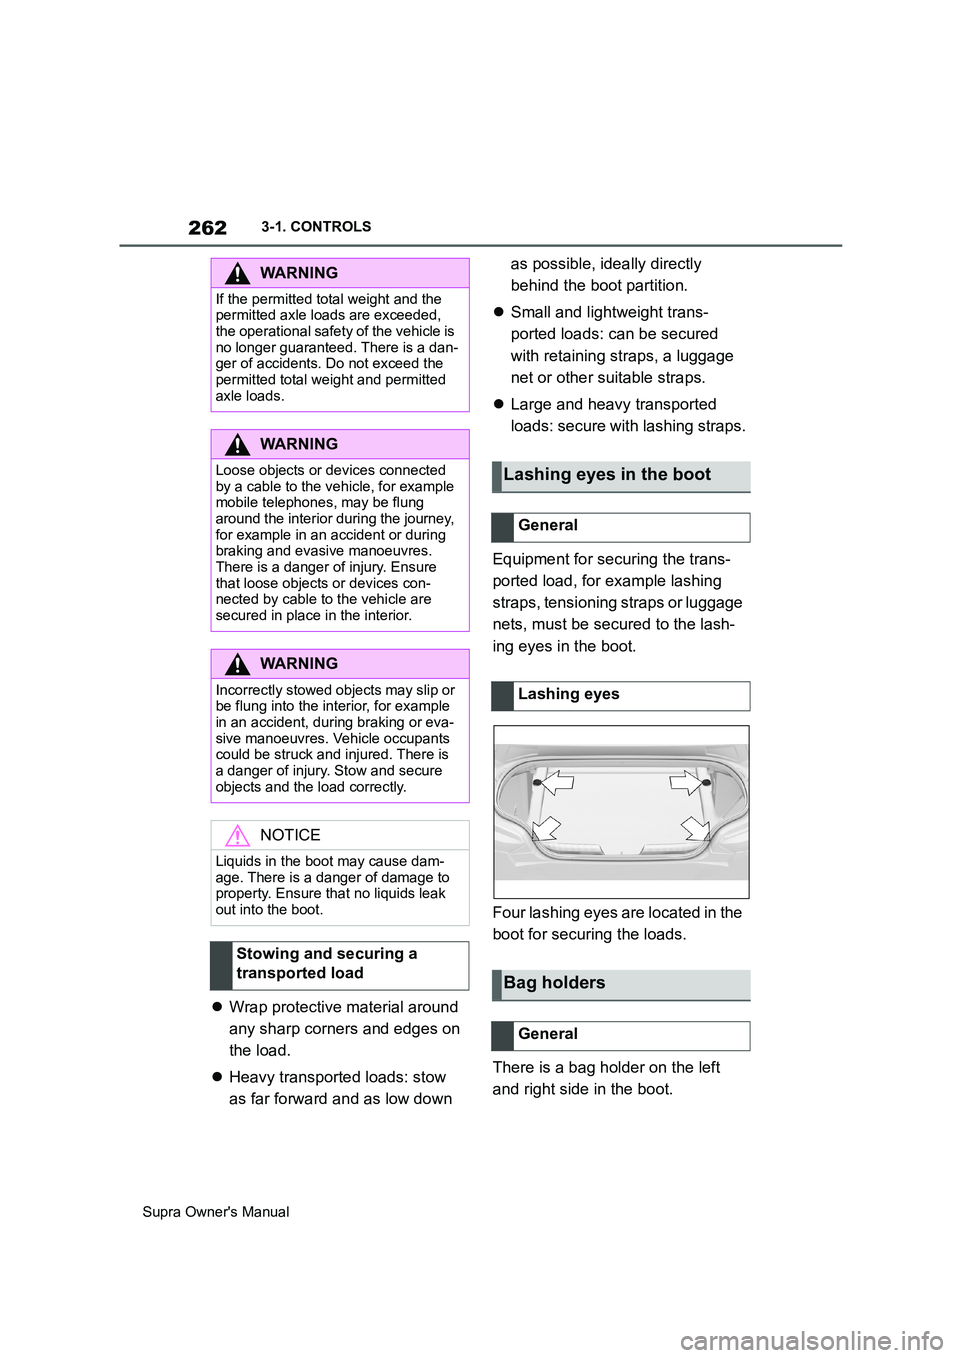
ing eyes in the boot.
Four lashing eyes are located in the
boot for securing the loads.
There is a bag holder on the left
and right side in the boot.
WARNING
If the permitted total weight and the
permitted axle loads are exceeded,
the operational safety of the vehicle is
no longer guaranteed. There is a dan-
ger of accidents. Do not exceed the
permitted total weight and permitted
axle loads.
WARNING
Loose objects or devices connected
by a cable to the vehicle, for example
mobile telephones, may be flung
around the interior during the journey,
for example in an accident or during
braking and evasive manoeuvres.
There is a danger of injury. Ensure
that loose objects or devices con-
nected by cable to the vehicle are
secured in place in the interior.
WARNING
Incorrectly stowed objects may slip or
be flung into the interior, for example
in an accident, during braking or eva-
sive manoeuvres. Vehicle occupants
could be struck and injured. There is
a danger of injury. Stow and secure
objects and the load correctly.
NOTICE
Liquids in the boot may cause dam-
age. There is a danger of damage to
property. Ensure that no liquids leak
out into the boot.
Stowing and securing a
transported load
Lashing eyes in the boot
General
Lashing eyes
Bag holders
General
Page 263 of 456
263
3
Supra Owner's Manual3-1. CONTROLS
CONTROLSThere is a tensioning strap on the
right-hand trim panel for securing
small objects.
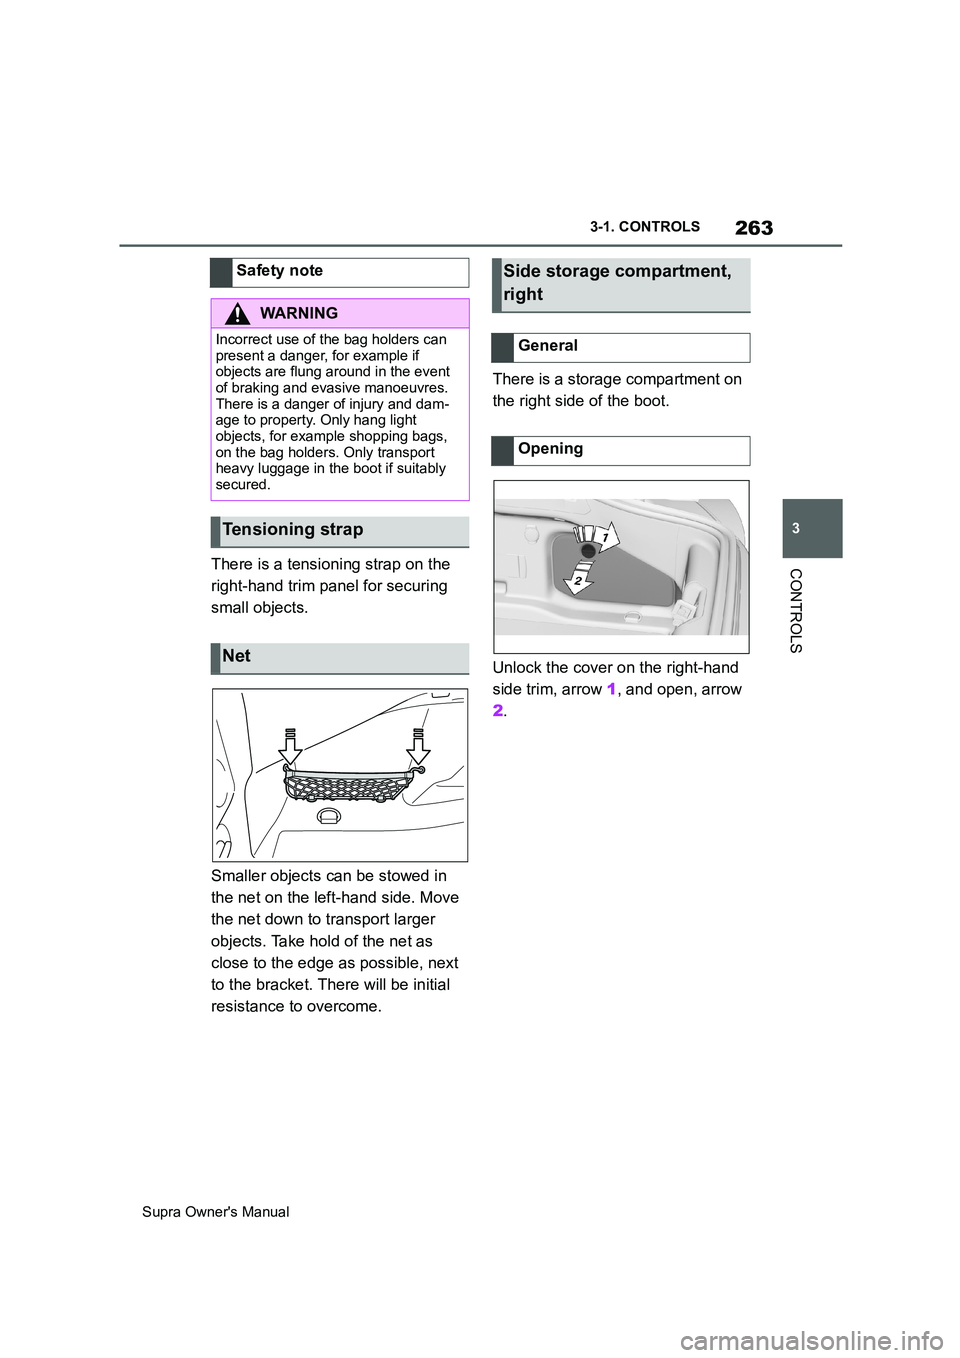
Smaller objects can be stowed in
the net on the left-hand side. Move
the net down to transport larger
objects. Take hold of the net as
close to the edge as possible, next
to the bracket. There will be initial
resistance to overcome.There is a storage compartment on
the right side of the boot.
Unlock the cover on the right-hand
side trim, arrow 1, and open, arrow
2. Safety note
WARNING
Incorrect use of the bag holders can
present a danger, for example if
objects are flung around in the event
of braking and evasive manoeuvres.
There is a danger of injury and dam-
age to property. Only hang light
objects, for example shopping bags,
on the bag holders. Only transport
heavy luggage in the boot if suitably
secured.
Tensioning strap
Net
Side storage compartment,
right
General
Opening
Page 270 of 456
270
Supra Owner's Manual4-1. DRIVING HINTS
This situation, known as aquaplan-
ing, means that the tyre can actu-
ally lose contact completely with
the road surface and the vehicle
can neither be steered, nor the
brakes properly applied.
Please comply with the following
when driving through water:
Only drive through still water.
Only drive through water up to a
max. depth of 25 cm, 9.8 in.
Drive through water at a walking
speed of no more than 5 km/h, 3
mph.
The vehicle is equipped with the
Anti-lock Brake System ABS as
standard.
Perform full braking in situations that require it.
The vehicle remains steerable. Any
obstacles can be avoided by per-
forming steering movements as
smoothly as possible.
A pulsing of the brake pedal and
hydraulic regulating sounds indi-
cate that the Anti-lock Brake Sys-
tem ABS is regulating.
In certain braking situations, the
perforated brake discs can cause
functional noise. However, func-
tional noises have no effect on the
efficiency and operational safety of
the brakes.
In damp weather, on gritted roads
and in heavy rain, apply the brakes
lightly every few kilometres/miles. Driving through water
General
Safety note
NOTICE
Driving through excessively deep
water too fast can result in water
entering the engine compartment,
electrical system or transmission.
There is a danger of damage to prop-
erty. When driving through water, do
not exceed the maximum water depth
and speed specified above.
Safe braking
General
Objects in the range of movement
of the pedals
WARNING
Objects in the driver's footwell can
restrict the pedal travel or block a
pedal that has been pressed. There is
a danger of accidents. Stow items in
the vehicle so that they are secure
and cannot get into the driver's
footwell. Only use floor mats that are
suitable for the vehicle and can be
securely fastened to the floor. Do not
use loose floor mats, and do not place
several floor mats on top of one
another. Make sure that there is suffi-
cient space for the pedals. Ensure
that floor mats are securely reat-
tached after having been removed, for
example for cleaning.
Wet roads
Page 281 of 456
281
5
Supra Owner's Manual5-1. MOBILITY
MOBILITY
have the legally prescribed mini-
mum height of 1.6 mm, approxi-
mately 0.06 in.
The positions of the wear displays
are identified on the tyre's side wall
by TWI, Tread Wear Indicator.
Inspect tyres regularly for damage,
the presence of foreign bodies and
wear.
Vehicle behaviour that may indicate
tyre damage or other faults:
• Unusual vibrations.
• Unusual tyre or running noises.
• Unusual vehicle response, such
as pronounced pulling to the left
or right.
Damage can be caused by the fol-
lowing situations, for example:
• Driving over kerbs.
• Road damage.
• Tyre inflation pressure insuffi-
cient.
• Vehicle overloading.
• Incorrect tyre storage.
Irrespective of the tyre tread depth,
change tyres after 6 years at the
latest.
The date of manufacture of the tyre
is indicated on the tyre sidewall.
Tyre damage
General
Safety notes
WARNING
If the tyres are damaged, the tyre
inflation pressure may be reduced,
which in turn could cause you to lose
control of the vehicle. There is a dan-
ger of accidents. If you suspect tyre
damage while you are driving, imme-
diately reduce speed and bring the
vehicle to a stop. Have the wheels
and tyres checked. To do so, carefully
drive to any authorized Toyota retailer
or Toyota authorized repairer, or any
reliable repairer. If necessary, have
the vehicle towed or transported
there. Do not repair damaged tyres,
but have them replaced instead.
WARNING
Tyres can become damaged by run-
ning over obstacles, for example
kerbs or road damage, at high speed.
Larger wheels have a smaller tyre
cross-section. The smaller the tyre
cross-section, the higher the risk of
tyre damage. There is a danger of
accidents and damage to property. If
possible, drive around obstacles or
drive over them slowly and carefully.
Age of tyres
Recommendation
Date of manufacture
Page 301 of 456

301
5
Supra Owner's Manual5-1. MOBILITY
MOBILITY
3After screwing on the wheel
stud, remove the adapter again
and stow it.
• Park the vehicle on firm and-
non-slip ground at a safe dis-
tance from traffic.
• Switch on the hazard warning
lights.
• Apply the parking brake.
• Engage a gear or select selector
lever position P.
• As soon as the traffic permits,
have all vehicle occupants get
out of the vehicle and guide them
out of the danger area, for exam-
ple behind the crash barrier.
• Depending on the equipment,
take the wheel change tools and,
if necessary, the emergency
wheel out of the vehicle.
• If applicable, set up warning tri-
angle or flashing light at the cor-
rect distance.
• Additionally protect the vehicle
against rolling away.
• Undo the wheel studs by half a
turn.The jacking points are located in
the marked positions.
1Hold the jack with one hand,
arrow 1, and grasp the jack
crank or lever with your other
hand, arrow 2.
2Guide the jack into the rectangu-
lar recess of the jacking point Preparing the vehicleJacking points
Raising vehicle
WARNING
Your hands or fingers could get
trapped when using the jack. There is
a danger of injury. Keep your hands in
the described position when using the
jack, and do not change this position.
Page 303 of 456
303
5
Supra Owner's Manual5-1. MOBILITY
MOBILITY
two wheel studs crosswise until
finger-tight.
If non-original light alloy wheels not
from the vehicle manufacturer are fit-
ted, the wheel studs belonging to the
wheels may also have to be used.
4Tighten the remaining wheels
tuds until finger-tight and then
tighten all the wheel studs
crosswise.
5Turn the jack crank anticlock-
wise to retract the jack and
lower the vehicle.
6Remove the jack and stow it
securely.
1Tighten the wheel studs cross-
wise. The tightening torque
is140 Nm, approximately 101 lb
ft.
2Stow the faulty wheel in the
boot, if necessary.
Due to its size, the faulty wheel cannot
be accommodated under the boot floor.
3Check tyre inflation pressure at
the next opportunity and correct
as necessary.
4Reset the Tyre Pressure Monitor
(TPM).
5Check the tight fit of the wheel
studs using a calibrated torque
wrench.
6Drive to the nearest any author-
ized Toyota retailer or Toyota
authorized repairer, or any relia-ble repairer to have the dam-
aged tyre replaced.
In case of a flat tyre, the emergency
wheel can be used as a replace-
ment for the defective tyre. The
emergency wheel is intended for
short-term use until the defective
wheel has been replaced.
Only fit one emergency wheel at
most.
Additionally, regularly check the
tyre inflation pressure of the emer-
gency wheel in the boot and correct
the pressure if necessary. After changing the wheel
Emergency wheel
Principle
General
Safety note
WARNING
The emergency wheel has special
dimensions. When driving with an
emergency wheel, the driving proper-
ties may change, for example
reduced directional stability when
braking, longer braking distance and
modified self-steering behaviour in
the limit range. There is a danger of
accidents. Drive with care and do not
exceed a speed of 80 km/h, 50 mph.
Page 304 of 456
304
Supra Owner's Manual5-1. MOBILITY
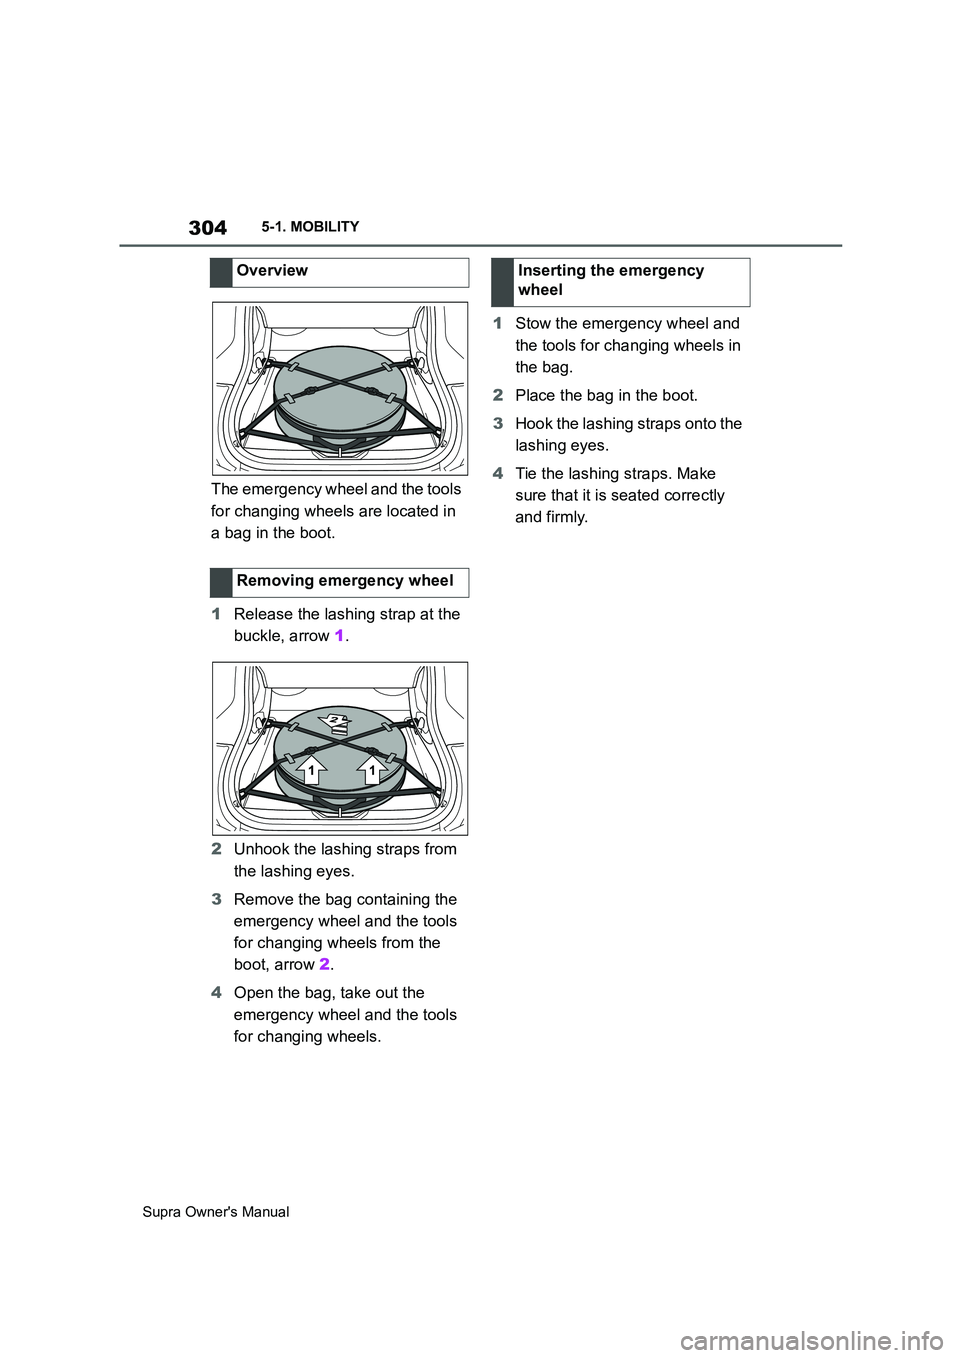
The emergency wheel and the tools
for changing wheels are located in
a bag in the boot.
1Release the lashing strap at the
buckle, arrow 1.
2Unhook the lashing straps from
the lashing eyes.
3Remove the bag containing the
emergency wheel and the tools
for changing wheels from the
boot, arrow 2.
4Open the bag, take out the
emergency wheel and the tools
for changing wheels.1Stow the emergency wheel and
the tools for changing wheels in
the bag.
2Place the bag in the boot.
3Hook the lashing straps onto the
lashing eyes.
4Tie the lashing straps. Make
sure that it is seated correctly
and firmly. Overview
Removing emergency wheel
Inserting the emergency
wheel