Page 169 of 224

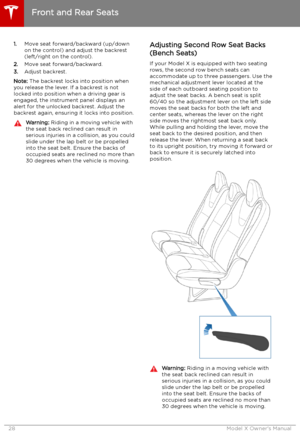
Charging Status
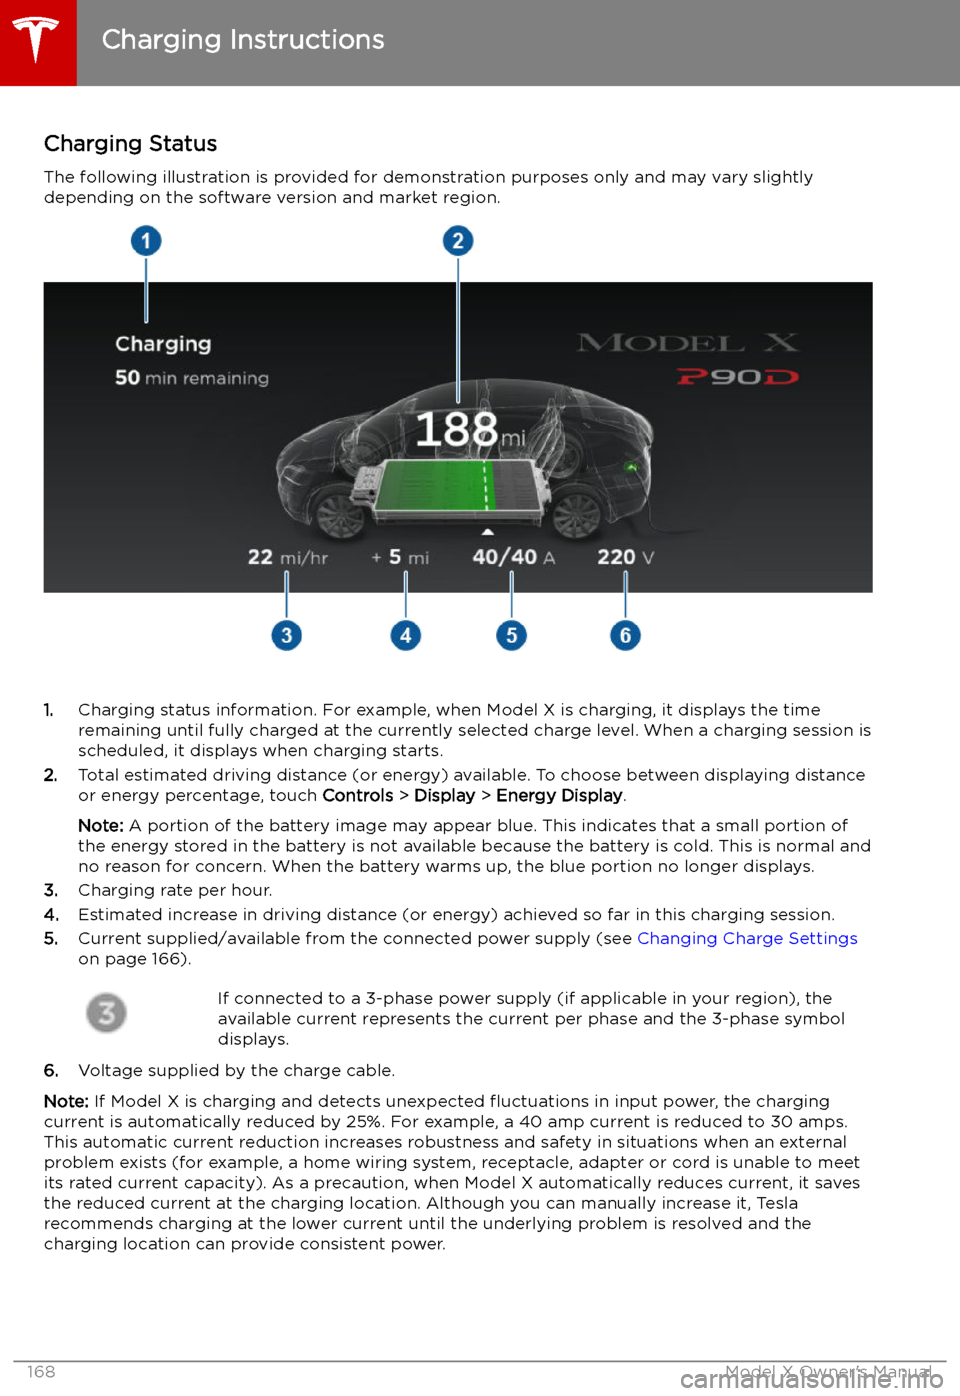
The following illustration is provided for demonstration purposes only and may vary slightly
depending on the software version and market region.
1. Charging status information. For example, when Model X is charging, it displays the time
remaining until fully charged at the currently selected charge level. When a charging session is
scheduled, it displays when charging starts.
2. Total estimated driving distance (or energy) available. To choose between displaying distance
or energy percentage, touch Controls > Display > Energy Display .
Note: A portion of the battery image may appear blue. This indicates that a small portion of
the energy stored in the battery is not available because the battery is cold. This is normal and
no reason for concern. When the battery warms up, the blue portion no longer displays.
3. Charging rate per hour.
4. Estimated increase in driving distance (or energy) achieved so far in this charging session.
5. Current supplied/available from the connected power supply (see Changing Charge Settings
on page 166).
If connected to a 3-phase power supply (if applicable in your region), the
available current represents the current per phase and the 3-phase symbol
displays.
6. Voltage supplied by the charge cable.
Note: If Model X is charging and detects unexpected
Page 170 of 224
Supercharger Usage Fees and Idle
Fees
When charging using a Tesla supercharger,
SUPERCHARGING information displays at the
bottom of the charging screen. This information includes the location, the time
that charging started, and an estimate of how
much the session will cost. When you stop
supercharging, the estimated cost of that
session displays until a new supercharging session begins. If free charging is applicable,
the estimated cost displays as zero.
Note: Estimated pricing is displayed for your
convenience only and may not re
Page 171 of 224
Maintenance
Maintenance Schedule
Service Intervals
Your vehicle should generally be serviced on an as-needed basis. However, Tesla
recommends the following maintenance items
and intervals, as applicable to your vehicle, to ensure continued reliability and efficiency of
your Model X.
Page 172 of 224
Model X, even if charging is not in
progress.Warning: Keep your hands and clothing
away from cooling fans. Some fans
operate even when Model X is powered
off.Warning: Some
Page 173 of 224
Tire Care and Maintenance
Maintaining Tire Pressures
If you are not towing a trailer, keep tires
in
Page 174 of 224
Checking and Adjusting Tire PressuresFollow these steps when tires are cold andModel X has been stationary for over three
hours:
1. Refer to the Tire and Loading Information
label located on the driver
Page 175 of 224
Punctured Tires
A puncture eventually causes the tire to lose pressure, which is why it is important to check
tire pressures frequently. Permanently repair
or replace punctured or damaged tires as
soon as possible.
Your tubeless tires may not leak when
penetrated, provided the object remains in the tire. If, however, you feel a sudden vibration or
ride disturbance while driving, or you suspect a tire is damaged, immediately reduce yourspeed. Drive slowly, while avoiding heavy
braking or sharp steering and, when safe to do so, stop the vehicle. Arrange to have Model X
transported to a Tesla Service Center, or to a nearby tire repair center.
Note: In some cases, you can temporarily
repair small tire punctures (under 6 mm) using
an optional tire repair kit available from Tesla.
This allows you to slowly drive Model X to Tesla or to a nearby tire repair facility.Warning: Do not drive with a punctured
tire, even if the puncture has not caused the tire to de
Page 176 of 224
Warning: Road holding is seriously
impaired if the tires are incorrectly
installed on the wheels.Removing and Installing Lug Nut Covers
If your Model X is equipped with lug nut
covers, you must remove them to access the
lug nuts.
To remove a lug nut cover:
1. Insert the curved part of the lug nut cover
tool (located in your glovebox) into the hole at the base of the Tesla "T".
2. Maneuver the lug nut cover tool so that it
is fully inserted into the hole in the lug nut
cover.
3. Twist the lug nut cover tool so that the
curved part is touching the middle of the
lug nut cover.
4. Firmly pull the lug nut tool away from the
wheel until the lug nut cover is released.
To install the lug nut cover:
1. Align the lug nut cover into position.
2. Push firmly on the lug nut cover until it
fully snaps into place.
Tire Care and Maintenance
Maintenance175