Page 60 of 610

Charging stations or V2X charging/
discharging devices using this standard
are UL certified and safe to use in the US.
While supported by NISSAN, this connector
may not become the US SAE standard. V2X
charging/discharging is possible (even
several times a day). If the battery tempera-
ture is near the red zone, in order to protect
the battery, power of the V2X charging/
discharging will be limited.For additional information, consult a V2X
device manufacturer or a V2X charging/
discharging service provider.
Power limitation mode
This mode protects the health and opera-
tion of the vehicle's Li-ion battery. This
mode operates in certain extreme condi-
tions (heat, cold, low state of charge). Power
available to vehicle systems, including its
traction motor, is limited resulting in limited
performance, acceleration and top speed.
Charging may be automatically termi-
nated, especially with repeated quick
charging in extreme hot weather.
Checking Li-ion battery charge
The three methods for checking the
amount of charge are as follows:
• Check by using the Li-ion battery available
charge gauge on the vehicle information
display when the power switch is placed in
the ON position. For additional informa-
tion, refer to “Li-ion battery available
charge gauge” and “Low battery charge
indicator” in the “Instruments and con-
trols” section of this manual. • Check by using an internet enabled
smart phone or personal computer. For
additional information, refer to the
“NissanConnect® Manual (for Leaf ).
• Check by using the charging status indi- cator light. For additional information,
refer to “Charging status indicator lights”
in this section.
NOTE:
• During the charge operation, charge
continues when the power switch is
placed in the ON position.
• The Li-ion battery cannot be charged if
the quick charge connector and the
normal charge connector are con-
nected at the same time. If another
charge connector is connected mid-
charge, charging will stop.
• For safety reasons, it is not possible to
switch to the READY to drive position
while a charge connector is connected.
• During charging, it is possible that the
radio may be inaudible due to noise by
the electromagnetic wave.
For 62 kWh battery models*
*Subject to charging equipment capability
to output 100kW
ChargingCH-9
Page 62 of 610

4. Connect the charge connector to thecharge port. If it is connected normally, a
beep will sound once.
5. If charging has started or if the battery is waiting for the charging timer, a beep
will sound twice and the charging status
indicator light display will change. For
additional information, refer to “Charg-
ing status indicator lights” in this section. To stop normal charge:
1. Ensure that the charge connector lock is
not engaged. For additional information,
refer to “Charge connector lock system”
in this section.
2. Press the button on the charge connec- tor, release the lock and remove the
charge connector from the charge port
and properly store it.
3. Close the charge port cap.
4. Af ter closing the charge port cap on the charge port, close the charge port lid.
NOTE:
To stop charging mid-charge, remove
the charge connector. Charging auto-
matically stops.
HOW TO TRICKLE CHARGE
(AC 110–120 VOLT) BY L1 EVSE
WARNING
• If you wear a pacemaker or an im- plantable cardiovascular defibrilla-
tor (ICD), stay at least 6 in (15 cm)
away from the EVSE.
• If you wear a pacemaker or an im- plantable cardiovascular defibrilla-
tor (ICD), check with the electric
medical device manufacturer con-
cerning the effects that charging
may have on implanted devices be-
fore starting the charge operation.
Charging may affect the operation.
• In order to avoid an electric shock or fire due to a short circuit, connect to
a GFI (Ground Fault Interrupter) cir-
cuit breaker and use a waterproof
electrical ground socket.
ChargingCH-11
Page 66 of 610
7. Remove the safety cap from the chargeconnector.
8. Connect the charge connector to the charge port. If it is connected normally, a
beep will sound once.
9. If charging has started, or if the Li-ion battery is waiting for the charging timer,
a beep will sound twice and the charg-
ing status indicator light display will
change. For additional information, refer
to “Charging status indicator lights” in
this section.
10. When recharging outside, such as inyour driveway, use a commercially
available padlock attached in position
�Ato prevent thef t.
ChargingCH-15
Page 73 of 610
6. Open the charge port cap. For additionalinformation, refer to “Charge port cap” in
the “Pre-driving checks and adjust-
ments” section of this manual. 7. Remove the safety cap from the charge
connector. 8. Connect the charge connector to the
charge port. If it is connected normally, a
beep will sound once.
9. If charging has started, or if the Li-ion battery is waiting for the charging timer,
a beep will sound twice and the charg-
ing status indicator light display will
change. For additional information, refer
to “Charging status indicator lights” in
this section.
CH-22Charging
Page 84 of 610
7. Remove the safety cap from the chargeconnector. 8. Connect the charge connector to the
charge port. If it is connected normally, a
beep will sound once.
9. If charging has started, or if the Li-ion battery is waiting for the charging timer,
a beep will sound twice and the charg-
ing status indicator light display will
change. For additional information, refer
to “Charging status indicator lights” in
this section. 10. When recharging outside, such as in
your driveway, use a commercially
available padlock attached in position
�Ato prevent thef t.
ChargingCH-33
Page 88 of 610
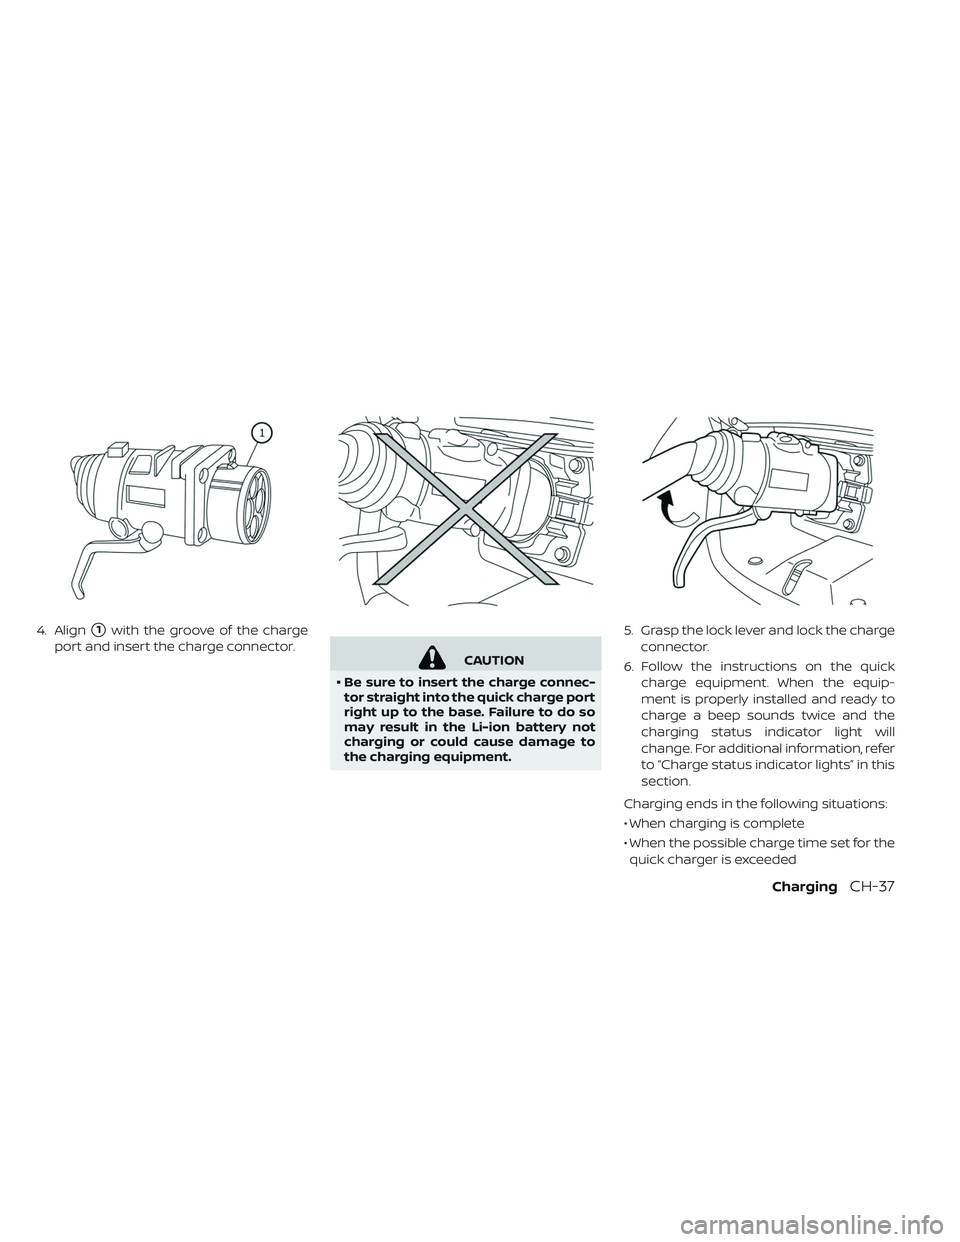
4. Align�1with the groove of the charge
port and insert the charge connector.
CAUTION
• Be sure to insert the charge connec-
tor straight into the quick charge port
right up to the base. Failure to do so
may result in the Li-ion battery not
charging or could cause damage to
the charging equipment. 5. Grasp the lock lever and lock the charge
connector.
6. Follow the instructions on the quick charge equipment. When the equip-
ment is properly installed and ready to
charge a beep sounds twice and the
charging status indicator light will
change. For additional information, refer
to “Charge status indicator lights” in this
section.
Charging ends in the following situations:
• When charging is complete
• When the possible charge time set for the quick charger is exceeded
ChargingCH-37
Page 91 of 610
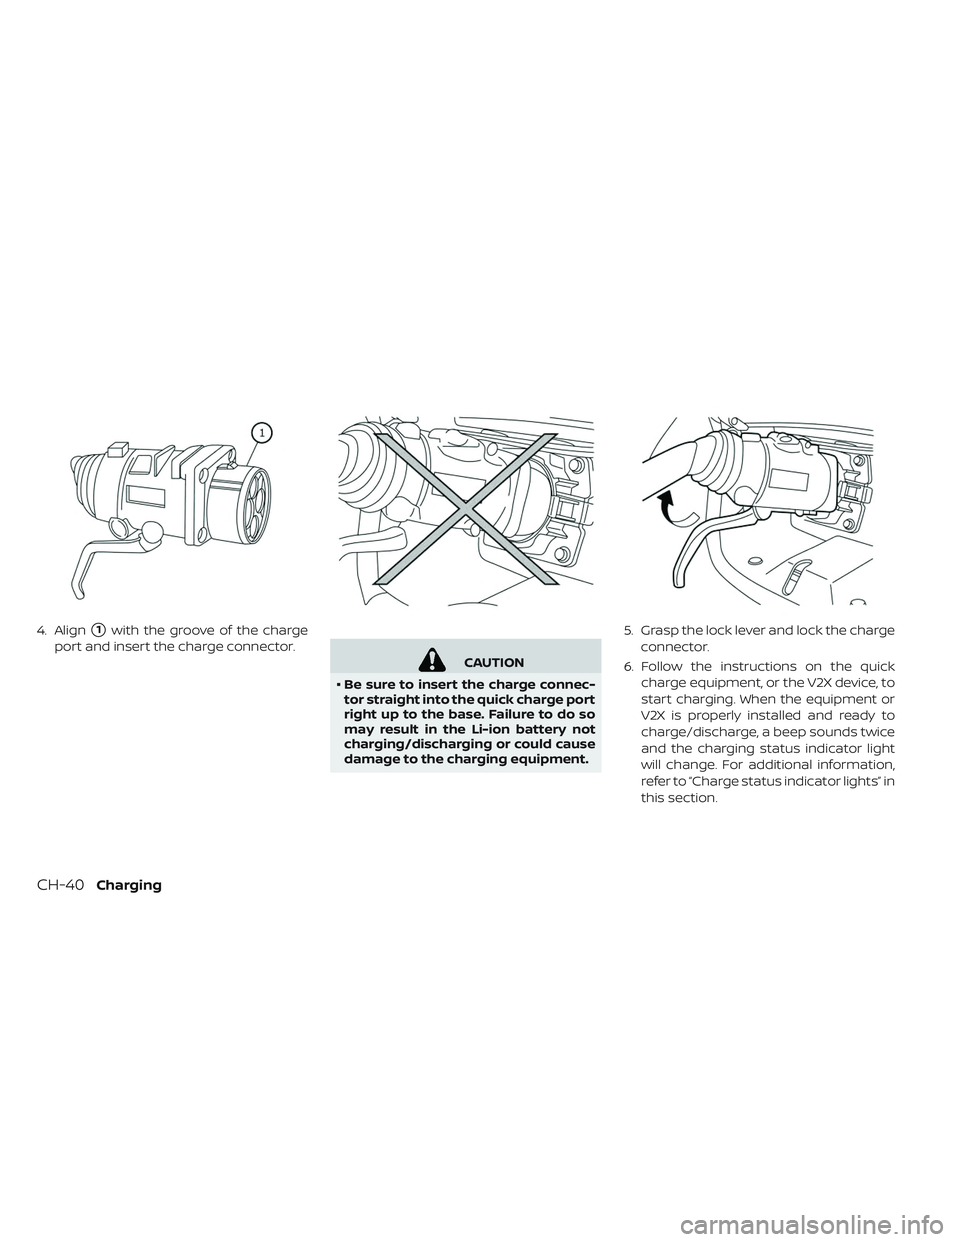
4. Align�1with the groove of the charge
port and insert the charge connector.
CAUTION
• Be sure to insert the charge connec-
tor straight into the quick charge port
right up to the base. Failure to do so
may result in the Li-ion battery not
charging/discharging or could cause
damage to the charging equipment. 5. Grasp the lock lever and lock the charge
connector.
6. Follow the instructions on the quick charge equipment, or the V2X device, to
start charging. When the equipment or
V2X is properly installed and ready to
charge/discharge, a beep sounds twice
and the charging status indicator light
will change. For additional information,
refer to “Charge status indicator lights” in
this section.
CH-40Charging
Page 100 of 610

IMMEDIATE CHARGE
When a charging timer is not turned on,
charging automatically starts when a nor-
mal or trickle charge connector is con-
nected to the vehicle.
Use the immediate charge mode anytime
you want to start charging when a charg-
ing timer is turned on by performing the
following:
1. Place the power switch in the OFFposition.
2. Push the immediate charge switch.
3. Connect the normal or trickle chargecable when the charging status indica-
tor light changes to display immediate
charge mode. For additional informa-
tion, refer to “Charging status indicator
lights” in this section.
NOTE:
•You have 15 minutes to connect a nor-
mal or trickle charge connector to the
vehicle af ter the immediate charge
switch is pushed. If a charge connector
is not connected to the vehicle within
15 minutes, the vehicle automatically
returns to the previous setting.
• To cancel immediate charge mode push
the immediate charge switch again.
• If the charge cable is disconnected, the
Li-ion battery automatically switches to
charging timer. To perform an immedi-
ate charge again, push the immediate
charge switch and connect the charge
cable.
• If the charge cable is already connected,
push the immediate charge switch to
start performing an immediate charge.
ChargingCH-49