2019 MERCEDES-BENZ SPRINTER tire pressure
[x] Cancel search: tire pressurePage 135 of 354

#
When driving on unpa vedro ads or off-
ro ad, regular lych eck theve hicle under‐
side. #
Remo vetrapped plants or other flam‐
mable material. #
Ifth ere is damage, consult a qualified
specialist workshop immediately. *
NO
TEDama getotheve hicle af ter driving
off-road When driving off-road or on unpa
ved sur fa‐
ces, fore ign bodies such as stones and
branches could become trapped on theve hi‐
cle underside, on wheels and tires, causing
damage totheve hicle.
Fo reign bodies could cause thefo llowing
damage:
R Damage the suspension, the fuel tank or
th e brake sy stem.
R Disturb the balance and cause vibrations. #
Regular lyremo veany trapped fore ign
bodies, e.g. stones and branches. #
After driving off-road, check carefully
whe ther there is any damage tothe
ve hicle. #
Ifth ere is damage, ha vetheve hicle
ch ecked at a qualified specialist work‐
shop. When driving off-road or on unpa
ved sur faces,
ch eck theve hicle underside, wheels and tires
re gularly at regular inter vals. In particular,
re mo veany trapped fore ign bodies, e.g. stones
and branches.
Obser vethefo llowing no tesre ga rding fore ign
bodies of this kind:
R They may damage the suspension, the fuel
ta nk or the brake sy stem.
R They may disturb the balance and cause
vibrations.
R They may be flung out from theve hicle when
yo u continue driving.
If th ere is any damage, inform a qualified special‐
ist workshop.
When driving off-road on steep inclines, you must
make sure that the DEF tank is su fficiently filled.
Therefore, ensure a le vel of at least ten li ters
before off-road driving. When driving off-road and on con
stru ction sites,
sand, mud and water,also mixed with oil, can get
into the brakes. This may lead toare duction in
braking ef fect or total brake failure, also as a
re sult of increased wear. The braking characteris‐
tics will vary depending on the material that has
got into the sy stem. Clean the brakes af ter driv‐
ing off-road. If youth en notice a reduced braking
ef fect or hear scraping noises, ha vethe brake
sy stem checked immediately at a qualified spe‐
cialist workshop. Adjust your driving style to the
ch anged braking characteristics.
Driving off- road or on con stru ction sites increa‐
ses the possibility of vehicle damage which may
in turn lead tothefa ilure of cer tain major assem‐
blies and sy stems. Adapt your driving style to the
off-road driving conditions. Drive carefull y.Ha ve
any vehicle damage rectified at a qualified spe‐
cialist workshop as soon as possible.
When driving on rough cross-country terrain, do
not shift the transmission into the neutral posi‐
tion and do not disengage the clutch. You could
lose control when attem pting tobrake theve hicle
with the service brake. If your vehicle cannot
manage an uphill incline, drive back down in
re ve rsege ar.
When loading your vehicle for off-road driving or
on a construction site, keep theve hicle's center
of gr avity as low as possible.
Checklist before off-road driving R Check the fuel and DEF le vels (/ page163)
and add if necessary (/ page 125).
R Engine: check the oil le vel and add oil if nec‐
essary (/ page 205). Before driving up or
down extreme inclines or slopes, fill th e oil to
th e maximum le vel.
% If
yo u drive up or down extreme inclines or
slopes, the00B2 symbol may appear in the
multifunction displa y.The engine operating
saf ety is not put at risk if you ha vefilled the
engine oil tothe maximum le vel before the
jou rney.
R Vehicle tool kit: check that the jack is work‐
ing (/ page 250).
R Make sure that a lug wrench (/ page 250), a
wo oden underlay forth e jac k,aro bust tow
ro pe, a folding spade and a wheel chock are
car ried in theve hicle.
R Tire s and wheels: check the tire tread dep th
( / page 232) and the tire pressure
(/ page 239). Driving and parking
111
Page 142 of 354

0047
Use
the engine's braking ef fect on extremely
st eep downhill gradients and on long down‐
hill stre tches. Using kickdown
#
For maximum acceleration: depressthe
accelerator pedal be yond the pressure point. #
Ease off the accelera tor pedal once the
desired speed is reached. All-wheel drive
Note
s on all-wheel drive All-wheel drive ensures permanent drive
for all
fo ur wheels, and toget her with ESP ®
it impr oves
th e traction of theve hicle.
The traction contro l ofthe all-wheel drive also
ta ke s place via the brake sy stem. Therefore, the
brake sy stem can overheat during extreme off-
ro ad use. In this case, ease off the accelerator
pedal or stop toallow the brake sy stem tocool
down.
If a driven wheel spins due toinsuf ficient trac‐
tion, obser vethefo llowing no tes:
R When pulling away, make use of the traction
cont rol integrated in ESP ®
. Depress the
accelerator pedal as far as necessar y.
R Take your foot off the accelera tor pedal,
slowly, while theve hicle is in motion.
In wintry driving conditions, alw ays use winter
tires (M+S tires) and, if necessar y,snow chains
(/ page 233). Only in this wa y can the maximum
ef fect of all-wheel drive be achie ved.
Use DSR (Downhill Speed Regulation) when driv‐
ing downhill off-road (/ page120).
If yo ufa ilto adapt your driving style or if you are
inat tentive, the all-wheel drive sy stem can neither
re duce therisk of an accident nor override the
la ws of ph ysics. The all-wheel drive sy stem can‐
not take road, weather and traf fic conditions into
account. The all-wheel drive sy stem is only an
aid. You are responsible for maintaining a safe
dis tan ce from theve hicle in front, forve hicle
speed, for braking in good time and forst ay ing in
lane. *
NO
TERisk of damage tothe driv etra in
and the brake sy stem If
yo u operate vehicles with all-wheel drive on
a one-axle test st and, you may damage the
driv etra in or the brake sy stem. #
A function or per form ance test should
only be car ried out on a two-axle test
st and. #
Ifyo u wish tooperate theve hicle on
such a test st and, please consult a
qu alified specialist workshop in
advance. *
NO
TERisk of damage tothe transfer
case If
yo uto w theve hicle with a raised axle, the
trans fer case can getdamaged. Such damage
is not co veredby Mercedes-Benz Limited
Wa rrant y. #
Neverto w theve hicle with a raised axle. #
Only tow theve hicle with all wheels on
th e ground or fully raised. #
Notethe instructions on towing the
ve hicle with full contact with the ground
fo r all wheels. Engaging all-wheel drive
Conditions
for en gaging/disengaging
Yo u can engage and deactivate the all-wheel drive
when stationary or while driving slowl y.
When stationar y,thefo llowing must be obser ved:
R The engine is running.
R The steering wheel in thest ra ight-ahead posi‐
tion.
If th e all-wheel drive cann otbe engaged when
st ationary: #
Vehicles with automatic transmission:
shift the selector le ver from 005Cto005B from
005B to005C from 005Cto005E and back to005C .
Engaging and disengaging the all-wheel drive
can be made easier in this wa y.
Obser vethefo llowing when driving slowly:
R The engine is running.
R The vehicle is not tr aveling fasterthan
6.2 mph (1 0 km/h).
R The vehicle is not being driven around a bend. 11 8
Driving and pa rking
Page 148 of 354

#
Toswitch electronic le vel control on
again: press button 4again.
The indicator lamp on button 4goes out.
Using the but ton in the control panel #
Park theve hicle, leaving the ignition switched
on. #
Tolowe r automatical ly:brie fly press the
lo we r section of switch 2.
Electronic le vel control automatically lo wers
th eve hicle. #
Tostop the mo vement, brief lypress the upper
section of switch 1. #
Toraise todriving le vel:briefly press the
upper section of swit ch1.
Electronic le vel control automatically raises
th eve hicle tothe driving le vel. #
Tostop the mo vement, brief lypress the lo wer
section of switch 2. #
Toswitch on automaticall y:drive at over
6.2 mph (10 km/h) or release the parking
brake.
Elect ronic le vel control controls theve hicle
le ve l automaticall y. Using electronic le
vel control forch arging
with air in an emer gency Only
forve hicles with valves for electronic le vel
control emergency charging. If electronic le velcontrol is malfunctioning and
theve hicle is lean‐
ing, you can raise or lo werth eve hicle bycon‐
necting an extern al compressed-air source toone
of the emer gency valves (tire valves). If elect ronic
le ve l control is deactivated, you can drive on
carefully tothe nearest qualified specialist work‐
shop and ha vethe malfunction remedied.
* NO
TEDama gedue topressure being too
high If
th e pressure in the air suspension bello ws
is too high, the compressed-air lines or the air
suspension bello wsmay be dama ged. #
Ensure you obse rveth e maximum per‐
missible operating pressure of 600 kPa
(6 bar/87 psi). #
Apply the parking brake. #
Vehicles with automatic transmission:
shift the transmission toposition 005D. #
Switch off electronic le vel control
(/ page 123). #
Switch off the engine and open the hood
(/ page 202). #
Unscr ewtheva lve cap of the cor responding
va lve. #
Connect theex tern al compressed-air source. #
Raise or lo werth eve hicle le velby charging or
re leasing compressed air until the driving
le ve l has been reached and theve hicle is in a
horizontal position. While doing so, ensure
yo u obse rveth e maximum permissible oper‐
ating pressure of 600 kPa (6 bar/87 psi). #
Disconnect theex tern al compressed-air
source. #
Tighten theva lve caps on theva lves. #
Close the hood (/ page 202). #
Drive on carefully tothe nearest qualified
specialist workshop. 124
Driving and pa rking
Page 161 of 354

Depending on
theve hicle's equipment, thera dar
sensors are integrated behind the bumpers
and/or behind thera diator grill. Keep these parts
free of dirt, ice and slush (/ page212). The se n‐
sors must not be co vered, forex ample bybicycle
ra ck s, overhanging loads or sticke rs. Af ter a colli‐
sion, ha vethe function of thera dar sensors
ch ecked at a qualified specialist workshop as
damage (bo thvisible or non-visible) may ha ve
occur redto the bumper or radiator trim. Fu
nction of driving sy stems and driving
saf ety sy stems In
this section, you will find information about the
fo llowing driving sy stems and driving saf ety sys‐
te ms:
R ABS ( Anti-lock braking system)
(/ page 137)
R ASC (Acceleration SkidControl)
(/ page 137)
R BAS (B rake Assist System) (/ page137)
R ESP ®
(Electronic Stability Program)
(/ page 138)
R EBD ( Electronic Brakeforce Distribution)
(/ page 139)
R Active Brake Assi st (/ page 139)
R Cruise co ntrol (/ page 141)
R Active Dis tance Assi stDISTRONIC
(/ page 143)
R Hill start assist
R HOLD function (/ page145)
R Parking Assist PARKTRONIC ( /page 145)
R Rear view camera (/ page147)
R 360° Camera (/ page149)
R ATTENTION ASSIST (/ page151)
R Blind Sp otAssi st (/ page 152)
R Active Lane Keeping Assist (/ page155) Fu
nctions of ABS (Anti-lock Braking Sy stem) Obser
vethe impor tant sa fety guidelines forthe
driving saf ety sy stem.
ABS cont rols the brake pressure in critical situa‐
tions:
R the wheels are pr evented from lo cking when
braking, e.g. during maximum full-s top brak‐
ing or when there is insuf ficient tire traction. R
thesteerability of theve hicle in term s of
ph ysical possibilities is ensured when brak‐
ing.
R ABS is active from speeds of appr ox. 3 mph
(5 km/h). On a slippery road sur face, ABS
inter venes even if you on lybrake gently.
Sy stem limitations
If th ere is a malfunction and theye llow 0025 ABS
wa rning lamp lights up continuously in the instru‐
ment display af terst arting the engine, ABS may
be impaired or inoperative.
If ABS inter venes, you will feel a pulsing in the
brake pedal. The pulsating brake pedal may be an
indication of hazardous road conditions and func‐
tions as a reminder totake extra care while driv‐
ing.
If ABS in terv enes: keep the brake pedal firm ly
depressed until the braking situation has passed.
To car ryout maximum full-s top braking:
dep ress the brake pedal with full forc e. Fu
nction of BAS (Brake Assist Sy stem) &
WARNING Risk of an accident caused by
a malfunction in BAS (Brake Assi stSys‐
te m)
If BA S is malfunctioning, the braking dis tance
in an emergency braking situation is
increased. #
Depress the brake pedal with full force
in emer gency braking situations. ABS
pr eve nts the wheels from locking. BA
S suppo rts yo u with additional braking forc e in
an emer gency braking situation.
If yo u depress the brake pedal quickl y,BA S is
acti vated:
R BAS au tomatically boosts the braking forc e of
th e brakes
R BAS can sho rten the braking dis tance
R ABS pr events the wheels from locking
When youre lease the brake pedal, the brakes
function as usual again. BAS is deactivated. Fu
nctions of ASR (Acceleration Skid Control) ASR can neither
reduce therisk of an accident
nor override the la wsof ph ysics if the driver does
not pay attention when pulling away or accelerat‐
ing. ASR is only an aid. Alw ays adapt your driving Driving and parking
137
Page 165 of 354

Canceling a brake application of
Active Brake
Assi st
Yo u can cancel a brake application of Active
Brake Assi stat any time by:
R Fully depressing the accelerator pedal or with
kickdown.
R Fully releasing the brake pedal (only during
situation-dependent braking assis tance).
Ac tive Brake Assi stmay cancel the brake applica‐
tion when one of thefo llowing conditions is fulfil‐
led:
R You maneuver toavo idthe obs tacle.
R Thereis no longer a risk of collision.
R An obs tacle is no longer de tected in front of
yo ur vehicle.
Sy stem limitations
The sy stem may be impaired or may not function
in thefo llowing situations:
R The sensors are af fected bysno w,rain, fog or
heavy spr ay.
R The sensors are dirty, fogged up, damaged or
co vered.
R The sensors are af fected byinter fere nce from
ot her radar sources, e.g. strongradar reflec‐
tions in parking garage s.
R If a loss of tire pressure or a defective tire has
been de tected and displa yed.
R Full sy stem per form ance is not available for a
fe w seconds af ter switching on the ignition or
af te r driving off.
The sy stem may not react cor rectly in thefo llow‐
ing situations:
R In complex traf fic situations, objects may not
al wa ys be clear lyde tected.
R Pedestrians or vehicles mo vequickly into the
de tection range of the sensors.
R Pedestrians are obscured by other objects.
R In bends with a nar rowradius. Setting
Active Brake Assi st Requ
irements:
R The ignition is switched on Multimedia sy
stem:
4 © 5
Settings 5
Assistance
5 Active Brake Assist
The following settings are available:
R Early
R Medium
R Late #
Select a setting.
The Medium setting is selec ted automatically
eve rytime the engine is star ted.
Deactivating Active Brake Assi st
% It is
recommended that Active Brake Assi stis
alw ays left activated. #
Select Off.
The dis tance warning function and autono‐
mous braking function are deactivated.
% When
Active Brake Assi stis deactivated, the
00D4 symbol appears inthest atus area of
th e multifunction displa y. Cruise control
Fu
nction of cruise control
Cruise cont rol accelerates and brakes theve hicle
automatically in order tomaintain a pr eviously
st ored speed.
If yo u accelerate toove rtake, forex ample, the
st ored speed is not dele ted. If youre mo veyour
fo ot from the accelerator pedal af terove rtaking,
cruise control will resume speed regulation back
to thestored speed.
Cruise contro l is operated using the cor respond‐
ing steering wheel buttons. You can store any
ro ad speed abo ve15 mp h (20 km/h).
If yo ufa ilto adapt your driving style, cruise con‐
trol can neither reduce therisk of an accident nor
ove rride the la wsof ph ysics. It cannot take into
account road, weather or traf fic conditions.
Cruise control is only an aid. You are responsible
fo rth e dis tance totheve hicle in front, forve hicle
speed, braking in good time and forst ay ing in
yo ur lane.
Displa ysinthe multifunction display
The status of cruise control and thestored speed
are shown in the multifunction displa y. Driving and pa
rking 141
Page 180 of 354
A
releva nt messa geappears in the instrument
displa y.
The brake application is available in the speed
ra nge between appr oximately 40 mph (60 km/h)
and 100mp h (160 km/h).
Yo u can either deactivate theAc tive Lane Keep‐
ing Assist warning or switch off the sy stem com‐
ple tely.
If yo ufa ilto adapt your driving style, Ac tive Lane
Ke eping Assist can neither reduce therisk of an
accident nor override the la wsof ph ysics. It can‐
not take into account road, weather or traf fic
conditions. The driving sy stem is an aid for when
yo u unin tentionally le aveor cross the lane and
not a sy stem for automatically keeping tothe
lane. You are responsible forth e dis tance tothe
ve hicle in front, forve hicle speed, braking in good
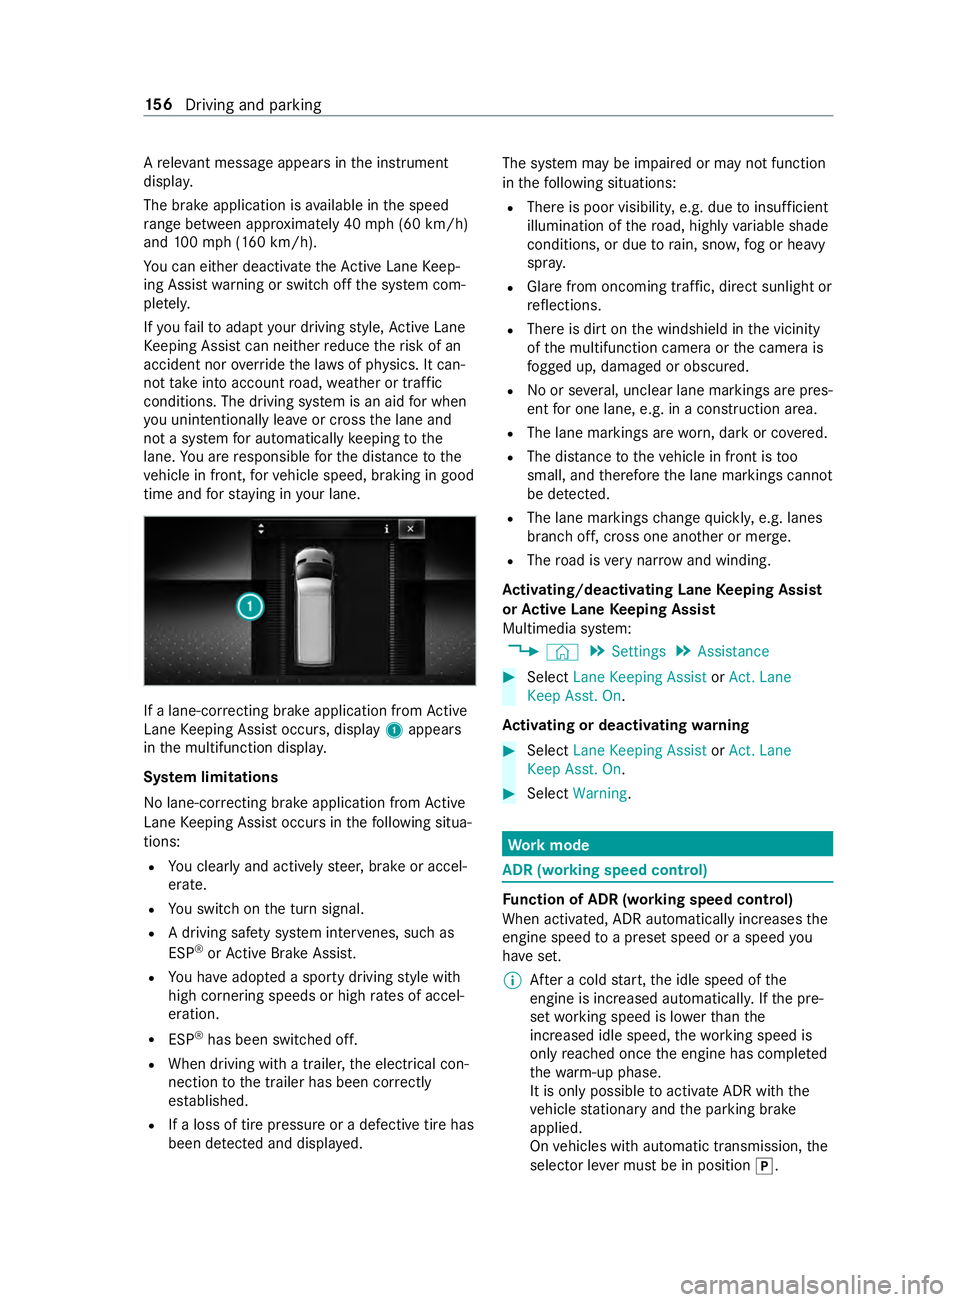
time and forst ay ing in your lane. If a lane-cor
recting brake application from Active
Lane Keeping Assist occurs, display 1appears
in the multifunction displa y.
Sy stem limitations
No lane-cor recting brake application from Active
Lane Keeping Assist occurs in thefo llowing situa‐
tions:
R You clearly and actively steer, brake or accel‐
erate.
R You swit chon the turn signal.
R A driving saf ety sy stem inter venes, su chas
ESP ®
or Active Brake Assi st.
R You ha veadop ted a sporty driving style with
high cornering speeds or high rates of accel‐
eration.
R ESP ®
has been switched off.
R When driving with a trailer, the electrical con‐
nection tothe trailer has been cor rectly
es tab lished.
R If a loss of tire pressure or a defective tire has
been de tected and displa yed. The sy
stem may be impaired or may not function
in thefo llowing situations:
R There is poor visibilit y,e.g. due toinsuf ficient
illumination of thero ad, highly variable shade
conditions, or due torain, sno w,fog or heavy
spr ay.
R Glare from oncoming traf fic, direct sunlight or
re flections.
R There is dirt on the windshield in the vicinity
of the multifunction camera or the camera is
fo gged up, damaged or obscured.
R No or se veral, unclear lane markings are pres‐
ent for one lane, e.g. in a construction area.
R The lane markings are worn, dark or co vered.
R The dis tance totheve hicle in front is too
small, and therefore the lane markings cann ot
be de tected.
R The lane markings change quickl y,e.g. lanes
branch off, cross one ano ther or mer ge.
R The road is very nar row and winding.
Ac tivating/deactivating Lane Keeping Assist
or Active Lane Keeping Assist
Multimedia sy stem:
4 © 5
Settings 5
Assistance #
Select Lane Keeping Assist orAct. Lane
Keep Asst. On.
Ac tivating or deactivating warning #
Select Lane Keeping Assist orAct. Lane
Keep Asst. On. #
Select Warning. Wo
rkmode ADR (working speed control)
Fu
nction of ADR (working speed control)
When activated, ADR automatically increases the
engine speed toa preset speed or a speed you
ha ve set.
% Af
ter a cold start, the idle speed of the
engine is increased automaticall y.Ifth e pre‐
set working speed is lo werth an the
inc reased idle speed, thewo rking speed is
only reached once the engine has comple ted
th ewa rm-up phase.
It is only possible toactivate ADR with the
ve hicle stationary and the parking brake
applied.
On vehicles with automatic transmission, the
selector le ver must be in position 005D. 15 6
Driving and pa rking
Page 182 of 354

designed
forth e trailer operation
re qu irements. #
Do not modify the ball coupling or the
trailer hitch. &
WARNING Risk of accident and inju ry
due toan incor rectly ins talled ball cou‐
pling
If th e ball coupling is not ins talled and
engaged cor rectly, it may become de tach ed
during tr avel and endanger other road users.
There is a risk of fata l injur y. #
Install and secure the ball coupling as
described in the ball coupling manufac‐
turer's ins tallation instructions. #
When the ball coupling has been ins tal‐
led, ensure that it is cor rectly secu red
before every trip. &
WARNING Risk of accident due toan
incor rectly ins talled and secured ball
neck
If th e ball neck is not cor rectly ins talled and
secured, the trailer can become de tach ed. #
Install and secure the ball neck as
described in the ball neck manufactur‐
er's ins tallation instructions. #
When the ball neck has been ins talled,
ensure that it is cor rectly secu red
before every trip *
NO
TEWearing out the brake linings by
continuously dep ressing the brake pedal #
Do not depress the brake pedal continu‐
ously whilst driving. #
Touse the braking ef fect of the engine,
shift toa lo werge ar in good time. Alw
ays comply with the operating instructions of
th e manufacturer of the trailer coupling and the
ball nec k.
Place your vehicle/trailer combination on sur fa‐
ces that are as even as possible and secu reit
against rolling away ( /page 132). Couple and
uncouple the trailer carefully.
When backing up theto wing vehicle, ensure that
th ere is no-one between theve hicle and the
traile r. If
yo u do not connect the trailer totheto wing
ve hicle cor rectly, the trailer may become
de tach ed. Once it has been connected and is
ro adwor thy, the trailer must be in a horizontal
position behind theto wing vehicle.
No tethefo llowing rega rding theto ngue weight:
R Make full use of the maximum tongue weight,
where possible
R Do not exceed or fall below the permitted
to ngue weight
Do not exceed thefo llowing values:
R Perm itted braked or unbraked towing capa‐
city
The maximum permissible towing capacity for
traile rswithout a separate braking sy stem is
1, 653 lbs (750 kg).
R Perm issible rear axle load of theto wing vehi‐
cle
R Perm issible gross mass of theto wing vehicle
R Perm issible gross mass of the trailer
R Perm issible gross towing mass
R Maximum permissible speed of the trailer
The releva nt pe rmitted values, which must not be
exc eeded, can be found in thefo llowing places:
R Inyour vehicle documents
R Onthe identification plate of the trailer hitch
R Onthe trailer's identification plate
R Ontheve hicle identification plate
If th ere are discrepancies between theva lues, the
lo we stone shall appl y.
Before driving off, ensu rethefo llowing:
R The tire pressure on there ar axle of theto w‐
ing vehicle has been set forth e maximum
load.
R The headlamps ha vebeen set cor rectly.
Va lues appr ovedby the manufacturer can be
fo und on the identification plates and in the sec‐
tion forth eto wing vehicle (/ page 235).
Yo ur vehicle will act dif fere ntly wi tha trailer rela‐
tive towithout a trailer:
R The vehicle/trailer combination will be heav‐
ier.
R The vehicle/trailer combination will be
re stricted in its acceleration and climbing
ability. 15 8
Driving and pa rking
Page 184 of 354
#
Shift the selector le verto position 005D. #
Apply theve hicle's parking brake. #
Close all the doors. #
Position the trailer on a le vel sur face behind
th eve hicle.
% The ball head height
changes depending on
th eve hicle's load. In this case, use a trailer
with a height-adjus table trailer dr awbar. #
Couple up the trailer. #
Establish all electrical and other connections
to the trailer. #
Remo veobjects or devices which pr eventthe
trailer from rolling, e.g. wheel choc ks. #
Release the trailer's parking brake.
% The
vehicle harness has a cable connection
to the brake light indicator lamp.
Obser vethe maximum permissible trailer dimen‐
sions (width and length).
Most US states and all Canadian pr ovinces pre‐
scribe thefo llowing points, and you are ur gently
re commended tocomply wi th these:
R Safetych ains between theto wing vehicle and
th e trailer. The chains should be routed in a
criss-cross pat tern under the trailer dr awbar.
They must be connected tothe trailer tow
hitch and not tothe bumper or totheve hicle
axle.
Lea vesuf ficient sla ckinthech ains. This
allo wsforeve n sha rpcornering.
R A separate brake sy stem is requ ired for cer‐
ta in trailers.
R A saf etyfe ature is requ ired for braked trailers.
De term ine the specific requ irements acco rd‐
ing tothere leva nt la ws.
If th e trailer becomes de tach ed from theto w‐
ing vehicle, the saf etyfe ature triggers the
trailer brakes and can thus reduce the danger.
Un coupling a trailer &
WARNING Risk of being crushed and
becoming trapped when uncoupling a
trailer
When uncoupling a trailer wi than engaged
ine rtia-activated brake, your hand may
become trapped between theve hicle and the
trailer dr awbar. #
Do not uncouple trailers with an
engaged overrun brake. Do not uncouple a trailer with an
overrun brake in
a st ate of overrun. Otherwise, there bound of the
ove rrun brake can damage your vehicle. #
Shift the selector le verto position 005D. #
Apply theve hicle's parking brake. #
Close all the doors. #
Apply the trailer's parking brake. #
Secure the trailer against rolling away with a
wheel chock or similar object. #
Remo vethe trailer cables and saf etych ains. #
Uncou plethe trailer. Information about
towing a trailer Operating a trailer is subject
tomany statutory
re gulations such as speed restrictions.
Many states also requ ire an auxiliary separate
functional braking sy stem when towing a weight
th at exc eeds a cer tain limit. Foryo ur saf ety, it is
re commended touse a separate functional brak‐
ing sy stem on any towe dve hicle.
Make sure that your trailer combination meets
local regulations. This not only applies to your
place of residence, but also to your destination.
In fo rm ation on this can be obtained from the
police and local authorities.
Comply with thefo llowing when driving with a
trailer:
R Practice cornering, stopping and backing up
in a traf fic-free location. In this wa y,yo u will
ga in driving experience and become accus‐
to med tothe new handling characteristics.
R Before driving, check thefo llowing:
- that the trailer tow hit chand ball coupling
are secure
- that the saf ety swit chfor braked trailers is
functioning cor rectly
- that the saf etych ains are secure and
undamaged
- that the electrical connections are secure
- that the lights are functioning cor rectly
- the wheels for dama geand cor rect tire
pressure (/ page 232)
R Adjust the outside mir rors so that you ha ve a
clear view of there ar section of the trailer.
R Ifth e trailer is equipped with an individual
braking sy stem, check before each journey
whe ther the brakes are functioning cor rectl y. 16 0
Driving and pa rking