2019 MERCEDES-BENZ GLS SUV automatic transmission
[x] Cancel search: automatic transmissionPage 191 of 398
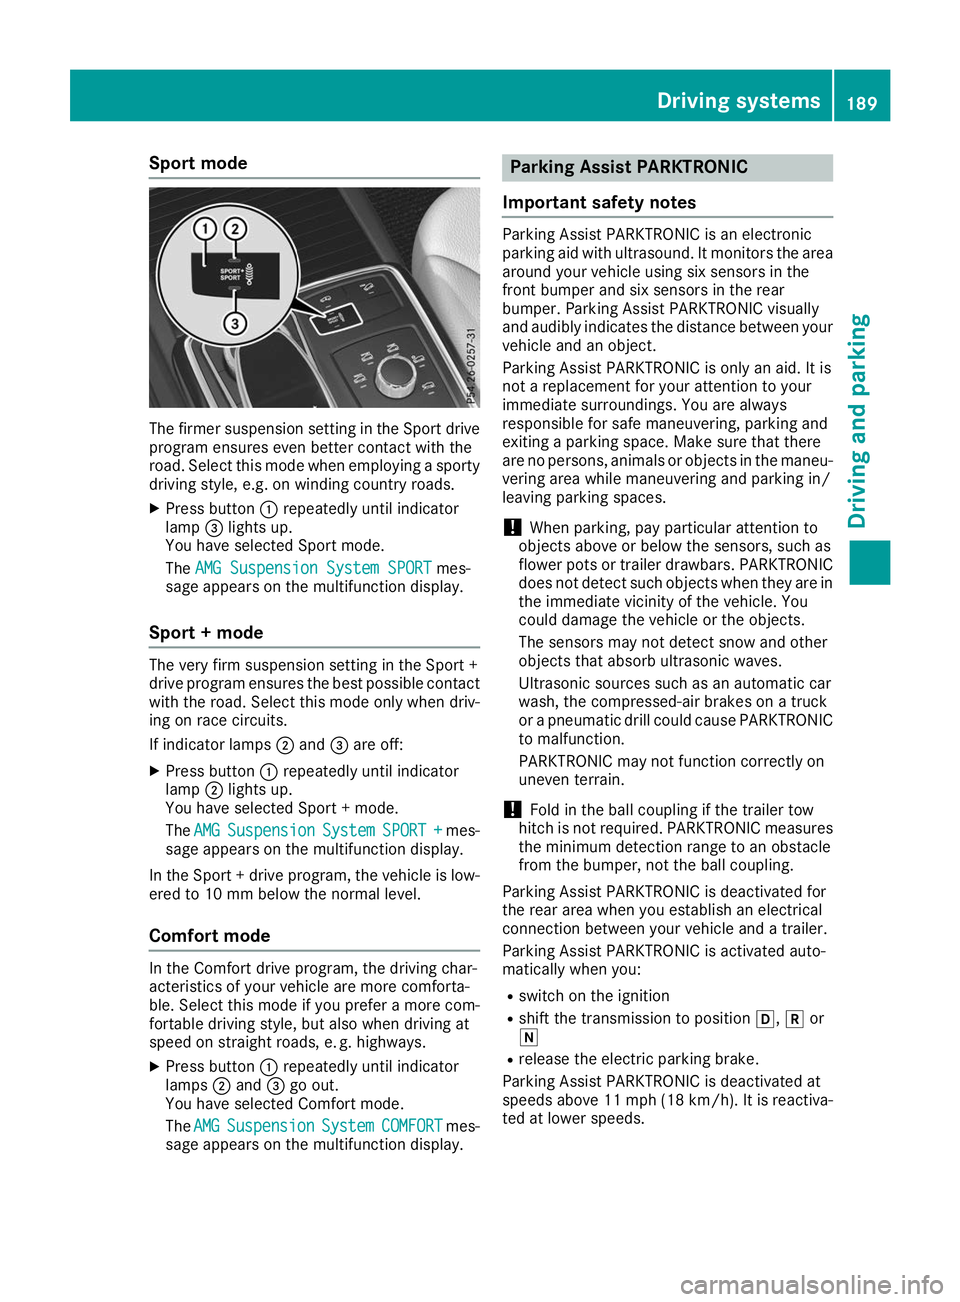
Sport mode
The firmer suspension setting in the Sport drive
program ensures even better contact with the
road. Select this mode when employing a sporty
driving style, e.g. on winding country roads.
X Press button 0043repeatedly until indicator
lamp 0087lights up.
You have selected Sport mode.
The AMG Suspension System SPORT AMG Suspension System SPORT mes-
sage appears on the multifunction display.
Sport + mode The very firm suspension setting in the Sport +
drive program ensures the best possible contact
with the road. Select this mode only when driv-
ing on race circuits.
If indicator lamps 0044and 0087are off:
X Press button 0043repeatedly until indicator
lamp 0044lights up.
You have selected Sport + mode.
The AMG AMG Suspension
Suspension System
SystemSPORT +
SPORT + mes-
sage appears on the multifunction display.
In the Sport + drive program, the vehicle is low-
ered to 10 mm below the normal level.
Comfort mode In the Comfort drive program, the driving char-
acteristics of your vehicle are more comforta-
ble. Select this mode if you prefer a more com-
fortable driving style, but also when driving at
speed on straight roads, e. g. highways.
X Press button 0043repeatedly until indicator
lamps 0044and 0087go out.
You have selected Comfort mode.
The AMG
AMG Suspension Suspension System
SystemCOMFORT
COMFORT mes-
sage appears on the multifunction display. Parking Assist PARKTRONIC
Important safety notes Parking Assist PARKTRONIC is an electronic
parking aid with ultrasound. It monitors the area
around your vehicle using six sensors in the
front bumper and six sensors in the rear
bumper. Parking Assist PARKTRONIC visually
and audibly indicates the distance between your
vehicle and an object.
Parking Assist PARKTRONIC is only an aid. It is
not a replacement for your attention to your
immediate surroundings. You are always
responsible for safe maneuvering, parking and
exiting a parking space. Make sure that there
are no persons, animals or objects in the maneu- vering area while maneuvering and parking in/
leaving parking spaces.
! When parking, pay particular attention to
objects above or below the sensors, such as
flower pots or trailer drawbars. PARKTRONIC does not detect such objects when they are in
the immediate vicinity of the vehicle. You
could damage the vehicle or the objects.
The sensors may not detect snow and other
objects that absorb ultrasonic waves.
Ultrasonic sources such as an automatic car
wash, the compressed-air brakes on a truck
or a pneumatic drill could cause PARKTRONIC to malfunction.
PARKTRONIC may not function correctly on
uneven terrain.
! Fold in the ball coupling if the trailer tow
hitch is not required. PARKTRONIC measures
the minimum detection range to an obstacle
from the bumper, not the ball coupling.
Parking Assist PARKTRONIC is deactivated for
the rear area when you establish an electrical
connection between your vehicle and a trailer.
Parking Assist PARKTRONIC is activated auto-
matically when you:
R switch on the ignition
R shift the transmission to position 005B,005Eor
005C
R release the electric parking brake.
Parking Assist PARKTRONIC is deactivated at
speeds above 11 mph (18 km/h). It is reactiva- ted at lower speeds. Driving systems
189Driving and parking Z
Page 196 of 398
R
that are parallel to the direction of travel and
at least 39.5 in (1.0 m)longer than your vehi-
cle
R that are at right angles to the direction of
travel and at least 39.5 in (1.0 m) wider than
your vehicle
i Note that Active Parking Assist cannot
measure the size of a parking space if it is at
right angles to the direction of travel. You will
need to judge whether your vehicle will fit into the parking space.
When driving at speeds below 19 mph
(30 km/h), you will see parking symbol 0044as a
status indicator in the instrument cluster. When
a parking space has been detected, an arrow
towards the right or the left also appears. By
default, Active Parking Assist only displays park- ing spaces on the front-passenger side. Parking spaces on the driver's side are displayed as
soon as the turn signal on the driver's side is
activated. When parking on the driver's side,
this must remain activated until you confirm the
use of Active Parking Assist by pressing the
0076 button on the multifunction steering
wheel. The system automatically determines
whether the parking space is parallel or at right
angles to the direction of travel.
A parking space is displayed while you are driv- ing past it, and until you are approximately 50 ft
(15 m) away from it.
Parking G
WARNING
If you leave the driver's seat when the vehicle is being braked only by the Active Parking
Assist, it could roll away in the following sit-
uations:
R if there is a malfunction in the system or in
the voltage supply
R if the electrical system in the engine com-
partment, the battery or the fuses have
been tampered with
R if the battery is disconnected
R if the vehicle is accelerated, e.g. by a vehi-
cle occupant
There is a risk of an accident.
Before leaving the vehicle, always secure it
against rolling away. i
If Parking Assist PARKTRONIC detects
obstacles, Active Parking Assist will brake
automatically whilst the vehicle is parking.
You are responsible for braking in good time.
X Stop the vehicle when the parking space sym-
bol shows the desired parking space in the
instrument cluster.
X Shift the transmission to position 005E.
The Start
Start Parking Parking Assist?
Assist?Yes:
Yes:OK
OKNo:
No:
0038 message will appear on the multifunc-
tion display.
X To cancel the procedure: press the0038
button on the multifunction steering wheel or pull away.
or
X To park using Active Parking Assist: press
the 0076 button on the multifunction steering
wheel.
The Parking
Parking Assist AssistActive
ActiveAccelerate
Accelerate
and Brake Observe Surroundings
and Brake Observe Surroundings mes-
sage will appear on the multifunction display.
X Let go of the multifunction steering wheel.
X Back up the vehicle, being ready to brake at all
times. When backing up, drive at a speed
below approximately 6 mph (10 km/h). Oth-
erwise, Active Parking Assist will be canceled.
Active Parking Assist brakes the vehicle to a
standstill when the vehicle approaches the
rear border of the parking space.
Maneuvering may be required in tight parking
spaces.
The Parking Assist Active Select D Parking Assist Active Select D
Observe Surroundings
Observe Surroundings message will appear
on the multifunction display.
X Shift the transmission to position 005Bwhile
the vehicle is stationary.
Active Parking Assist immediately steers in
the other direction.
The Parking Parking Assist
AssistActive
ActiveAccelerate
Accelerate
and Brake Observe Surroundings
and Brake Observe Surroundings mes-
sage will appear on the multifunction display.
i You will achieve the best results by waiting
for the steering procedure to complete before
pulling away.
X Drive forwards and be ready to brake at all
times.
Active Parking Assist brakes the vehicle to a
standstill.
The Parking Assist Active Select R Parking Assist Active Select R
Observe Surroundings
Observe Surroundings message will appear
on the multifunction display. 194
Driving systemsDriving and parking
Page 198 of 398
the vehicle has exited the parking space com-
pletely. This is useful, for example when you
recognize that it is already possible to pull out of
the parking space.
Canceling Active Parking Assist X
Stop the movement of the multifunction
steering wheel or steer yourself.
Active Parking Assist will be canceled at once.
The Active Parking Assist Canceled
Active Parking Assist Canceled
message appears on the multifunction dis-
play.
or X Press the Parking Assist PARKTRONIC button
(Y page 191).
Parking Assist PARKTRONIC is switched off
and Active Parking Assist is immediately can-
celed. The Active Parking Assist Can‐
Active Parking Assist Can‐
celed celed message appears on the multifunction
display.
Active Parking Assist is canceled automatically
if: R the electric parking brake is engaged
R transmission position 005Dis selected
R parking using Active Parking Assist is no lon-
ger possible
R you are driving faster than 6 mph (10 km/h)
R a wheel spins, ESP ®
intervenes or fails. The
00E5 warning lamp lights up in the instrument
cluster
A warning tone sounds. The parking symbol dis-
appears and the multifunction display shows the
Active
Active Parking Parking Assist
AssistCanceled
Canceled message.
When Active Parking Assist is canceled, you
must steer and brake again yourself.
If a system malfunction occurs, the vehicle is
braked to a standstill. To drive on, depress the
accelerator again. Rear view camera
General notes Rear view camera
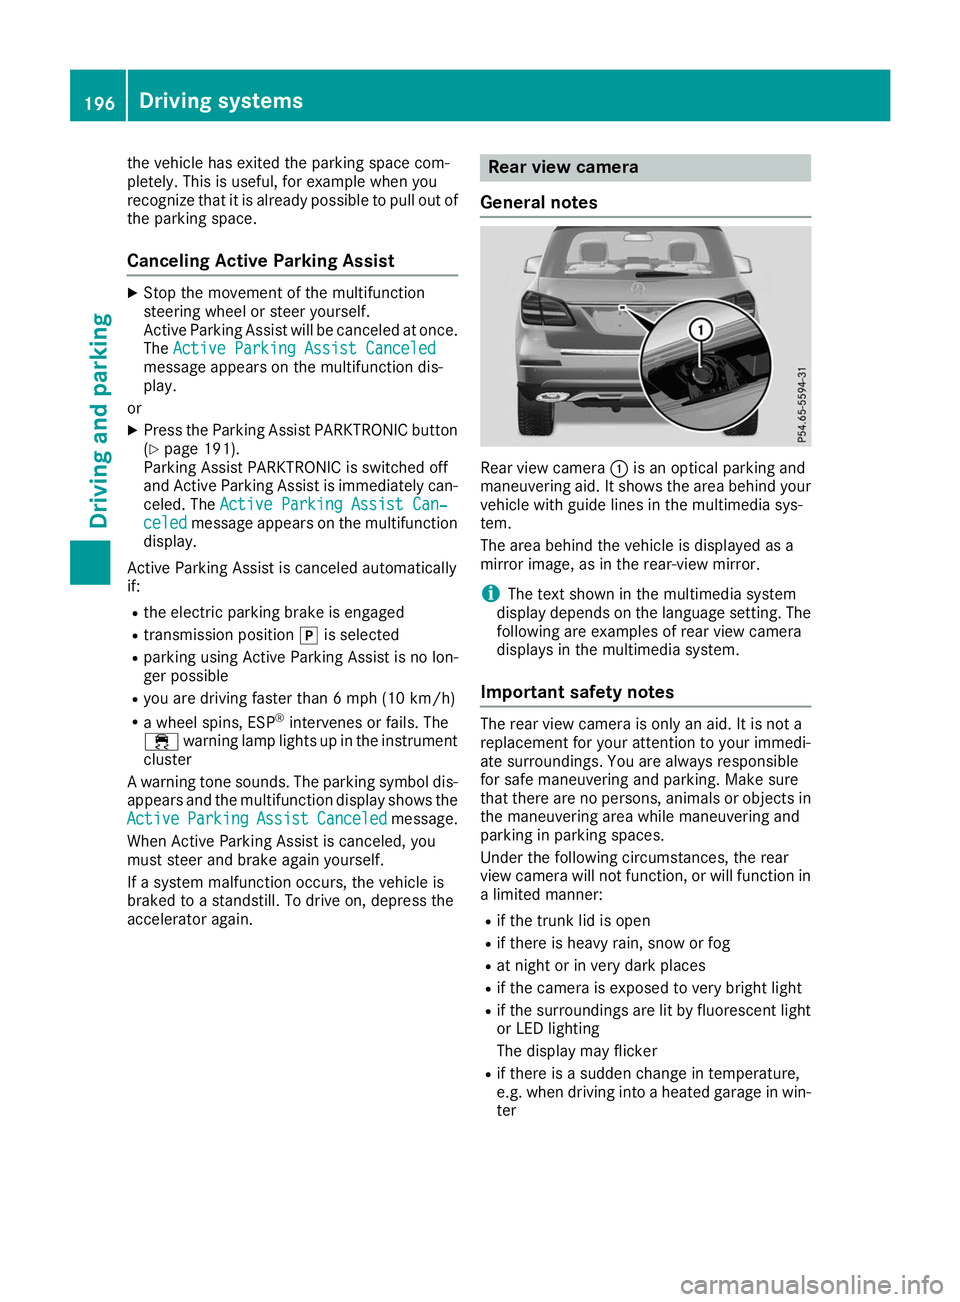
0043is an optical parking and
maneuvering aid. It shows the area behind your
vehicle with guide lines in the multimedia sys-
tem.
The area behind the vehicle is displayed as a
mirror image, as in the rear-view mirror.
i The text shown in the multimedia system
display depends on the language setting. The
following are examples of rear view camera
displays in the multimedia system.
Important safety notes The rear view camera is only an aid. It is not a
replacement for your attention to your immedi-
ate surroundings. You are always responsible
for safe maneuvering and parking. Make sure
that there are no persons, animals or objects in
the maneuvering area while maneuvering and
parking in parking spaces.
Under the following circumstances, the rear
view camera will not function, or will function in
a limited manner:
R if the trunk lid is open
R if there is heavy rain, snow or fog
R at night or in very dark places
R if the camera is exposed to very bright light
R if the surroundings are lit by fluorescent light
or LED lighting
The display may flicker
R if there is a sudden change in temperature,
e.g. when driving into a heated garage in win-
ter 196
Driving systemsDriving an
d parking
Page 204 of 398
Guide lines are always shown at road level. In
trailer mode, the guide lines are shown at the
level of the trailer coupling.
The field of vision and other functions of the
camera system may be restricted due to addi-
tional accessories on the rear of the vehicle (e.g.
license plate holder, bicycle rack).
On vehicles with height-adjustable chassis,
depending on technical conditions, leaving the
standard height can result in:
R inaccuracies in the guide lines
R inaccuracies in the display of generated
images (top view)
Activation conditions The 360° camera image can be displayed in the
following situations:
R your vehicle is equipped with a 360° camera
R the SmartKey is in key position 0048in the igni-
tion lock
R the multimedia system is switched on
Switching on the 360° camera X
Press the 00D4button in the center console
for longer than two seconds.
Depending on whether transmission position
005B or005E is selected, the following appears:
R a split screen with top view and the image
from the front camera or
R a split screen with top view and the image
from the rear view camera
or
X Press the 00D4button in the center console.
The vehicle menu is displayed.
X Select 360°
360° Camera Camera and press 7to confirm.
Depending on whether transmission position
005B or005E is selected, the following appears:
R a split screen with top view and the image
from the front camera or
R a split screen with top view and the image
from the rear view camera
Activating the 360° camera using
reverse gear The 360° camera images can be automatically
displayed by engaging reverse gear. X
Make sure that the SmartKey is in position 0048
in the ignition lock.
X Make sure that the Activation by R gear Activation by R gear
function is selected on the multimedia system (see the Digital Operator's Manual).
X To show the 360° camera image: engage
reverse gear.
The multimedia system shows the area
behind the vehicle in split-screen mode. You
see the top view of the vehicle and the image from the rear view camera.
Selecting the split-screens or 180° view Selecting split-screen view
X To switch to the line with the vehicle icons:
slide 5the controller.
X To select one of the vehicle icons: turn 3
the controller.
X To switch to 180° View
180° View :turn 3 the con-
troller to select 180° View
180° View and press7to
confirm.
i The
180° 180° View
Viewoption is only available in the
following views:
R Top view with picture from the rear view
camera
R Top view with picture from the front camera
Displays in the multimedia system Important safety notes
The camera system may show a distorted view
of obstacles, show them incorrectly or not at all. Obstacles are not shown by the system in the
following locations:
R under the front and rear bumpers
R very close to the front and rear bumpers
R in the area immediately above the tailgate
handle
R very close to the exterior mirrors
R in the transitional areas between the various
cameras in the virtual top view
! Objects not at ground level may appear to
be further away than they actually are, e.g.:
R the bumper of a parked vehicle
R the drawbar of a trailer
R the ball coupling of a trailer tow hitch 202
Driving systemsDriving and parking
Page 216 of 398
cases, the system may make an inappropriate
brake application, e.g. after intentionally driv-
ing over a solid lane marking. There is a risk of an accident.
An inappropriate brake application may be
interrupted at any time if you steer slightly in
the opposite direction. Always make sure that
there is sufficient distance on the side for
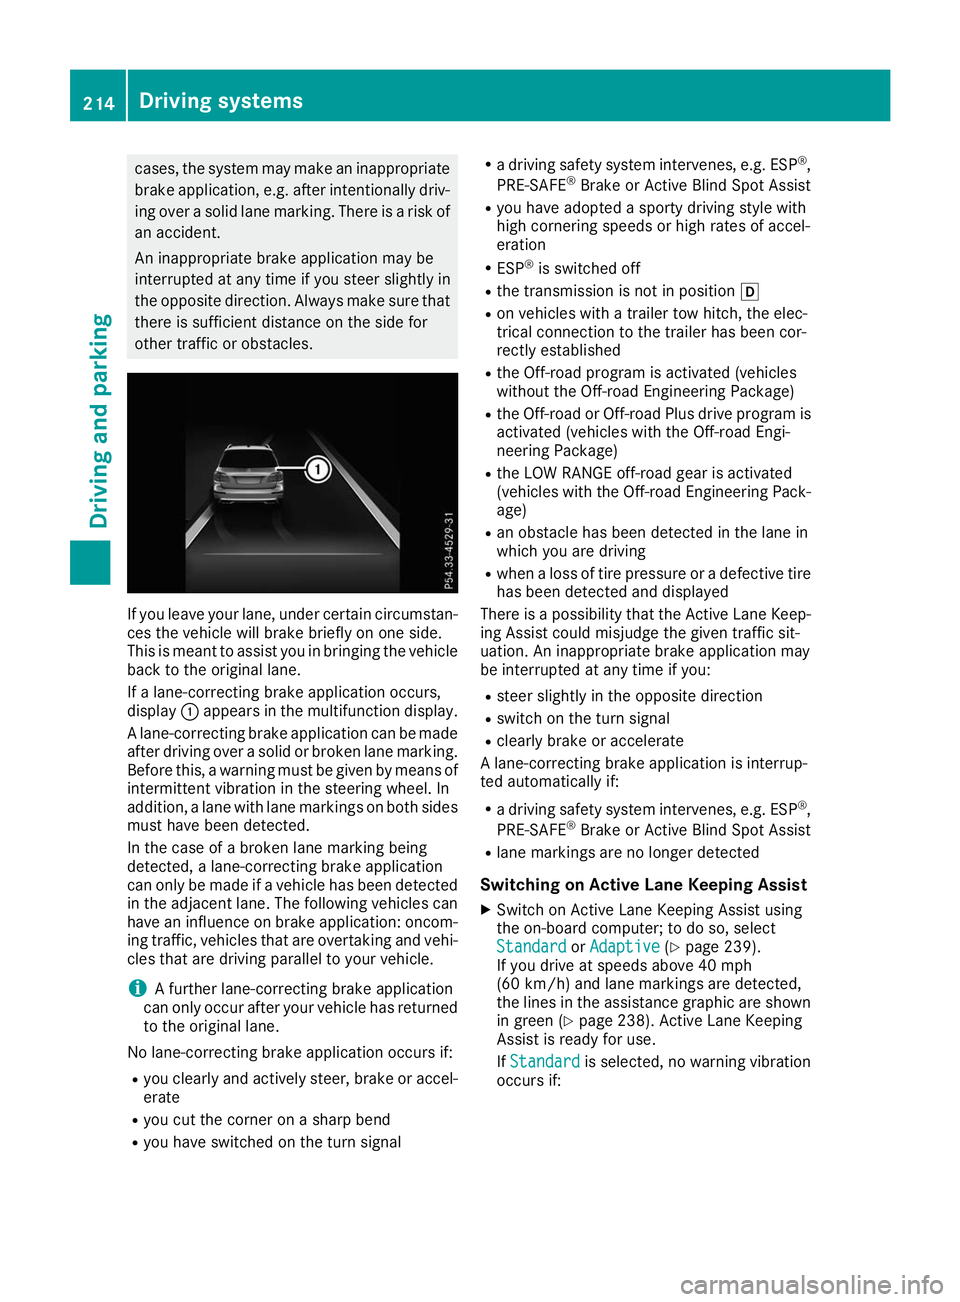
other traffic or obstacles. If you leave your lane, under certain circumstan-
ces the vehicle will brake briefly on one side.
This is meant to assist you in bringing the vehicle
back to the original lane.
If a lane-correcting brake application occurs,
display 0043appears in the multifunction display.
A lane-correcting brake application can be made
after driving over a solid or broken lane marking.
Before this, a warning must be given by means of
intermittent vibration in the steering wheel. In
addition, a lane with lane markings on both sides must have been detected.
In the case of a broken lane marking being
detected, a lane-correcting brake application
can only be made if a vehicle has been detected
in the adjacent lane. The following vehicles can
have an influence on brake application: oncom- ing traffic, vehicles that are overtaking and vehi-cles that are driving parallel to your vehicle.
i A further lane-correcting brake application
can only occur after your vehicle has returned
to the original lane.
No lane-correcting brake application occurs if:
R you clearly and actively steer, brake or accel-
erate
R you cut the corner on a sharp bend
R you have switched on the turn signal R
a driving safety system intervenes, e.g. ESP ®
,
PRE-SAFE ®
Brake or Active Blind Spot Assist
R you have adopted a sporty driving style with
high cornering speeds or high rates of accel-
eration
R ESP ®
is switched off
R the transmission is not in position 005B
R on vehicles with a trailer tow hitch, the elec-
trical connection to the trailer has been cor-
rectly established
R the Off-road program is activated (vehicles
without the Off-road Engineering Package)
R the Off-road or Off-road Plus drive program is
activated (vehicles with the Off-road Engi-
neering Package)
R the LOW RANGE off-road gear is activated
(vehicles with the Off-road Engineering Pack-
age)
R an obstacle has been detected in the lane in
which you are driving
R when a loss of tire pressure or a defective tire
has been detected and displayed
There is a possibility that the Active Lane Keep-
ing Assist could misjudge the given traffic sit-
uation. An inappropriate brake application may
be interrupted at any time if you:
R steer slightly in the opposite direction
R switch on the turn signal
R clearly brake or accelerate
A lane-correcting brake application is interrup-
ted automatically if:
R a driving safety system intervenes, e.g. ESP ®
,
PRE-SAFE ®
Brake or Active Blind Spot Assist
R lane markings are no longer detected
Switching on Active Lane Keeping Assist X Switch on Active Lane Keeping Assist using
the on-board computer; to do so, select
Standard
Standard orAdaptive
Adaptive (Ypage 239).
If you drive at speeds above 40 mph
(60 km/h) and lane markings are detected,
the lines in the assistance graphic are shown in green (Y page 238). Active Lane Keeping
Assist is ready for use.
If Standard Standard is selected, no warning vibration
occurs if: 214
Driving systemsDriving and parking
Page 220 of 398
multifunction display. The last active drive pro-
gram is selected again.
Selecting the Offroad program X To select a drive program: turn DYNAMIC
SELECT controller 0043until indicator lamp 0044
lights up.
The Drive program "Offroad" Max.
Drive program "Offroad" Max.
speed 60 mph speed 60 mph message appears in the mul-
tifunction display.
The vehicle is raised by +1.2 in (30 mm).
The vehicle changes from the Offroaddrive pro-
gram to the Comfortdrive program if you drive
faster than 70 mph (112 km/h).
The Drive more slowly
Drive more slowly message appears in
the multifunction display.
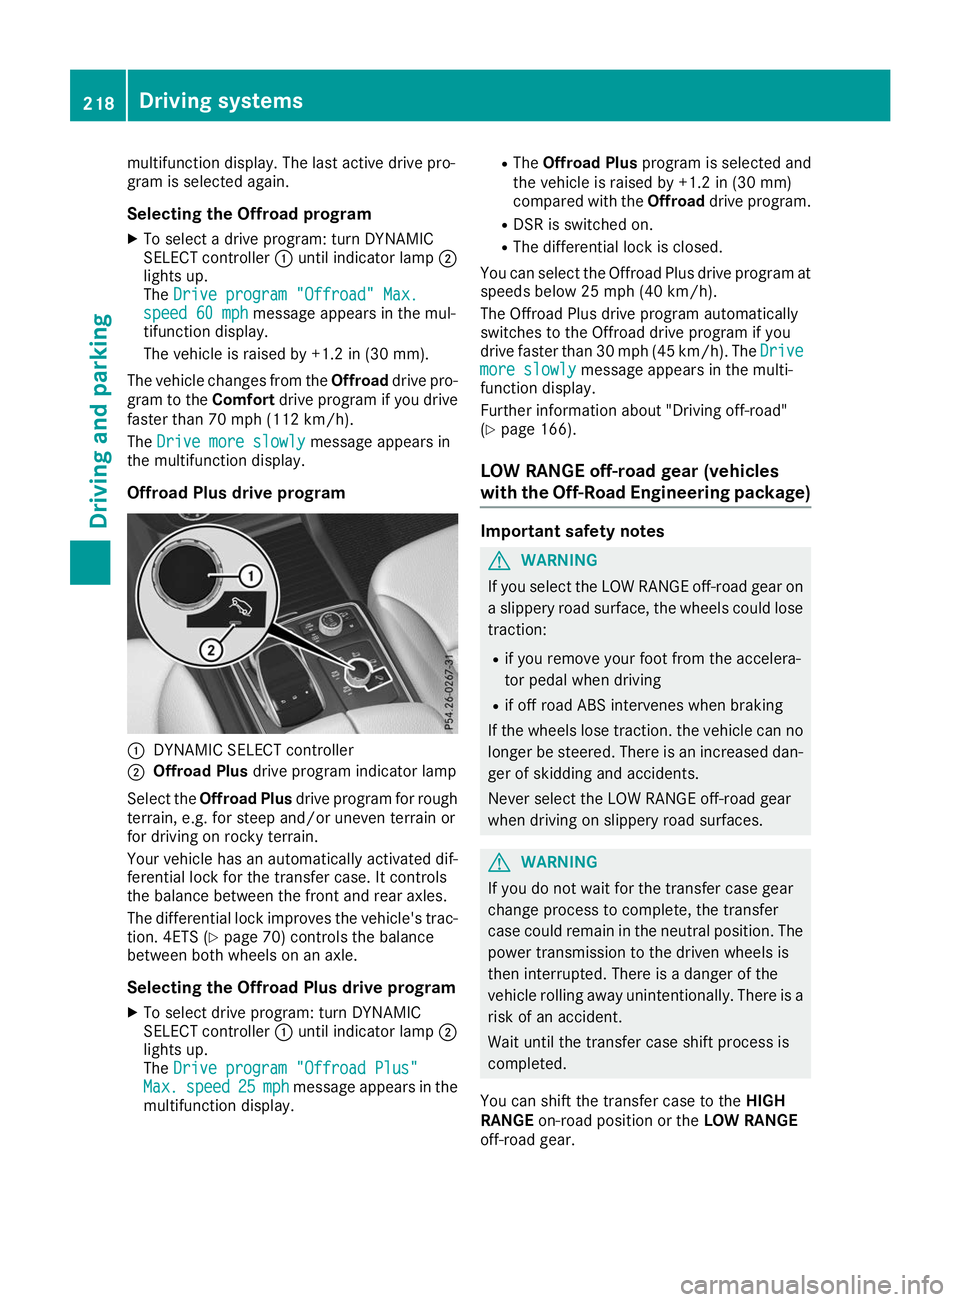
Offroad Plus drive program 0043
DYNAMIC SELECT controller
0044 Offroad Plus drive program indicator lamp
Select the Offroad Plus drive program for rough
terrain, e.g. for steep and/or uneven terrain or
for driving on rocky terrain.
Your vehicle has an automatically activated dif-
ferential lock for the transfer case. It controls
the balance between the front and rear axles.
The differential lock improves the vehicle's trac-
tion. 4ETS (Y page 70) controls the balance
between both wheels on an axle.
Selecting the Offroad Plus drive program X To select drive program: turn DYNAMIC
SELECT controller 0043until indicator lamp 0044
lights up.
The Drive program "Offroad Plus" Drive program "Offroad Plus"
Max.
Max. speed
speed 25
25mph
mph message appears in the
multifunction display. R
The Offroad Plus program is selected and
the vehicle is raised by +1.2 in (30 mm)
compared with the Offroaddrive program.
R DSR is switched on.
R The differential lock is closed.
You can select the Offroad Plus drive program at speeds below 25 mph (40 km/h).
The Offroad Plus drive program automatically
switches to the Offroad drive program if you
drive faster than 30 mph (45 km/h). The Drive
Drive
more slowly more slowly message appears in the multi-
function display.
Further information about "Driving off-road"
(Y page 166).
LOW RANGE off-road gear (vehicles
with the Off-Road Engineering package) Important safety notes
G
WARNING
If you select the LOW RANGE off-road gear on a slippery road surface, the wheels could lose traction:
R if you remove your foot from the accelera-
tor pedal when driving
R if off road ABS intervenes when braking
If the wheels lose traction. the vehicle can no
longer be steered. There is an increased dan-
ger of skidding and accidents.
Never select the LOW RANGE off-road gear
when driving on slippery road surfaces. G
WARNING
If you do not wait for the transfer case gear
change process to complete, the transfer
case could remain in the neutral position. The power transmission to the driven wheels is
then interrupted. There is a danger of the
vehicle rolling away unintentionally. There is a
risk of an accident.
Wait until the transfer case shift process is
completed.
You can shift the transfer case to the HIGH
RANGE on-road position or the LOW RANGE
off-road gear. 218
Driving systemsDriving and parking
Page 221 of 398
Do not turn off the engine while changing gear
and do not shift the automatic transmission to
another position.
Shift ranges HIGH RANGE LOW RANGE
Position for all normal
on-road driving con-
ditions Off-road gear for driv-
ing off-road, fording
and driving on steep
slopes. Characteristics of the LOW RANGE off-road
gear:
R lower maximum permissible speed: 31 mph
(50 km/h)
R increased tractive power
R the transmission ratio is different by a factor
of approximately three
R increase drive torque
Do not use LOW RANGE in the following situa-
tions:
R when driving on public roads.
R if you have snow chains installed
Switching to the LOW RANGE off-road
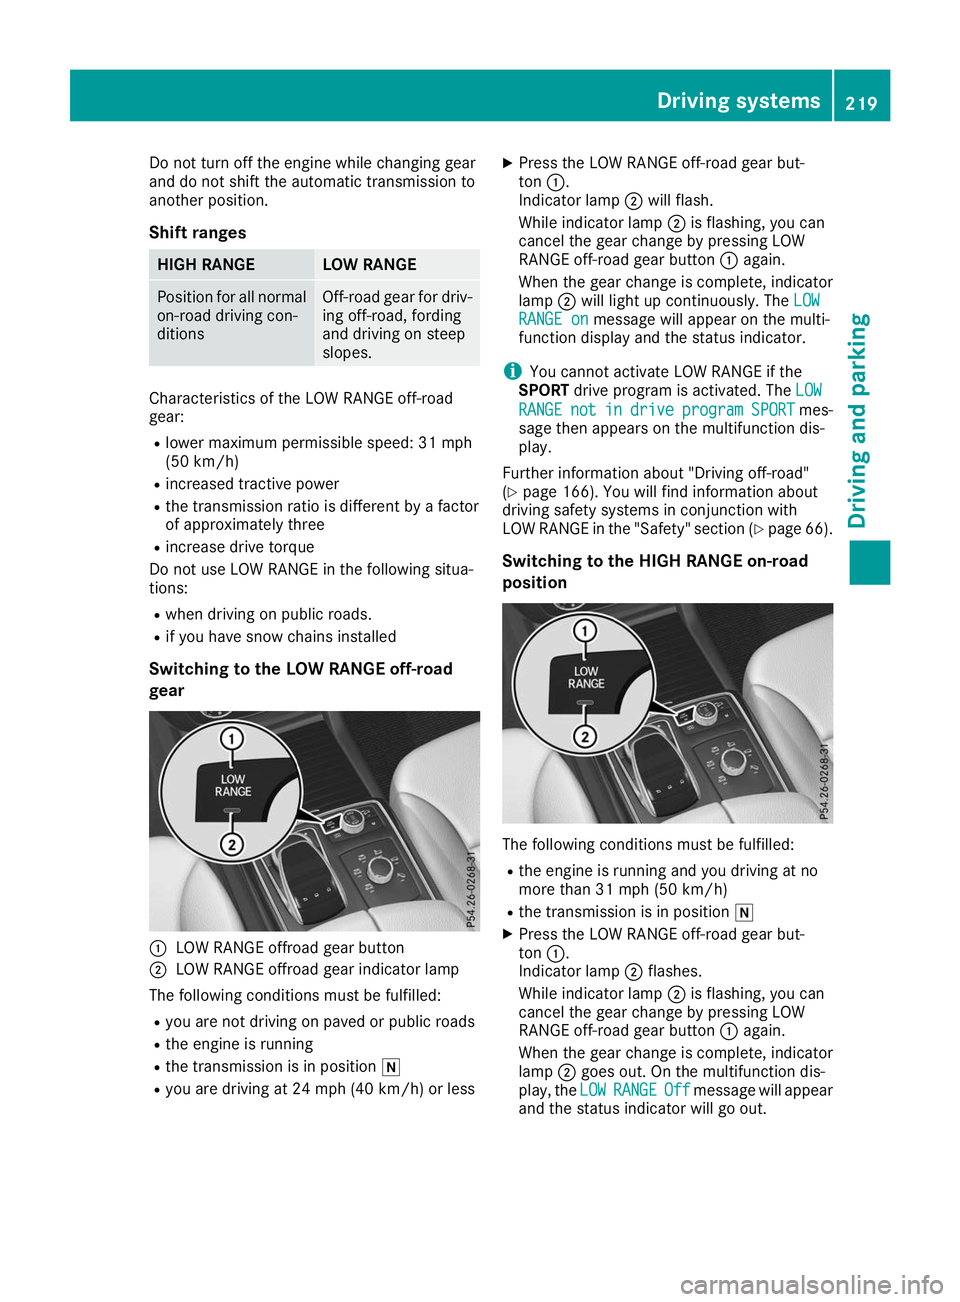
gear 0043
LOW RANGE offroad gear button
0044 LOW RANGE offroad gear indicator lamp
The following conditions must be fulfilled: R you are not driving on paved or public roads
R the engine is running
R the transmission is in position 005C
R you are driving at 24 mph (40 km/h) or less X
Press the LOW RANGE off-road gear but-
ton 0043.
Indicator lamp 0044will flash.
While indicator lamp 0044is flashing, you can
cancel the gear change by pressing LOW
RANGE off-road gear button 0043again.
When the gear change is complete, indicator
lamp 0044will light up continuously. The LOW LOW
RANGE on
RANGE on message will appear on the multi-
function display and the status indicator.
i You cannot activate LOW RANGE if the
SPORT drive program is activated. The LOW
LOW
RANGE
RANGE not
notin
indrive
drive program
program SPORT
SPORTmes-
sage then appears on the multifunction dis-
play.
Further information about "Driving off-road"
(Y page 166). You will find information about
driving safety systems in conjunction with
LOW RANGE in the "Safety" section (Y page 66).
Switching to the HIGH RANGE on-road
position The following conditions must be fulfilled:
R the engine is running and you driving at no
more than 31 mph (50 km/h)
R the transmission is in position 005C
X Press the LOW RANGE off-road gear but-
ton 0043.
Indicator lamp 0044flashes.
While indicator lamp 0044is flashing, you can
cancel the gear change by pressing LOW
RANGE off-road gear button 0043again.
When the gear change is complete, indicator
lamp 0044goes out. On the multifunction dis-
play, the LOW LOWRANGE
RANGE Off
Offmessage will appear
and the status indicator will go out. Driving systems
219Driving and parking Z
Page 226 of 398
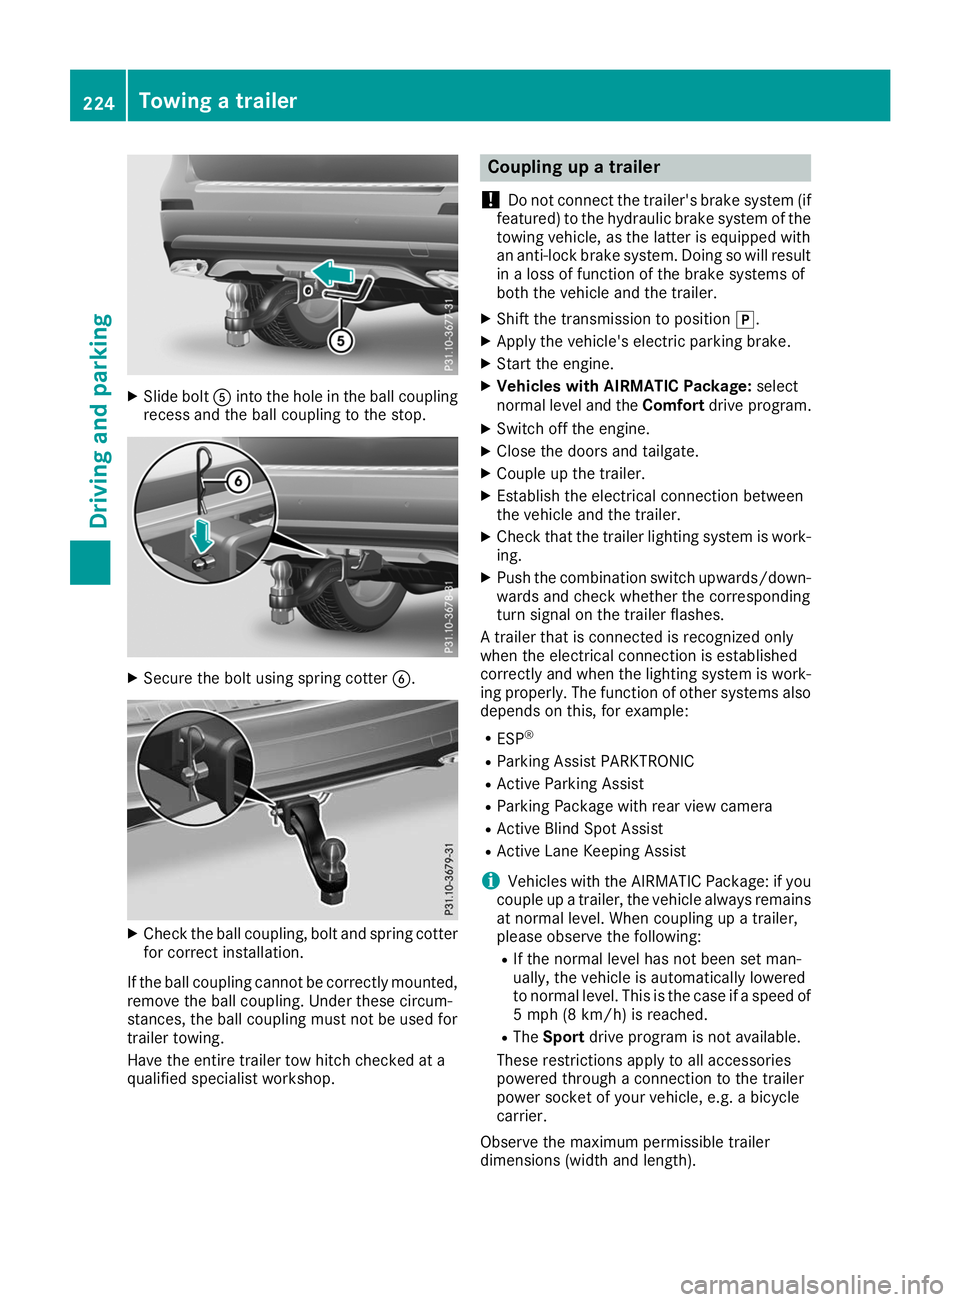
X
Slide bolt 0083into the hole in the ball coupling
recess and the ball coupling to the stop. X
Secure the bolt using spring cotter 0084.X
Check the ball coupling, bolt and spring cotter
for correct installation.
If the ball coupling cannot be correctly mounted,
remove the ball coupling. Under these circum-
stances, the ball coupling must not be used for
trailer towing.
Have the entire trailer tow hitch checked at a
qualified specialist workshop. Coupling up a trailer
! Do not connect the trailer's brake system (if
featured) to the hydraulic brake system of the towing vehicle, as the latter is equipped with
an anti-lock brake system. Doing so will result
in a loss of function of the brake systems of
both the vehicle and the trailer.
X Shift the transmission to position 005D.
X Apply the vehicle's electric parking brake.
X Start the engine.
X Vehicles with AIRMATIC Package: select
normal level and the Comfortdrive program.
X Switch off the engine.
X Close the doors and tailgate.
X Couple up the trailer.
X Establish the electrical connection between
the vehicle and the trailer.
X Check that the trailer lighting system is work-
ing.
X Push the combination switch upwards/down-
wards and check whether the corresponding
turn signal on the trailer flashes.
A trailer that is connected is recognized only
when the electrical connection is established
correctly and when the lighting system is work-
ing properly. The function of other systems also depends on this, for example:
R ESP ®
R Parking Assist PARKTRONIC
R Active Parking Assist
R Parking Package with rear view camera
R Active Blind Spot Assist
R Active Lane Keeping Assist
i Vehicles with the AIRMATIC Package: if you
couple up a trailer, the vehicle always remains
at normal level. When coupling up a trailer,
please observe the following:
R If the normal level has not been set man-
ually, the vehicle is automatically lowered
to normal level. This is the case if a speed of
5 mph (8 km/h) is reached.
R The Sport drive program is not available.
These restrictions apply to all accessories
powered through a connection to the trailer
power socket of your vehicle, e.g. a bicycle
carrier.
Observe the maximum permissible trailer
dimensions (width and length). 224
Towing a trailerDriving and parking