2019 MERCEDES-BENZ GLS SUV automatic transmission
[x] Cancel search: automatic transmissionPage 167 of 398
You can obtain further information about this
from your authorized Mercedes-Benz Center.
New and replaced brake pads and discs only
reach their optimum braking effect after several
hundred kilometers of driving. Compensate for
this by applying greater force to the brake pedal. Keep this in mind, and adapt your driving and
braking accordingly during this break-in period.
Excessive heavy braking results in correspond-
ingly high brake wear. Observe the 0026brake
wear warning lamp in the instrument cluster and
note any brake status messages in the multi-
function display. Especially for high perform-
ance driving, it is important to maintain and have the brake system checked regularly. Driving on wet roads
Hydroplaning If water has accumulated to a certain depth on
the road surface, there is a danger of hydro-
planing occurring, even if:
R you drive at low speeds
R the tires have adequate tread depth
For this reason, in the event of heavy rain or in
conditions in which hydroplaning may occur,
you must drive in the following manner:
R lower your speed
R avoid ruts
R avoid sudden steering movements
R brake carefully
Driving on flooded roads !
Do not drive through flooded areas. Check
the depth of any water before driving through
it. Drive slowly through standing water. Oth-
erwise, water could enter the vehicle interior
or engine compartment. It can then damage
the engine's or automatic transmission's
electronic components. It can also be sucked
in by the engine's air intake connection and
cause engine damage.
i Vehicles with the AIRMATIC Package:
select the raised vehicle level before driving
through a body of water. Off-road fording !
Under no circumstances should you accel-
erate before entering the water. The bow
wave could cause water to enter and damage
the engine and other assemblies.
! Do not open any of the vehicle's doors while
fording. Otherwise, water could get into the
vehicle interior and damage the vehicle's
electronics and interior equipment.
R Establish how deep the water is and the char-
acteristics of the body of water before ford-
ing.
R Select the highest possible vehicle level.
R Shift to a lower gear using the left-hand steer-
ing wheel paddle shifter.
R Avoid high engine speeds.
R Enter and exit the water at a flat place and at
a steady walking pace.
R Drive slowly and at an even speed through the
water.
R Ensure that a bow wave does not form as you
drive.
R Do not stop and do not switch off the engine.
Water offers a high degree of resistance, and the ground is slippery and in some cases
unstable. Therefore, it is difficult and danger-
ous to pull away in the water.
R Clean any mud from the tire tread after ford-
ing.
R Apply the brakes to dry them after fording.
Always observe the maximum fording depth val- ues (Y page 390). Winter driving
G
WARNING
If you shift down on a slippery road surface in an attempt to increase the engine's braking
effect, the drive wheels could lose their grip.
There is an increased danger of skidding and
accidents.
Do not shift down for additional engine brak-
ing on a slippery road surface. G
DANGER
If the exhaust pipe is blocked or adequate
ventilation is not possible, poisonous gases Driving tips
165Driving and parking
Z
Page 170 of 398
R
Take care when turning on an uphill or down-
hill slope or when driving across a slope. The
vehicle could otherwise tip over.
R Always keep the doors, the tailgate, the side
windows and the sliding sunroof closed while the vehicle is in motion.
R Do not shift the automatic transmission to
position 005C.
R Observe the notes on off-road fording
(Y page 165).
i Information about retrofitting special all-ter-
rain tires is available from any qualified spe-
cialist workshop.
i Do not use the HOLD function when driving
off-road, on steep uphill or downhill gradients
or on slippery or loose surfaces. The HOLD
function cannot hold the vehicle on such sur- faces.
Checklist before driving off-road !
If the engine oil warning lamp lights up while
the vehicle is in motion, stop the vehicle in a
safe place as soon as possible. Check the
engine oil level. The engine oil warning lamp
warning must not be ignored. Continuing the
journey while the symbol is displayed could
lead to engine damage.
X Engine oil level: check the engine oil level
and add engine oil if necessary.
When you drive on steep gradients, the engine
oil level must be sufficiently high to ensure
that oil is supplied correctly in the vehicle.
X Tire-changing tool kit: check that the jack is
working and make sure you have the lug
wrench, a robust tow cable and a folding
spade in the vehicle.
X Wheels and tires: check the tread depth and
pressure of the tires.
X Check for damage and remove any foreign
objects, e.g. small stones, from the wheels/
tires.
X Replace any missing valve caps.
X Replace dented or damaged wheels.
X Rims: dented or bent rims can result in a loss
of tire pressure and damage the tire bead.
Before driving off-road, check the wheels and
replace them if necessary. Checklist after driving off-road !
If you detect damage to the vehicle after
driving off-road, have the vehicle checked
immediately at a qualified specialist work-
shop.
Driving over rough terrain places greater
demands on your vehicle than driving on normal
roads. After driving off-road, check the vehicle.
This allows you to detect damage promptly and reduce the risk of an accident to yourself and
other road users.
X If the Offroad orOffroad Plus drive program
is selected: select the Individual,Sport,
Comfort orSlippery drive program
(Y page 147).
X Deactivate the LOW RANGE off-road gear
(Y page 218).
X Deactivate DSR (Y page 215).
X Lower the vehicle level again to a level suita-
ble to the road conditions, e.g. to the normal
level.
X Clean the headlamps and rear lights and
check for damage.
X Clean the front and rear license plates.
X Clean the wheels and tires with a water jet
and remove any foreign objects.
X Clean the wheels, wheel housings and the
vehicle underside with a water jet; check for
any foreign objects and damage.
X Check whether twigs or other parts of plants
have become trapped. These increase the risk of fire and can damage fuel pipes, brake
hoses or the rubber bellows of the axle joints
and propeller shafts.
X After the trip, examine without fail the entire
undercarriage, wheels, tires, brakes, body-
work structure, steering, chassis and exhaust
system for damage.
X After driving for extended periods across
sand, mud, gravel, water or in similarly dirty
conditions, have the brake discs, wheels,
brake pads/linings and axle joints checked
and cleaned.
X If you detect strong vibrations after off-road
travel, check for foreign objects in the wheels
and drive train and remove them if necessary.
Foreign objects can disturb the balance and
cause vibrations. 168
Driving tipsDriving and parking
Page 173 of 398

Further information on driving safety systems
(Y page 66). Cruise control
General notes Cruise control maintains a constant road speed
for you. It brakes automatically in order to avoid exceeding the set speed. You must select a
lower gear in good time on long and steep down-
hill gradients, especially if the vehicle is laden or towing a trailer. By doing so, you will make use of
the braking effect of the engine. This relieves the
load on the brake system and prevents the
brakes from overheating and wearing too
quickly.
Use cruise control only if road and traffic con-
ditions make it appropriate to maintain a steady speed for a prolonged period. You can store anyroad speed above 20 mph (30 km/h).
i Cruise control should not be activated when
driving off-road.
Important safety notes If you fail to adapt your driving style, cruise con-
trol can neither reduce the risk of an accident
nor override the laws of physics. Cruise control
cannot take into account the road, traffic and
weather conditions. Cruise control is only an
aid. You are responsible for the distance to the
vehicle in front, for vehicle speed, for braking in
good time and for staying in your lane.
Do not use cruise control:
R in road and traffic conditions which do not
allow you to maintain a constant speed, e.g. in
heavy traffic or on winding roads
R on slippery road surfaces. Braking or accel-
erating could cause the drive wheels to lose
traction and the vehicle could then skid
R when there is poor visibility, e.g. due to fog,
heavy rain or snow
If there is a change of drivers, advise the new
driver of the speed stored. Cruise control lever 0043
Activates or increases speed
0044 Activates or reduces speed
0087 Deactivates cruise control
0085 Activates at the current speed/last stored
speed
When you activate cruise control, the stored
speed is shown in the multifunction display for
five seconds.
Activation conditions To activate cruise control, all of the following
activation conditions must be fulfilled:
R the electric parking brake must be released.
R you are driving faster than 20 mph (30 km/h).
R ESP ®
must be active, but not intervening.
R the transmission must be in position 005B.
R DSR must be deactivated.
R the Offroad Plus drive program must be deac-
tivated (vehicles with the Off-road Engineer-
ing Package).
Storing, maintaining and calling up a
speed Storing and maintaining a speed
X Accelerate the vehicle to the desired speed.
X Briefly press the cruise control lever up 0043or
down 0085.
X Remove your foot from the accelerator pedal.
Cruise control is activated. The vehicle auto-
matically maintains the stored speed.
i Cruise control may be unable to maintain
the stored speed on uphill gradients. The
stored speed is resumed when the gradient
evens out. Cruise control maintains the Driving systems
171Driving and parking Z
Page 174 of 398
stored speed on downhill gradients by auto-
matically applying the brakes.
Storing or calling up a speed G
WARNING
If you call up the stored speed and it differs
from the current speed, the vehicle acceler-
ates or decelerates. If you do not know the
stored speed, the vehicle could accelerate or brake unexpectedly. There is a risk of an acci-
dent.
Pay attention to the road and traffic condi-
tions before calling up the stored speed. If you do not know the stored speed, store the
desired speed again.
X Briefly pull the cruise control lever towards
you 0087.
X Remove your foot from the accelerator pedal.
Cruise control is operational and when first
activated stores the current speed or regu-
lates the speed of the vehicle to the stored
speed.
Setting a speed Keep in mind that it may take a brief moment
until the vehicle has accelerated or braked to
the speed set.
X Press the cruise control lever up 0043for a
higher speed or down 0044for a lower speed.
X To adjust the set speed in 1 mph incre-
ments (1 km/h increments):
briefly press
the cruise control lever up 0043or down 0044to
the pressure point.
Every time the cruise control lever is pressed
up 0043 or down 0044the last speed stored is
increased or reduced.
X To adjust the set speed in 5 mph incre-
ments (10 km/h increments):
briefly press
the cruise control lever up 0043or down 0044
beyond the pressure point.
Every time the cruise control lever is pressed
up 0043 or down 0044the last speed stored is
increased or reduced.
i Cruise control is not deactivated if you
depress the accelerator pedal. For example, if
you accelerate briefly to overtake, cruise con-
trol adjusts the vehicle's speed to the last
speed stored after you have finished overtak-
ing. Deactivating cruise control There are several ways to deactivate cruise con-
trol:
X Briefly press the cruise control lever for-
wards 0043.
or X Brake.
Cruise control is automatically deactivated if: R you engage the electric parking brake
R you are driving at less than 20 mph (30 km/h)
R ESP ®
intervenes or you deactivate ESP ®
R you activate DSR
R you activate the Offroad Plus program (vehi-
cles with the Off-road Engineering Package)
R you shift the transmission to position 005C
while driving
If cruise control is deactivated, you will hear a
warning tone. You will see the Cruise Con‐ Cruise Con‐
trol Off
trol Off message in the multifunction display
for approximately five seconds.
i When you switch off the engine, the last
speed stored is cleared. Active Distance Assist DISTRONIC
General notes Active Distance Assist DISTRONIC regulates the
speed and automatically helps you maintain the
distance from the vehicle detected in front.
Vehicles are detected with the aid of the radar
sensor system. Active Distance Assist
DISTRONIC brakes automatically so that the set
speed is not exceeded.
You must select a lower gear in good time on
long and steep downhill gradients, especially if
the vehicle is laden or towing a trailer. By doing so, you will make use of the braking effect of theengine. This relieves the load on the brake sys-
tem and prevents the brakes from overheating
and wearing too quickly.
If Active Distance Assist DISTRONIC detects
that there is a risk of a collision with the vehicle
in front, you will be warned visually and audibly.
Active Distance Assist DISTRONIC cannot pre-
vent a collision without your intervention. An
intermittent warning tone will then sound and
the distance warning lamp will light up in the
instrument cluster. Brake immediately in order 172
Driving systemsDriving and parking
Page 178 of 398
between your vehicle and the vehicle in front
becomes too small.
i When you change lanes, Active Distance
Assist DISTRONIC monitors the right lane (in
left-side traffic) or the left lane (in right-side
traffic).
Stopping G
WARNING
If you leave the driver's seat when the vehicle is only being braked by Active Distance Assist
DISTRONIC, it could roll away:
R if there is a malfunction in the system or in
the voltage supply
R if Active Distance Assist DISTRONIC is
deactivated using the cruise control lever,
for example by a vehicle occupant or from
outside the vehicle
R if the electrical system in the engine com-
partment, the battery or the fuses are tam-
pered with
R if the battery is disconnected
R if the vehicle is accelerated, e.g. by a vehi-
cle occupant
There is a risk of an accident.
Always deactivate Active Distance Assist
DISTRONIC and secure the vehicle against
rolling away before you leave it.
If Active Distance Assist DISTRONIC detects
that the vehicle in front is stopping, it brakes
your vehicle until it is stationary.
Once your vehicle is stationary, it remains sta-
tionary and you do not need to depress the
brake.
After a time, the electric parking brake secures
the vehicle and relieves the service brake.
Depending on the specified minimum distance,
your vehicle will come to a standstill at a suffi-
cient distance behind the vehicle in front. The
specified minimum distance is set using the
control on the cruise control lever. When Active Distance Assist DISTRONIC is acti-
vated and the vehicle is at a standstill, the trans-
mission will be shifted automatically to position
005D if:
R the driver's door is open and the driver's seat
belt is unfastened.
R the engine is switched off, unless it is auto-
matically switched off by the ECO start/stop
function.
When Active Distance Assist DISTRONIC is acti-
vated and the vehicle is at a standstill, the elec- tric parking brake will secure the vehicle auto-
matically if:
R a system malfunction occurs
R the power supply is not sufficient
On steep uphill or downhill inclines or if there is
a malfunction, the transmission may also be
automatically shifted into position 005D.
Setting a speed Keep in mind that it may take a brief moment
until the vehicle has accelerated or braked to
the speed set.
X Press the cruise control lever up 0043for a
higher speed or down 0083for a lower speed
X To adjust the set speed in 1 mph incre-
ments (1 km/h increments):
briefly press
the cruise control lever up 0043or down 0044to
the pressure point.
Every time the cruise control lever is pressed
up 0043 or down 0044the last speed stored is
increased or reduced.
X To adjust the set speed in 5 mph incre-
ments
(10 km/h increments): briefly press
the cruise control lever up 0043or down 0044
beyond the pressure point.
Every time the cruise control lever is pressed
up 0043 or down 0044, the last speed stored is
increased or reduced.
i If you accelerate to overtake, Active Dis-
tance Assist DISTRONIC adjusts the vehicle's
speed to the last speed stored after you have
finished overtaking. 176
Driving systemsDriving and parking
Page 179 of 398
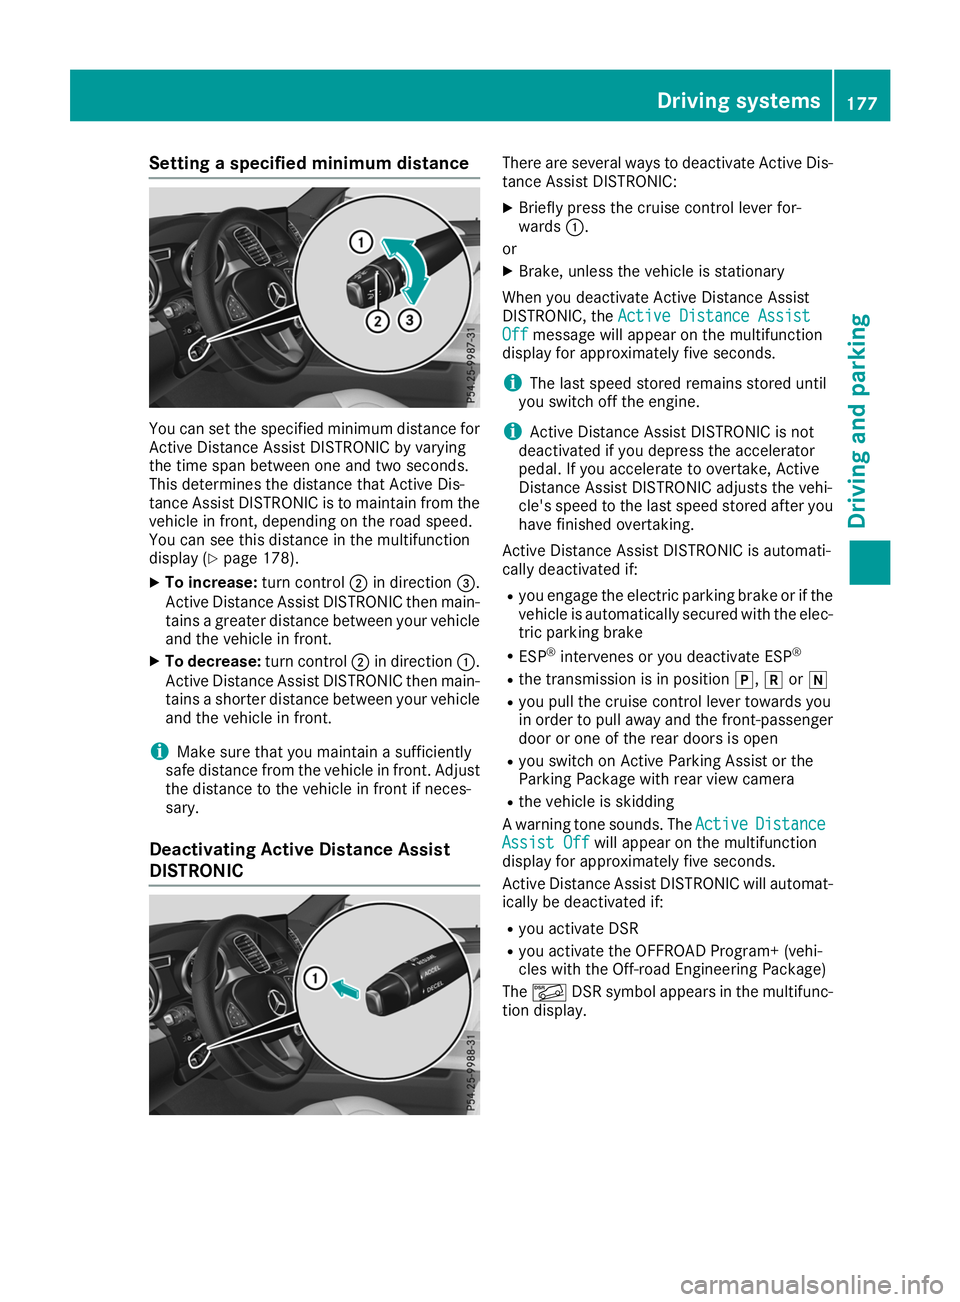
Setting a specified minimum distance
You can set the specified minimum distance for
Active Distance Assist DISTRONIC by varying
the time span between one and two seconds.
This determines the distance that Active Dis-
tance Assist DISTRONIC is to maintain from the
vehicle in front, depending on the road speed.
You can see this distance in the multifunction
display (Y page 178).
X To increase: turn control0044in direction 0087.
Active Distance Assist DISTRONIC then main-
tains a greater distance between your vehicle and the vehicle in front.
X To decrease: turn control0044in direction 0043.
Active Distance Assist DISTRONIC then main- tains a shorter distance between your vehicle
and the vehicle in front.
i Make sure that you maintain a sufficiently
safe distance from the vehicle in front. Adjust
the distance to the vehicle in front if neces-
sary.
Deactivating Active Distance Assist
DISTRONIC There are several ways to deactivate Active Dis-
tance Assist DISTRONIC:
X Briefly press the cruise control lever for-
wards 0043.
or
X Brake, unless the vehicle is stationary
When you deactivate Active Distance Assist
DISTRONIC, the Active Distance Assist Active Distance Assist
Off
Off message will appear on the multifunction
display for approximately five seconds.
i The last speed stored remains stored until
you switch off the engine.
i Active Distance Assist DISTRONIC is not
deactivated if you depress the accelerator
pedal. If you accelerate to overtake, Active
Distance Assist DISTRONIC adjusts the vehi-
cle's speed to the last speed stored after you have finished overtaking.
Active Distance Assist DISTRONIC is automati-
cally deactivated if:
R you engage the electric parking brake or if the
vehicle is automatically secured with the elec-
tric parking brake
R ESP ®
intervenes or you deactivate ESP ®
R the transmission is in position 005D,005Eor005C
R you pull the cruise control lever towards you
in order to pull away and the front-passenger
door or one of the rear doors is open
R you switch on Active Parking Assist or the
Parking Package with rear view camera
R the vehicle is skidding
A warning tone sounds. The Active ActiveDistance
Distance
Assist Off
Assist Off will appear on the multifunction
display for approximately five seconds.
Active Distance Assist DISTRONIC will automat- ically be deactivated if:
R you activate DSR
R you activate the OFFROAD Program+ (vehi-
cles with the Off-road Engineering Package)
The 00C6 DSR symbol appears in the multifunc-
tion display. Driving systems
177Driving and parking Z
Page 186 of 398
i
Do not use the HOLD function when driving
off-road, on steep uphill or downhill gradients or on slippery or loose surfaces. The HOLD
function cannot hold the vehicle on such sur- faces.
Important safety notes G
WARNING
If the vehicle is only braked using the HOLD
function, the vehicle may roll away in the fol-
lowing situations when you leave the vehicle:
R if there is a malfunction in the system or in
the voltage supply
R if the HOLD function is deactivated by
depressing the accelerator pedal or brake
pedal, e.g. by a vehicle occupant
There is a risk of an accident.
Always deactivate the HOLD function and
secure the vehicle against rolling away before
you leave it.
! When Active Distance Assist DISTRONIC or
the HOLD function is activated, the vehicle
brakes automatically in certain situations.
To avoid damage to the vehicle, deactivate
Active Distance Assist DISTRONIC and the
HOLD function in the following or similar sit-
uations:
R when towing the vehicle
R in the car wash
Deactivate the HOLD function (Y page 184).
Activation conditions You can activate the HOLD function if:
R the vehicle is stationary
R the engine is running or if it has been auto-
matically switched off by the ECO start/stop
function
R the driver's door is closed or your seat belt is
fastened
R the electric parking brake is released
R the transmission is in position 005B,005Eor005C
R Active Distance Assist DISTRONIC is deacti-
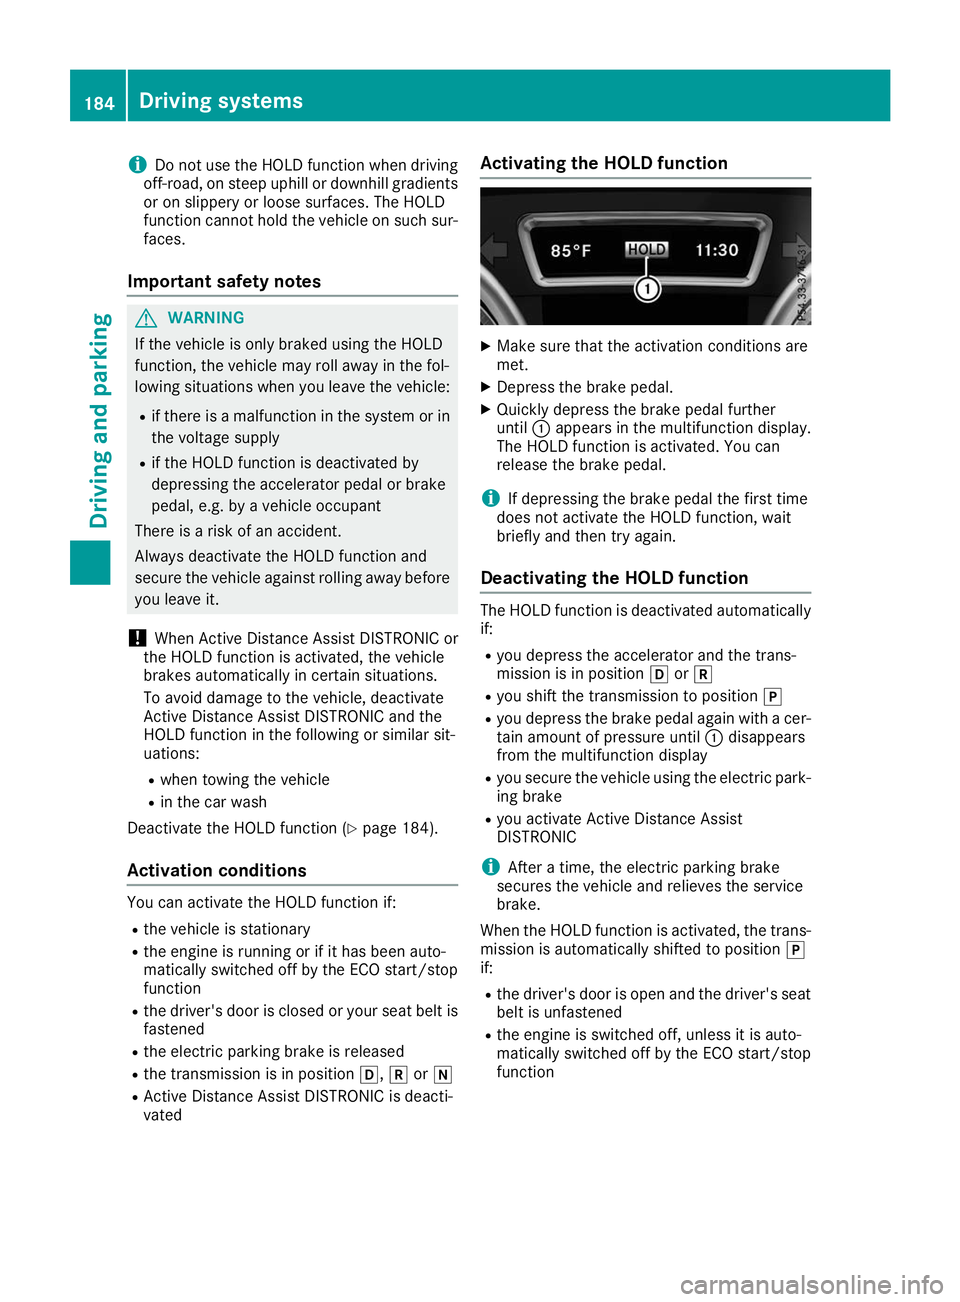
vated Activating the HOLD function X
Make sure that the activation conditions are
met.
X Depress the brake pedal.
X Quickly depress the brake pedal further
until 0043appears in the multifunction display.
The HOLD function is activated. You can
release the brake pedal.
i If depressing the brake pedal the first time
does not activate the HOLD function, wait
briefly and then try again.
Deactivating the HOLD function The HOLD function is deactivated automatically
if:
R you depress the accelerator and the trans-
mission is in position 005Bor005E
R you shift the transmission to position 005D
R you depress the brake pedal again with a cer-
tain amount of pressure until 0043disappears
from the multifunction display
R you secure the vehicle using the electric park-
ing brake
R you activate Active Distance Assist
DISTRONIC
i After a time, the electric parking brake
secures the vehicle and relieves the service
brake.
When the HOLD function is activated, the trans-
mission is automatically shifted to position 005D
if:
R the driver's door is open and the driver's seat
belt is unfastened
R the engine is switched off, unless it is auto-
matically switched off by the ECO start/stop
function 184
Driving systemsDriving an
d parking
Page 187 of 398
The electric parking brake secures the vehicle
automatically if the HOLD function is activated
when the vehicle is stationary and:
R a system malfunction occurs
R the power supply is insufficient
On steep uphill or downhill gradients or if there
is a malfunction, the transmission may also be
automatically shifted to position 005D.AIRMATIC package
General notes AIRMATIC is an air suspension system with var-
iable damping for improved driving comfort.
Level control ensures the best possible suspen- sion and constant ground clearance, even with a laden vehicle. When you drive fast, the vehicle islowered automatically to improve driving safety
and to reduce fuel consumption. There is also
the option to manually adjust the vehicle level.
AIRMATIC consists of:
R level settings
R level control and
R ADS or ADS PLUS (Adaptive Damping Sys-
tem)
All vehicles (except Mercedes-AMG vehi-
cles): your vehicle may also be equipped with
the ACTIVE CURVE SYSTEM (Y page 186).
Mercedes-AMG vehicles: your vehicle is equip-
ped with the ACTIVE CURVE SYSTEM
(Y page 186).
Observe the notes on driving with a trailer
(Y page 222).
The vehicle level can be set using the DYNAMIC
SELECT controller (Y page 147) or the level but-
ton (Y page 187). The setting always corre-
sponds to the last selected function.
Important safety notes G
WARNING
When the vehicle is being lowered, people
could become trapped if their limbs are
between the vehicle body and the wheels or
underneath the vehicle. There is a risk of
injury. Make sure no one is underneath the vehicle or
in the immediate vicinity of the wheel arches
when the vehicle is being lowered.
If you unlock the vehicle or open a door, the
vehicle begins to compensate for load discrep-
ancies while still parked. However, for signifi-
cant level changes, such as after the vehicle has
been stationary for a long period, the engine
must be on. For safety reasons, the vehicle is
only lowered when the doors are closed. Low-
ering is interrupted if a door is opened, and it
continues once the door has been closed.
ADS and ADS PLUS (Adaptive Damping
System) General notes
The Adaptive Damping System automatically
controls the calibration of the dampers. The
damping characteristics adapt to the current
operating and driving situation.
The damping is tuned individually to each wheel
and depends on:
R your driving style, e.g. sporty
R the road surface conditions
R the drive program selected
R the vehicle level setting
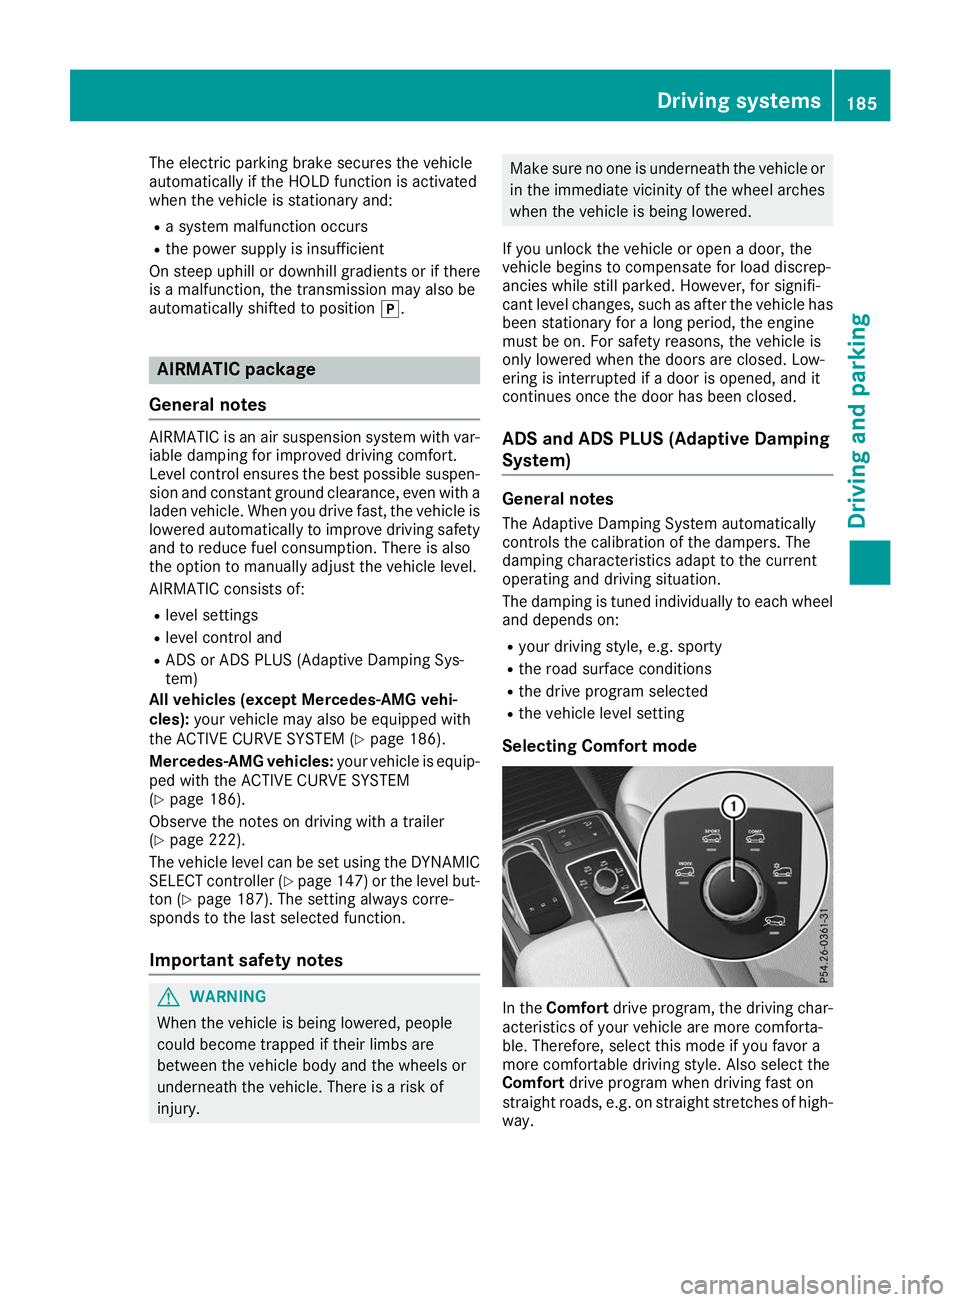
Selecting Comfort mode In the
Comfort drive program, the driving char-
acteristics of your vehicle are more comforta-
ble. Therefore, select this mode if you favor a
more comfortable driving style. Also select the
Comfort drive program when driving fast on
straight roads, e.g. on straight stretches of high-
way. Driving systems
185Driving and parking Z