2019 MERCEDES-BENZ GLS SUV tow
[x] Cancel search: towPage 58 of 398
Problem
Possible causes/consequences and
0050
0050Solutions The PASSENGER AIR
BAG OFF indicator lamp
lights up and remains lit,
even though the front-
passenger seat is occu-
pied by an adult or a per-
son of a stature corre-
sponding to that of an
adult. The classification of the person on the front-passenger seat is incor-
rect.
X Make sure the conditions for a correct classification of the person
on the front-passenger seat are met (Y page 52).
X If the PASSENGER AIR BAG OFF indicator lamp remains lit, the front-
passenger seat may not be used.
X Have OCS checked as soon as possible at an authorized Mercedes-
Benz Center. The PASSENGER AIR
BAG OFF indicator lamp
does not light up and/or
does not stay on.
The front-passenger seatis:
R unoccupied
R occupied by the
weight of a child up to
twelve months old in achild restraint system OCS is malfunctioning.
X Make sure there is nothing between the seat cushion and the child
seat.
X Make sure that the entire base of the child restraint system rests on
the seat cushion of the front-passenger seat. The backrest of the
forward-facing child restraint system must lie as flat as possible
against the backrest of the front passenger seat. If necessary,
adjust the position of the front-passenger seat.
X When installing the child restraint system, make sure that the seat
belt is tight. Do not pull the seat belt tight using the front-passenger
seat adjustment. This could result in the seat belt and the child
restraint system being pulled too tightly.
X Check for correct installation of the child restraint system.
Make sure that the head restraint does not apply a load to the child restraint system. If necessary, adjust the head restraint accord-
ingly.
X Make sure that no objects are applying additional weight onto the
seat.
X If the PASSENGER AIR BAG OFF indicator lamp remains off and/or
the PASSENGER AIR BAG ON indicator lamp lights up, do not install a child restraint system on the front-passenger seat. It is recom-
mended that you install the child restraint system on a suitable rear
seat.
X Have OCS checked as soon as possible at an authorized Mercedes-
Benz Center. Deployment of Emergency Tensioning
Devices and air bags
Important safety notes G
WARNING
The air bag parts are hot after an air bag has
been deployed. There is a risk of injury.
Do not touch the air bag parts. Have a
deployed air bag replaced at a qualified spe-
cialist workshop as soon as possible. G
WARNING
A deployed air bag no longer offers any pro-
tection and cannot provide the intended pro-
tection in an accident. There is an increased
risk of injury.
Have the vehicle towed to a qualified special- ist workshop in order to have a deployed air
bag replaced.
It is important for your safety and that of your
passenger to have deployed air bags replaced
and to have any malfunctioning air bags 56
Occupant safetySafety
Page 63 of 398
Activating the special seat belt retractor:
X Pull the seat belt out fully and let the inertia
reel retract it again.
While the seat belt is retracting, you should
hear a ratcheting sound. The special seat belt retractor is enabled.
X Push the child restraint system down so that
the seat belt is tight and does not loosen.
Removing the child restraint system and deac-
tivating the special seat belt retractor:
X Make sure you observe the child restraint
system manufacturer's installation instruc-
tions.
X Press the release button of the seat belt
buckle and guide the seat belt tongue back
towards the belt sash guide.
The special seat belt retractor is deactivated. child restraint system
The use of seat belts and child restraint systems
is required by law in:
R all 50 states
R the U.S. territories
R the District of Columbia
R all Canadian provinces
If you install a rearward-facing child restraint
system on the center rear seat, the rear arm rest must be folded back as far as possible.
You can obtain further information about the
correct child restraint system from any author-
ized Mercedes-Benz Center. G
WARNING
If the child restraint system is installed incor- rectly on a suitable seat, it cannot protect as
intended. The child cannot then be restrained in the event of an accident, heavy braking or
sudden changes of direction. There is an
increased risk of injury, possibly even fatal.
Make sure that you observe the child restraint
system manufacturer's installation instruc-
tions and the notes on use. Please ensure,
that the base of the child restraint system is
always resting completely on the seat cush-
ion. Never place objects, e.g. cushions, under or behind the child restraint system. Only use
child restraint systems with the original cover designed for them. Only replace damaged
covers with genuine covers.
G
WARNING
If the child restraint system is installed incor- rectly or is not secured, it can come loose in
the event of an accident, heavy braking or a
sudden change in direction. The child
restraint system could be thrown about, strik- ing vehicle occupants. There is an increased
risk of injury, possibly even fatal.
Always install child restraint systems prop-
erly, even if they are not being used. Make
sure that you observe the child restraint sys-
tem manufacturer's installation instructions.
You will find further information on stowing
objects, luggage or loads under "Loading guide-
lines" (Y page 295). G
WARNING
Child restraint systems or their securing sys-
tems which have been damaged or subjected to a load in an accident can no longer protect
as intended. The child cannot then be
restrained in the event of an accident, heavy
braking or sudden changes of direction. There is an increased risk of injury, possibly even
fatal.
Replace child restraint systems which have
been damaged or subjected to a load in an
accident as soon as possible. Have the secur-
ing systems on the child restraint system
checked at a qualified specialist workshop,
before you install a child restraint system
again.
The securing systems of child restraint systems
are:
R the seat belt system
R the LATCH-type (ISOFIX) securing rings
R the Top Tether anchorages
If it is absolutely necessary to carry a child on
the front passenger seat, be sure to observe the information on the "Occupant Classification
System (OCS)" (Y page 51). There you will also
find information on disabling the front
passenger front air bag. Children in the vehicle
61Safety Z
Page 86 of 398

Automatic locking feature
X
To deactivate: press and hold button 0043for
about five seconds until a tone sounds.
X To activate: press and hold button 0044for
about five seconds until a tone sounds.
If you press one of the two buttons and do not
hear a tone, the relevant setting has already
been selected.
The vehicle is locked automatically when the
ignition is switched on and the wheels are turn-
ing.
You could therefore be locked out if:
R the vehicle is being pushed.
R the vehicle is being towed.
R the vehicle is on a roller dynamometer.
You can also switch the automatic locking func-
tion on and off using the on-board computer
(Y page 241). Power closing
Power closing pulls the doors and tailgate into
their locks automatically even if they are not
completely closed.
X To power close a door: push the door into
the lock up to the first detent position.
Power closing will pull the door fully closed.
X To power close the tailgate: lightly press
the tailgate downwards.
Power closing will pull the tailgate fully
closed. Unlocking/locking the driver's door
using the mechanical key
i If you want to centrally lock the vehicle using
the mechanical key, begin by pressing the
locking button for the interior locking mech-
anism while the driver's door is open. Then
proceed to lock the driver's door using the
mechanical key. X
Insert the mechanical key into the lock of the
driver's door as far as it will go.
X To unlock: turn the mechanical key counter-
clockwise to position 0047.
X To lock: turn the mechanical key clockwise as
far as it will go to position 0047.
If you use the mechanical key to unlock and
open the driver's door, the anti-theft alarm sys- tem will be triggered. Switch off the alarm
(Y page 75).
If you lock the vehicle as described above, the
fuel filler flap is not locked. The anti-theft alarm
system is not armed. Cargo compartment
Important safety notes
G
DANGER
Combustion engines emit poisonous exhaust
gases such as carbon monoxide. Exhaust
gases can enter the vehicle interior if the tail- gate is open while the engine is running, espe-cially if the vehicle is in motion. There is a risk of poisoning.
Always switch off the engine before opening
the tailgate. Never drive with the tailgate
open. 84
Cargo compartmentOpening and closing
Page 118 of 398
The daytime running lamps improve the visibility
of your vehicle during the day. To do this, the
daytime running lamps function must be
switched on using the on-board computer
(Y page 240).
If the engine is running and you turn the light
switch to 0060or0058, the manual settings
take precedence over the daytime running
lamps.
Low-beam headlamps
Even if the light sensor does not detect that it is dark, the parking lamps and low-beam head-
lamps switch on when the ignition is switched on and the light switch is set to the 0058position.
This is a particularly useful function in the event
of rain and fog.
X To switch on the low-beam headlamps:
turn the SmartKey to position
0048in the igni-
tion lock or start the engine.
X Turn the light switch to 0058.
The green 0058indicator lamp in the instru-
ment cluster lights up.
Rear fog lamp
The rear fog lamp improves visibility of your
vehicle for the traffic behind in the event of thick fog. Please take note of the country-specific
regulations for the use of rear fog lamps.
X To switch on the rear fog lamp: turn the
SmartKey to position 0048in the ignition lock or
start the engine.
X Turn the light switch to 0058or0071.
X Press the 005Ebutton.
The yellow 005Eindicator lamp in the instru-
ment cluster lights up.
X To switch off the rear fog lamp: press the
005E button.
The yellow 005Eindicator lamp in the instru-
ment cluster goes out.
Parking lamps ! If the battery charge is very low, the parking
lamps or standing lamps are automatically
switched off to enable the next engine start.
Always park your vehicle safely and in a well lit area, in accordance with the relevant legal
stipulations. Avoid using the 0060parking
lamps over a period of several hours. If pos-
sible, switch on the right-hand 0064or left-
hand 0063 standing lamps. X
To switch on: turn the light switch to 0060.
The green 0060indicator lamp in the instru-
ment cluster lights up.
Standing lamps Switching on the standing lamps ensures the
corresponding side of the vehicle is illuminated.X To switch on the standing lamps: the
SmartKey should not be in the ignition lock or in key position 0092in the ignition lock.
X Turn the light switch to 0063(left-hand side of
the vehicle) or 0064(right-hand side of the
vehicle).
Vehicles towing a trailer: both the right-hand
and left-hand standing lamps (tail lamps) are
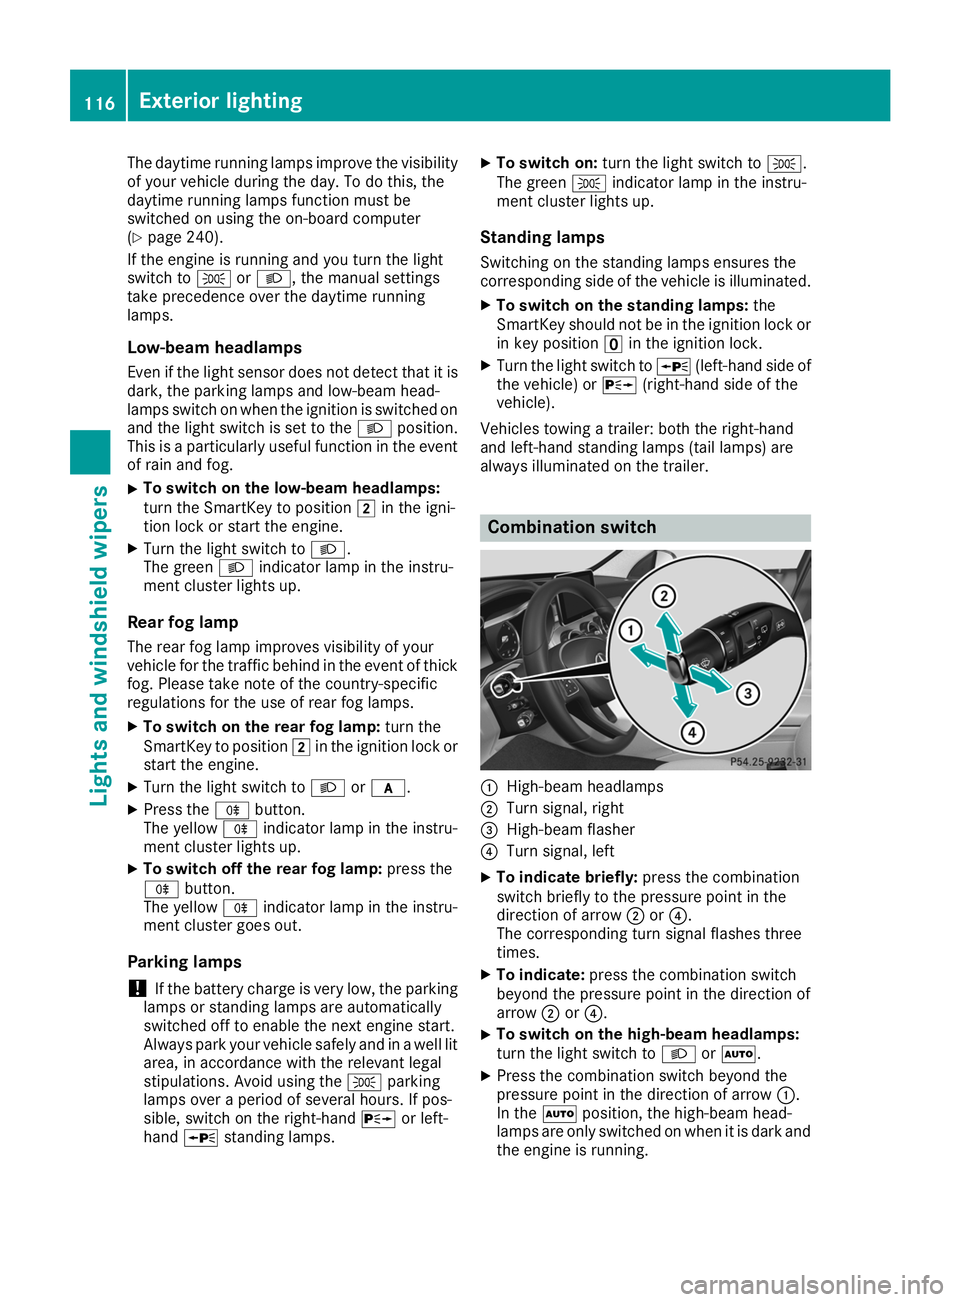
always illuminated on the trailer. Combination switch
0043
High-beam headlamps
0044 Turn signal, right
0087 High-beam flasher
0085 Turn signal, left
X To indicate briefly: press the combination
switch briefly to the pressure point in the
direction of arrow 0044or0085.
The corresponding turn signal flashes three
times.
X To indicate: press the combination switch
beyond the pressure point in the direction of
arrow 0044or0085.
X To switch on the high-beam headlamps:
turn the light switch to 0058or0058.
X Press the combination switch beyond the
pressure point in the direction of arrow 0043.
In the 0058position, the high-beam head-
lamps are only switched on when it is dark and
the engine is running. 116
Exterior lightingLights and windshield wipers
Page 141 of 398
Notes on breaking-in a new vehicle
Important safety notes
The sensor system of some driving and driving
safety systems adjusts automatically while a
certain distance is being driven after the vehicle has been delivered or after repairs. Full system
effectiveness is not reached until the end of this
teach-in procedure.
New and replaced brake pads and discs only
reach their optimum braking effect after several hundred kilometers of driving. Compensate for
this by applying greater force to the brake pedal. The first 1000 miles (1500 km)
The more you look after the engine when it is
new, the more satisfied you will be with its per-
formance in the future. R You should therefore drive at varying vehicle
and engine speeds for the first 1000 miles
(1500 km).
R Avoid heavy loads, e.g. driving at full throttle,
during this period.
R Change gear in good time, before the tach-
ometer needle is 00C3of the way to the red area
of the tachometer.
R Do not manually shift to a lower gear to brake
the vehicle.
R Try to avoid depressing the accelerator pedal
beyond the point of resistance (kickdown).
Additional breaking-in notes for Mercedes-AMG
vehicles:
R Do not drive faster than 85 mph (140 km/h)
for the first 1,000 miles (1,500 km).
R Only allow the engine to reach a maximum
engine speed of 4,500 rpm briefly.
R Change gear in good time.
R Ideally, for the first 1,000 miles (1,500 km),
drive in the Comfortdrive program.
After 1000 mile s(1500 km), you can increase
the engine speed gradually and accelerate the
vehicle to full speed.
You should also observe these notes on break-
ing in if the engine or parts of the drive train on your vehicle have been replaced.
Always observe the maximum permissible
speed. Driving
Important safety notes
G
WARNING
Objects in the driver's footwell can restrict the pedal travel or obstruct a depressed pedal.
The operating and road safety of the vehicle is
jeopardized. There is a risk of an accident.
Make sure that all objects in the vehicle are
stowed correctly, and that they cannot enter
the driver's footwell. Install the floormats
securely and as specified in order to ensure
sufficient clearance for the pedals. Do not use loose floormats and do not place floormats on
top of one another. G
WARNING
Unsuitable footwear can hinder correct usage of the pedals, e.g.:
R shoes with thick soles
R shoes with high heels
R slippers
There is a risk of an accident.
Wear suitable footwear to ensure correct
usage of the pedals. G
WARNING
If you switch off the ignition while driving,
safety-relevant functions are only available
with limitations, or not at all. This could affect, for example, the power steering and the brake
boosting effect. You will require considerably
more effort to steer and brake. There is a risk of an accident.
Do not switch off the ignition while driving. G
WARNING
If the parking brake has not been fully
released when driving, the parking brake can:
R overheat and cause a fire
R lose its hold function.
There is a risk of fire and an accident. Release
the parking brake fully before driving off. Driving
139Driving and pa rking Z
Page 151 of 398
Shifting to neutral N
G
WARNING
If children are left unsupervised in the vehicle, they could:
R open the doors, thus endangering other
people or road users.
R get out and disrupt traffic.
R operate the vehicle's equipment.
Additionally, children could set the vehicle in
motion if, for example, they:
R release the parking brake.
R shifting the automatic transmission out of
park position P
R Start the engine.
There is a risk of an accident and injury.
When leaving the vehicle, always take the
SmartKey with you and lock the vehicle. Never
leave children or animals unattended in the
vehicle. Always keep the SmartKey out of
reach of children.
X If the transmission is in position 005Bor005E:
push the DIRECT SELECT lever up or down to the first point of resistance.
X If the transmission is in position 005D: depress
the brake pedal and push the DIRECT SELECT
lever up or down to the first point of resist-
ance.
If you switch the engine off with the transmis-
sion in position 005Eor005B, the automatic trans-
mission shifts to 005Cautomatically.
With the SmartKey: if you then open the driv-
er's door or the front-passenger door or remove
the SmartKey from the ignition lock, the auto-
matic transmission shifts to 005Dautomatically.
With the Start/Stop button: if you then open
the driver's door or the front-passenger door,
the automatic transmission shifts automatically to 005D.
If you want the automatic transmission to
remain in neutral 005C, e.g. when having the vehi-
cle cleaned in an automatic, tow-through car
wash: With the SmartKey:
X Switch on the ignition.
X Depress the brake pedal and keep it
depressed.
X Shift to neutral 005C.
X Release the brake pedal.
X Release the electric parking brake.
X Switch off the ignition and leave the SmartKey
in the ignition lock.
With the Start/Stop button: X Remove the Start/Stop button from the igni-
tion lock.
X Insert the SmartKey into the ignition lock.
X Switch on the ignition.
X Depress the brake pedal and keep it
depressed.
X Shift to neutral 005C.
X Release the brake pedal.
X Release the electric parking brake.
X Switch off the ignition and leave the SmartKey
in the ignition lock.
Engaging drive position D X
If the transmission is in position 005Eor005C:
push the DIRECT SELECT lever down past the first point of resistance.
X If the transmission is in position 005D: depress
the brake pedal and push the DIRECT SELECT lever down past the first point of resistance. Transmission position and drive pro-
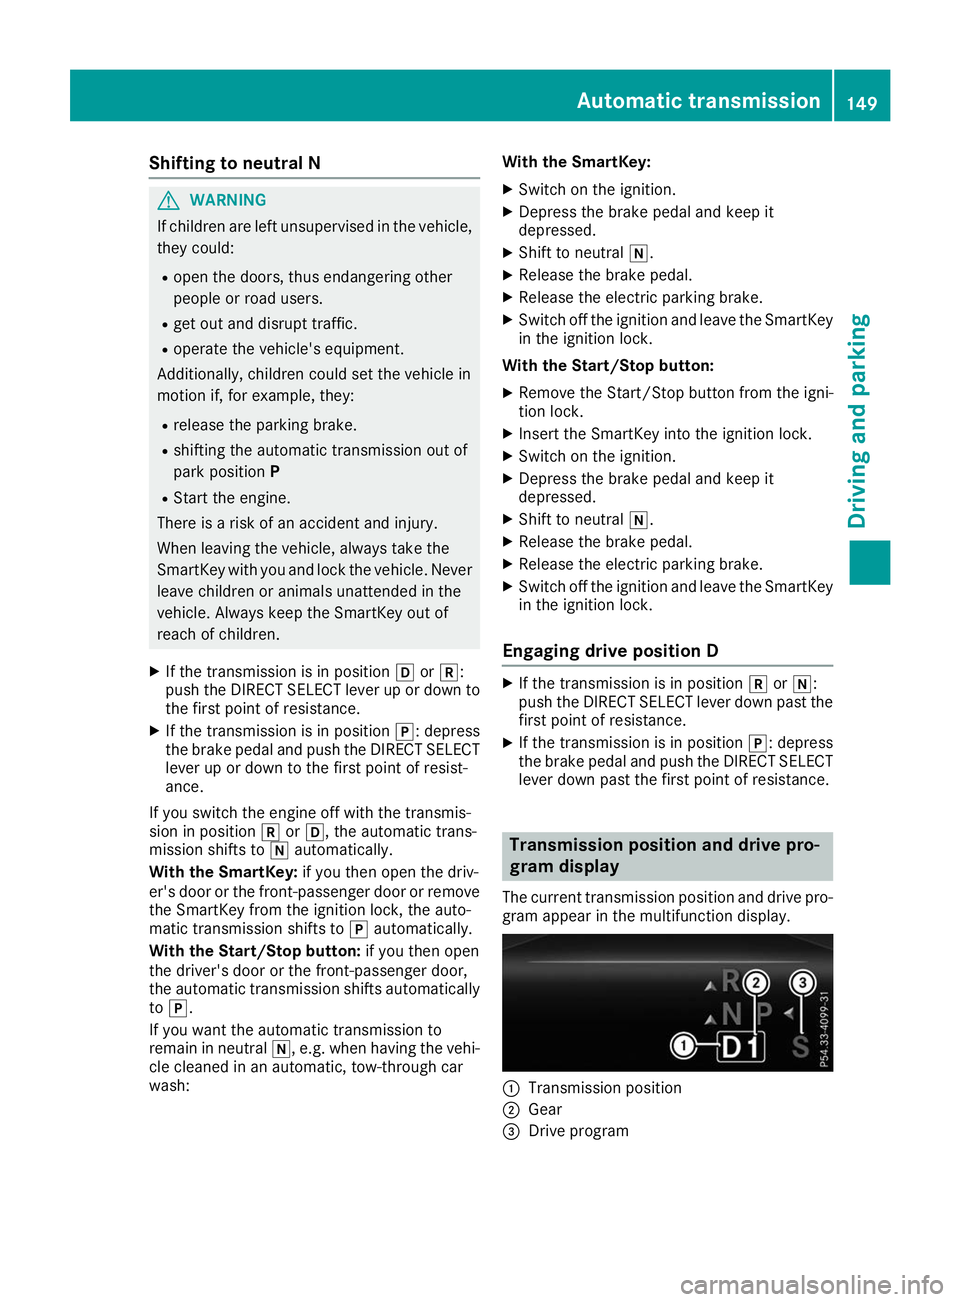
gram display
The current transmission position and drive pro-
gram appear in the multifunction display. 0043
Transmission position
0044 Gear
0087 Drive program Automatic transmission
149Driving and parking Z
Page 152 of 398
The arrows in the transmission position display
show how and into which transmission positions you can shift using the DIRECT SELECT lever.
If the transmission position display on the mul-
tifunction display is not working, you should pull
away carefully to check whether the desired
transmission position is engaged. Ideally, you
should select transmission position 005Band, in
Mercedes-AMG vehicles, drive program Cor S. Transmission positions
0045 Park position
Only shift the transmission into posi- tion 005D(Ypage 158) when the vehi-
cle is stationary. The parking lock
should not be used as a brake when
parking. Always apply the electronic
parking brake in addition to the park-
ing lock in order to secure the vehi-
cle.
In the event of a malfunction of the
vehicle's electronics, the transmis-
sion may lock in position 005D. Have
the vehicle electronics checked
immediately at a qualified specialist
workshop.
Park position 005Dis automatically
engaged if:
R you switch off the engine using the
SmartKey and remove the Smart-
Key
R you switch off the engine using the
SmartKey or using the Start/Stop
button and open the driver's door
or front-passenger door
R you open the driver's door when
the vehicle is stationary or when
driving at a very low speed and the
transmission is in position 005Bor
005E 0046 Reverse gear
Shift the transmission into position
005E only when the vehicle is station-
ary. 0044 Neutral
Do not shift the transmission to
005C
while driving. The automatic trans-
mission could otherwise be dam-
aged.
No power is transmitted from the
engine to the drive wheels.
Releasing the brakes will allow you to
move the vehicle freely, e.g. to push
it or tow it.
If ESP ®
is deactivated or faulty: shift
the transmission to position 005Cif the
vehicle is in danger of skidding, e.g.
on icy roads.
If you switch the engine off with the
transmission in position 005Eor005B,
the automatic transmission will shift
to 005C automatically.
! Coasting in neutral
005Cmay
cause damage to the drive train. 003A Drive
The automatic transmission changes
gear automatically. All forward gears
are available. Driving tips
Changing gear The automatic transmission shifts through the
individual gears automatically when it is in trans-
mission position 005B. This automatic gear shift-
ing behavior is determined by:
R the selected drive program
R the position of the accelerator pedal
R the road speed
Accelerator pedal position Your style of driving influences how the auto-
matic transmission shifts gear:
R little throttle: early upshifts
R more throttle: late upshifts 150
Automatic transmissionDriving and parking
Page 153 of 398
Kickdown
Use kickdown for maximum acceleration.
X Depress the accelerator pedal beyond the
pressure point.
The automatic transmission shifts to a lower
gear depending on the engine speed.
X Ease off the accelerator pedal once the
desired speed is reached.
The automatic transmission shifts back up.
Rocking the vehicle free Shifting back and forth between transmission
positions 005Band 005Ecan help to free up the
vehicle if it gets stuck in mud or snow. The vehi- cle's engine management system limits the
speed to a maximum of 5 mph (9 km/h) when
shifting back and forth. To shift repeatedly
between transmission positions 005Band 005E,
move the DIRECT SELECT lever up and down
beyond the pressure point.
Towing a trailer X
Drive in the middle of the engine speed range
on uphill gradients.
X Depending on the uphill or downhill gradient,
use the left-hand steering wheel paddle
shifter (Y page 152) to select a lower gear,
even if cruise control or Active Distance
Assist DISTRONIC is activated. Drive programs
Slippery drive program The
Slippery drive program has the following
characteristics:
R reduced engine and transmission settings for
optimum propulsion on slippery or snow-cov-
ered roads.
R optimized ESP ®
stability control on slippery or
snow-covered roads.
R the vehicle has improved driving stability on
slippery or snow-covered roads, for example. Comfort drive program The
Comfort drive program has the following
characteristics:
R comfort-oriented engine and transmission
settings.
R optimal fuel consumption resulting from the
automatic transmission shifting up sooner.
R the vehicle pulls away more gently in forward
and reverse gears, unless the accelerator
pedal is depressed fully.
R the automatic transmission shifting up
sooner. This results in the vehicle being driven
at lower engine speeds and the wheels being
less likely to spin.
Sport drive program The
Sport drive program has the following char-
acteristics:
R sporty engine and transmission settings.
R the automatic transmission shifts up later.
The fuel consumption possibly being higher
as a result of the later automatic transmission
shift points.
R the suspension exhibits sporty damping (vehi-
cles with AIRMATIC).
Drive program Sport Plus (Mercedes-
AMG vehicles) The
Sport Plus drive program has the following
characteristics:
R the vehicle exhibits particularly sporty driving
characteristics.
R the vehicle pulls away in first gear.
R the automatic transmission shifts up later.
The fuel consumption possibly being higher
as a result of the later automatic transmission
shift points.
R the suspension exhibits particularly firm
springing and damping settings (vehicles with
AIRMATIC).
R the ECO start/stop function is deactivated, it
can, however, be activated again using the
ECO button (Y page 145). Automatic trans
mission
151Driving an d parking Z