2019 MERCEDES-BENZ GLE SUV change time
[x] Cancel search: change timePage 4 of 681
We
lcome totheworl d of Mercedes-Benz
Before youfirs t drive off, read this Owner's Man‐
ual carefully and familiarise yourself with your
ve hicle. Foryo ur ow n sa fety and a longer operat‐
ing li fespan, follow the instructions and warning
notices in this Owner's Manual. Disregarding
th em may lead todamage totheve hicle or per‐
sonal injur y.
The equipment or model designation of your
ve hicle may vary according to:
R model
R order
R national version
R availability
The illustrations in this Owner's Manual show a
left-hand drive vehicle. On right-hand-drive vehi‐
cles, the la yout of co mponents and contro l ele‐
ments dif fers accordin gly.
Mercedes-Benz is cons tantly de veloping its vehi‐
cles fur ther. Mercedes-Benz
therefore reser vesth eright to
int roduce changes in thefo llowing areas:
R design
R equipment
R tech nical features
The equipment in your vehicle may therefore dif‐
fe r from that shown in the descriptions and illus‐
trations.
The following are integral parts of theve hicle:
R Digital Owner's Manual
R Printed Owner's Manual
R service booklet
R equipment-dependent Supplements
Ke ep these documents in theve hicle at all
times. If you sell theve hicle, alw ays pass all of
th e documents on tothe new owner.
1675844300Z102
1675844300Z102
Page 25 of 681
Pr
otection of the environment
+ ENVIRONMENTAL
NOTEEnvironmental
dama gedue tooperating conditions and
personal driving style The pollutant emission of
your vehicle is
directly related tothewa yyo u operate your
ve hicle.
Yo u can help toprotect the environment by
operating your vehicle in an environmentally-
re sponsible manner. Please obser vethefo l‐
lowing recommendations on ope rating condi‐
tions and pe rsonal driving style.
Operating conditions: #
make sure that the tyre pressure is cor‐
re ct. #
do not car ryany unnecessary weight
(e.g. roof luggage rack s once you no
lon ger need them). #
adhere tothe service inter vals.
a re gularly serviced vehicle will contri b‐
ute toenvironmen tal pr otection. #
always ha vemaintenance workcar ried
out at a qualified specialist workshop.
Pe rsonal driving style: #
do not depress the accelera tor pedal
when starting the engine. #
do not warm upthe engine while the
ve hicle is stationar y. #
drive carefully and maintain a suitable
distance from theve hicle in front. #
avoid frequent, sudden acceleration and
braking. #
change gear in good time and use each
ge ar on lyup toÔ of its maximum
engine speed. #
switch off the engine in stationary traf‐
fi c, e.g. byusing the ECO start/ stop
function. #
drive fuel-ef ficiently. Obser vethe ECO
display for a fuel-ef ficient driving style. +
ENVIRONMEN
TALNO TEEnvironmental
pollution caused byirre sponsible dis‐
posal of the high-voltage battery A high-voltage battery conta
ins materials
which are harmful tothe environment. #
Dispose of faulty high-voltage bat teries
at a qualified specialist workshop. Ta
ke -back of end-of-life vehicles
EU countries onl y:
Mercedes-Benz will take back your end-of-life
ve hicle for environment-friendly disposal in
accordance with the European Union(EU) End-
of-Life Vehicles Directive.
A network of vehicle take -ba ckpoints and dis‐
mantlers has been es tablished foryo uto return
yo ur vehicle. You can lea veit at any of these
points free of charge . This makes an impor tant
contribution toclosing there cycling circle and
conse rving resources.
Fo r fur ther information about there cycling and
disposal of end-of-li fevehicles, and theta ke- 22
General no tes
Page 34 of 681
Depending on
the selected equipment, you can
import data into vehicle con venience and info‐
ta inment functions yourself.
This includes, forex ample:
R multimedia data such as music, films or pho‐
to sfo r playback in an integrated multimedia
sy stem
R address book data for use in connection with
an integrated hands-free sy stem or an inte‐
grated navigation sy stem
R entered navigation destinations
R data about the use of Internet services
This data can be sa ved locally in theve hicle or it
is located on a device which you ha veconnected
to theve hicle (e.g. smartphone, USB flash drive
or MP3 pla yer). If this data is stored in theve hi‐
cle, you can dele teit at any time. This data is
sent tothird parties only at your requ est, partic‐
ular lywhen you use online services in accord‐
ance with the settings that you ha veselected.
Yo u can store or change con venience settings/
individualisations in theve hicle at any time. Depending on
the equipment, this includes, for
ex ample:
R settings forth e seat and steering wheel posi‐
tions
R suspension and climate control settings
R customisations such as interior lighting
If yo ur vehicle is accordingly equipped, you can
connect your smartphone or ano ther mobile end
device totheve hicle. You can cont rolth is by
means of the control elements integrated in the
ve hicle. Images and audio from the smartphone
can be output via the multimedia sy stem. Cer‐
ta in information is simultaneously transfer redto
yo ur smartphone.
Depending on the type of integration, this can
include:
R general vehicle data
R position data
This allo wsyouto use selected apps on your
smartphone, such as navigation or music play‐
bac k.There is no fur ther interaction between the
smartphone and theve hicle; in particular, vehi‐
cle data is not directly accessible. Which type of fur
ther data processing occurs is de term ined by
th e pr ovider of the specific app used. Which set‐
tings you can make, if an y,depends on the spe‐
cific app and the operating sy stem of your
smartphone. Online services
Wire
less network connection
If yo ur vehicle has a wireless network connec‐
tion, it enables data tobe exc hanged between
yo ur vehicle and additional sy stems. The wire‐
less network connection is enabled via theve hi‐
cle's transmission and reception unit or via con‐
nected mobile end devices (e.g. sma rtphones).
Online functions can be used via the wireless
network connection. This includes online serv‐
ices and applications/apps pr ovided bythe man‐
ufacturer or other pr oviders.
Manu factu rer's se rvices
Re garding online services of the manufacturer,
th e individual functions are described bythe
manufacturer in a suita ble place (e.g. Owner's
Manual, website of the manufacturer) along with
th ere leva nt da taprotection information. Per‐ General no
tes31
Page 117 of 681
#
Pull the head restra int upwards as far as it
will go. #
Push release knob 1inthe direction of the
ar row and pull out the head restra int.
Fi tting #
Inse rtthe head restra int such that the
notches on the bar are on the left when
vie we d in the direction of tra vel. #
Push the head restra int down until you hear
it en gage in position. #
Foldthere ar seat backrest back until it
engages. Configuring
the seat settings Multimedia sy
stem:
, © .
Comfort .
Seat comfort
Ad justing the seat contour in the lumbar
re gion of the seat backrest (lumbar) #
Select Lumbar . #
Select the settings Zforth e desired seat. #
Adjust the air cushions. Ad
justing the backrest side bols ters #
Select Side bolsters . #
Adjust the air cushion forth ere qu ired seat.
Setting the seat heating balance #
Select Seat heating balance. #
Adjust the heat distribution forth ere qu ired
seat. Setting automatic seat adju
stment &
WARNING Risk of becoming trapped
du ring adjustment of the driver's seat
af te r calling up a driver profile
Selecting a profile may trigger an adju stment
of the driver's seat tothe position sa ved
under the profile. You or other vehicle occu‐
pants could be injured in the process. #
Make sure that when the position of
driver's seat is being adjus ted using the
multimedia sy stem, no people or body
parts are in the seat's range of mo ve‐
ment. If
th ere is a risk of someone becoming trap‐
ped, stop the adjustment process immedi‐
ately: #
a)Tapth ewa rning message on the
media displa y.
or #
b) Press a memory position button or a
seat adjustment switch in the driver's
door.
The adjustment process is stopped. Re
quirements:
Ad apt tobody size:
R Automatic seat adju stment is activated.
Multimedia sy stem:
, © .
Settings .
Fahrzeug (Vehi‐
cle) .
Auto. seat adjustment
Switching automatic seat adjustment on/off
When the active user profile is changed while
th eve hicle is stationar y,the driver's seat, steer‐
ing wheel, outside mir ror and seat contour are
auto matically adapte dto the driver. 11 4
Seats and stowing
Page 118 of 681
#
Select OnorOff.
% This setting is available on lyfor individual
user profiles. Forth e guest profile, auto‐
matic seat adjustment cann otbe switched
on or off. Further information about user
profiles (→ page 344).
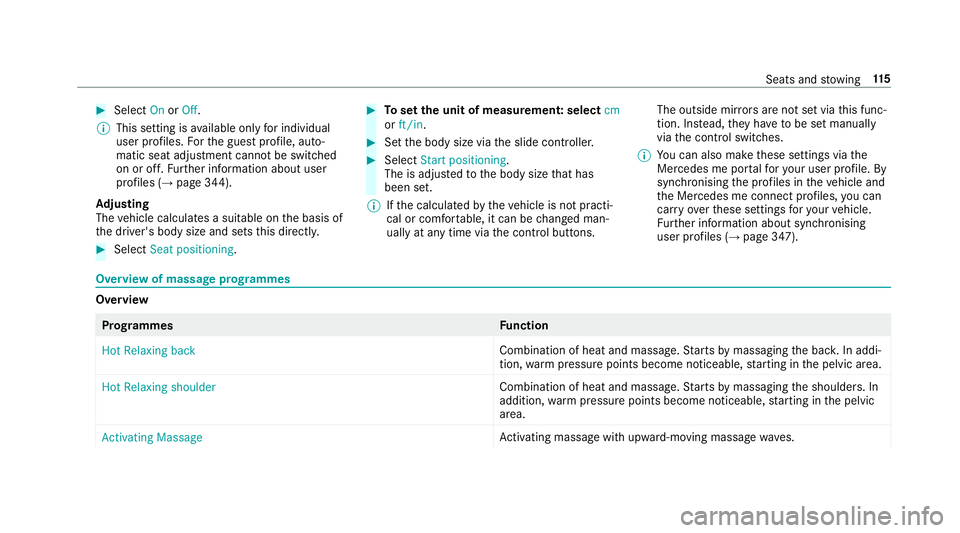
Ad justing
The vehicle calculates a suitable on the basis of
th e driver's body size and sets this direct ly. #
Select Seat positioning . #
Toset the unit of measurement: select cm
or ft/in. #
Set the body size via the slide controller. #
Select Start positioning.
The is adjus tedto the body size that has
been set.
% Ifth e calculated bytheve hicle is not practi‐
cal or comfor table, it can be changed man‐
ually at any time via the control buttons. The outside mir
rors are not set via this func‐
tion. Ins tead, they have tobe set manually
via the control switches.
% You can also make these settings via the
Mercedes me por talfo ryo ur user profile. By
syn chro nising the profiles in theve hicle and
th e Mercedes me connect profiles, you can
car ryove rth ese settings foryo ur vehicle.
Fu rther information about synchronising
user profiles (→ page 347). Overview of massage prog
rammes Overvi
ew Prog
rammes Function
Hot Relaxing back Combination of heat and massage.
Starts bymassaging the bac k.In addi‐
tion, warm pressure points become noticeable, starting in the pelvic area.
Hot Relaxing shoulder Combination of heat and massage.
Starts bymassaging the shoulders. In
addition, warm pressure points become noticeable, starting in the pelvic
area.
Activating Massage Ac
tivating massa gewith upward-m oving massage waves. Seats and
stowing 11 5
Page 119 of 681
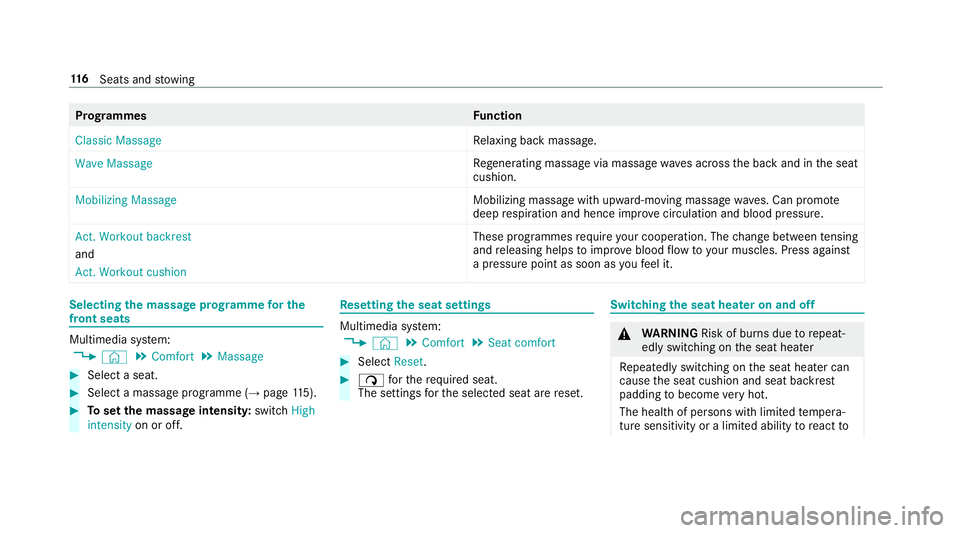
Prog
rammes Function
Classic Massage Re
laxing back massage.
Wave Massage Re
generating massa gevia massa gewav es across the back and in the seat
cushion.
Mobilizing Massage Mobilizing massage with upward-moving massage
waves. Can promo te
deep respiration and hence impr ovecirculation and blood pressure.
Act. Workout backrest
and
Act. Workout cushion These programmes
requ ire your cooperation. The change between tensing
and releasing helps toimpr ove blood flow to yo ur muscles. Press against
a pressure point as soon as youfe el it. Selecting
the massage prog ramme for the
front seats Multimedia sy
stem:
, © .
Comfort .
Massage #
Select a seat. #
Select a massage programme (→ page115). #
Toset the massage intensit y:switch High
intensity on or off. Re
setting the seat settings Multimedia sy
stem:
, © .
Comfort .
Seat comfort #
Select Reset. #
ß forth erequ ired seat.
The settings forth e selected seat are reset. Switching
the seat heater on and off &
WARNING Risk of bu rns due torepeat‐
edly switching on the seat heater
Re peatedly switching on the seat heater can
cause the seat cushion and seat backrest
padding tobecome very hot.
The health of persons with limited temp era‐
ture sensitivity or a limited ability toreact to 11 6
Seats and stowing
Page 152 of 681
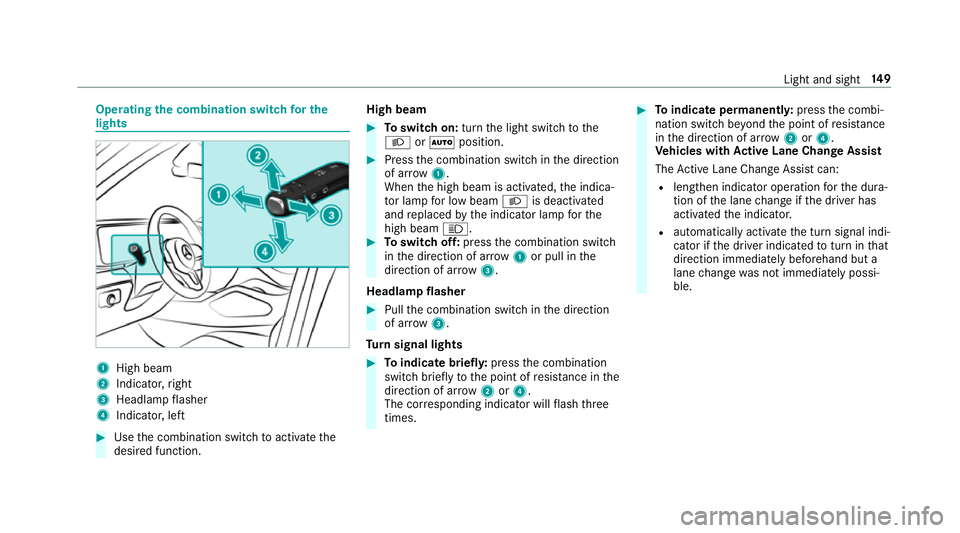
Operating
the combination switch for the
lights 1
High beam
2 Indicator, right
3 Headlamp flasher
4 Indicator, left #
Use the combination switch toactivate the
desired function. High beam #
Toswitch on: turnthe light switch tothe
L orà position. #
Press the combination switch in the direction
of ar row1.
When the high beam is activated, the indica‐
to r lamp for low beam Lis deactivated
and replaced bythe indicator lamp forthe
high beam K. #
Toswitch off: pressthe combination switch
in the direction of ar row1or pull in the
direction of ar row3.
Headlamp flasher #
Pull the combination switch in the direction
of ar row3.
Tu rn signal lights #
Toindicate briefl y:press the combination
switch briefly tothe point of resis tance in the
direction of ar row2or4.
The cor responding indicator will flash three
times. #
Toindicate permanentl y:press the combi‐
nation switch be yond the point of resis tance
in the direction of ar row2or4.
Ve hicles with Active Lane Change Assi st
The Active Lane Change Assi stcan:
R lengthen indicator ope ration forth e dura‐
tion of the lane change if the driver has
activated the indicator.
R automatically activate the turn signal indi‐
cator if the driver indicated toturn in that
direction immediately beforehand but a
lane change was not immediately possi‐
ble. Light and sight
14 9
Page 155 of 681
The function is not active under
thefo llowing
conditions:
R at speeds abo ve100 km/h af ter activation.
R when there ar fog light is switched off.
Fu nction of the off-road light
The off- road light impr oves illumination during
off-road driving. The dipped beam is distributed
symmetrically and across a wide angle, and
brightness is increased slightly. This makes it
easier tofind your wa y when driving off- road and
to detect obs tacles at an ea rly st age. The active
headlamps function is deactivated during this
time so that steering mo vements do not change
th e illumination.
The function is active when the dipped beam is
switched on if you do not drive abo ve50 km/h
and theF (Offroad) or G(Offroad Plus)
driving programme has been selected.
Switching the Intelligent Light Sy stem on or
off
Requ irement:
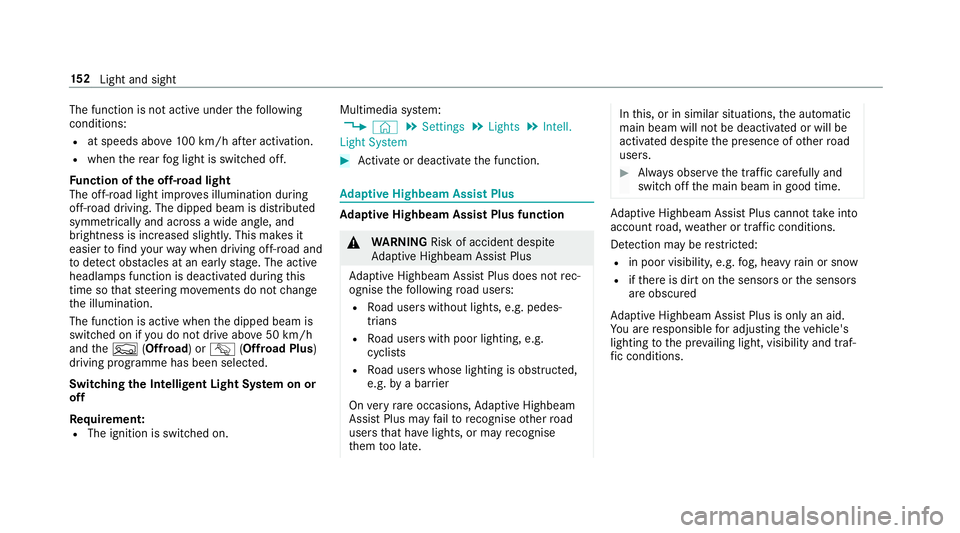
R The ignition is switched on. Multimedia sy
stem:
, © .
Settings .
Lights .
Intell.
Light System #
Activate or deacti vate the function. Ad
aptive Highbeam Assist Plus Ad
aptive Highbeam Assist Plus function &
WARNING Risk of accident despi te
Ad aptive Highbeam Assist Plus
Ad aptive Highbeam Assist Plus does not rec‐
ognise thefo llowing road users:
R Road users without lights, e.g. pedes‐
trians
R Road users with poor lighting, e.g.
cyclists
R Road users whose lighting is obstructed,
e.g. bya bar rier
On very rare occasions, Adaptive Highbeam
Assist Plus may failto recognise other road
users that ha velights, or may recognise
th em too late. In
this, or in similar situations, the automatic
main beam will not be deactivated or will be
activated despite the presence of other road
users. #
Alw ays obser vethe tra ffic carefully and
switch off the main beam in good time. Ad
aptive Highbeam Assist Plus cannot take into
account road, weather or traf fic conditions.
De tection may be restricted:
R in poor visibility, e.g. fog, heavy rain or snow
R ifth ere is dirt on the sensors or the sensors
are obscured
Ad aptive Highbeam Assist Plus is on lyan aid.
Yo u are responsible for adju sting theve hicle's
lighting tothe pr evailing light, visibility and traf‐
fi c conditions. 15 2
Light and sight