Page 120 of 681

high
temp eratures may be af fected or they
may even su ffer burn-like injuries. #
Do not repeatedly switch on the seat
heater. To
protect against overheating, the seat heater
may be temp orarily deactivated af ter it is
switched on repeatedly.
* NO
TEDama getothe seats caused by
objects or documents when the seat
heater is switched on When
the seat heater is switched on, over‐
heating can occur due toobjects or docu‐
ments placed on the seats e.g. seat cushions
or child seats. This could cause damage to
th e seat sur face. #
Makesure that no objects or docu‐
ments are on the seats when the seat
heater is switched on. Re
quirements:
R The po wer supply has been switched on
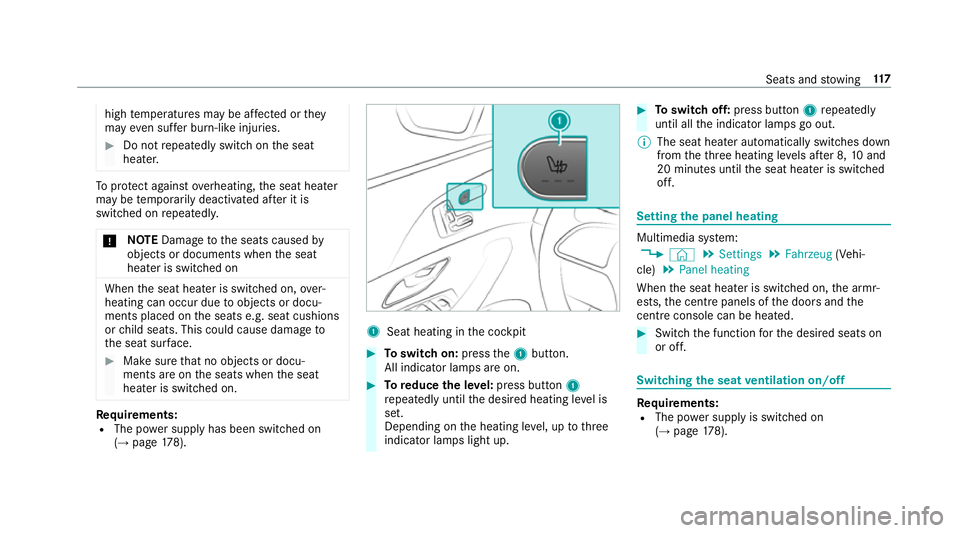
(→ page 178). 1
Seat heating in the cockpit #
Toswitch on: pressthe1 button.
All indicator lamps are on. #
Toreduce the le vel:press button 1
re peatedly until the desired heating le vel is
set.
Depending on the heating le vel, up tothree
indicator lamps light up. #
Toswitch off: press button 1repeatedly
until all the indicator lamps go out.
% The seat heater automatically switches down
from theth re e heating le vels af ter 8, 10and
20 minutes until the seat heater is switched
off. Setting
the panel heating Multimedia sy
stem:
, © .
Settings .
Fahrzeug (Vehi‐
cle) .
Panel heating
When the seat heater is switched on, the armr‐
ests, the cent repanels of the doors and the
centre console can be hea ted. #
Switch the function forth e desired seats on
or off. Switching
the seat ventilation on/off Re
quirements:
R The po wer supply is switched on
(→ page 178). Seats and
stowing 117
Page 121 of 681

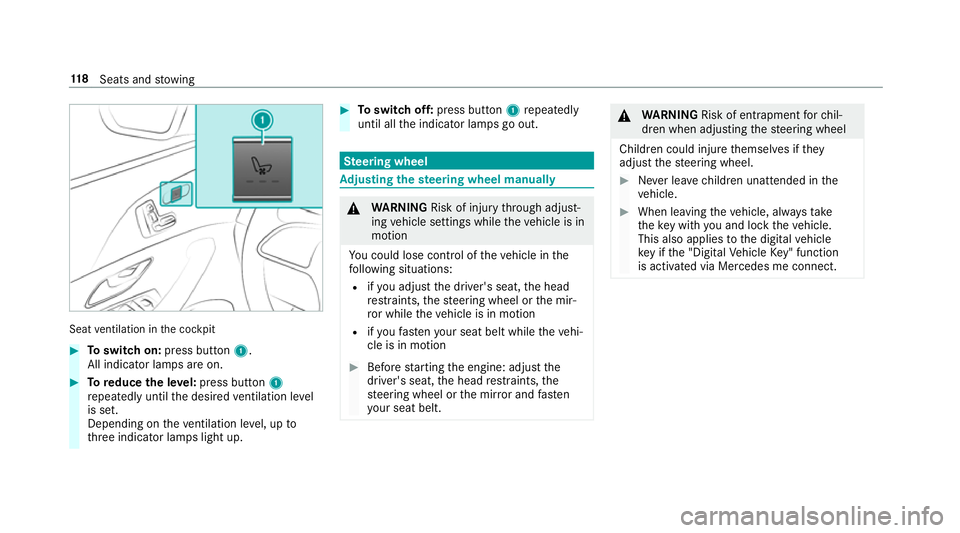
Seat
ventilation in the cockpit #
Toswitch on: press button 1.
All indicator lamps are on. #
Toreduce the le vel:press button 1
re peatedly until the desired ventilation le vel
is set.
Depending on theve ntilation le vel, up to
th re e indicator lamps light up. #
Toswitch off: press button 1repeatedly
until all the indicator lamps go out. Ste
ering wheel Ad
justing the steering wheel manually &
WARNING Risk of inju rythro ugh adjust‐
ing vehicle settings while theve hicle is in
motion
Yo u could lose cont rol of theve hicle in the
fo llowing situations:
R ifyo u adjust the driver's seat, the head
re stra ints, thesteering wheel or the mir‐
ro r while theve hicle is in motion
R ifyo ufast enyour seat belt while theve hi‐
cle is in motion #
Before starting the engine: adjust the
driver's seat, the head restra ints, the
st eering wheel or the mir ror and fasten
yo ur seat belt. &
WARNING Risk of entrapment forch il‐
dren when adjusting thesteering wheel
Children could injure themselves if they
adjust thesteering wheel. #
Never lea vechildren unat tended in the
ve hicle. #
When leaving theve hicle, alw aysta ke
th eke y with you and lock theve hicle.
This also applies tothe digital vehicle
ke y if the "Digital Vehicle Key" function
is activated via Mercedes me connect. 11 8
Seats and stowing
Page 122 of 681
#
Push release le ver1 down as far as it will
go.
The steering column is unloc ked. #
Adjust height 2and di stance 3tothe
st eering wheel. #
Push release le ver1 up as far as it will go.
The steering column is loc ked. #
Check and make sure that thesteering col‐
umn is loc kedby moving thesteering wheel. Ad
justing the steering wheel electrically The
steering wheel can be adjus ted when the
ignition is switched off. 1
Adjusts the dis tance tothesteering wheel
2 Adjusts the height #
Save the settings with the memory function
(→ page 121). Switching
thest eering wheel heater on/off R
the ignition is switched on. #
Toswitch on: pushthe switch toposition
1.
The indicator lamp 3lights up. #
Toswitch off: pushthe switch toposition
2.
The indicator lamp 3goes out. Seats and
stowing 11 9
Page 138 of 681
1
Tie-down eyes Overview of bag hooks
&
WARNING Risk of inju rywhen using bag
hooks with heavy objects
The bag hooks cannot restra in heavy objects
or items of luggage. Objects or items of luggage could be
thrown
around and thereby hit vehicle occupants
when braking or abruptly changing direc‐
tions. #
Onlyhang light objects on the bag
hooks. #
Never hang hard, sharp-edged or fragile
objects on the bag hooks. Obser
vethe no tes on loading theve hicle
(→ page 122).
The bag hooks can bear a maximum load of
3 kg . Do not use them tosecure a load. 1
Bag hook Seats and
stowing 13 5
Page 142 of 681
#
Ensu rethat no children can access the
cup holder's hot heating elements. #
Never lea vechildren unat tended in the
ve hicle. *
NO
TE If
yo u place objects into thete mp erature-
controlled cup holder, they may become
dama ged. #
Do not place objects into thete mp era‐
ture-contro lled cup holder. 1
Cup holder in the front cent reconsole 1
Cup holder in there ar #
Toswitch on: on cup holder 1, press but‐
to n2 repeatedly until the blue (keep cool)
or red (keep warm) indicator lamp on the but‐
to n lights up.
If yo u use the heating function, the me tal
inse rtof the cup holder is heated. Once a
cer tain temp erature has been reached, the
wa rning lamp lights up. Do not reach into the Seats and
stowing 13 9
Page 143 of 681

cup holder's me
tal inse rtwhen thewa rning
lamp is lit. #
Toswitch off: press button 2repeatedly
until the indicator lamp on the button goes
out.
% Clean there mo vable rubber mat only with
clean, luk ewarmwate r and the cup holder
with a damp clo th. Asht
ray and cigar ette lighter Using
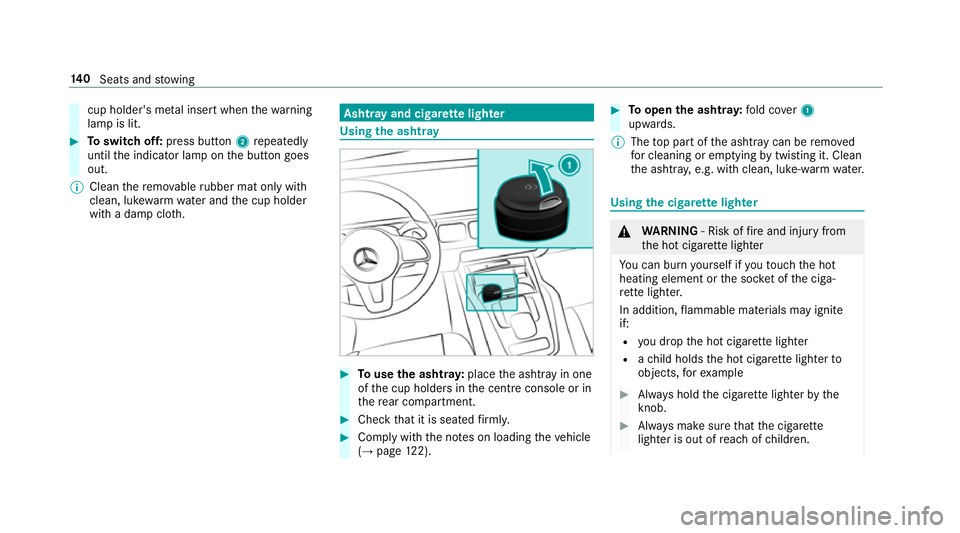
the ashtr ay #
Touse the ashtr ay:place the ashtray in one
of the cup holders in the cent reconsole or in
th ere ar compartment. #
Check that it is seated firm ly. #
Comply with the no tes on loading theve hicle
(→ page 122). #
Toopen the ashtr ay:fold co ver1
upwards.
% The top part of the ashtr aycan be remo ved
fo r cleaning or em ptying bytwi sting it. Clean
th e ashtr ay, e.g. with clean, luke-warm water. Using
the cigar ette lighter &
WARNING ‑ Risk of fire and injury from
th e hot cigar ette lighter
Yo u can burn yourself if youto uch the hot
heating element or the soc ket of the ciga‐
re tte lighter.
In addition, flammable materials may ignite
if:
R you drop the hot cigar ette lighter
R ach ild holds the hot cigar ette lighter to
objects, forex ample #
Alw ays hold the cigar ette lighter bythe
knob. #
Alw ays make sure that the cigar ette
lighter is out of reach of children. 14 0
Seats and stowing
Page 144 of 681

#
Never lea vechildren unat tended in the
ve hicle. Re
quirements:
R The ignition is switched on. #
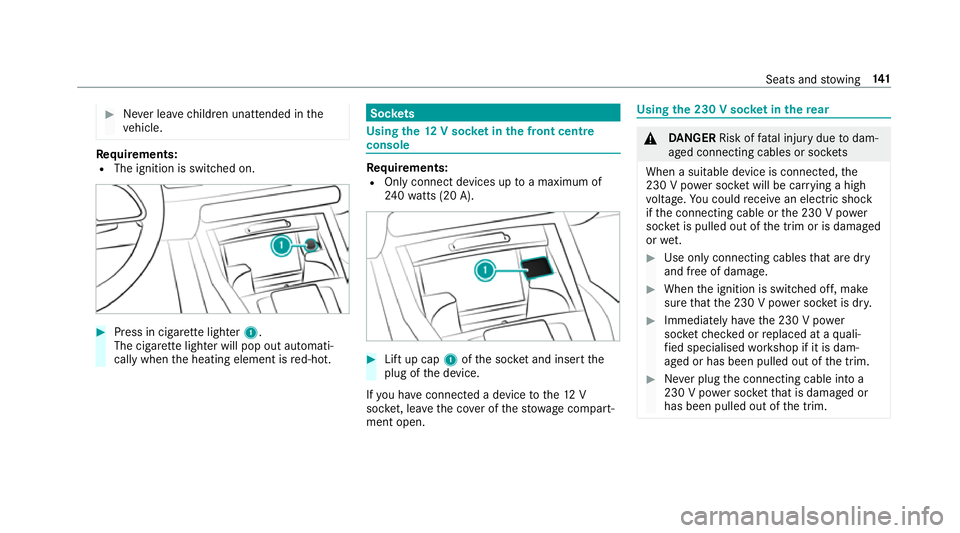
Press in cigar ette lighter 1.
The cigar ette lighter will pop out automati‐
cally when the heating element is red-hot. Soc
kets Using the
12V so cket inthe front centre
console Re
quirements:
R Only connect devices up toa maximum of
24 0wa tts (20 A). #
Lift up cap 1ofthe soc ket and insert the
plug of the device.
If yo u ha veconnected a device tothe12 V
soc ket, le ave the co ver of thestow age compart‐
ment open. Using
the 230 V soc ket in the rear &
DANG ER Risk of fata l injury due todam‐
aged connecting cables or soc kets
When a suitable device is connected, the
230 V power soc ket will be car rying a high
vo ltage. You could recei vean electric shock
if th e connecting cable or the 230 V po wer
soc ket is pulled out of the trim or is damaged
or we t. #
Use only connecting cables that are dry
and free of damage. #
When the ignition is switched off, make
sure that the 230 V po wer soc ket is dr y. #
Immedia tely ha ve the 230 V po wer
soc ketch ecked or replaced at a quali‐
fi ed specialised workshop if it is dam‐
aged or has been pulled out of the trim. #
Never plug the connecting cable into a
230 V po wer soc ketth at is damaged or
has been pulled out of the trim. Seats and
stowing 141
Page 145 of 681
&
DANG ER Risk of fata l injury due toincor‐
re ct handling of the soc ket
Yo u could recei vean electric shock:
R ifyo ure ach into the soc ket.
R ifyo u insert unsuitable devices or objects
into the soc ket. #
Only connect suitable devices tothe
soc ket. Re
quirements:
R Only connect devices with a suitable plug
which con form sto thest andards specific to
th e count ryyou are in.
R Only connect devices uptoa maximum of
15 0wa tts (0.65 A).
R Do not use multiple soc ket outlets. Example: 230 V soc
ket in the cent reconsole #
Open flap 3. #
Insert the plug of the device into 230 V
soc ket1.
When the on-board electrical sy stem voltage
is suf ficient, indicator la mp2lights up. Using
the12 V so cket inthe load compa rt‐
ment Re
quirements:
R Only devices with up toa maximum of
24 0wa tts (20 A) are pe rmissible. #
Lift up cap 1ofthe soc ket and insert the
plug of the device. 14 2
Seats and stowing