Page 151 of 657
Moving
the wiper arms tothere placement
position #
Switch the ignition on and switch off again
immediatel y. #
Within around 15seconds, press theî
button on the combination switch for appro x‐
ima tely thre e seconds (/ page147).
The wiper arms will mo veinto there place‐
ment position.
Re moving the wiper blades #
Foldthe wiper arms away from the wind‐
screen. #
Hold the wiper arm with one hand. With the
ot her hand, turn the wiper blade in the direc‐
tion of ar row1away from the wiper arm as
fa r as it will go. #
Slide catch 2inthe direction of ar row 3
until it engages in there mo val position. #
Remo vethe wiper blade from the wiper arm
in the direction of ar row4. Fi
tting the wiper blades #
Inse rtthe new wiper blade into the wiper
arm in the direction of ar row1. #
Slide catch 2inthe direction of ar row 3
until it engages in the locking position. #
Make sure that the wiper blade is seated cor‐
re ctly. 14 8
Light and sight
Page 152 of 657

#
Foldthe wiper arms back onto the wind‐
screen. #
Switch on the ignition. #
Press theî button on the combination
switch (/ page147).
The wiper arms will mo veinto the original
position.
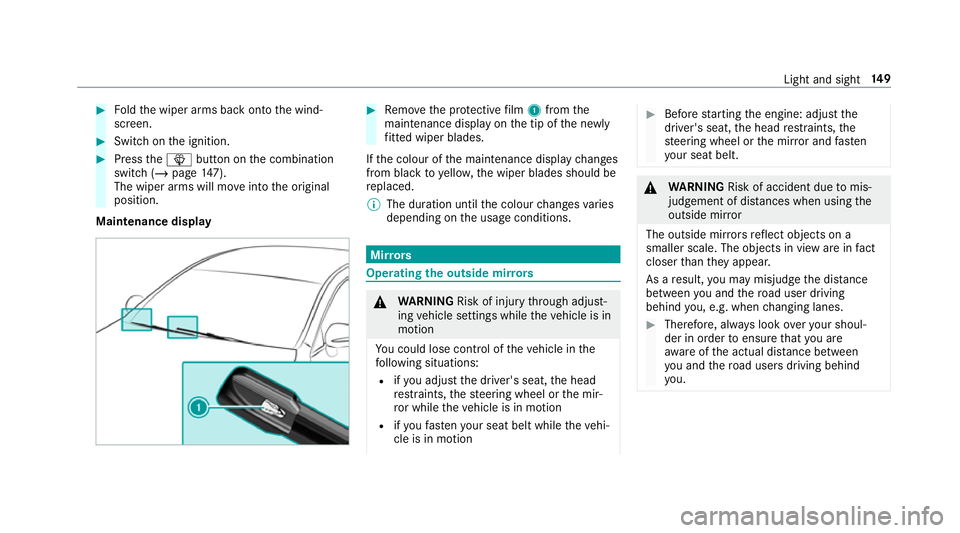
Maintenance display #
Remo vethe pr otective film 1 from the
maintenance display on the tip of the newly
fi tted wiper blades.
If th e colour of the maintenance display changes
from black to yellow, the wiper blades should be
re placed.
% The duration until the colour changes varies
depending on the usage conditions. Mir
rors Operating
the outside mir rors &
WARNING Risk of inju rythro ugh adjust‐
ing vehicle settings while theve hicle is in
motion
Yo u could lose cont rol of theve hicle in the
fo llowing situations:
R ifyo u adjust the driver's seat, the head
re stra ints, thesteering wheel or the mir‐
ro r while theve hicle is in motion
R ifyo ufast enyour seat belt while theve hi‐
cle is in motion #
Before starting the engine: adjust the
driver's seat, the head restra ints, the
st eering wheel or the mir ror and fasten
yo ur seat belt. &
WARNING Risk of accident due tomis‐
judgement of dis tances when using the
outside mir ror
The outside mir rors reflect objects on a
smaller scale. The objects in view are in fact
closer than they appear.
As a result, you may misjud gethe dis tance
between you and thero ad user driving
behind you, e.g. when changing lanes. #
Therefore, alw ays look over your shoul‐
der in order toensure that you are
aw are of the actual dis tance between
yo u and thero ad users driving behind
yo u. Light and sight
14 9
Page 153 of 657

Fo
lding the outside mir rors in/out #
Brief lypress button 1.
Re setting the outside mir rors
% Ifth e battery has been disconnected or com‐
ple tely discharged, the outside mir rors must
be reset. Only then will the automatic mir ror
fo lding function workproperly. #
Brief lypress button 1. Ad
justing the outside mir rors #
Press button 3or4 toselect the outside
mir rorto be adjus ted. #
Press button 2toadjust the position of the
mir rorgl ass.
Engaging the outside mir rors #
Vehicles without electrical lyfolding out‐
side mir rors: manually mo vethe outside
mir ror into the cor rect position. #
Vehicles with electrical lyfolding outside
mir rors: press and hold button 1.
Yo u will hear a click and the mir ror will audi‐
bly engage in position. The outside mir ror will
now be set tothe cor rect position. Au
tomatic anti-dazzle mir rors function &
WARNING Risk of bu rns and poisoning
due tothe anti-dazzle mir ror electrolyte
Electrolyte may escape if theglass in an
automatic anti-dazzle mir ror breaks. The electrolyte is harmful and causes ir
rita‐
tion. It mu stnot come into contact wi thyour
skin, eyes,respiratory organs or clo thing or
be swallo wed. #
Ifyo u come into contact with electro‐
ly te , obser vethefo llowing:
R Rinse the electrolyte from your skin
and seek medical attention immedi‐
atel y.
R If electrolyte comes into contact
with your eyes, rinse them thor‐
oughly with clean water and seek
medical attention immediately.
R Ifth e electrolyte is swallo wed,
immediately rinse your mouth out
th oroughly. Do not induce vomiting.
Seek medical attention immediately.
R Immedia tely ch ange out of clo thing
which has come into con tact wi th
electrolyte.
R If an allergic reaction occurs, seek
medical attention immediatel y.15 0
Light and sight
Page 154 of 657

The inside
rearview mir ror and the outside mir‐
ro r on the driver's side automatically go into
anti-dazzle mode if light from a headlamp hits
th e sensor on the inside rearview mir ror.
Sy stem limitations
The sy stem does not go into anti-dazzle mode in
th efo llowing situations:
R the engine is switched off
R reve rsege ar is engaged
R the interior lighting is switched on Fr
ont-passenger outside mir ror parking posi‐
tion function The pa
rking position makes parking easier.
In thefo llowing situations, the front-passen ger
outside mir ror will swivel down wards in the
direction of there ar wheel on the front passeng‐
er's side:
R The parking position is stored (/ page151)
R The front-passenger mir ror is selected
R Reversege ar is engaged The front-passenger outside mir
ror will mo ve
back toits original position in thefo llowing sit‐
uations:
R You shift the transmission toano ther trans‐
mission position
R You are tra velling at speeds greaterth an
15 km/h
R You press the button forth e outside mir ror
on the driver's side St
oring the pa rking position of the front-
passenger outside mir ror using reve rsege ar St
oring #
Select the front-passen ger outside mir ror
using but ton2. #
Engage reve rsege ar. #
Movethe front-passen ger outside mir ror into
th e desired parking position using button 1. Light and sight
151
Page 155 of 657
Calling up
#
Select the front-passen ger outside mir ror
using but ton2. #
Engage reve rsege ar.
The front-passenger outside mir ror will mo ve
to thestored parking position. Ac
tivating/deactivating the automatic mir ror
fo lding function Multimedia sy
stem:
4 © 5
Settings 5
Vehicle #
Switch Automatic fold-in on or off. Operating
the sun visors
Using the single sun visor #
Glarefrom the front: fold sun visor 1
down. #
Glare from the side: swing sun visor 1to
th e side. 15 2
Light and sight
Page 158 of 657

%
If climate control is switched off, the win‐
do ws may mist up more quickl y.Switch off
climate control only brie fly. Switching
the A/C function on or off via the
cont rol panel The A/C function heats, cools and dehumidifies
th
eve hicle's interior air. #
Press the ¿ button.
Switch off the A/C function only brief ly;ot her‐
wise, the windo wsmay mist up more quickl y.
Condensation may drip from the underside of
th eve hicle when cooling mode is active. This is
not a sign that there is a malfunction. Calling up
the air conditioning menu Calling up
the air conditioning menu using
th e multimedia sy stem #
Select one of thete mp erature displa ysatthe
lo we r edge of the media displa y. Calling up
the air conditioning menu using
th e but ton on the control panel #
Press thet button on the control panel.
% The button on the control panel is not availa‐
ble on all equipment variants. In this case,
th e air conditioning menu can only be called
up using the multimedia sy stem. Ac
tivating/deactivating the A/C function via
the multimedia sy stem The A/C function heats, cools and dehumidifies
th
eve hicle's interior air. #
Call up the air conditioning menu
(/ page 155). #
Select First row of seats . #
Select A/C.
Depending on the pr evious status, the func‐
tion is activated or deactivated. Setting climate control
toautomatic mode In auto
matic mode, the set temp erature is con‐
trolled and maintained at a const ant levelby the
air suppl y. #
Press the à button. #
Toswitch tomanual mode: pressthe H
or _ button. Climate
style Climate
style function
In automatic mode, you can select thefo llowing
climate style settings forth e driver's and front
passenger areas:
R FOCUS: high air flow , slightly cooler setting
R MEDIUM: medium air flow ,st andard setting
R DIFFUSE: low airflow , slightly warmer and
draught-f ree setting
Setting the clima testyle #
Call up the air conditioning menu
(/ page 155). Clima
tecontrol 15 5
Page 163 of 657

#
Set the desired temp erature using thew
button. #
Press button 1.
The red or blue indicator lamp on button 1
lights up or goes out.
The colours of the indicator lamp ha vethefo l‐
lowing meaning:
R Blue: stationary ventilation is switched on. R
Red:thest ationary heater is swit ched on.
R Yello w: the departure time is preselected.
The stationary heater / stationary ventilation will
switch off au tomatical lyafte r 50 minutes.
Operation using the app: thest ationary
heater/ ventilation can also be operated via the
Mercedes me connect app. Further information
can be found in the separate Owner's Manual
under http://manuals.daimler.com/baix/cars/
connectme/en_GB/index.html.
Setting thest ationary heater / stationary
ve ntilation via the multimedia sy stem #
Call up the air conditioning menu
(/ page 155). #
Select Auxiliary heating.
Selecting the departure time #
Select the time TIME A: XX, TIME B: XXor
TIME C: XX.
Setting the departu retime #
Select the time TIME A: XX, TIME B: XXor
TIME C: XX. #
Select the pen beside the time. #
Set a time.
Setting thest ationary heater/stationary ven‐
tilation via remo tecont rol
Re quirements:
R The fuel tank is filled toat least reser vefuel
le ve l.
Switching on immedia tely 16 0
Climate cont rol
Page 169 of 657

R
theke y is located in theve hicle and thekey
battery is not dischar ged.
R or: a Digital Vehicle Key is located in the
mar ked space (/ page167).
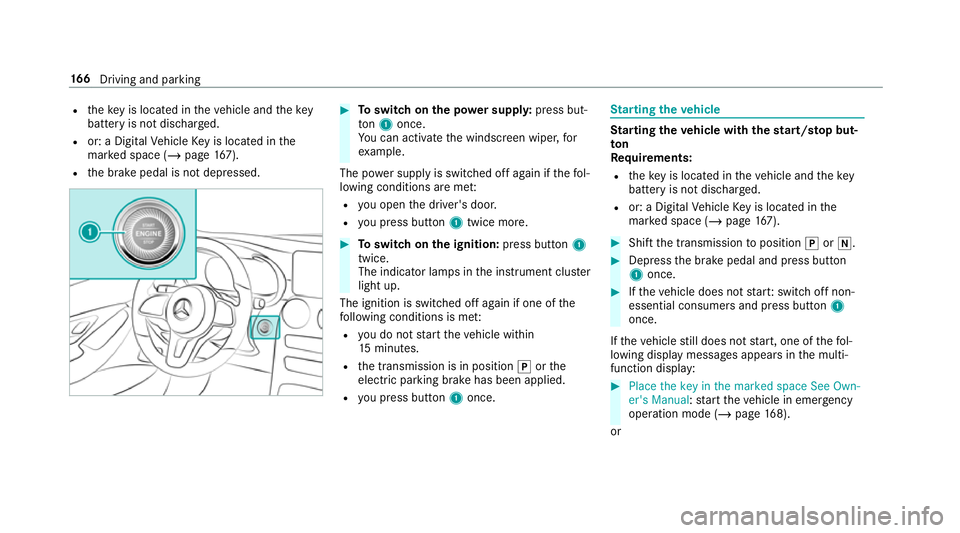
R the brake pedal is not depressed. #
Toswitch on the po wer supp ly:press but‐
to n1 once.
Yo u can activate the windscreen wiper, for
ex ample.
The po wer supp lyis switched off again if thefo l‐
lowing conditions are me t:
R you open the driver's door.
R you press but ton1 twice more. #
Toswitch on the ignition: press button 1
twice.
The indicator lamps in the instrument clus ter
light up.
The ignition is switched off again if one of the
fo llowing conditions is me t:
R you do not start theve hicle within
15 minutes.
R the transmission is in position jorthe
electric parking brake has been applied.
R you press but ton1 once. St
arting theve hicle St
arting theve hicle with thest art/s top but‐
ton
Requ irements:
R theke y is located in theve hicle and thekey
battery is not dischar ged.
R or: a Digital Vehicle Key is located in the
mar ked space (/ page167). #
Shift the transmission toposition jori. #
Depress the brake pedal and press button
1 once. #
Ifth eve hicle does not star t:switch off non-
essential consumers and press button 1
once.
If th eve hicle still does not start, one of thefo l‐
lowing display messages appears in the multi‐
function display: #
Place the key in the marked space See Own-
er's Manual :st art theve hicle in emer gency
operation mode (/ page 168).
or 16 6
Driving and pa rking