2019 MERCEDES-BENZ GLC COUPE oil
[x] Cancel search: oilPage 189 of 657

R
petrol with more than 3% me thanol by
vo lume, e.g. M15, M30
R petrol with additives con taining me tal
If yo u acciden tally refuel with the wrong fuel: #
Do not switch the ignition on. #
Consult a qualified specialist workshop. *
NO
TEDama gecaused bythe wrong fuel Ve
hicles with a diesel engine:
Even small amounts of the wrong fuel could
re sult in damage tothe fuel sy stem, the
engine and the emission control sy stem. #
Only refuel using sulphu r-free diesel
fuel that con form sto European stand‐
ard EN 590, or an equivalent specifica‐
tion.
In countries without sulphur-f ree diesel
fuel, refuel using only lo w-sulphur diesel
fuel with a sulphur content less than
50 ppm. Ne
verre fuel using any of thefo llowing fuels:
R petrol
R marine diesel
R heating oil
R pure bio-diesel fuel or vege table oil
R paraf fin or kerosene
If yo u accidentally refuel with the wrong fuel: #
Do not switch the ignition on. #
Consult a qualified specialist workshop. *
NO
TEDo not use diesel torefuel vehi‐
cles with a petrol engine. If
yo u acciden tally refuel with the wrong fuel:
R Do not switch the ignition on. Otherwise
fuel can enter the engine.
Even small amounts of the wrong fuel
could result in damage tothe fuel sy stem
and the engine. The repair costs are high. #
Consult a qualified specialist workshop. #
Have the fuel tank and fuel lines
drained compl etely. *
NO
TEDo not use petrol torefuel vehi‐
cles with a diesel engine. If
yo u acciden tally refuel with the wrong fuel:
R Do not switch the ignition on. Otherwise,
fuel can enter the fuel sy stem.
Even small amounts of the wrong fuel
could result in damage tothe fuel sy stem
and the engine. The repair costs are high. #
Consult a qualified specialist workshop. #
Have the fuel tank and fuel lines
drained compl etely. *
NO
TEDama getothe fuel sy stem caused
by ove rfilled fuel tanks. #
Only fill th e fuel tank until the pump
nozzle switches off. 18 6
Driving and pa rking
Page 203 of 657

in front of, behind or next
totheve hicle (depend‐
ing on theve hicle's equipment).
Depending on theve hicle's equipment, thera dar
sensors are integrated behind the bumpers
and/or behind the Mercedes star. The ultrasonic
sensors are located in the front and rear bump‐
ers. Keep these parts free of dirt, ice and slush
(/ page 475). The se nsors mustnot be cov‐
ered, forex ample bycycle rack s, ove rhanging
loads, sticke rs,fo il or foils toprotect against
st one chipping. Additional license plate brac kets
can li kewise impair the function of the ultrasonic
sensors. In theev ent of damage tothe bumpers
or radiator grille, or following a collision impact‐
ing the bumpers or radiator grille, ha vethe func‐
tion of the sensors checked at a qualified spe‐
cialist workshop. If the sensors are damaged,
some driving sy stems and driving saf ety sy stems
may no longer function proper ly. Overview of driving sy
stems and driving
saf ety sy stems In
this section, you will find information about
th efo llowing driving sy stems and driving saf ety
sy stems:
R 360° Camera (/ page243)
R ABS ( Anti-lo ckBra king System)
(/ page 201)
R Active Dis tance Assi stDISTRONIC
(/ page 216)
R Adaptive Brake Lights (/ page212)
R AIR BODY CONTROL (/ page 230)
R Active Brake Assi st (/ page 206)
R Active Lane Keeping Assist (/ page 260)
R ATTENTION ASSIST (/ page 253)
R BAS (Bra keAssist System) (/ page 201)
R Hill Start Assist (/ page 228)
R DYNA MIC BODY CONTROL (/ page 230)
R EBD ( Electronic Brakeforc eDistribution)
(/ page 206) R
ESP ®
(Elect ronic Stability Program)
(/ page 201)
R ESP ®
Crosswind Assist (/ page 205)
R ESP ®
trailer stabilisation (/ page 206)
R Active Speed Limit Assi st (/ page 220)
R HOLD function (/ page 228)
R STEER CONTROL (/ page 206)
R Active Steering Assist with rescue lane func‐
tion (/ page 222)
R Limiter (/ page213)
R Active Emergency Stop Assist (/ page 226)
R Active Parking Assist (/ page247)
R Parking Assist PARKTRONIC (/ page 233)
R Reversing camera (/ page240)
R Active Lane Change Assi st (/ page 224)
R Cruise control (/ page212)
R Blind Spot Assi stand Active Blind Spot Assi st
with exitwa rning (/ page 257)
R Traf fic Sign Assi st (/ page 255) 200
Driving and parking
Page 278 of 657

Fu
rther displa yson the multifunction display:
Z Gearshift
recommendation (/ page 183)
ë Active Parking Assist activated
(/ page 249)
é Parking Assist PARKTRONIC deacti vated
( / page 237, 236, 237)
¯ Cruise control (/
page212)
È Limi
ter (/ page213)
ç Active Dis tance Assi stDISTRONIC
(/ page 216)
æ Ac
tive Brake Assi st (/ page 211)
è Active Steering Assist (/ page 222)
à Ac
tive Lane Keeping Assist (/ page 260)
± Active Lane Change Assi st (/ page 224)
è ECO
start/ stop function (/ page172)
ë HOLD fu
nction (/ page 228)
_ Ad
aptive Highbeam Assist (/ page142)
Ad aptive Highbeam Assist Plus
(/ page 143)
ð Maximum pe rmissible speed exceeded
(for cer tain countries only) Ve
hicles with Traf fic Sign Assis t:de tected
instructions and traf fic signs (/ page 255). Ad
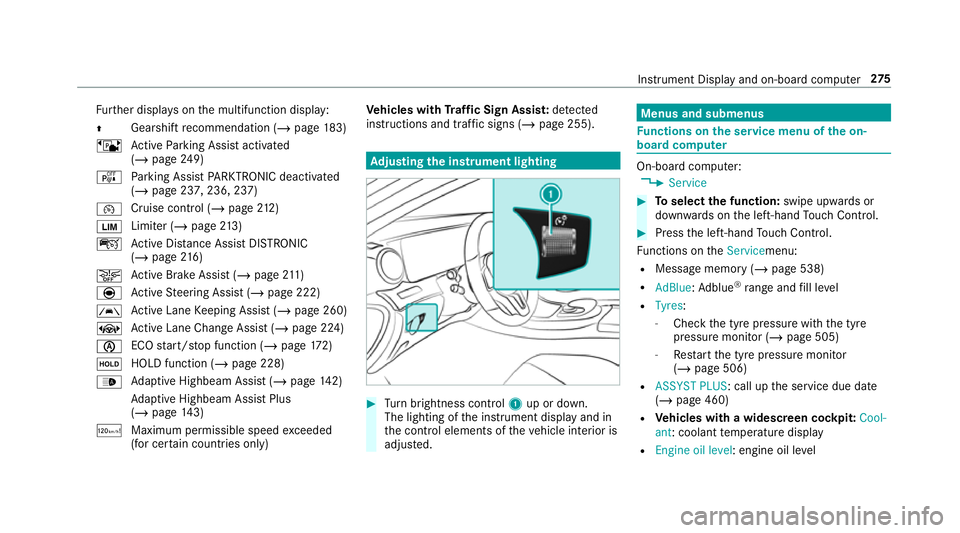
justing the in stru ment lighting #
Turn brightness control 1up or down.
The lighting of the instrument display and in
th e control elements of theve hicle interior is
adjus ted. Menus and submenus
Fu
nctions on the service menu of the on-
board compu ter On-board computer:
4 Service #
Toselect the function: swipe upwards or
down wards on the left-hand Touch Control. #
Press the left-hand Touch Control.
Fu nctions on theServicemenu:
R Message memory (/ page 538)
R AdBlue: Adblue ®
ra nge and fill le vel
R Tyres:
- Check the tyre pressure with the tyre
pressure monitor (/ page 505)
- Restart the tyre pressure monitor
(/ page 506)
R ASSYST PLUS: call up the service due date
(/ page 460)
R Vehicles with a widescreen cock pit:Cool-
ant: coolant temp erature display
R Engine oil level: engine oil le vel Instrument Display and on-board computer
275
Page 464 of 657

fi
ed based on the actual operating conditions
and/or loads.
Examples of arduous operating conditions:
R regular city driving with frequent intermedi‐
ate stops
R mainly short-dis tance driving
R frequent operation in mountainous terrain or
on poor road sur faces
R when the engine is of ten le ftidling for long
periods
R operation in particula rly dusty conditions
and/or if air-recirculation mode is frequently
used
In these or similar operating conditions, ha vethe
interior air filter, engine air cleaner, engine oil
and oil filter etc. changed more frequent ly. The
ty re s must be checked more frequently if the
ve hicle is operated under increased loads. Fur‐
th er information can be obtained at a qualified
specialist workshop. Battery disconnection periods
The ASS
YST PLUS se rvice inter val display
can only calculate the service due da tewhen
th e bat tery is connected. #
Notedown the service due date displa yed on
th e instrument display before disconnecting
th e battery (/ page 460). Engine compartment
Ac
tive bonn et(pedestrian pr otection) Operation of
the active bonnet (pedestrian
pr otection)
In cer tain accident situations, therisk of injury
to pedestrians can be reduced bythe actuation
of the active bonn et. The rear area of the bonn et
is raised byappr oximately 85 mm.
Fo rth e drive tothewo rkshop, reset the trig‐
ge red active bonn etyourself. Af terth e active
bonn ethas been triggered, pedestrian pr otection
may be limited.
A qu alified specialist workshop must re-ins tate
th e full functionality of the active bonn et. The active bonnet is not
available in all coun‐
tries.
Re setting the active bonnet &
WARNING Risk of bu rns from hot com‐
ponent parts in the engine compartment
Cer tain components in the engine compart‐
ment can be very hot, e.g. the engine, the
ra diator and parts of theex haust sy stem. #
Allow the engine tocool down and only
to uch co mponent parts described in
th efo llowing. Maintenance and care
461
Page 467 of 657

#
Push the handle 1ofthe bonn etcatch
up wa rds and lift the bonn etby appr oximately
40 cm. #
Toclose: lowe rth e bonn etand let it fall from
a height of appr oximately 20 cm. #
Ifth e bonn etcan still be lif ted slightl y,open
th e bonn etagain and close it with a little
more forc e until it engages cor rectly. Engine oil
Che
cking the engine oil le vel using the oil
dip stick &
WARNING Risk of bu rns from hot com‐
ponent parts in the engine compartment
Cer tain components in the engine compart‐
ment can be very hot, e.g. the engine, the
ra diator and parts of theex haust sy stem. #
Allow the engine tocool down and only
to uch co mponent parts described in
th efo llowing. Plug-in
hybrid: be sure toobser vethe no tes in
th e Supplement. Otherwise, you may failto rec‐
ognise dangers.
Re quirements:
R the engine must ha vean oil dipstic k.If not,
th e engine oil le vel can be checked only with
th e on-board computer (/ page 465).
Depending on the engine, the oil dipstick may be
ins talled in the engine compartment in dif fere nt
locations. The
waiting time before checking the oil le vel
when the engine is at normal operating temp era‐
ture is five minutes. #
Park theve hicle on a le vel sur face. #
Pull oil dipstick 1out and wipe off. 464
Maintenance and care
Page 468 of 657

#
Slowly slide oil dipstick 1into the guide
tube tothestop, and take it out again af ter
appr oximately thre e seconds.
R Oil le vel is cor rect: oil le vel is between 2
and 3.
R Oil le velto o low: oil le vel is at 3or
belo w.
R Oil le velto o high: oil le vel is abo ve2 . #
Ifth e oil le vel is too lo w,top up with 1 litre of
engine oil. #
Ifth e oil le vel is too high, drain off excess
engine oil. Consult a qualified specialist
wo rkshop.
Checking the engine oil le vel using the on-
board compu ter
Re quirements:
The engine oil le vel is de term ined during driving.
De term ining the engine oil le vel can take up to
30 minutes with a normal driving style and even
longer with an active driving style.
In order torecei veare sult as quickly as possi‐
ble:
R warm upthe engine R
park theve hicle on a le vel sur face
R leave the engine running at idling speed
On-board compu ter:
4 Service 5
Engine oil level
Yo u will see one of thefo llowing messages on
th e multifunction display:
R Engine oil level Measuring now : measure‐
ment of the oil le vel is not yet possible. #
Repeat there qu est af ter a maximum of
30 minutes driving.
R Engine oil level OK andthe bar display for
indicating the oil le vel on the multifunction
display is green and is between "min" and
"max": the oil le vel is cor rect.
R Engine oil level Add 1.0 l andthe bar display
fo r indicating the oil le vel on the multifunc‐
tion display is orange and is below "min": #
Add 1 l of engine oil.
R Reduce engine oil level andthe bar display
fo r indicating the oil le vel on the multifunc‐
tion display is orange and is abo ve"max": #
Drain off any excess engine oil that has been
added. Consult a qualified specialist work‐
shop.
R For engine oil level turn on ignition: #
Switch on the ignition tocheck the engine oil
le ve l.
R Engine oil level System inoperative : sensor
fa ulty or not inser ted. #
Consult a qualified specialist workshop.
R Engine oil level System currently unavail. : #
Close the bonn et.
To pping up engine oil &
WARNING Risk of bu rns from hot com‐
ponent parts in the engine compartment
Cer tain components in the engine compart‐
ment can be very hot, e.g. the engine, the
ra diator and parts of theex haust sy stem. #
Allow the engine tocool down and only
to uch co mponent parts described in
th efo llowing. Maintenance and care
465
Page 469 of 657

&
WARNING Risk offire and injury from
engine oil
If engine oil comes into con tact wi thhot
component parts in the engine compart‐
ment, it may ignite. #
Make sure that no engine oil is spilled
next tothefiller opening. #
Allow the engine tocool off and thor‐
oughly clean the engine oil from compo‐
nent parts before starting theve hicle. *
NO
TEEngine dama gecaused byan
incor rect oil filter, incor rect oil or addi‐
tives #
Do not use engine oils or oil filters
which do not cor respond tothe specifi‐
cations explicitly prescribed forthe
service inter vals. #
Do not alter the engine oil or oil filter in
order toachie velonger change inter vals
th an presc ribed. #
Do not use additives. #
Follow the instructions in the service
inter val display rega rding the oil
ch ange. *
NO
TEDama gecaused bytopping up too
much engine oil To
o much engine oil can damage the engine
or the catalytic con verter. #
Have excess engine oil remo ved at a
qu alified specialist workshop. #
Turn cap 1anti-clockwise and remo veit. #
Top up the engine oil. #
Replace cap 1and turn it clockwise as far
as it will go. #
Check the oil le vel again (/ page 464). 466
Maintenance and care
Page 473 of 657

R
Parking Assist PARKTRONIC is deacti vated.
R Vehicles with 360° Camera: the front
image is activated af ter appro x. eight sec‐
onds.
R Vehicles with AIRMATIC or E- ACTIVE
BO DY CONT ROL:theve hicle is raised tothe
maximum possible chassis le vel
( / page 232) .
If one of the settings cann otbe selected, this is
displa yedby a% behind there spective set‐
ting.
Car wash mode is automatically deactivated at
speeds abo ve20 km/h.
The following settings are reset when car wash
mode is deactivated:
R the outside mir rors are folded out.
R thera in sensor is activated.
R there ar wind owwiper is activated.
R the air conditioning sy stem is set tofresh air
mode.
R Parking Assist PARKTRONIC is reset tothe
pr ev iously selec ted setting. R
the windo wsand the sliding sunroof remain
closed.
R Vehicles with 360° Camera: the front
image is deactivated at speeds abo ve
18 km/h.
R Vehicles with AIRMATIC or E- ACTIVE
BO DY CONT ROL:theve hicle is lo weredto
th e pr eviously set chassis le vel. Information on using a high-pressure cleaner
&
WARNING Risk of an accident when
using high-pressure cleane rswith circu‐
lar jet nozzles
The water jet of a circular jet nozzle (dirt
grinder) can cause extern ally invisible dam‐
age tothe tyres or chassis parts.
Components damaged in this wa y may unex‐
pec tedly fail. #
Do not use high-pressure cleaners with
circular jet nozzles toclean theve hicle. #
Have damaged tyres or chassis parts
re placed immediatel y. To
avo id damage to yourvehicle, obser vethefo l‐
lowing when using a high-pressure cleaner:
R keep theke y at least 3 m away from theve hi‐
cle. Otherwise theta ilgate could open unin‐
te ntional ly.
R maintain a dis tance of at least 30 cm tothe
ve hicle.
R vehicles with deco rative foil: parts of your
ve hicle are co vered with a decorative foil.
Maintain a dis tance of at least 70 cm
between thefo il-c ove red parts of theve hicle
and the nozzle of the high-pressure cleaner.
Mo vethe high-pressure cleaner nozzle
around whilst cleaning. The waterte mp era‐
ture of the high-pressure cleaner must not
exc eed 60 °C.
R obser vethe information on the cor rect dis‐
ta nce in the equipment manufacturer's oper‐
ating instructions.
R do not point the nozzle of the high-pressure
cleaner directly at sensitive parts such as
tyres, slits, electrical components, bat teries,
light bulbs and ventilation sl ots. 47 0
Maintenance and care