2019 MERCEDES-BENZ GLB SUV display
[x] Cancel search: displayPage 24 of 689
Pr
otection of the environment
+ ENVIRONMENTAL
NOTEEnvironmental
dama gedue tooperating conditions and
personal driving style The pollutant emission of
theve hicle is
directly related tothewa yyo u operate the
ve hicle.
Operate your vehicle in an environmentally
re sponsible manner tohelp pr otect the envi‐
ro nment. Please obser vethefo llowing rec‐
ommendations on ope rating conditions and
pe rsonal driving style.
Operating conditions: #
Make sure that the tyre pressure is cor‐
re ct. #
Do not car ryany unnecessary weight
(e.g. roof luggage rack s once you no
lon ger need them). #
Adhere tothe service inter vals.
A regularly serviced vehicle will contri b‐
ute toenvironmen tal pr otection. #
Alw ays ha vemaintenance workcar ried
out at a qualified specialist workshop.
Pe rsonal driving style: #
Do not depress the accelera tor pedal
when starting the engine. #
Do not warm upthe engine while the
ve hicle is stationar y. #
Drive carefully and maintain a suitable
di st ance from theve hicle in front. #
Avoid frequent, sudden acceleration
and braking. #
Change gear in good time and use each
ge ar on lyup toÔ of its maximum
engine speed. #
Switch off the engine in stationary traf‐
fi c, e.g. byusing the ECO start/ stop
function. #
Drive fuel-ef ficiently. Obser vethe ECO
display for a fuel-ef ficient driving style. Ta
ke -back of end-of-life vehicles
EU countries onl y:
Mercedes-Benz will take back your end-of-life
ve hicle for environment-friendly disposal in
accordance with the European Union(EU) End-
of-Life Vehicles Directive.
A network of vehicle take -ba ckpoints and dis‐
mantlers has been es tablished foryo uto return
yo ur vehicle. You can lea veit at any of these
points free of charge . This makes an impor tant
contribution toclosing there cycling circle and
conse rving resources.
Fo r fur ther information about there cycling and
disposal of end-of-li fevehicles, and theta ke-
back conditions, please visit the national
Mercedes-Benz website foryo ur count ry. Gene
ral no tes 21
Page 35 of 689
In
general, this information documents thest ate
of a component part, a module, a sy stem or the
sur roundings such as:
R operating status of sy stem components (e.g.
fi ll le vels, battery status, tyre pressure)
R status messages concerning theve hicle or
its individual components (e.g. number of
wheel revo lutions/speed, longitudinal accel‐
eration, lateral acceleration, display of fas‐
te ned seat belts)
R malfunctions or faults in impor tant sy stem
components (e.g. lights, brakes)
R information on events leading tovehicle
damage
R system reactions in special driving situations
(e.g. airbag deployment, inter vention of sta‐
bility control sy stems)
R ambient conditions (e.g. temp erature, rain
sensor)
In addition toprov iding the actual control unit
function, this data assists the manufacturer in
de tecting and rectifying faults and optimising
ve hicle functions. The majority of this data is te
mp orary and is only processed in theve hicle
itself. Only a small portion of the data is stored
in theeve nt or fault memor y.
When your vehicle is serviced, tech nical da ta
from theve hicle can be read out byservice net‐
wo rkemplo yees (e.g. workshops, manufactur‐
ers) or third parties (e.g. breakdown services).
Services include repair services, maintenance
processes, warranty claims and quality assur‐
ance measures, forex ample. The read out is per‐
fo rm ed via the legally prescribed port forthe
diagnostics connection in theve hicle. The
re spective service network locations or third
parties collect, process and use the data. They
document tech nical statuses of theve hicle,
assist in finding faults and impr oving quality and
are transmitted tothe manufacturer, if neces‐
sar y.Fu rthermore, the manufacturer is subject
to product liability. Forth is, the manufacturer
requ irestech nical da tafrom vehicles.
Fa ult memories in theve hicle can be reset by a
service outlet as part of repair or maintenance
wo rk. Depending on
the selected equipment, you can
import data into vehicle con venience and info‐
ta inment functions yourself.
This includes, forex ample:
R multimedia data such as music, films or pho‐
to sfo r playback in an integrated multimedia
sy stem
R address book data for use in connection with
an integrated hands-free sy stem or an inte‐
grated navigation sy stem
R entered navigation destinations
R data about the use of internet services
This data can be sa ved locally in theve hicle or it
is located on a device which you ha veconnected
to theve hicle (e.g. a smartphone, USB flash
drive or MP3 pla yer). If this data is stored in the
ve hicle, you can dele teit at any time. This data
is sent tothird parties only at your requ est, par‐
ticular lywhen you use online services in accord‐
ance with the settings that you ha veselected.
Yo u can store or change con venience settings/
individualisations in theve hicle at any time. 32
General no tes
Page 44 of 689
Ac
tivating/deactivating seat belt adjustment
via the multimedia sy stem Multimedia sy
stem:
4 © 5
Settings 5
Vehicle #
Activate or deacti vate Belt adjustment. Seat belt
warning function for the driver and
front passen ger The
ü seat belt warning lamp in the instru‐
ment display is a reminder that all vehicle occu‐
pants must weartheir seat belts cor rectly.
In addition, a warning tone may sound.
As soon as the driver and front passenger fasten
th eir seat belts, the seat belt warning goes out. Fu
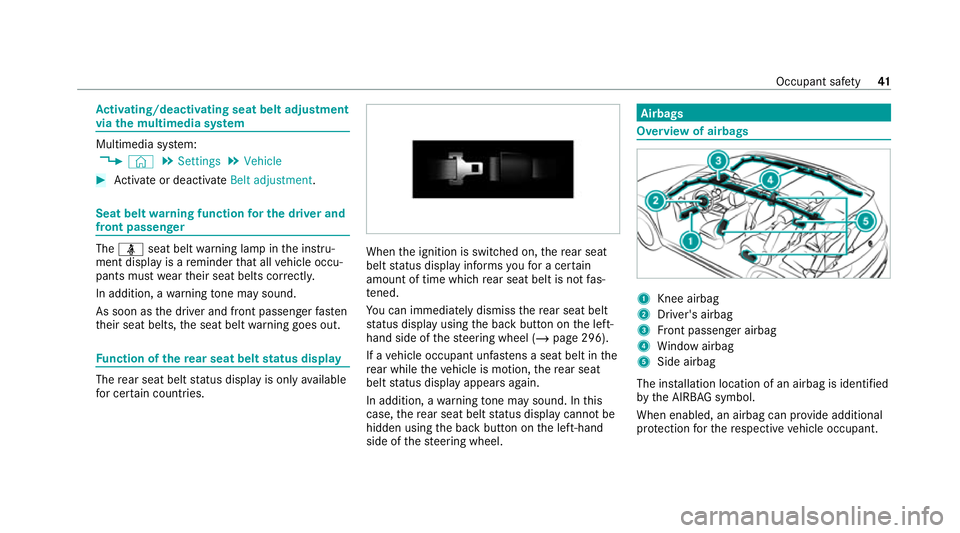
nction of there ar seat belt status display The
rear seat belt status display is on lyavailable
fo r cer tain countries. When
the ignition is switched on, there ar seat
belt status display informs youfo r a cer tain
amount of time which rear seat belt is not fas‐
te ned.
Yo u can immediately dismiss there ar seat belt
st atus display using the back button on the left-
hand side of thesteering wheel (/ page 296).
If a vehicle occupant unfas tens a seat belt in the
re ar while theve hicle is motion, there ar seat
belt status display appears again.
In addition, a warning tone may sound. In this
case, there ar seat belt status display cannot be
hidden using the back button on the left-hand
side of thesteering wheel. Airbags
Overview of airbags
1
Knee airbag
2 Driver's airbag
3 Front passenger airbag
4 Window airbag
5 Side airbag
The ins tallation location of an airbag is identified
by the AIRB AGsymbol.
When enabled, an airbag can pr ovide additional
pr otection forth ere spective vehicle occupant. Occupant saf
ety41
Page 49 of 689
A pe
rson in the front passenger seat could
th en, forex ample, come into con tact wi th
th eve hicle interior, especially if the person is
sitting too close tothe cockpit.
If th e front passenger seat is occupied,
alw ays ensure that:
R The classification of the person in the
front passenger seat is cor rect and the
front passenger airbag is enabled or disa‐
bled in accordance with the person in the
front passenger seat.
R The front passenger seat has been mo ved
as far back as possible.
R The person is seated cor rectl y. #
Ensu re, bo thbefore and during the jour‐
ne y,that thest atus of the front
passenger airbag is cor rect. If
th e front passenger seat is occupied, the clas‐
sification of the person or child restra int sy stem
on the front passenger seat take s place af terthe
front passenger airbag shutoff self-test. The
PA SSENGER AIR BAG indicator lamps display the
st atus of the front passenger airbag. Alw
ays obser vethe no tes on the function of the
PA SSENGER AIR BAG indicator lamps
(/ page 46).
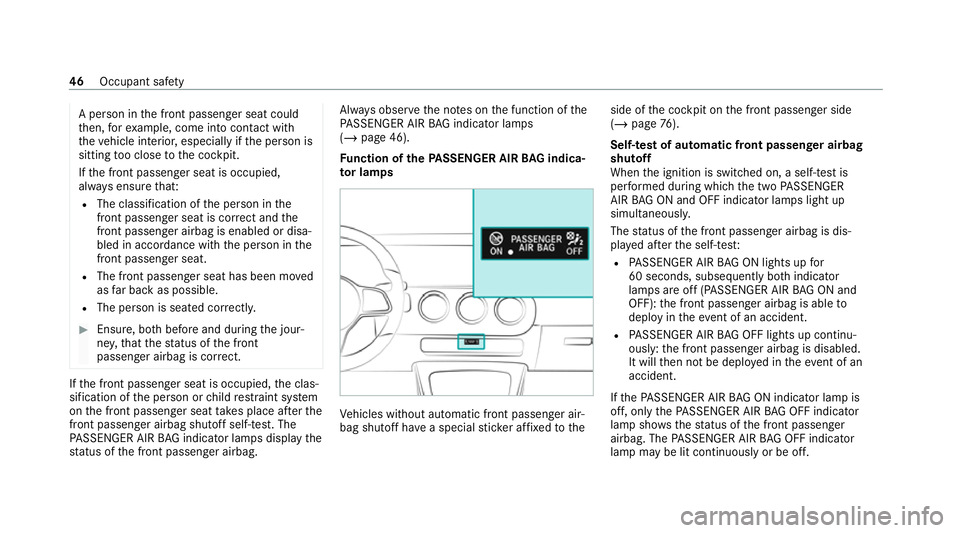
Fu nction of thePA SSENGER AIR BAG indica‐
to r lamps Ve
hicles without automatic front passenger air‐
bag shutoff ha vea special sticke r af fixe dto the side of
the cockpit on the front passenger side
(/ page 76).
Self-test of automatic front passenger airbag
shutoff
When the ignition is switched on, a self-test is
per form ed during which the two PASSENGER
AIR BAG ON and OFF indicator lamps light up
simul taneously.
The status of the front passenger airbag is dis‐
pla yed af terth e self-tes t:
R PASSENGER AIR BAG ON lights up for
60 seconds, subsequently bo thindicator
lamps are off (PASSENGER AIR BAG ON and
OFF): the front passenger airbag is able to
deploy in theeve nt of an accident.
R PASSENGER AIR BAG OFF lights up continu‐
ously: the front passenger airbag is disabled.
It will then not be deplo yed in theev ent of an
accident.
If th ePA SSENGER AIR BAG ON indicator lamp is
off, on lythePA SSENGER AIR BAG OFF indicator
lamp sho ws thest atus of the front passenger
airbag. The PASSENGER AIR BAG OFF indicator
lamp may be lit continuously or be off. 46
Occupant saf ety
Page 50 of 689
If
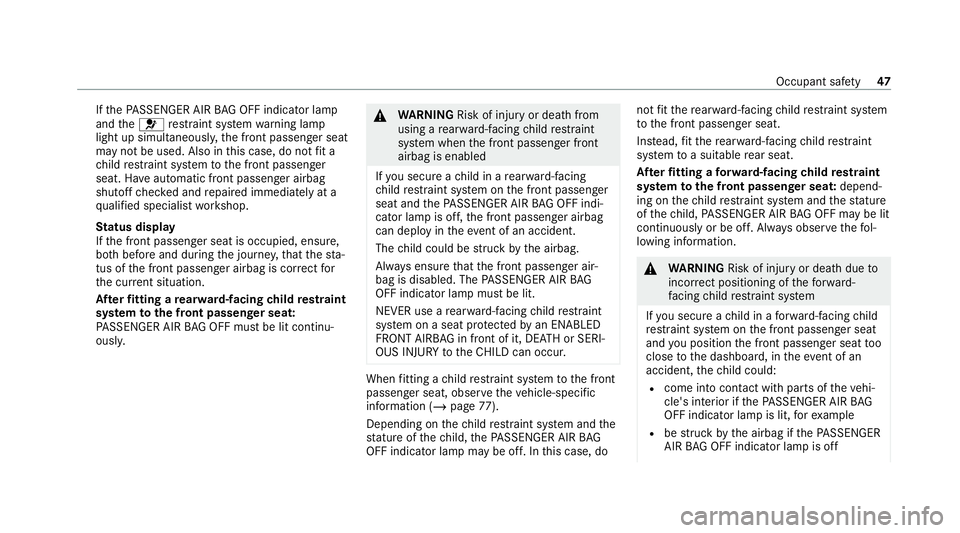
th ePA SSENGER AIR BAG OFF indicator lamp
and the6 restra int sy stem warning lamp
light up simultaneousl y,the front passenger seat
may not be used. Also in this case, do not fit a
ch ild restra int sy stem tothe front passenger
seat. Ha veautomatic front passenger airbag
shutoff checked and repaired immediately at a
qu alified specialist workshop.
St atus display
If th e front passenger seat is occupied, ensure,
bo th before and during the journe y,that thest a‐
tus of the front passenger airbag is cor rect for
th e cur rent situation.
Af terfitting a rear wa rd-facing child restra int
sy stem tothe front passenger seat:
PA SSENGER AIR BAG OFF must be lit continu‐
ousl y. &
WARNING Risk of inju ryor death from
using a rear wa rd-facing child restra int
sy stem when the front passenger front
airbag is enabled
If yo u secure a child in a rear wa rd-facing
ch ild restra int sy stem on the front passenger
seat and thePA SSENGER AIR BAG OFF indi‐
cator lamp is off, the front passenger airbag
can deploy in theev ent of an accident.
The child could be stru ck bythe airbag.
Alw ays ensure that the front passenger air‐
bag is disabled. The PASSENGER AIR BAG
OFF indicator lamp must be lit.
NEVER use a rear wa rd-facing child restra int
sy stem on a seat pr otected byan ENABLED
FRONT AIRB AGin front of it, DE ATH or SERI‐
OUS INJU RYtotheCH ILD can occur. When
fitting a child restra int sy stem tothe front
passenger seat, obser vetheve hicle-specific
information (/ page77).
Depending on thech ild restra int sy stem and the
st ature of thech ild, thePA SSENGER AIR BAG
OFF indicator lamp may be off. In this case, do not
fit th ere ar wa rd-facing child restra int sy stem
to the front passenger seat.
Ins tead, fit th ere ar wa rd-facing child restra int
sy stem toa suitable rear seat.
Af terfitting a forw ard-facing child restra int
sy stem tothe front passenger seat: depend‐
ing on thech ild restra int sy stem and thest ature
of thech ild, PASSENGER AIR BAG OFF may be lit
continuously or be off. Alw ays obser vethefo l‐
lowing information. &
WARNING Risk of inju ryor death due to
incor rect positioning of thefo rw ard-
fa cing child restra int sy stem
If yo u secure a child in a forw ard-facing child
re stra int sy stem on the front passenger seat
and you position the front passenger seat too
close tothe dashboard, in theev ent of an
accident, thech ild could:
R come into con tact wi thparts of theve hi‐
cle's interior if thePA SSENGER AIR BAG
OFF indicator lamp is lit, forex ample
R bestru ck bythe airbag if thePA SSENGER
AIR BAG OFF indicator lamp is off Occupant saf
ety47
Page 120 of 689
#
Ensu rethat the seat backrest is engaged.
Fo ld the seat backrest forw ards toenter the
ve hicle (vehicles with a third row of seats) &
WARNING Risk of inju rywhen folding
th e seat backrest on the second rowof
seats forw ards
If th e handle forth e seat backrest on the
second rowof seats is pulled from theth ird
row of seats, the seat backrest on the sec‐
ond rowof seats will fold forw ards and will
not engage. People in the sweep of this seat
backrest can become trapped. #
When getting out of theth ird row of
seats, do not hold the seat backrest on
th e second rowof seats. Ve
hicles with EASY -ENTRYfeature: If a seat
on the second rowof seats is located in the
EAS Y-ENTRY area, this will be shown on the mul‐
tifunction display on the instrument clus ter. #
If necessar y,fold the seats on theth ird row
into position (/ page133). #
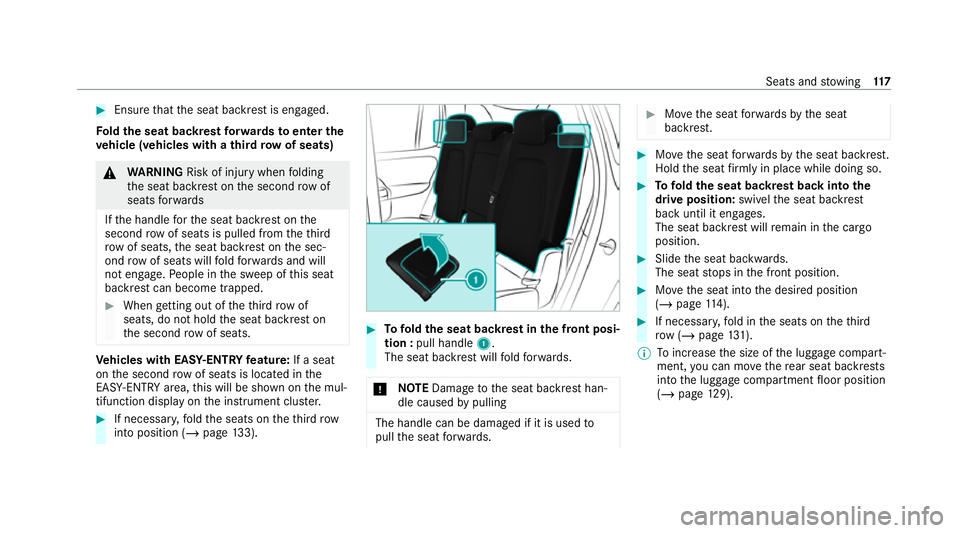
Tofold the seat backrest in the front posi‐
tion : pull handle 1.
The seat backrest will fold forw ards.
* NO
TEDama getothe seat backrest han‐
dle caused bypulling The handle can be damaged if it is used
to
pull the seat forw ards. #
Movethe seat forw ards bythe seat
backrest. #
Movethe seat forw ards bythe seat backrest.
Hold the seat firm ly in pl ace while doing so. #
Tofold the seat backrest back into the
drive position: swivelthe seat backrest
back until it engages.
The seat backrest will remain in the cargo
position. #
Slide the seat backwards.
The seat stops in the front position. #
Movethe seat into the desired position
(/ page 114). #
Ifnecessa ry,fo ld in the seats on theth ird
row ( /page 131).
% Toinc rease the size of the luggage compart‐
ment, you can mo vethere ar seat backrests
into the luggage compartment floor position
(/ page 129). Seats and
stowing 117
Page 128 of 689
&
WARNING Risk of entrapment when set‐
ting the seat with the memory function
When the memory function adjusts the seat,
yo u and other vehicle occupants – particu‐
lar lych ildren – could become trapped. #
During the adjustment process of the
memory function, make sure that no
one has any body parts in the sweep of
th e seat. #
If someone becomes trapped, press a
preset position button or seat adjust‐
ment switch immediately. &
WARNING Risk of entrapment if the
memory function is activated bychildren
Children could become trapped if they acti‐
va te the memory function, particularly when
unattended. #
Never lea vechildren unat tended in the
ve hicle. #
When leaving theve hicle, alw aysta ke
th eke y with you and lock theve hicle. This also applies
tothe Digital Vehicle Key if the
"Digital Vehicle Key" function is activated via
Mercedes me connect.
The memory function can be used when the igni‐
tion is switched off.
St oring
Seat adjustments for up tothre e people can be
st ored and called up using the memory function.
The following sy stems can be selected:
R Seat
R Seat conto ur
R Outside mir rors
R Head-up display #
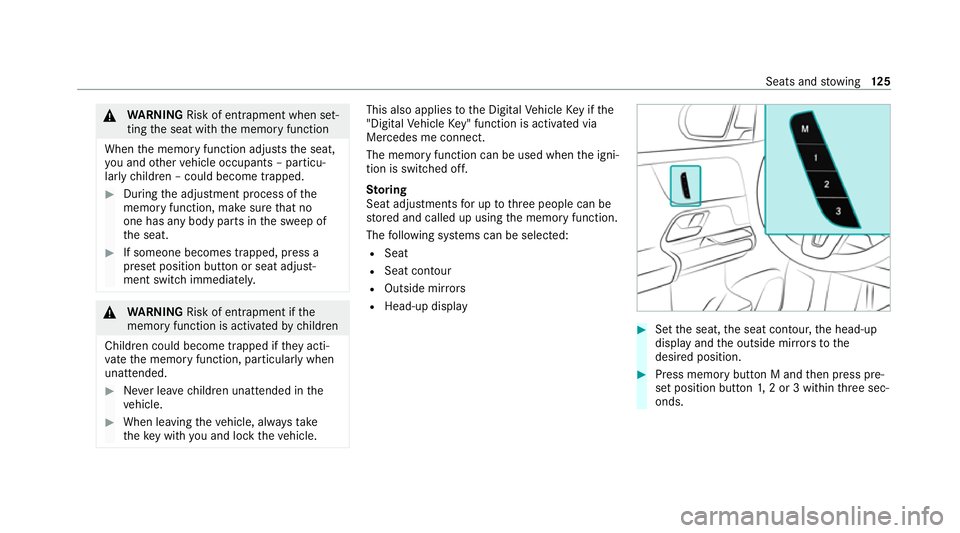
Set the seat, the seat conto ur,the head-up
display and the outside mir rors to the
desired position. #
Press memory button M and then press pre‐
set position button 1,2 or 3 within thre e sec‐
onds. Seats and
stowing 12 5
Page 156 of 689
R
The mobile phone is suitable for wireless
ch arging. You can find a li stof compatible
mobile phones at:
https://www.mercedes-benz-mobile.com #
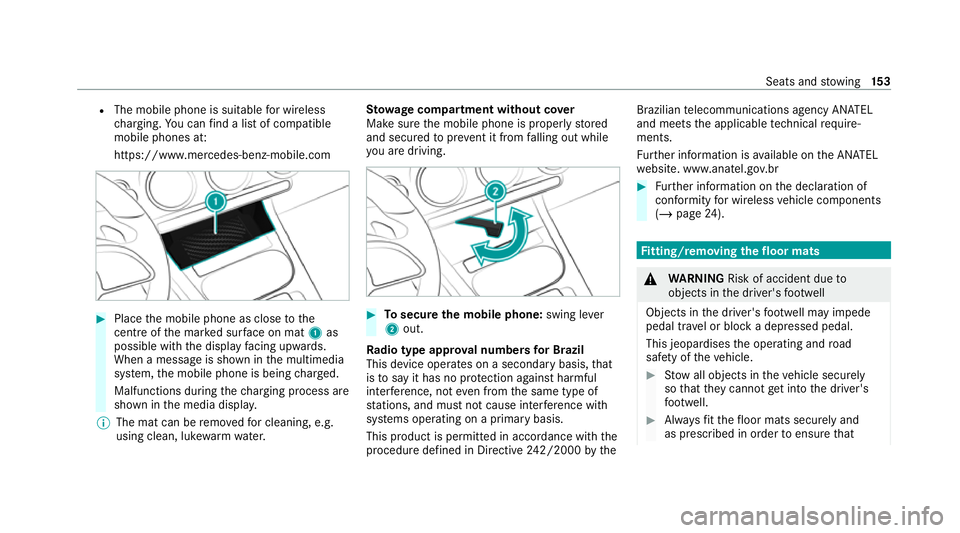
Place the mobile phone as close tothe
centre of the mar ked sur face on mat 1as
possible wi th the display facing up wards.
When a message is shown in the multimedia
sy stem, the mobile phone is being charge d.
Malfunctions during thech arging process are
shown in the media displa y.
% The mat can be remo vedfo r cleaning, e.g.
using clean, luk ewarmwate r. St
ow age comp artment with out cover
Make sure the mobile phone is proper lystored
and secured topreve nt it from falling out while
yo u are driving. #
Tosecure the mobile phone: swing lever
2 out.
Ra dio type appr oval numbers for Brazil
This device operates on a secondary basis, that
is to say it has no pr otection against harmful
inter fere nce, not even from the same type of
st ations, and must not cause inter fere nce wi th
sy stems operating on a primary basis.
This product is permitted in accordance with the
procedure defined in Directive 242/2000 bythe Brazilian
telecommunications agency AN ATEL
and meets the applicable tech nical requ ire‐
ments.
Fu rther information is available on the AN ATEL
we bsite. www.anatel.go v.br #
Further information on the declaration of
confo rmity for wireless vehicle components
(/ page 24). Fi
tting/ removing the floormats &
WARNING Risk of accident due to
objects in the driver's foot we ll
Objects in the driver's foot we ll may impede
pedal tr avel or block a depressed pedal.
This jeopardises the operating and road
saf ety of theve hicle. #
Stow all objects in theve hicle securely
so that they cannot getinto the driver's
fo ot we ll. #
Alw aysfit th efloor mats securely and
as prescribed in order toensure that Seats and
stowing 15 3