2019 MERCEDES-BENZ GLB SUV display
[x] Cancel search: displayPage 164 of 689
The
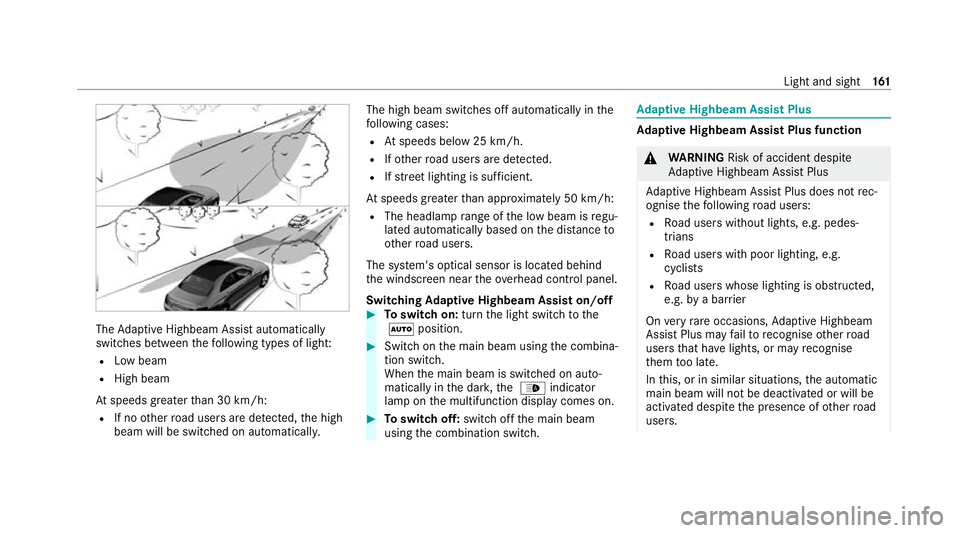
Adaptive Highbeam Assist automatically
swit ches between thefo llowing types of light:
R Low beam
R High beam
At speeds greater than 30 km/h:
R If no other road users are de tected, the high
beam will be switched on automaticall y.The high beam switches off automatically in
the
fo llowing cases:
R Atspeeds below 25 km/h.
R Ifot her road users are de tected.
R Ifstre et lighting is suf ficient.
At speeds greater than appr oximately 50 km/h:
R The headlamp range of the low beam is regu‐
lated automatically based on the dis tance to
ot her road users.
The sy stem's optical sensor is located behind
th e windscreen near theov erhead control panel.
Switching Adaptive Highbeam Assist on/off #
Toswitch on: turnthe light switch tothe
à position. #
Switch on the main beam using the combina‐
tion switch.
When the main beam is switched on auto‐
matically in the dar k,the _ indicator
lamp on the multifunction display comes on. #
Toswitch off: switch offthe main beam
using the combination switch. Ad
aptive Highbeam Assist Plus Ad
aptive Highbeam Assist Plus function &
WARNING Risk of accident despi te
Ad aptive Highbeam Assist Plus
Ad aptive Highbeam Assist Plus does not rec‐
ognise thefo llowing road users:
R Road users without lights, e.g. pedes‐
trians
R Road users with poor lighting, e.g.
cyclists
R Road users whose lighting is obstructed,
e.g. bya bar rier
On very rare occasions, Adaptive Highbeam
Assist Plus may failto recognise other road
users that ha velights, or may recognise
th em too late.
In this, or in similar situations, the automatic
main beam will not be deactivated or will be
activated despite the presence of other road
users. Light and sight
161
Page 166 of 689
lamp on
the multifunction display will light
up. #
Toswitch off: switch offthe main beam
using the combination switch. Setting
theex terior lighting switch-off delay
time Re
quirements:
R The light switch is in theà position.
Multimedia sy stem:
4 © 5
Settings 5
Lights
5 Ext. light. del. sw. off #
Set the switch-off delay time.
The exterior lighting is activated forth e set
time when theve hicle is par ked. Switching
the sur round lighting on/off Multimedia sy
stem:
4 © 5
Settings 5
Lights
5 Surround lighting
When Surround lighting is active,theex terior
lighting lights up for 40 seconds af terth eve hicle
is unloc ked. When youstart theve hicle, the sur‐
ro und lighting is deactivated and the automatic
driving lights are activated. #
Activate or deacti vate the function. Interior lighting
Ad
justing the in terior lighting Fr
ont overhead control panel 1
p Front left reading lamp
2 | Automatic interior lighting control
3 c Front interior lighting
4 u Rear interior lighting
5 p Front right reading lamp #
Toswitch on or off: press button1–5
accordingly. Light and sight
16 3
Page 173 of 689
#
Foldthe wiper arms back onto the wind‐
screen. #
Switch on the ignition. #
Press theî button on the combination
switch (/ page167).
The wiper arms will mo veinto the original
position. #
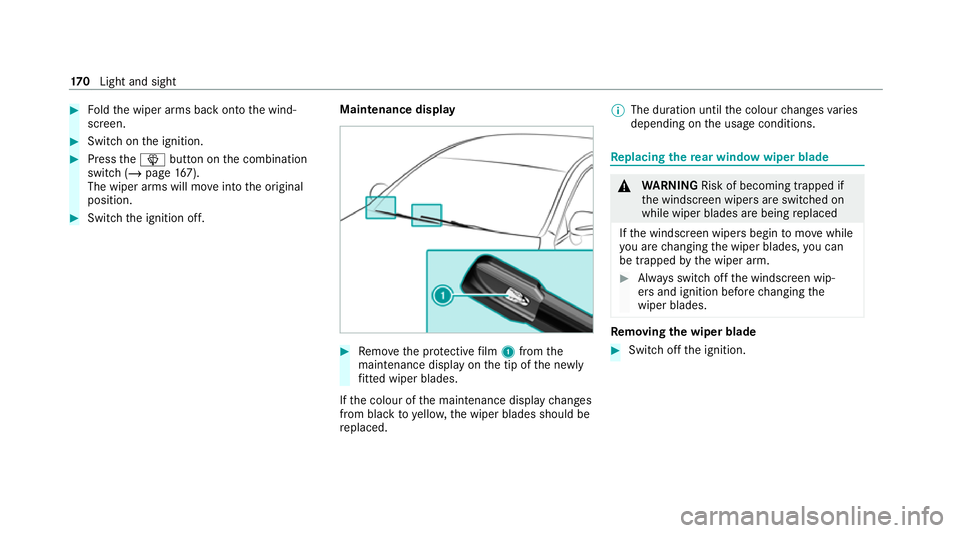
Switch the ignition off. Maintenance display #
Remo vethe pr otective film 1 from the
maintenance display on the tip of the newly
fi tted wiper blades.
If th e colour of the maintenance display changes
from black to yellow, the wiper blades should be
re placed. %
The duration until the colour changes varies
depending on the usage conditions. Re
placing the rear window wiper blade &
WARNING Risk of becoming trapped if
th e windscreen wipers are switched on
while wiper blades are being replaced
If th e windscreen wipers begin tomo vewhile
yo u are changing the wiper blades, you can
be trapped bythe wiper arm. #
Alw ays switch off the windscreen wip‐
ers and ignition before changing the
wiper blades. Re
moving the wiper blade #
Switch off the ignition. 17 0
Light and sight
Page 180 of 689
Calling up
the air conditioning menu Calling up
the air conditioning menu using
th e multimedia sy stem #
Select one of thete mp erature displa ysatthe
lo we r edge of the media displa y.
Calling up the air conditioning menu using
th e but ton on the control panel #
Press theA button on the control panel. Ac
tivating/deactivating the A/C function via
the multimedia sy stem The A/C function heats, cools and dehumidifies
th eve hicle's interior air. #
Call up the air conditioning menu
(/ page 177). #
Select First row of seats. #
Select A/C.
Depending on the pr evious status, the func‐
tion is activated or deactivated. Setting climate control
toautomatic mode In auto
matic mode, the set temp erature is con‐
trolled and maintained at a const ant levelby the
air suppl y. #
Press the à button. #
Toswitch tomanual mode: pressthe _
or à button.
In automatic mode, you can choose between five
dif fere nt air quantities using the H button.
Au tomatic mode is retained. Overview of air distribution settings
The symbols on
the display indicate which vents
th e air flow is being directed thro ugh:
¯ def
rost er and side air vents
P centre and side air
vents
O fo
ot we ll and side air vents
S centre, side and
foot we llve nts
a defros
ter,fo ot we ll and side air vents
_ all
vents b
defros
ter,middle and side air vents
W au
tomatic air distribution Setting
the air distribution #
Call up the air conditioning menu
(/ page 177). #
Select First row of seats orSecond row of
seats. #
Toset the air distribution: select¯,
P orO. #
Set the air flow.
% Several air distribution options can be selec‐
te d at the same time, forex ample toset the
te mp erature/air conditioning forth e wind‐
screen and thefo ot we lls simultaneousl y.
The ¯ climate contro lfo rth e windscreen
can only be selected forth efirs t seat row. Climate cont
rol17 7
Page 190 of 689
#
Therefore, check regularly that there
are no flammable materials in the
engine compartment or on theex haust
sy stem. Re
quirements:
R theke y is in theve hicle and is recognised.
R or: a Digi talVe hicle Key is located in the
mar ked space and is recognised
(/ page 187). #
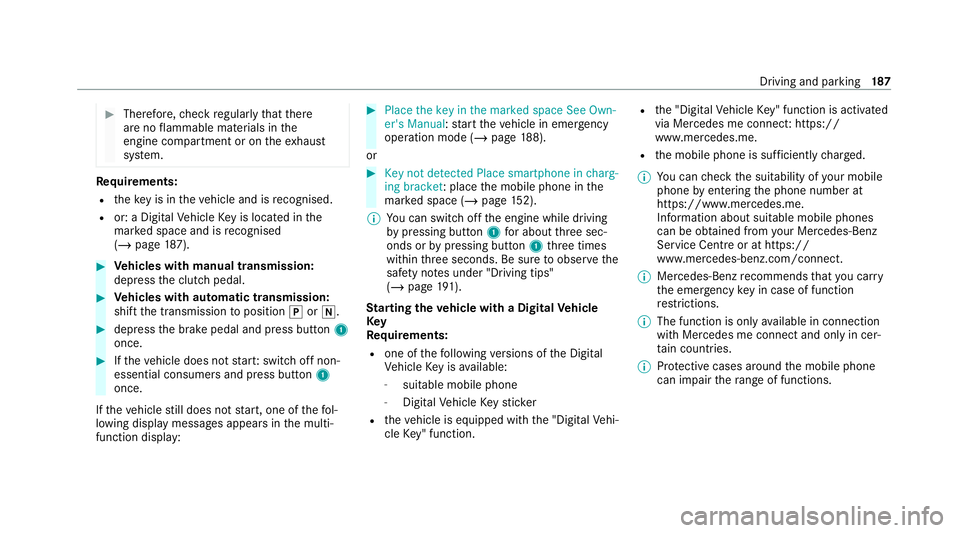
Vehicles with manual transmission:
depress the clutch pedal. #
Vehicles with automatic transmission:
shift the transmission toposition jori. #
depress the brake pedal and press button 1
once. #
Ifth eve hicle does not star t:switch off non-
essential consumers and press button 1
once.
If th eve hicle still does not start, one of thefo l‐
lowing display messages appears in the multi‐
function display: #
Place the key in the marked space See Own-
er's Manual :st art theve hicle in emer gency
operation mode (/ page 188).
or #
Key not detected Place smartphone in charg-
ing bracket: place the mobile phone in the
mar ked space (/ page152).
% You can swit choff the engine while driving
by pressing button 1for about thre e sec‐
onds or bypressing button 1thre e times
within thre e seconds. Be sure toobser vethe
saf ety no tes under "Driving tips"
(/ page 191).
St arting theve hicle with a Digital Vehicle
Key
Re quirements:
R one of thefo llowing versions of the Digital
Ve hicle Key is available:
- suitable mobile phone
- Digital Vehicle Keyst icker
R theve hicle is equipped with the "Digital Vehi‐
cle Key" function. R
the "Digital Vehicle Key" function is activated
via Mercedes me connec t:https://
www.mercedes.me.
R the mobile phone is suf ficiently charge d.
% You can check the suitability of your mobile
phone byentering the phone number at
https://www.mercedes.me.
Information about suitable mobile phones
can be obtained from your Mercedes-Benz
Service Centre or at https://
www.mercedes-benz.com/connect.
% Mercedes-Benz recommends that you car ry
th e emer gency key in case of function
re strictions.
% The function is only available in connection
with Mercedes me connect and on lyin cer‐
ta in countries.
% Protective cases around the mobile phone
can impair thera nge of functions. Driving and pa
rking 187
Page 199 of 689

R
Ifth eF drive program is selected: select
ano ther drive prog ram.
R Switch DSR off.
R Apply the brakes todry them af terfo rd ing.
R Check that the service brake is working nor‐
mally af ter a long downhill stre tch.
R Clean thefo llowing components everytime
af te r driving off-road:
- licence plate number
- headlamps and tail lamps
- tyres, wheels and wheel ar ches
- underbody
R After driving thro ugh sand, mud, water or
gr ave l, ha vethefo llowing components
ch ecked and cleaned:
- brake discs and brakepads
- Tyres and wheels
- axle joints ECO
start/s top function Ope
ration of the ECO start/s top function
Mercedes -AMG vehicles: observeth e no tes in
th e Supplement. You could otherwise failto rec‐
ognise dangers.
The engine is switched off au tomatically in the
fo llowing situations if all vehicle conditions for
an automatic engine stop are me t:
R vehicles with manual transmission: you
brake theve hicle, shift into neutral iwhen
tr ave lling at a low speed and then release the
clutch pedal.
R vehicles with automatic transmission:
yo u brake theve hicle toast andstill in trans‐
mission position hori.
Ve hicles with automatic transmission:
if yo u swit chon the HOLD function in transmis‐
sion position hori, the engine will automati‐
cally stop in thefo llowing situations:
R youstop behind a vehicle that is pulling
aw ay.
R youstop at a stop sign when there is no vehi‐
cle in front of you. R
you turn thesteering wheel hard at a low
speed.
% In transmission position k,the engine is
not switched off automatically even when
th e HOLD function is switched on.
The engine is restar ted automatically if:
R vehicles with automatic transmission: in
transmission position h,youre lease the
brake pedal when the HOLD function is not
active.
R vehicles with automatic transmission:
yo u shift into transmission position hor
k.
R you depress the accelera tor pedal.
R you en gage drive prog ram B orF.
R an auto matic engine start is requ ired bythe
ve hicle.
ECO start/ stop function symbols in the multi‐
function display:
R the symbol è(green) appears when the
ve hicle is at a standstill: the engine was
switched off bythe ECO start/ stop function. 19 6
Driving and pa rking
Page 200 of 689
R
the symbol ç(yellow) appears when the
ve hicle is at a standstill: not all vehicle condi‐
tions for an engine stop ha vebeen met.
R neither the symbol ènorç appears
when theve hicle is at a standstill: an intelli‐
ge nt stop inhibitor was de tected, e.g. a stop
sign.
R the symbol èOFF appears:the ECO
st art/ stop function is deactivated or there is
a malfunction.
% If, in spite of an intelligent stop inhibitor, the
engine should be switched off bythe ECO
st art/ stop function, you ha vethefo llowing
options:
R switch on the HOLD function in transmis‐
sion position hori.
R you en gage transmission position j.
If th e engine was switched off bythe ECO start/
st op function and you lea vetheve hicle, a warn‐
ing tone sounds and the engine is not restar ted.
The display message Vehicle is operational
Switch off ignition before exitingalso appears in
th e multifunction displa y.Ifyo u do not swit choff th
e ignition, the ignition is automatically
switched off af terth re e minutes.
Deactivating or activating the ECO start/
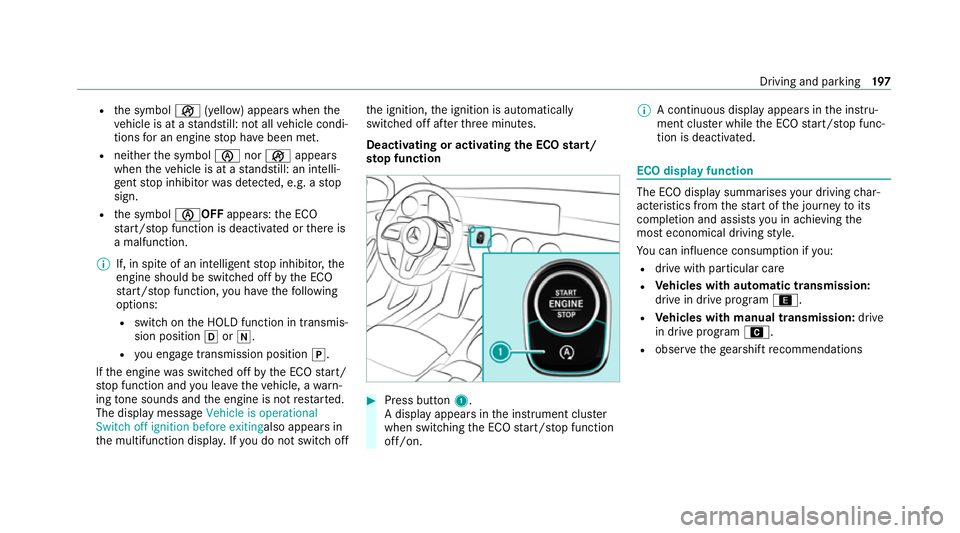
st op function #
Press button 1.
A display appears in the instrument clus ter
when swit ching the ECO start/ stop function
off/on. %
A continuous display appears in the instru‐
ment clus ter while the ECO start/ stop func‐
tion is deactivated. ECO display function
The ECO display summarises
your driving char‐
acteristics from thest art of the journey toits
completion and assists you in achieving the
most economical driving style.
Yo u can influence consum ption if you:
R drive with particular care
R Vehicles with automatic transmission:
drive in drive program ;.
R Vehicles with manual transmission: drive
in drive program A.
R obse rveth ege arshift recommendations Driving and pa
rking 197
Page 201 of 689
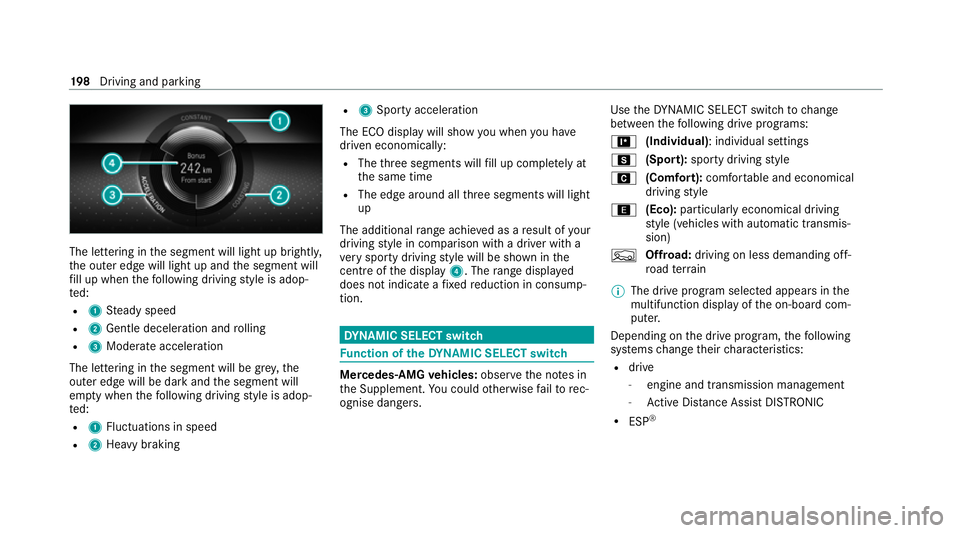
The lettering in
the segment will light up brightl y,
th e outer edge will light up and the segment will
fi ll up when thefo llowing driving style is adop‐
te d:
R 1 Steady speed
R 2 Gentle deceleration and rolling
R 3 Moderate acceleration
The lettering in the segment will be gr ey,the
outer edge will be dark and the segment will
em pty when thefo llowing driving style is adop‐
te d:
R 1 Fluctuations in speed
R 2 Heavy braking R
3 Sporty acceleration
The ECO display will show you when you ha ve
driven economically:
R The thre e segments will fill up comple tely at
th e same time
R The edge around all thre e segments will light
up
The additional range achi eved as a result of your
driving style in comparison with a driver with a
ve ry sporty driving style will be shown in the
centre of the display 4. Therange displ ayed
does not indicate a fixe dre duction in consump‐
tion. DY
NA MIC SELECT switch Fu
nction of theDY NA MIC SELECT switch Mercedes-AMG
vehicles: observeth e no tes in
th e Supplement. You could otherwise failto rec‐
ognise dangers. Use
theDY NA MIC SELECT switch tochange
between thefo llowing drive prog rams:
= (Individual): individual settings
C (Sport): sporty driving style
A (Comfort): comfortable and economical
driving style
; (Eco):particularly economical driving
st yle (vehicles with automatic transmis‐
sion)
F Offroad: driving on less demanding off-
ro ad terrain
% The drive prog ram selected appears in the
multifunction display of the on-board com‐
puter.
Depending on the drive prog ram, thefo llowing
sy stems change their characteristics:
R drive
-
engine and transmission management
- Active Dis tance Assi stDISTRONIC
R ESP ® 19 8
Driving and pa rking