Page 111 of 629
#
Toswitch off / reduce the le vel:press but‐
to n1 repeatedly until the desired heating
le ve l is set.
If all indicator lamps are off, the seat heating
is switched off.
% The seat heating will automatically switch
down from theth re e heating le vels af ter 8,
10 and 20 minutes until the seat heating is
switched off. Setting
the panel heating Multimedia sy
stem:
4 © 5
Settings 5
Vehicle
5 Panel heating
When the seat heater is switched on, the armr‐
ests, the cent repanels of the doors and the
centre console can be hea ted. #
Switch the function forth e desired seats on
or off. Switching
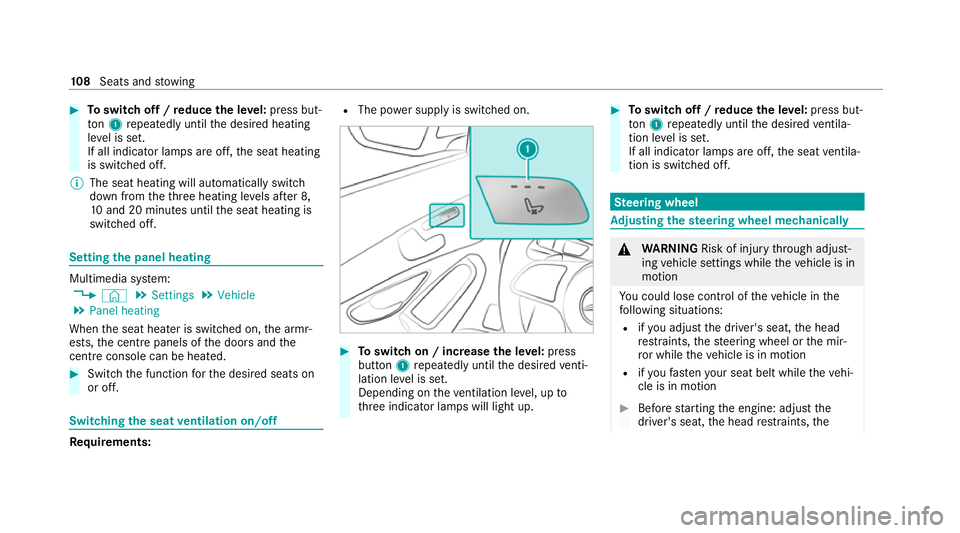
the seat ventilation on/off Re
quirements: R
The po wer supply is switched on. #
Toswitch on / increase the le vel:press
button 1repeatedly until the desired venti‐
lation le vel is set.
Depending on theve ntilation le vel, up to
th re e indicator lamps will light up. #
Toswitch off / reduce the le vel:press but‐
to n1 repeatedly until the desired ventila‐
tion le vel is set.
If all indicator lamps are off, the seat ventila‐
tion is switched off. Ste
ering wheel Ad
justing the steering wheel mechanically &
WARNING Risk of inju rythro ugh adjust‐
ing vehicle settings while theve hicle is in
motion
Yo u could lose cont rol of theve hicle in the
fo llowing situations:
R ifyo u adjust the driver's seat, the head
re stra ints, thesteering wheel or the mir‐
ro r while theve hicle is in motion
R ifyo ufast enyour seat belt while theve hi‐
cle is in motion #
Before starting the engine: adjust the
driver's seat, the head restra ints, the 108
Seats and stowing
Page 113 of 629

Switching
thest eering wheel heater on/off Re
quirements:
R The ignition is switched on. #
Turn the le ver in the direction of ar row1or
2.
If th e indicator lamp 3lights up, thesteer‐
ing wheel heater is switched on. When
you swit ch the ignition off, thesteering
wheel heater will switch off. Easy entry and
exitfeature Using
the easy entry and exitfeature &
WARNING Risk of accident when pulling
aw ay during the adjustment process of
th e easy exitfeature
‑ If you pull away while the easy entry and
ex itfeature is making adjustments, you could
lose cont rol of theve hicle. #
Alw ayswa it until the adjustment proc‐
ess is comple tebefore pulling away. &
WARNING Risk of becoming trapped
while adjusting the easy entry andexit
fe ature
When the easy entry andexitfeature adjusts
th esteering wheel and the driver's seat, you
and other vehicle occupants – particular ly
ch ildren – could become trapped. #
During the adjustment process forthe
easy entry andexitfeature, make sure
th at no one has any body parts in the
sweep of thesteering wheel or the driv‐
er's seat.
If th ere is a risk of becoming trapped bythe
st eering wheel: #
Movethe adjustment le ver of thesteer‐
ing wheel.
The adjustment process is stopped.
If th ere is a risk of becoming trapped bythe
driver's seat: #
Press the seat adjustment switch.
The adjustment process is stopped. #
Never lea vechildren unat tended in the
ve hicle. #
When leaving theve hicle, alw aysta ke
th eke y with you and lock theve hicle.
This also applies tothe digital vehicle
ke y if the "Digital Vehicle Key" function
is activated via Mercedes me connect. 11 0
Seats and stowing
Page 125 of 629
1
Tie-down eyes Overview of bag hooks
&
WARNING Risk of inju rywhen using bag
hooks with heavy objects
The bag hooks cannot restra in heavy objects
or items of luggage. Objects or items of luggage could be
thrown
around and thereby hit vehicle occupants
when braking or abruptly changing direc‐
tions. #
Onlyhang light objects on the bag
hooks. #
Never hang hard, sharp-edged or fragile
objects on the bag hooks. Obser
vethe no tes on loading theve hicle
(/ page 113).
The bag hooks can bear a maximum load of
3 kg . Do not use them tosecure a load. 1
Bag hook Overview of coat hooks on
the tailgate Obser
vethe no tes on loading theve hicle
(/ page 113). 12 2
Seats and stowing
Page 126 of 629
1
Coat hook
Coat hooks are not suitable for hanging heavy
objects as this can cause theta ilgate tolower
automaticall y.Use the coat hooks only for light
objects such as jac kets. EA
SY-PAC K load-secu ring kit Note
s onthe snap-in module for the load
co mp artment (telescopic rods)
The EAS Y-PA CK load-securing kit allo wsyouto
use your load co mpartment for a variet y of pur‐
poses. The co mponents are located in thestow‐
age space under the load compartment floor. 1
Telescopic rod with mounting elements and
holders Installing a
telescopic rod &
WARNING Risk of inju rydue toan open
load compartment floor
If yo u drive when the load compartment floor
is open, objects could be thro wn around and
th ereby strike vehicle occupants. There is a
ri sk of injur y,particular lyin theeve nt of sud‐
den braking or a sudden change in direction. #
Alw ays close the load compartment
fl oor before a journe y. Seats and
stowing 12 3
Page 131 of 629
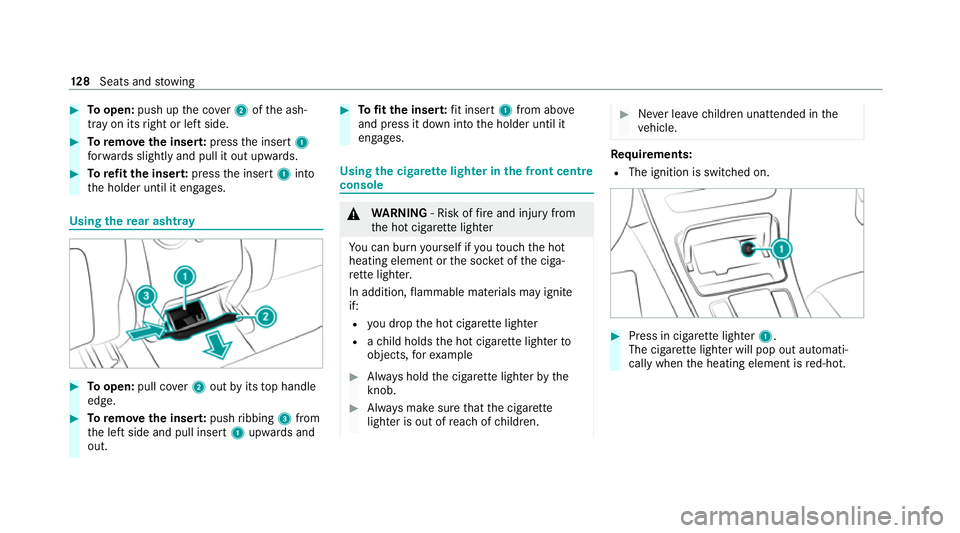
#
Toopen: push up the co ver2 ofthe ash‐
tray on its right or left side. #
Toremo vethe inser t:press the insert 1
fo rw ards slightly and pull it out upwards. #
Torefit the inse rt:press the insert 1into
th e holder until it engages. Using
there ar ashtr ay #
Toopen: pull co ver2 out byits top handle
edge. #
Toremo vethe inser t:push ribbing 3from
th e left side and pull insert 1upwards and
out. #
Tofit the inse rt:fit insert 1from ab ove
and press it down into the holder until it
engages. Using
the cigar ette lighter in the front centre
console &
WARNING ‑ Risk of fire and injury from
th e hot cigar ette lighter
Yo u can burn yourself if youto uch the hot
heating element or the soc ket of the ciga‐
re tte lighter.
In addition, flammable materials may ignite
if:
R you drop the hot cigar ette lighter
R ach ild holds the hot cigar ette lighter to
objects, forex ample #
Alw ays hold the cigar ette lighter bythe
knob. #
Alw ays make sure that the cigar ette
lighter is out of reach of children. #
Never lea vechildren unat tended in the
ve hicle. Re
quirements:
R The ignition is switched on. #
Press in cigar ette lighter 1.
The cigar ette lighter will pop out automati‐
cally when the heating element is red-hot. 12 8
Seats and stowing
Page 138 of 629
R
Obser vethe no tes on sur round lighting
(/ page 140).
Au tomatic driving lights function
The standing lights, low beam and daytime run‐
ning lights are switched on au tomatical ly
depending on the ignition status and the light
conditions. &
WARNING Risk of accident when the
dipped beam is switched off in poor visi‐
bility
When the light switch is set toà ,the
dipped beam may not be switched on auto‐
matically if there is fog, snow or other causes
of poor visibility such as spr ay.#
In such cases, turn the light switch to
L . The automatic driving lights are only an aid.
Yo u
are responsible forve hicle lighting.
Switching there ar fog lights on or off
Re quirements: R
The light switch is in theL orà posi‐
tion. #
Press the R button.
Please obser vethe count ry-specific la wsonthe
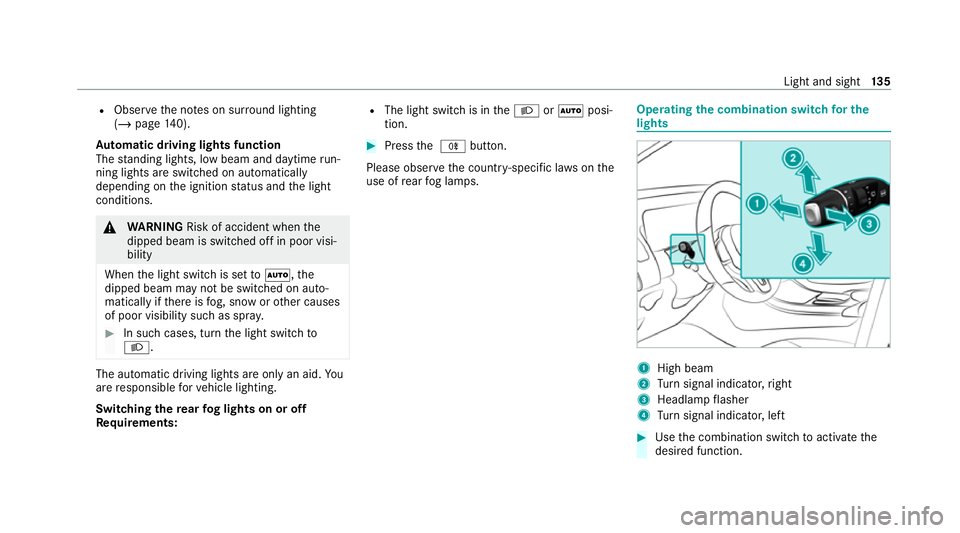
use of rear fog lamps. Operating
the combination switch for the
lights 1
High beam
2 Turn signal indicator, right
3 Headlamp flasher
4 Turn signal indicator, left #
Use the combination switch toactivate the
desired function. Light and sight
13 5
Page 139 of 629
High beam
#
Toswitch on: turnthe light switch tothe
L orà position. #
Press the combination switch be yond the
point of resis tance in the direction of ar row
1 .
When the main beam is activated, the indica‐
to r lamp for dipped beam Lis deactiva‐
te d and replaced bythe indicator lamp for
th e main beam K.#
Toswitch off: movethe combination switch
back toits starting position.
Headla mpflasher #
Pull the combination switch in the direction
of ar row3.
Tu rn signal indicators #
Toindicate briefl y:press the combination
switch briefly tothe point of resis tance in the
direction of ar row2or4.
The cor responding turn signal indicator will
fl ash thre e times. #
Toindicate permanentl y:press the combi‐
nation switch be yond the point of resis tance
in the direction of ar row2or4.
Ve hicles with Active Lane Change Assi st:
R Indicator operation activated bythe driver
can extend forth e duration of the lane
ch ange.
R Ifth e driver indicated directly beforehand
but a lane change was not immediately
possible, the turn signal indicator may
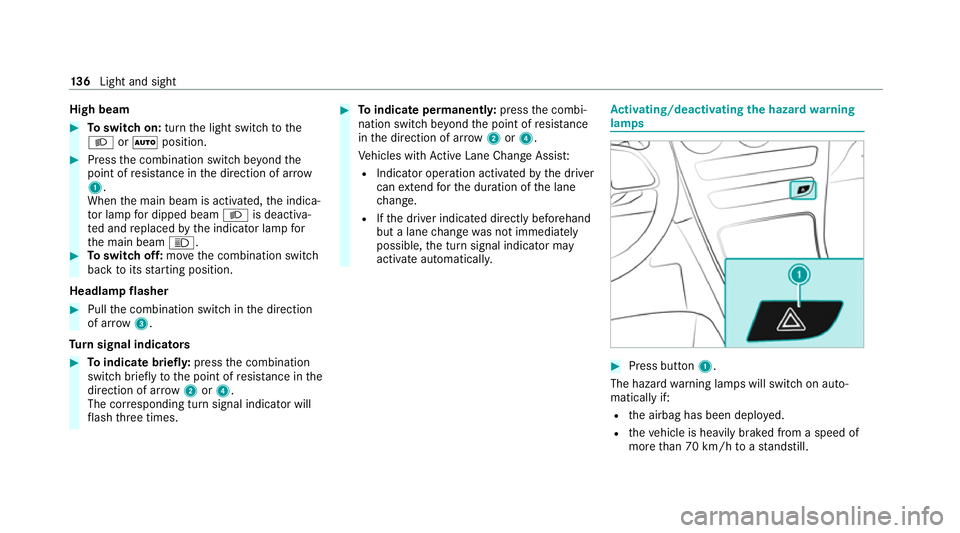
activate automaticall y. Ac
tivating/deactivating the hazard warning
lamps #
Press button 1.
The hazard warning lamps will switch on auto‐
matically if:
R the airbag has been deplo yed.
R theve hicle is heavily braked from a speed of
more than 70 km/h toast andstill. 13 6
Light and sight
Page 140 of 629
When
you pull away again, the hazard warning
lamps will switch off automatically at appr ox‐
imately 10km/h. You can also swit choff the
hazard warning lamps using button 1.Ad
aptive functions, MULTIBEAM LED Fu
nctions of the Intelligent Light Sy stem
The MULTIBEAM LED headlamps adapt tothe
driving and weather situation and pr ovide exten‐
ded functions for impr oved illumination of the
ro ad.
The sy stem comprises thefo llowing functions:
R Active headla mps (/ page137)
R Cor nering light (/ page 137)
R Motorw ay mode (/ page138)
R City lighting (/ page138)
Sy stem limits
R The sy stem is active only when it is dar k.Ac
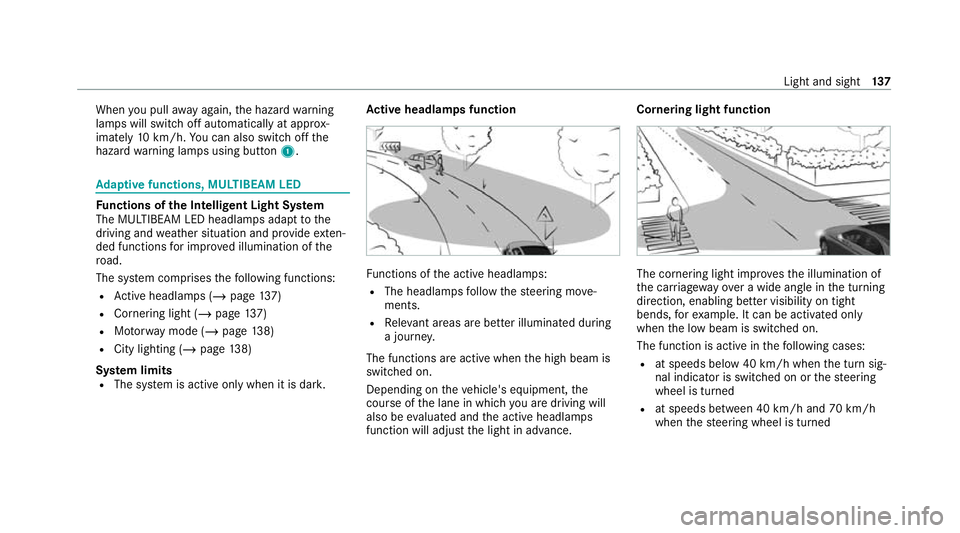
tive headlamps function Fu
nctions of the active headlamps:
R The headlamps follow thesteering mo ve‐
ments.
R Releva nt areas are better illumina ted during
a journe y.
The functions are active when the high beam is
switched on.
Depending on theve hicle's equipment, the
cou rse of the lane in which you are driving will
also be evaluated and the active headlamps
function will adjust the light in advance. Cornering light function
The cornering light impr
ovesth e illumination of
th e car riag ewa yove r a wide angle in the turning
direction, enabling better visibility on tight
bends, forex ample. It can be activated on ly
when the low beam is switched on.
The function is active in thefo llowing cases:
R at speeds below 40 km/h when the turn sig‐
nal indicator is switched on or thesteering
wheel is turned
R at speeds between 40 km/h and 70 km/h
when thesteering wheel is turned Light and sight
137