2019 MERCEDES-BENZ AMG GT ROADSTER instrument cluster
[x] Cancel search: instrument clusterPage 130 of 298
position
005Bor005E, otherwise park position 005D
is engaged automatically.
The transmission could be damaged.
! Always secure the vehicle correctly against
rolling away. Otherwise, the vehicle or its driv-
etrain could be damaged.
To ensure that the vehicle is secured against
rolling away unintentionally: R the electric parking brake must be applied.
R the transmission must be in position 005D.
R the SmartKey must be removed from the igni-
tion lock or the Start/Stop button must be
pressed.
R the front wheels must be turned towards the
curb on steep uphill or downhill gradients.
R the empty vehicle must be secured at the
front axle with a wheel chock or similar, for
example, on uphill or downhill gradients.
R a laden vehicle must also be secured at the
rear axle with a wheel chock or similar, for
example, on uphill or downhill gradients. Switching off the engine
Important safety notes G
WARNING
The automatic transmission switches to neu-
tral position Nwhen you switch off the engine.
The vehicle may roll away. There is a risk of an
accident.
After switching off the engine, always switch
to parking position P. Prevent the parked vehi-
cle from rolling away by applying the parking
brake.
AMG SPEEDSHIFT DCT 7-speed sport
transmission !
Do not remove the SmartKey while the vehi-
cle is in motion. Otherwise, at low speeds,
parking lock 005Dwill be activated automati-
cally.
Do not open the driver's door while the vehi-
cle is in motion. At low speeds, transmission
position 005Dis engaged automatically.
This could cause damage to the transmission
and the parking lock. X
Apply the electric parking brake.
X Shift the transmission to 005Dusing the button
on the center console.
Using the Start/Stop button
X Press the Start/Stop button (Y page 110)
The engine stops and all the indicator lamps in
the instrument cluster go out.
If the driver's door is closed, this is the same
as key position 0047. If the driver's door is open,
this is the same as key position 0092, i.e. the
SmartKey having been removed.
If you switch the engine off with the trans-
mission in position 005Eor005B, the transmis-
sion automatically shifts to 005C.
If you move the E-SELECT lever to 005Cbefore
switching off the engine, the transmission
remains in 005Cfor 30 minutes.
If you open the driver's or front-passenger
door during this period, the transmission
automatically shifts to 005Dand the electric
parking brake is automatically applied.
The engine can be switched off in an emer-
gency while the vehicle is in motion by press- ing and holding the Start/Stop button for
three seconds. This function operates inde-
pendently of the ECO start/stop automatic
engine switch-off function.
Using the SmartKey
X Turn the SmartKey to key position 0092in the
ignition lock and remove it.
The immobilizer is activated.
If you move the E-SELECT lever to 005Cbefore
switching off the engine, the transmission
remains in 005Cfor approximately 30 minutes.
If you open the driver's or front-passenger
door during this time, the transmission shifts automatically to 005D.
The transmission remains in 005Cif:
R the SmartKey is in the ignition lock and
R you use the E ‑SELECT lever to shift the
transmission to 005Cbefore switching the
engine off
This still applies if you open the driver's or
front-passenger door.
Further information on transmission position
005C when operating with a SmartKey is avail-
able under "Automatic car wash"
(Y page 242). 128
ParkingDriving and parking
Page 131 of 298
Electric parking brake
General notes G
WARNING
If you leave children unsupervised in the vehi- cle, they could set it in motion by, for example:
R release the parking brake.
R shift the automatic transmission out of the
parking position P.
R start the engine.
In addition, they may operate vehicle equip-
ment and become trapped. There is a risk of
an accident and injury.
When leaving the vehicle, always take the
SmartKey with you and lock the vehicle. Never
leave children unsupervised in the vehicle.
The function of the electric parking brake is
dependent on the on-board voltage. If the on-
board voltage is low or there is a malfunction in
the system, it may not be possible to apply the
released parking brake.
X If this is the case, only park the vehicle on
level ground and secure it to prevent it rolling
away.
X Shift the automatic transmission to position
005D.
It may not be possible to release an applied
parking brake if the on-board voltage is low or
there is a malfunction in the system. Contact a
qualified specialist workshop.
The electric parking brake performs a function
test at regular intervals while the engine is
switched off. The sounds that can be heard while
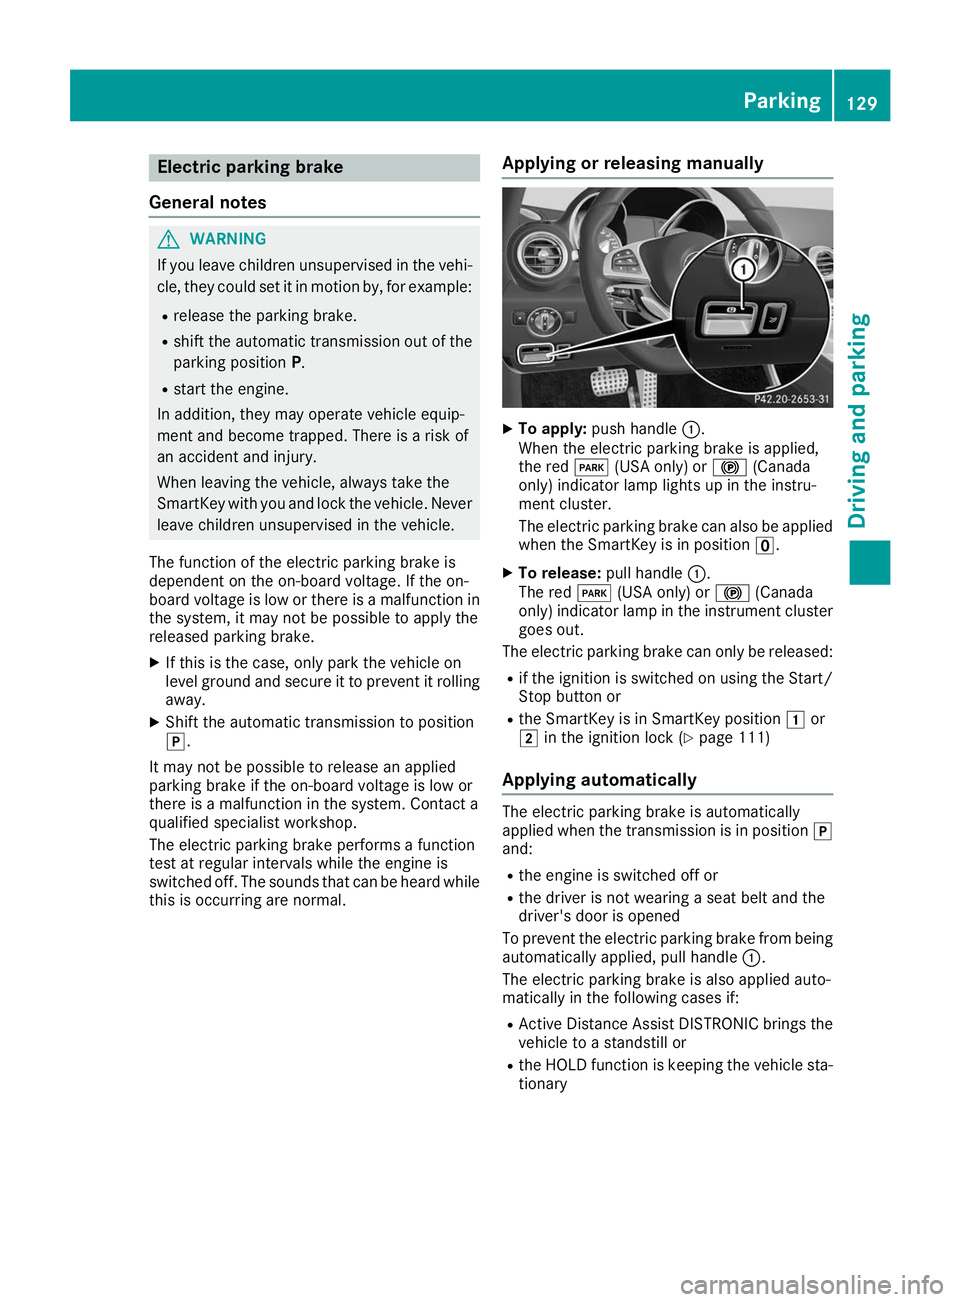
this is occurring are normal. Applying or releasing manually X
To apply: push handle 0043.
When the electric parking brake is applied,
the red 0049(USA only) or 0024(Canada
only) indicator lamp lights up in the instru-
ment cluster.
The electric parking brake can also be applied when the SmartKey is in position 0092.
X To release: pull handle0043.
The red 0049(USA only) or 0024(Canada
only) indicator lamp in the instrument cluster goes out.
The electric parking brake can only be released:
R if the ignition is switched on using the Start/
Stop button or
R the SmartKey is in SmartKey position 0047or
0048 in the ignition lock (Y page 111)
Applying automatically The electric parking brake is automatically
applied when the transmission is in position 005D
and:
R the engine is switched off or
R the driver is not wearing a seat belt and the
driver's door is opened
To prevent the electric parking brake from being
automatically applied, pull handle 0043.
The electric parking brake is also applied auto-
matically in the following cases if:
R Active Distance Assist DISTRONIC brings the
vehicle to a standstill or
R the HOLD function is keeping the vehicle sta-
tionary Parking
129Driving and parking Z
Page 132 of 298
In addition, at least one of the following condi-
tions must be fulfilled:
R there is a system malfunction
R the power supply is insufficient
R the vehicle is stationary for a lengthy period
The red 0049(USA only) or 0024(Canada only)
indicator lamp in the instrument cluster lights
up.
The electric parking brake is not automatically
applied if the engine is switched off by the ECO
start/stop function.
Releasing automatically The electric parking brake is released when the
following conditions are fulfilled:
R The engine is running
R The seat belt tongue is engaged in the belt
buckle
R the transmission is in position 005Bor005E and
you depress the accelerator pedal or shift
from position 005Dto005B or005E
R if the transmission is in position 005E, the trunk
lid must be closed
If the seat belt tongue is not engaged in the seat belt buckle, the following conditions must be
fulfilled:
R the driver's door and front-passenger door
are closed
R you move the transmission out of position 005D
or you have previously driven at a speed
above 2 mph (3 km/h)
R if the transmission is in position 005E, the trunk
lid must be closed
When the electric parking brake is released, the red 0049 (USA only) or 0024(Canada only) indi-
cator lamp goes out in the instrument cluster.
Emergency braking The vehicle can also be braked during an emer-
gency by using the electric parking brake.
X While driving, push handle 0043of the electric
parking brake (Y page 129).
The vehicle is braked as long as you keep
handle 0043of the electric parking brake
pressed. The longer electric parking brake
handle 0043is depressed, the greater the brak-
ing force. During braking:
R a warning tone sounds
R the Please Release Parking Brake
Please Release Parking Brake mes-
sage appears
R the red 0049(USA only) or 0024(Canada
only) indicator lamp in the instrument cluster
flashes
When the vehicle has been braked to a stand-
still, the electric parking brake is applied. Parking the vehicle for a long period
General notes If you leave the vehicle parked for longer than
four weeks, the battery may be damaged by
exhaustive discharging.
If you leave the vehicle parked for longer than six weeks, the vehicle may suffer damage as a
result of lack of use.
X Visit a qualified specialist workshop and seek
advice.
Trickle charging the on-board electrical
system battery The battery may drain if the vehicle is left sta-
tionary for long periods. In this case, Mercedes-
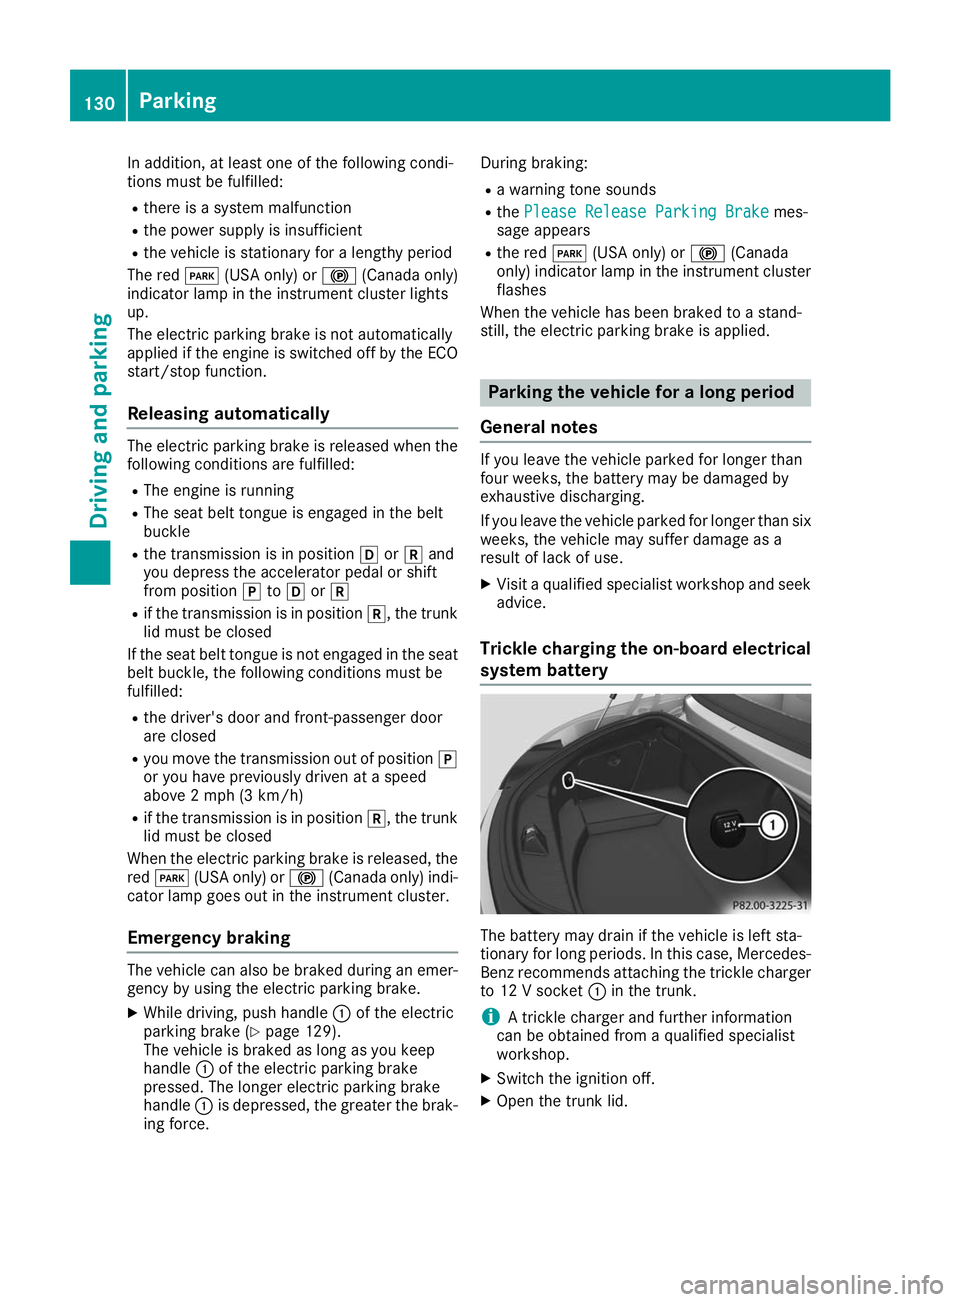
Benz recommends attaching the trickle charger to 12 V socket 0043in the trunk.
i A trickle charger and further information
can be obtained from a qualified specialist
workshop.
X Switch the ignition off.
X Open the trunk lid. 130
ParkingDriving and parking
Page 135 of 298
Observe the following rules when driving on salt-
treated roads:
R In order to prevent any salt build-up, apply the
brakes occasionally while paying attention to
the traffic conditions.
R Carefully depress the brake pedal and the
beginning and end of a journey.
R Maintain a greater distance to the vehicle
ahead.
Servicing the brakes !
The brake fluid level may be too low, if:
R if the red brake warning lamp lights up in
the instrument cluster and
R you hear a warning tone while the engine is
running
Observe additional warning messages in the
multifunction display.
The brake fluid level may be too low due to
brake pad wear or leaking brake lines.
Have the brake system checked immediately. Consult a qualified specialist workshop to
arrange this.
All checks and maintenance work on the brake
system must be carried out at a qualified spe-
cialist workshop.
Have brake pads installed and brake fluid
replaced at a qualified specialist workshop.
If the brake system has only been subject to
moderate loads, you should test the functional-
ity of your brakes at regular intervals.
Information on BAS (Brake Assist) (Y page 59).
For safety reasons, Mercedes-Benz recom-
mends only installing the following brake disks
and brake pads/linings:
R brake disks that have been approved by
Mercedes-Benz
R brake pads/linings that have been approved
by Mercedes-Benz or that are of an equivalent
standard of quality
Other brake disks or brake pads/linings can
compromise the safety of your vehicle.
Always replace all brake disks and brake pads/
linings on an axle at the same time. Always
install new brake pads/linings when replacing
brake disks.
The vehicle is equipped with lightweight brake
disks to which the wheel assembly with rim and threaded connection is matched. The use of brake disks other than those
approved by Mercedes-Benz can change the
track width and is subject to approval, if appli-
cable.
Shock-type loads when handling the brake
discs, such as when changing wheels, can lead
to a reduction in comfort when driving with light-
weight brake discs. Avoid shock-type loads on
the lightweight brake disks, particularly on the
brake plate.
Mercedes-Benz recommends that you only use
brake fluid that has been specially approved for your vehicle by Mercedes-Benz, or which corre-
sponds to an equivalent quality standard. Brake fluid which has not been approved for
Mercedes-Benz vehicles or which is not of an
equivalent quality could affect your vehicle's
operating safety.
AMG high-performance and ceramic
brakes The AMG brake systems are designed for heavy
loads. This may lead to noise when braking. This
will depend on:
R Speed
R Braking force
R Environmental conditions, such as tempera-
ture and humidity
The wear of individual components of the brake system, such as the brake pads/linings or brake
discs, depends on the individual driving style
and operating conditions.
For this reason, it is impossible to state a mile-
age that will be valid under all circumstances. An aggressive driving style will lead to high wear.
You can obtain more information on this from a qualified specialist workshop.
New and replaced brake pads and discs only
reach their optimum braking effect after several
hundred kilometers of driving. Compensate for
this by applying greater force to the brake pedal.
Keep this in mind, and adapt your driving and
braking accordingly during this break-in period.
Excessive heavy braking results in correspond-
ingly high brake wear. Observe the brake wear
warning lamp in the instrument cluster and note
any brake status messages in the multifunction
display. Especially for high performance driving,
it is important to maintain and have the brake
system checked regularly. Driving tips
133Driving and parking Z
Page 138 of 298
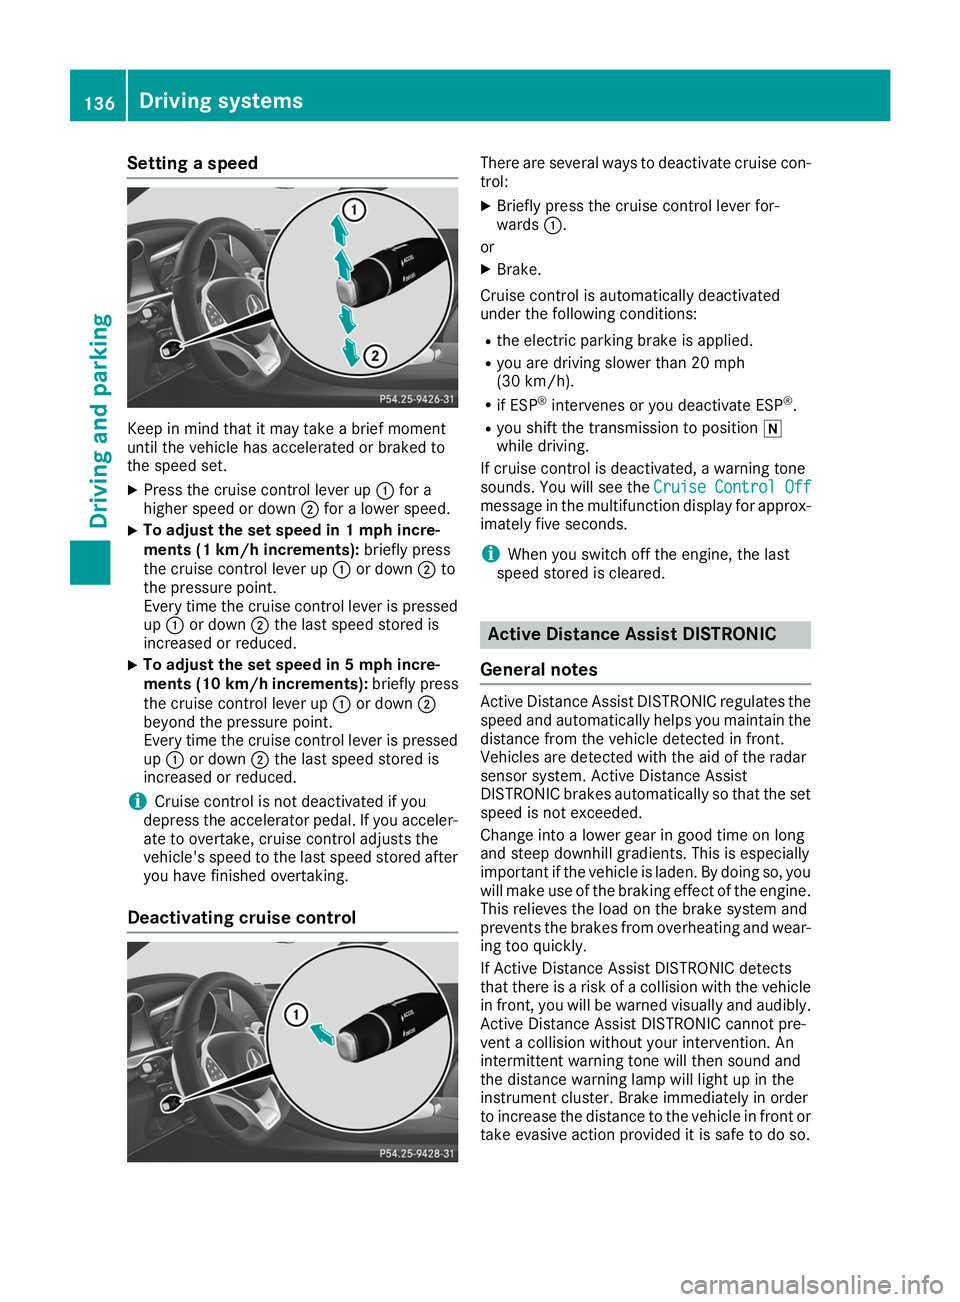
Setting a speed
Keep in mind that it may take a brief moment
until the vehicle has accelerated or braked to
the speed set.
X Press the cruise control lever up 0043for a
higher speed or down 0044for a lower speed.
X To adjust the set speed in 1 mph incre-
ments (1 km/h increments):
briefly press
the cruise control lever up 0043or down 0044to
the pressure point.
Every time the cruise control lever is pressed
up 0043 or down 0044the last speed stored is
increased or reduced.
X To adjust the set speed in 5 mph incre-
ments
(10 km/h increments): briefly press
the cruise control lever up 0043or down 0044
beyond the pressure point.
Every time the cruise control lever is pressed
up 0043 or down 0044the last speed stored is
increased or reduced.
i Cruise control is not deactivated if you
depress the accelerator pedal. If you acceler-
ate to overtake, cruise control adjusts the
vehicle's speed to the last speed stored after
you have finished overtaking.
Deactivating cruise control There are several ways to deactivate cruise con-
trol:
X Briefly press the cruise control lever for-
wards 0043.
or
X Brake.
Cruise control is automatically deactivated
under the following conditions:
R the electric parking brake is applied.
R you are driving slower than 20 mph
(30 km/h).
R if ESP ®
intervenes or you deactivate ESP ®
.
R you shift the transmission to position 005C
while driving.
If cruise control is deactivated, a warning tone
sounds. You will see the Cruise Control Off Cruise Control Off
message in the multifunction display for approx-
imately five seconds.
i When you switch off the engine, the last
speed stored is cleared. Active Distance Assist DISTRONIC
General notes Active Distance Assist DISTRONIC regulates the
speed and automatically helps you maintain the
distance from the vehicle detected in front.
Vehicles are detected with the aid of the radar
sensor system. Active Distance Assist
DISTRONIC brakes automatically so that the set
speed is not exceeded.
Change into a lower gear in good time on long
and steep downhill gradients. This is especially
important if the vehicle is laden. By doing so, you will make use of the braking effect of the engine.
This relieves the load on the brake system and
prevents the brakes from overheating and wear- ing too quickly.
If Active Distance Assist DISTRONIC detects
that there is a risk of a collision with the vehicle
in front, you will be warned visually and audibly.
Active Distance Assist DISTRONIC cannot pre-
vent a collision without your intervention. An
intermittent warning tone will then sound and
the distance warning lamp will light up in the
instrument cluster. Brake immediately in order
to increase the distance to the vehicle in front or take evasive action provided it is safe to do so. 136
Driving systemsDriving and parking
Page 144 of 298
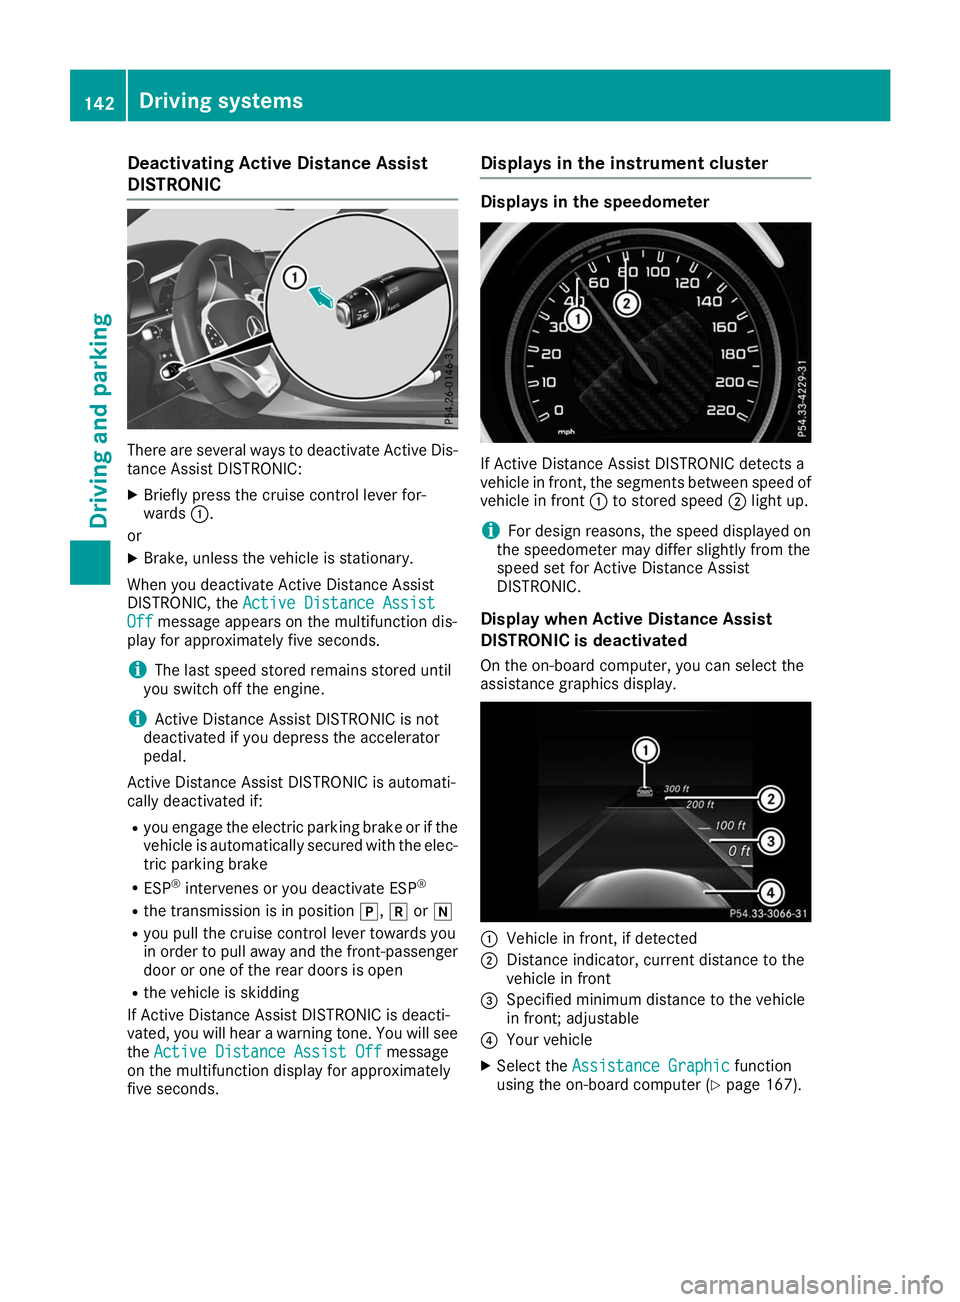
Deactivating Active Distance Assist
DISTRONIC There are several ways to deactivate Active Dis-
tance Assist DISTRONIC:
X Briefly press the cruise control lever for-
wards 0043.
or X Brake, unless the vehicle is stationary.
When you deactivate Active Distance Assist
DISTRONIC, the Active Distance Assist Active Distance Assist
Off
Off message appears on the multifunction dis-
play for approximately five seconds.
i The last speed stored remains stored until
you switch off the engine.
i Active Distance Assist DISTRONIC is not
deactivated if you depress the accelerator
pedal.
Active Distance Assist DISTRONIC is automati-
cally deactivated if: R you engage the electric parking brake or if the
vehicle is automatically secured with the elec-
tric parking brake
R ESP ®
intervenes or you deactivate ESP ®
R the transmission is in position 005D,005Eor005C
R you pull the cruise control lever towards you
in order to pull away and the front-passenger door or one of the rear doors is open
R the vehicle is skidding
If Active Distance Assist DISTRONIC is deacti-
vated, you will hear a warning tone. You will see
the Active Distance Assist Off
Active Distance Assist Off message
on the multifunction display for approximately
five seconds. Displays in the instrument cluster Displays in the speedometer
If Active Distance Assist DISTRONIC detects a
vehicle in front, the segments between speed of
vehicle in front 0043to stored speed 0044light up.
i For design reasons, the speed displayed on
the speedometer may differ slightly from the
speed set for Active Distance Assist
DISTRONIC.
Display when Active Distance Assist
DISTRONIC is deactivated
On the on-board computer, you can select the
assistance graphics display. 0043
Vehicle in front, if detected
0044 Distance indicator, current distance to the
vehicle in front
0087 Specified minimum distance to the vehicle
in front; adjustable
0085 Your vehicle
X Select the Assistance Graphic Assistance Graphic function
using the on-board computer (Y page 167).142
Driving syste
msDriving and parking
Page 161 of 298
Important safety notes
G
WARNING
If you operate information systems and com-
munication equipment integrated in the vehi- cle when driving, you may be distracted from
the traffic situation. You could also lose con-
trol of the vehicle. There is a risk of an acci-
dent.
Only operate this equipment when the traffic
situation permits. If you are not sure that this
is possible, park the vehicle paying attention
to traffic conditions and operate the equip-
ment when the vehicle is stationary.
You must observe the legal requirements for the country in which you are currently driving whenoperating the on-board computer. G
WARNING
If the instrument cluster has failed or mal-
functioned, you may not recognize function
restrictions in systems relevant to safety. The operating safety of your vehicle may be
impaired. There is a risk of an accident.
Drive on carefully. Have the vehicle checked
at a qualified specialist workshop immedi-
ately.
The on-board computer only shows messages or
warnings from certain systems in the multifunc- tion display. You should therefore make sure
your vehicle is operating safely at all times.
If the operating safety of your vehicle is
impaired, pull over as soon as it is safe to do so. Contact a qualified specialist workshop.
For an overview, see the instrument panel illus-
tration (Y page 34). Displays and operation
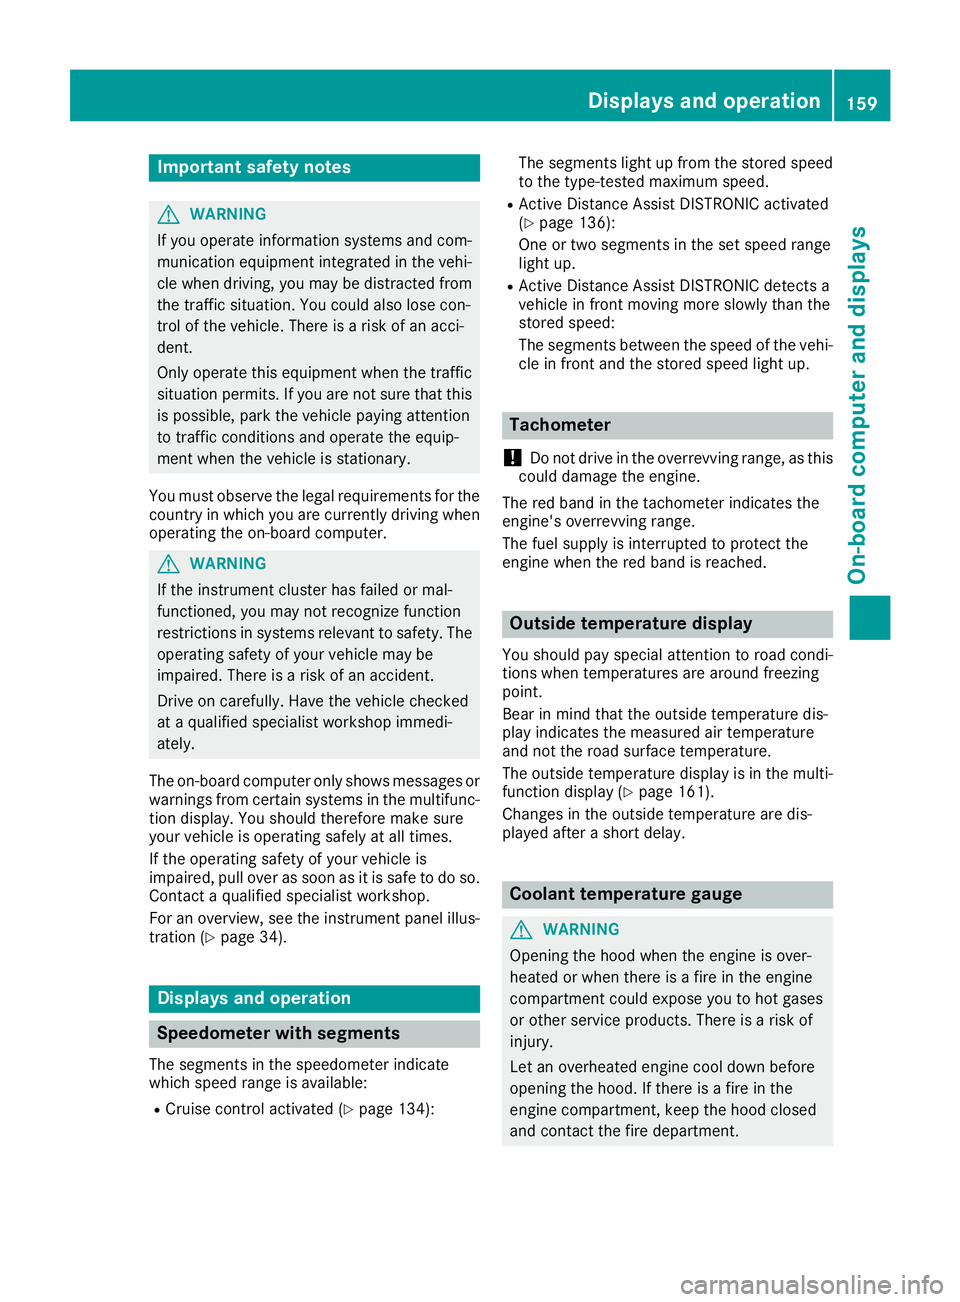
Speedometer with segments
The segments in the speedometer indicate
which speed range is available:
R Cruise control activated (Y page 134):The segments light up from the stored speed
to the type-tested maximum speed.
R Active Distance Assist DISTRONIC activated
(Y page 136):
One or two segments in the set speed range
light up.
R Active Distance Assist DISTRONIC detects a
vehicle in front moving more slowly than the
stored speed:
The segments between the speed of the vehi-
cle in front and the stored speed light up. Tachometer
! Do not drive in the overrevving range, as this
could damage the engine.
The red band in the tachometer indicates the
engine's overrevving range.
The fuel supply is interrupted to protect the
engine when the red band is reached. Outside temperature display
You should pay special attention to road condi-
tions when temperatures are around freezing
point.
Bear in mind that the outside temperature dis-
play indicates the measured air temperature
and not the road surface temperature.
The outside temperature display is in the multi-
function display (Y page 161).
Changes in the outside temperature are dis-
played after a short delay. Coolant temperature gauge
G
WARNING
Opening the hood when the engine is over-
heated or when there is a fire in the engine
compartment could expose you to hot gases
or other service products. There is a risk of
injury.
Let an overheated engine cool down before
opening the hood. If there is a fire in the
engine compartment, keep the hood closed
and contact the fire department. Displays and operation
159On-board computer and displays Z
Page 170 of 298
R
Active Distance Assist DISTRONIC
(Y page 136)
R Distance warning function of Active Brake
Assist (Y page 59)
R Blind Spot Assist (Y page 155)
R ATTENTION ASSIST (Y page 154)
R Lane Keeping Assist (Y page 157)
X Press 0064to display the ATTENTION ASSIST
assessment. Service menu
Depending on the equipment installed in the
vehicle, you have the following options in the
Service
Service menu:
R calling up display messages in message mem-
ory (Y page 174)
R checking the tire pressure electronically
(Y page 270).
R calling up the service due date (Y page 241).
R checking the engine oil level using the on-
board computer (Y page 237).Settings menu
Introduction Depending on the equipment installed in the
vehicle, you have the following options in the
Settings Settings menu:
R changing assistance settings (Y page 168).
R changing the light settings (Y page 169).
R changing the instrument cluster settings
(Y page 169).
R restoring the factory settings (Y page 170).
Assistance submenu Activating/deactivating Active Brake
Assist
X Press 00E2on the steering wheel to open the
menu list.
X Press 0064or0063 on the steering wheel to
select the Settings
Settings menu.
X Confirm by pressing 0076on the steering
wheel.
X Press 0064or0063 to select the DriveAs‐ DriveAs‐
sist
sist submenu. X
Press 0076to confirm.
X Press 0063or0064 to select Brake BrakeAssist Assist.
X Press 0076to confirm.
The current selection appears.
X To activate/deactivate: press the0076but-
ton again.
When Active Brake Assist is deactivated, the
00D4 symbol appears in the Assistance Assistance
Graphic
Graphic menu of the multifunction display.
Further information on Active Brake Assist
(Y page 59).
Activating/deactivating Blind Spot Assist
X Press 00E2on the steering wheel to open the
menu list.
X Press 0064or0063 on the steering wheel to
select the Settings
Settings menu.
X Confirm by pressing 0076on the steering
wheel.
X Press 0064or0063 to select the DriveAs‐
DriveAs‐
sist
sist submenu.
X Press 0076to confirm.
X Press 0064or0063 to select Blind Spot
Blind Spot
Assist
Assist .
X Press 0076to confirm.
The current selection appears.
X To activate/deactivate: press the0076but-
ton again.
When Blind Spot Assist is activated, gray
radar waves propagating backwards appear
next to the vehicle in the Assistance
Assistance
Graphic Graphic menu in the multifunction display.
For further information about Blind Spot Assist,
see (Y page 155).
Setting ATTENTION ASSIST X Press 00E2on the steering wheel to open the
menu list.
X Press 0064or0063 on the steering wheel to
select the Settings
Settings menu.
X Confirm by pressing 0076on the steering
wheel.
X Press 0064or0063 to select the DriveAs‐
DriveAs‐
sist
sist submenu.
X Press 0076to confirm.
X Select Attention Assist
Attention Assist with0064 or
0063.
X Press 0076to confirm. 168
Menus and submenusOn-board computer and displays