2019 MASERATI QUATTROPORTE engine
[x] Cancel search: enginePage 96 of 396

• Check the tires (see “Tire Inflation
Pressure” chapter in section
“Features and Specifications”) for
proper cold inflation pressure.
Lights and Indicator Lights
• Have someone observe the operation
of exterior lights while you operate
the controls (see “Lights” chapter in
section “Understanding the
Vehicle”).
• Check turn signal and high beam
indicator lights on the instrument
cluster (see “Instrument Cluster”
chapter in section “Dashboard
Instruments and Controls”).
Door Latches
• Check for positive closing, latching,
and locking of doors and trunk lid
(see “Unlock the Vehicle with Key
fob” chapter in this section).
Fluid Leaks
• Check area under vehicle after
overnight parking for recent fluid
leaks (oil, fuel, etc.).
• If gasoline fumes are detected or
fluid leaks are suspected, contact the
Authorized Maserati Dealer . WARNING!
California Proposition 65
Operating, servicing and maintaining
a passenger vehicle or off-road vehicle
can expose you to chemicals including
such as, engine exhaust, carbon
monoxide, phthalates and lead, that
which are known to the State of
California to cause cancer and birth
defects or other reproductive harm. To
minimize exposure, avoid breathing
exhaust, do not idle the engine except
as necessary, service your vehicle in a
well-ventilated area and wear gloves
or wash your hands frequently when
servicing your vehicle. For more
information go to:
www.P65Warnings.ca.gov/passenger-
vehicleBefore Starting
2
92
Page 99 of 396

1 Adjustable side air outlets.
2 Engine START/STOP button.
3 Light switch.
4 Light dimmer controls.
5 Steering wheel controls.
6 Instrument cluster.
7* Right shift paddle +.
8* Left shift paddle –.
9 Hood release.
10 Adjustable central air outlets.
11 Analog clock.
12 MTC+ display.
13 Multifuction lever (windshield
wipers, headlight selection and
turn signals).
14 Climate controls.
15 Dashboard glove box handle.
16 Dashboard glove box.
17 Cover for compartment with
AUX, USB, SD memory card
port and slide phone drawer.
18 Storage compartment handle.
19 Storage compartment.
20 Vehicle security light and solar
sensor.
21 Internal rear view mirror. 22 Auto-dimming on/off button.
23 Front dome console.
(*) If equipped.
Central Console Components 1 Automatic transmission shift
lever.
2 Hazard lights switch.
3 Drive mode switches.
4 Electric Parking Brake lever.
5 Glove compartment.
6 Unlock button for central
console with cupholder and
power outlet.
7 Rotary selectors and buttons
foe the multimedia navigation.
8 Cover for cupholder and power
socket compartment.
9 Central console covers with
armrest function.
10 Air outlets (adjustable).
11 Rear power sunshade and rear
seats comfort controls panel.
12 Storage compartment.
13 Rear climate controls panel for
four-zone air conditioner
(optional).A/C Dual – zone
A/C Four – zone Understanding the Vehicle
3
95
Page 104 of 396

Front Seats Heat Function
NOTE:
The engine must be running for the
heated seats to operate.
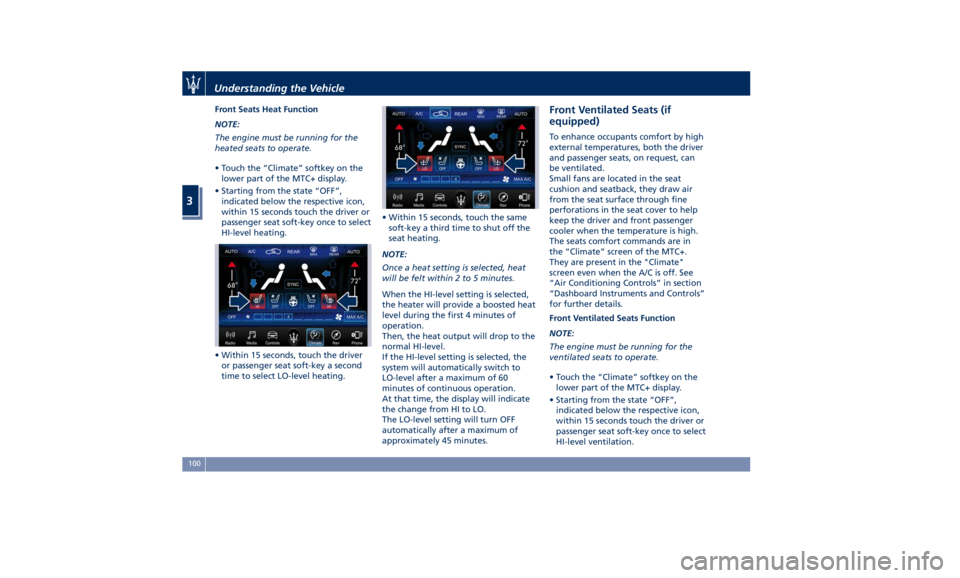
• Touch the “Climate” softkey on the
lower part of the MTC+ display.
• Starting from the state “OFF”,
indicated below the respective icon,
within 15 seconds touch the driver or
passenger seat soft-key once to select
HI-level heating.
• Within 15 seconds, touch the driver
or passenger seat soft-key a second
time to select LO-level heating. • Within 15 seconds, touch the same
soft-key a third time to shut off the
seat heating.
NOTE:
Once a heat setting is selected, heat
will be felt within 2 to 5 minutes.
When the HI-level setting is selected,
the heater will provide a boosted heat
level during the first 4 minutes of
operation.
Then, the heat output will drop to the
normal HI-level.
If the HI-level setting is selected, the
system will automatically switch to
LO-level after a maximum of 60
minutes of continuous operation.
At that time, the display will indicate
the change from HI to LO.
The LO-level setting will turn OFF
automatically after a maximum of
approximately 45 minutes. Front Ventilated Seats (if
equipped) To enhance occupants comfort by high
external temperatures, both the driver
and passenger seats, on request, can
be ventilated.
Small fans are located in the seat
cushion and seatback, they draw air
from the seat surface through fine
perforations in the seat cover to help
keep the driver and front passenger
cooler when the temperature is high.
The seats comfort commands are in
the “Climate” screen of the MTC+.
They are present in the "Climate"
screen even when the A/C is off. See
“Air Conditioning Controls” in section
“Dashboard Instruments and Controls”
for further details.
Front Ventilated Seats Function
NOTE:
The engine must be running for the
ventilated seats to operate.
• Touch the “Climate” softkey on the
lower part of the MTC+ display.
• Starting from the state “OFF”,
indicated below the respective icon,
within 15 seconds touch the driver or
passenger seat soft-key once to select
HI-level ventilation.Understanding the Vehicle
3
100
Page 109 of 396

the seat heater to overheat. Sitting
in a seat that has been overheated
could cause irritation due to the
increased surface temperature of the
seat.
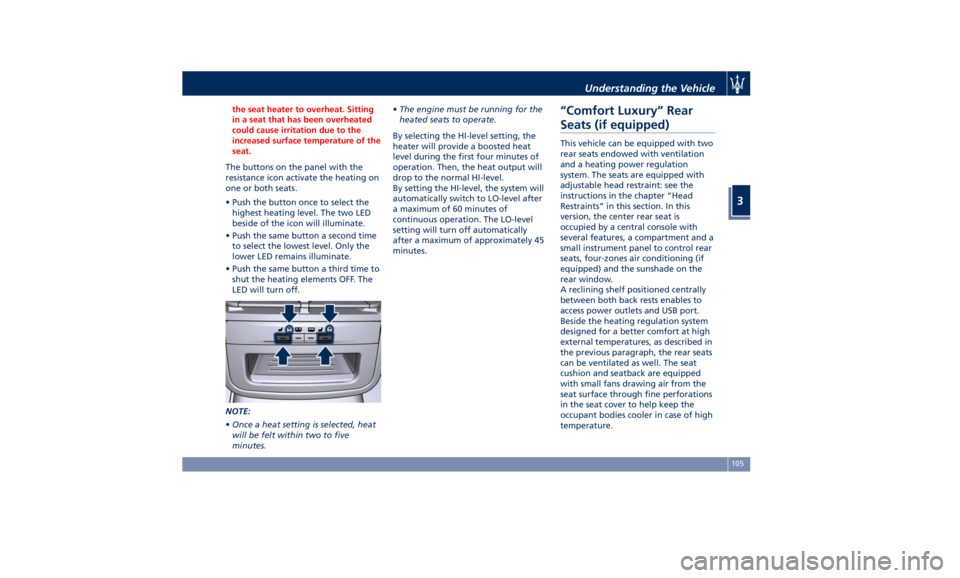
The buttons on the panel with the
resistance
icon activate the heating on
one or both seats.
• Push the button once to select the
highest heating level. The two LED
beside of the icon will illuminate.
• Push the same button a second time
to select the lowest level. Only the
lower LED remains illuminate.
• Push the same button a third time to
shut the heating elements OFF. The
LED will turn off.
NOTE:
• Once a heat setting is selected, heat
will be felt within two to five
minutes. • The engine must be running for the
heated seats to operate.
By selecting the HI-level setting, the
heater will provide a boosted heat
level during the first four minutes of
operation. Then, the heat output will
drop to the normal HI-level.
By setting the HI-level, the system will
automatically switch to LO-level after
a maximum of 60 minutes of
continuous operation. The LO-level
setting will turn off automatically
after a maximum of approximately 45
minutes.
“Comfort Luxury” Rear
Seats (if equipped) This vehicle can be equipped with two
rear seats endowed with ventilation
and a heating power regulation
system. The seats are equipped with
adjustable head restraint: see the
instructions in the chapter “Head
Restraints” in this section. In this
version, the center rear seat is
occupied by a central console with
several features, a compartment and a
small instrument panel to control rear
seats, four-zones air conditioning (if
equipped) and the sunshade on the
rear window.
A reclining shelf positioned centrally
between both back rests enables to
access power outlets and USB port.
Beside the heating regulation system
designed for a better comfort at high
external temperatures, as described in
the previous paragraph, the rear seats
can be ventilated as well. The seat
cushion and seatback are equipped
with small fans drawing air from the
seat surface through fine perforations
in the seat cover to help keep the
occupant bodies cooler in case of high
temperature.Understanding the Vehicle
3
105
Page 111 of 396

NOTE:
The engine must be running for the
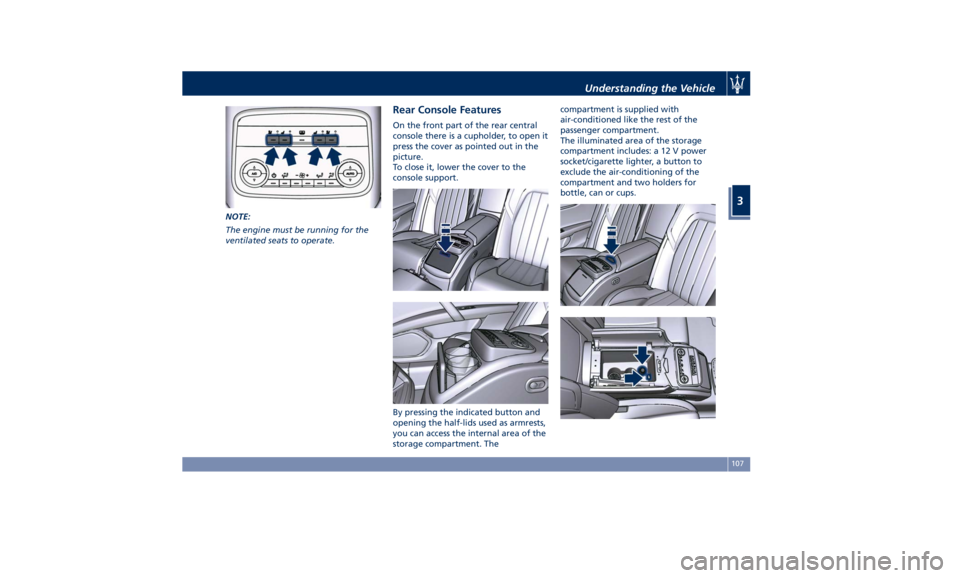
ventilated seats to operate. Rear Console Features On the front part of the rear central
console there is a cupholder, to open it
press the cover as pointed out in the
picture.
To close it, lower the cover to the
console support.
By pressing the indicated button and
opening the half-lids used as armrests,
you can access the internal area of the
storage compartment. The compartment is supplied with
air-conditioned like the rest of the
passenger compartment.
The illuminated area of the storage
compartment includes: a 12 V power
socket/cigarette lighter, a button to
exclude the air-conditioning of the
compartment and two holders for
bottle, can or cups.Understanding the Vehicle
3
107
Page 115 of 396

Power Steering Wheel
Adjustment This feature allows you to tilt the
steering column upward or downward
or to lengthen or shorten it in order to
adjust the steering wheel to an
optimized position.
The power tilt/telescoping steering
column/wheel switch is located on the
lower left side of the steering column.
To adjust the tilt of the steering
column/wheel, move the switch up or
down as desired.
To lengthen or shorten the steering
column/wheel, pull the switch toward
you or push the switch away from you
as desired. NOTE:
You can use your key fob with RKE
transmitter or the memory buttons on
the driver's door trim panel to return
the tilt/telescopic steering
column/wheel to programmed
positions. See “Driver Memory Seat”
in this section.
WARNING!
Do not adjust the steering
column/wheel while driving.
Adjusting the steering column/wheel
while driving could cause the driver to
lose control of the vehicle. Be sure the
steering column/wheel is adjusted
before driving your vehicle. Failure to
follow this warning may result in
serious injury or death.
Heated Steering Wheel
(optional) The steering wheel contains a heating
element inside the rim that helps
warm driver’s hands by cold weather.
The heated steering wheel has only
one temperature setting. Once turned
on, this function will operate for
approximately 58 to 70 minutes
before automatically shutting off. The heated steering wheel can shut
off early or may not turn on when the
steering wheel is already warm.
The heating steering wheel command
is in the “Climate” screen of MTC+.
See “Air Conditioning Controls” in
section “Dashboard Instruments and
Controls” for further details.
NOTE:
The engine must be running for the
heated steering wheel to operate.
• Touch the “Climate” softkey located
on the lower part of the MTC+
display.
• When the heating function is in the
off state, soft-key is not highlighted.
• Within 15 seconds, touch the heated
steering wheel soft-key to turn on
the function.Understanding the Vehicle
3
111
Page 121 of 396

Lighting Up External Lights according to the Position of the Lights Switch and Ignition Device, and according to the
Engine Status and Twilight Sensor Mode
Ignition
Device
Position Engine
Status Twilight
Sensor
Mode Lights Switch Position
AUTO
0
OFF –– All lights off. All lights off. Position lights (1),
side marker and
license plate lights on
(3). Low beams, position
(1), side marker and
license plate lights
on.
ACC Off – All lights off. All lights off. Position lights (1),
side marker and
license plate lights on
(2). Low beams, position
(1), side marker and
license plate lights on
(2).
RUN Off – All lights off. All lights off. Position lights (1),
side marker and
license plate lights on
(2). Low beams, position
(1), side marker and
license plate lights on
(2).
RUN On DAY DRL (1) on. DRL (1) on. DRL (1), rear position
lights, side marker
and license plate
lights on. Low beams, position
(1), side marker and
license plate lights
on.
RUN On NIGHT Low beams, position
(1), side marker and
license plate lights
on. DRL (1) on. DRL (1), rear position
lights, side marker
and license plate
lights on. Low beams, position
(1), side marker and
license plate lights
on.
(1) The lighting system uses the same LED for DRL and front position lights with two different levels of intensity: high for
DRL and low for position lights.
(2) The lights are powered up for 30 minutes to preserve the charge of the battery.
(3) The lights are powered up for 8 minutes to preserve the charge of the battery. Understanding the Vehicle
3
117
Page 122 of 396

Automatic Headlights This system automatically turns the
headlights on or off according to
ambient light intensity detected by the
twilight sensor positioned on the inner
surface of the windshield, over the
rear view mirror. To turn the system
on, rotate the lights switch clockwise
to “AUTO” position.
When the automatic system is
activated, the headlight time delay
feature is activated as well. This means
the headlights will stay on for up to 90
seconds after you place the ignition
device into OFF position.
To turn the automatic system off,
move the lights switch out of “AUTO”
position.
NOTE:
The engine must be running before
the headlights turn on in automatic
mode.
WARNING!
The responsibility for turning on the
lights, depending on the daylight and
regulations in force in the country of
use, always lies with the driver. The
automatic system for switching on
and off the external lights is to be considered as an aid for the driver. If
necessary, switch the lights including
the rear fog lights on and off
manually.
Headlights On with Wipers
When
this feature
is active, the
headlights will turn on approximately
10 seconds after activation of the
wipers, if the lights switch is placed in
the “AUTO” position. The headlights
will additionally turn off by
deactivation of the wipers if previously
activated with this function.
NOTE:
The Headlights with wipers feature
may be turned on and off using the
MTC+ System, refer to “MTC+
Settings” in section “Dashboard
Instruments and Controls”.
Headlights Time Delay This safety feature provides headlight
illumination for up to 90 seconds
(programmable) when leaving your
vehicle in an unlit area. To activate the
delay feature, place the ignition switch
in the OFF or ACC position while the
headlights are still on. Then turn off
the headlights within 45 seconds. The delay interval begins when the
lights switch is turned off (position
“0”). If you turn the headlights or
position lights on, or place the ignition
switch in RUN , the system will cancel
the delay.
If you turn the headlights off (“0”
position) before the ignition, they will
turn off in the normal mode.
NOTE:
• To activate this feature the lights
must be turned off (“0” position)
within 45 seconds of placing the
ignition switch in the OFF or ACC
position.
• Once the delay feature is active, any
additional shifting of the light switch
will cancel the feature.
• The headlight delay time is
programmable using the MTC+
System, see “MTC+ Settings” in
section “Dashboard Instruments and
Controls”.
• If the low beam LEDs are active due
to “Headlights with Wipers”, then
the headlamps delay feature will not
be activated when the ignition
switch is set in OFF position.Understanding the Vehicle
3
118