2019 MASERATI QUATTROPORTE ECO mode
[x] Cancel search: ECO modePage 30 of 396

NOTE:
Refer to “MTC+ Settings” in Section
“Dashboard Instruments and Controls”
for further information.
WARNING!
• When leaving the vehicle, always
remove the key fob and lock your
vehicle.
• Do not allow children to be in a
vehicle unattended or with access to
an unlocked vehicle. A child or
others could be seriously or fatally
injured. Children should be warned
not to touch the parking brake
trigger, brake pedal or the shift
lever.
• Do not leave the key fob in or near
the vehicle, and do not leave the
ignition switch in the ACC or RUN
mode. A child could operate power
windows, other controls, or move
the vehicle.
• Do not leave children or animals
inside parked vehicles in hot
weather. Interior heat build-up may
cause serious injury or death.
• An unlocked car is an invitation to
thieves. Always remove the key fob
from vehicle, cycle the ignition switch to OFF and lock all doors
when leaving the vehicle
unattended.
Sentry Key ®
Immobilizer
System The Sentry Key ®
Immobilizer System
prevents unauthorized vehicle
operation by disabling the engine. The
system does not need to be armed or
activated. Operation is automatic,
regardless of whether the vehicle is
locked or unlocked.
The system uses a key fob with Remote
Keyless Entry (RKE) transmitter, an
ignition switch and a RF (Radio
Frequency) receiver to prevent
unauthorized vehicle operation.
Therefore, only key fobs expressly
programmed can be used to start and
operate the vehicle.
After placing the ignition in the RUN
position, the Vehicle Security Light (see
picture) will light up for a three
seconds bulb check.Before Starting
2
26
Page 34 of 396

To disarm the System Use any of the following steps to
disarm the vehicle security alarm.
• Press the button on key fob RKE
transmitter.
• Grasp the “Passive Entry” unlock
door handle (see “Passive Entry
System” in this section for further
information).
• Press the START/STOP button so as to
release the OFF position.
NOTE:
• When the vehicle security alarm is
armed, the interior power door lock
switch will not allow unlocking of
the doors.
• The use of the emergency key into
the driver door lock and the use of
the button
on the key fob
cannot arm or disarm the security
alarm of the vehicle.
• The vehicle security alarm remains
engaged while accessing the power
trunk lid. Pressing the button
between the license plate lights will
not disarm the vehicle security alarm.
If anyone enters the vehicle through
the trunk lid and opens a door, the
alarm will trigger. The vehicle security alarm is designed
to protect your vehicle; however, you
can create conditions where the
system will give you a false alarm. If
one of the previously described arming
sequences has occurred, the vehicle
security alarm will arm regardless of
whether you are in the vehicle or not.
If you remain in the vehicle and open a
door, the alarm will activate. If this
occurs, disarm the vehicle security
alarm.
If the vehicle security alarm is armed
and the battery becomes disconnected,
the vehicle security alarm will remain
armed when the battery is
reconnected; the exterior lights will
flash, the buzzer will activate. If this
occurs, disarm the vehicle security
alarm.
Tamper Alert If something has triggered the vehicle
security alarm in your absence, the
horn will sound three times when you
disarm the vehicle security alarm.
Check the vehicle for tampering.Illuminated Entry/Exit Lights will turn on and off when you
enter/exit the vehicle and operate the
buttons on the key fob RKE
transmitter and/or on the “Passive
Entry” system as follows:
• If the unlock command is enabled by
pressing the specific
button on the
key fob RKE transmitter or by the
“Passive Entry” system, the
“illuminated entry” mode will
activate. Courtesy & dimmable
internal lighting, night front seats
lighting, and approach lighting will
stay on for 27 seconds.Before Starting
2
30
Page 35 of 396

• If the lock command of the car is
enabled by pressing the specific
button on the key fob RKE
transmitter or by the “Passive Entry”
system, when the key fob RKE
transmitter is moved out of range,
all the lights will turn off within 3
seconds, if they were previously on.
• After activating the power trunk lid
opening command in the possible
modes (see “Power Trunk Lid
Operation” in this section), the inner
trunk lights will turn on and will stay
on for 10 minutes before turning off.
The lights will immediately turn off
if you lock the power trunk lid
before 10 minutes.Before Starting
2
31
Page 42 of 396
The message on the instrument cluster
stays active as long as the ignition
switch is in RUN position.
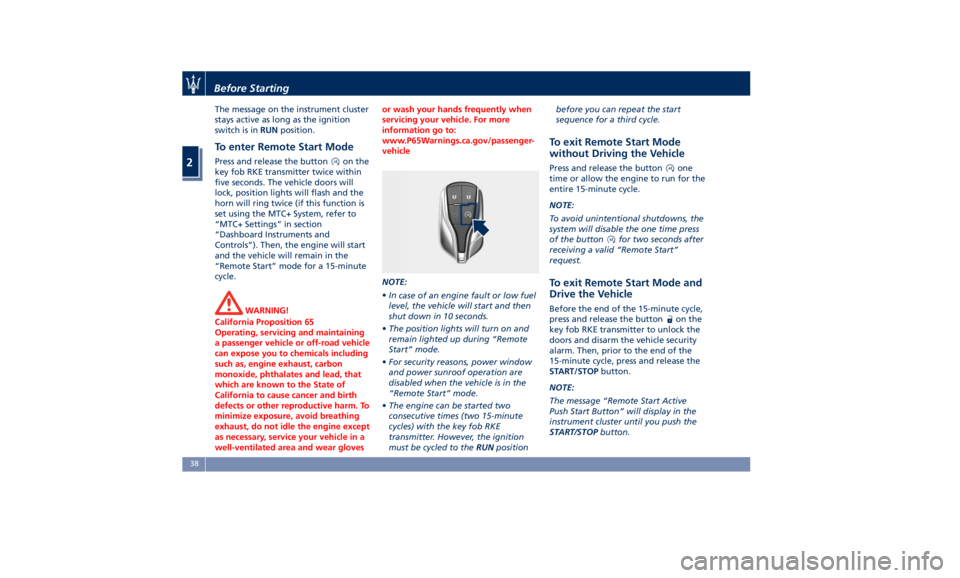
To enter Remote Start Mode Press and release the button on the
key fob RKE transmitter twice within
five seconds. The vehicle doors will
lock, position lights will flash and the
horn will ring twice (if this function is
set using the MTC+ System, refer to
“MTC+ Settings” in section
“Dashboard Instruments and
Controls”). Then, the engine will start
and the vehicle will remain in the
“Remote Start” mode for a 15-minute
cycle.
WARNING!
California Proposition 65
Operating, servicing and maintaining
a passenger vehicle or off-road vehicle
can expose you to chemicals including
such as, engine exhaust, carbon
monoxide, phthalates and lead, that
which are known to the State of
California to cause cancer and birth
defects or other reproductive harm. To
minimize exposure, avoid breathing
exhaust, do not idle the engine except
as necessary, service your vehicle in a
well-ventilated area and wear gloves or wash your hands frequently when
servicing your vehicle. For more
information go to:
www.P65Warnings.ca.gov/passenger-
vehicle
NOTE:
• In
case of an engine fault or low fuel
level, the vehicle will start and then
shut down in 10 seconds.
• The position lights will turn on and
remain lighted up during “Remote
Start” mode.
• For security reasons, power window
and power sunroof operation are
disabled when the vehicle is in the
“Remote Start” mode.
• The engine can be started two
consecutive times (two 15-minute
cycles) with the key fob RKE
transmitter. However, the ignition
must be cycled to the RUN position before you can repeat the start
sequence for a third cycle.
To exit Remote Start Mode
without Driving the Vehicle Press and release the button one
time or allow the engine to run for the
entire 15-minute cycle.
NOTE:
To avoid unintentional shutdowns, the
system will disable the one time press
of the button
for two seconds after
receiving a valid “Remote Start”
request.
To exit Remote Start Mode and
Drive the Vehicle Before the end of the 15-minute cycle,
press and release the button
on the
key fob RKE transmitter to unlock the
doors and disarm the vehicle security
alarm. Then, prior to the end of the
15-minute cycle, press and release the
START/STOP button.
NOTE:
The message “Remote Start Active
Push Start Button” will display in the
instrument cluster until you push the
START/STOP button.Before Starting
2
38
Page 50 of 396
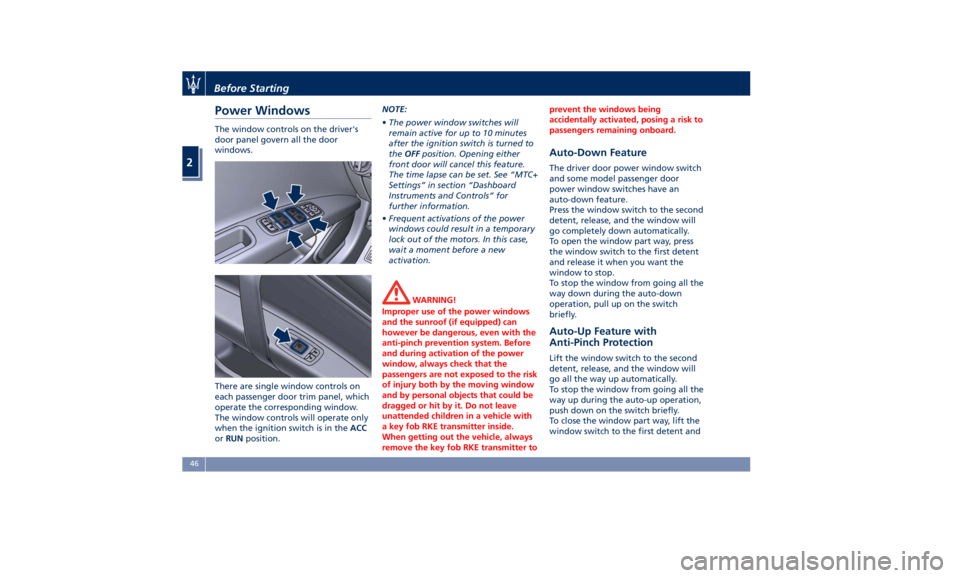
Power Windows The window controls on the driver's
door panel govern all the door
windows.
There are single window controls on
each passenger door trim panel, which
operate the corresponding window.
The window controls will operate only
when the ignition switch is in the ACC
or RUN position. NOTE:
• The power window switches will
remain active for up to 10 minutes
after the ignition switch is turned to
the OFF position. Opening either
front door will cancel this feature.
The time lapse can be set. See “MTC+
Settings” in section “Dashboard
Instruments and Controls” for
further information.
• Frequent activations of the power
windows could result in a temporary
lock out of the motors. In this case,
wait a moment before a new
activation.
WARNING!
Improper use of the power windows
and the sunroof (if equipped) can
however be dangerous, even with the
anti-pinch prevention system. Before
and during activation of the power
window, always check that the
passengers are not exposed to the risk
of injury both by the moving window
and by personal objects that could be
dragged or hit by it. Do not leave
unattended children in a vehicle with
a key fob RKE transmitter inside.
When getting out the vehicle, always
remove the key fob RKE transmitter to prevent the windows being
accidentally activated, posing a risk to
passengers remaining onboard.
Auto-Down Feature The driver door power window switch
and some model passenger door
power window switches have an
auto-down feature.
Press the window switch to the second
detent, release, and the window will
go completely down automatically.
To open the window part way, press
the window switch to the first detent
and release it when you want the
window to stop.
To stop the window from going all the
way down during the auto-down
operation, pull up on the switch
briefly.
Auto-Up Feature with
Anti-Pinch Protection Lift the window switch to the second
detent, release, and the window will
go all the way up automatically.
To stop the window from going all the
way up during the auto-up operation,
push down on the switch briefly.
To close the window part way, lift the
window switch to the first detent andBefore Starting
2
46
Page 52 of 396
Power Sunshades on the
Rear Door Windows NOTE:
• The window switches also operate
the sunshades on the rear windows.
• The rear window lock button also
operates the rear power sunshades.
• Window and sunshade controls only
operate if the ignition switch is in
ACC or RUN position.
Operation of the rear windows and
related sunshades is done by pressing
or pulling the window switch and
depends on the position of the
windows prior to the command
operation.
As described for the opening and
closing functions of the power
windows (see chapter “Power
Windows” in this section), the window
switch has two functioning modes:
press and release the switch to the first
detent to partially move the window;
press and release the switch to the
second detent to move the window all
the way up or down. Operations WARNING!
Rear seat passengers must be careful
when operating the sunshades, since
there is the risk of being pinched
between the top of the sunshade and
the headlining, during raising, and
between the top edge of the sunshade and the door panel, during
lowering.
CAUTION!
Before activating the sunshade, make
sure that no objects can interfere with
its travel.
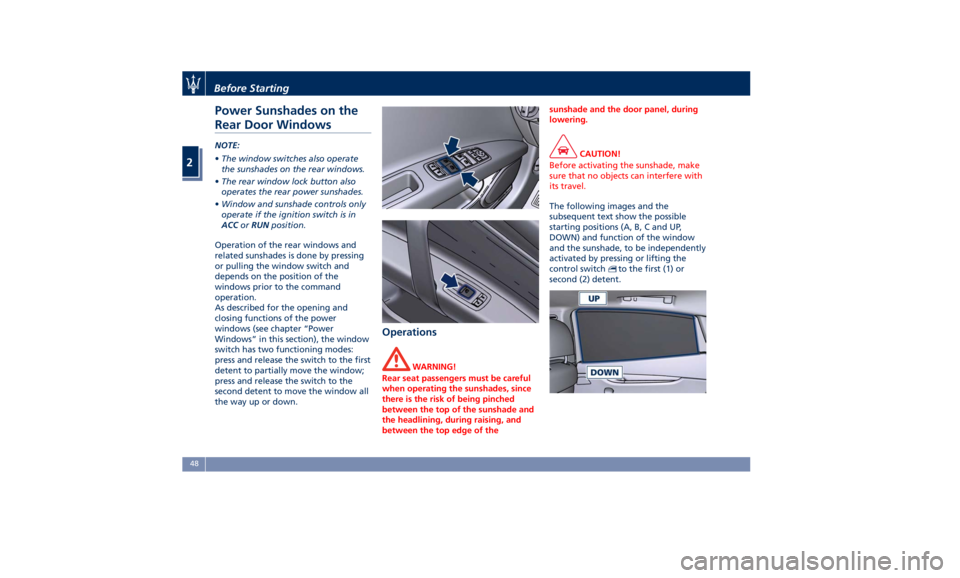
The following images and the
subsequent
text show
the possible
starting positions (A, B, C and UP,
DOWN) and function of the window
and the sunshade, to be independently
activated by pressing or lifting the
control switch
to the first (1) or
second (2) detent.Before Starting
2
48
Page 68 of 396
(Continued)
• In the event of a collision, the seat
belts help reduce the possibility of
the vehicle’s occupants being thrown
against the structures of the
passenger compartment or out of
the vehicle.
• The air bags are designed to work
together with the seat belts, not to
substitute them. The front air bags
only deploy in the event of certain
head-on collisions of sufficient
intensity. They may not be activated
if the vehicle rolls over, or in the
event of rear bumps or minor frontal
collisions, or non-frontal collisions.
Using Seat Belt in Automatic
Locking Retractor Mode (ALR) Use the seat belt automatic locking
mode anytime a child safety seat is
installed in a seating position that has
a belt with this feature.
Children under 5 ft (1.50 m) in height,
should be properly buckled up in a
child restraint system.
Automatic Locking Mode Setting
• Buckle the lap and shoulder belt.
• Grasp the shoulder portion and pull
downward until the entire belt is
extracted. • Allow the belt to retract. As the belt
retracts, you will hear a clicking
sound. This indicates the safety belt
is now in the automatic locking
mode.
Automatic Locking Mode Unsetting
Unbuckle the three point seat belt and
allow it to retract completely to
disengage the automatic locking mode
and activate the vehicle emergency
locking mode.
WARNING!
• The belt and retractor assembly must
be checked by an Authorized
Maserati Dealer and must be
replaced if the Automatic Locking
Retractor (ALR) feature or any other
seat belt function is not working
properly.
• Failure to replace the belt and
retractor assembly could increase the
risk of injury in collisions.
Seat Belt Pretensioners The car is equipped with front seat
belt pretensioners, that reduce slack in
the belts in the event of a severe
frontal impact. This guarantees the
perfect adherence of the seat belts to the occupants bodies before the
restraining action begins.
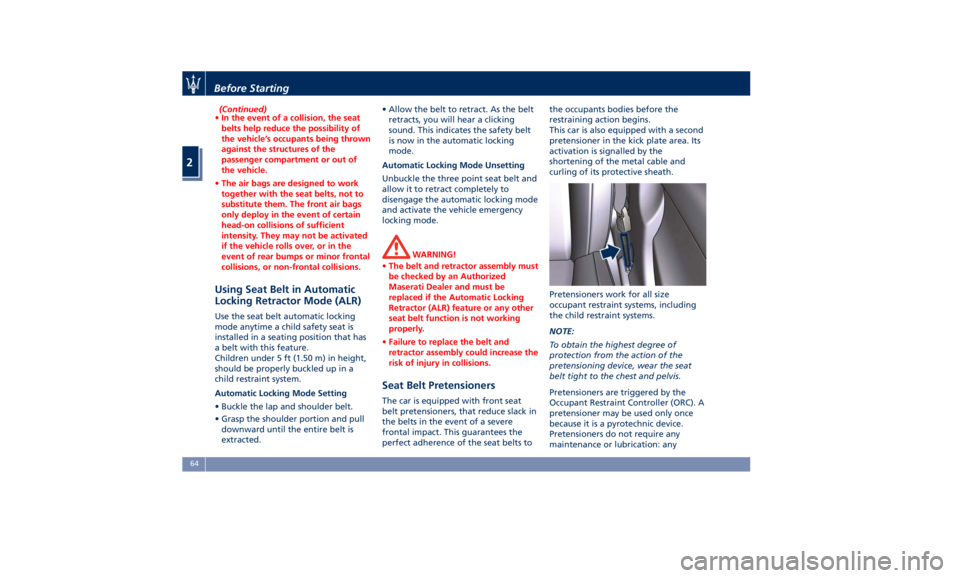
This car is also equipped with a second
pretensioner in the kick plate area. Its
activation is signalled by the
shortening of the metal cable and
curling of its protective sheath.
Pretensioners work for all size
occupant restraint systems, including
the child restraint systems.
NOTE:
To obtain the highest degree of
protection from the action of the
pretensioning device, wear the seat
belt tight to the chest and pelvis.
Pretensioners are triggered by the
Occupant Restraint Controller (ORC). A
pretensioner may be used only once
because it is a pyrotechnic device.
Pretensioners do not require any
maintenance or lubrication: anyBefore Starting
2
64
Page 80 of 396
NOTE:
For additional information, refer to
"http://www.safercar.gov/parents/
index.htm"
www.safercar.gov/parents/index.htm
or call 1-888-327-4236.
Canadian residents should refer to
Transport Canada’s website for
additional information:
http://www.tc.gc.ca/eng/motorvehicle
safety/safedrivers-childsafety-index-
53.htm
WARNING!
• Improper installation can lead to
failure of an infant or child restraint.
It could come loose in a collision. The
child could be badly injured or killed.
Follow the restraint manufacturer’s
directions exactly when installing an
infant or child restraint.
• A rearward-facing child restraint
should only be used in a rear seat. A
rearward-facing child restraint in the
front seat may be struck by a
deploying passenger air bag, which
may cause severe or fatal injury to
the infant. Here are some tips on getting
the most out of your child
restraint • Before buying any restraint system,
make sure that it has a label
certifying that it meets all applicable
Safety Standards. Maserati also
recommends that you make sure that
you can install the child restraint in
the vehicle where you will use it
before you buy it.
• The restraint system must be
appropriate for your child’s weight
and height.
• Check the label on the restraint
system for weight and height limits.
• Carefully follow the instructions that
come with the restraint system.
• If installed improperly, it may not
work when needed.
• Fit the child into the seat according
to the child restraint manufacturer’s
directions.
WARNING!
When your child restraint system is
not in use, secure it in the vehicle with
the seat belt or remove it from the
vehicle. Do not leave it loose in the
vehicle. In a sudden stop or accident, it could strike the occupants or
seatbacks and cause serious personal
injury.
Installing Child Restraint
Systems using the Vehicle Seat
Belt equipped with ALR Child restraint systems are designed to
be secured in vehicle seats by lap belts
or the lap belt portion of a
lap/shoulder belt.
All the passenger seat belts are
equipped with an Automatic Locking
Retractor (ALR) to secure child
protection through a Child Restraint
System (CRS). These types of seat belts
are designed to keep the lap portion
of the seat belt tight around the child
restraint seat avoiding to use a locking
clip.
The ALR will make a ratcheting noise if
the entire belt is pulled out of the
retractor in order to enable the belt to
retract subsequently. For additional
information on ALR, see “Using Seat
Belt in Automatic Locking Retractor
(ALR) Mode” in “Occupants Restraint
Systems” in this section.
To install a Child Restraint System with
ALR, pull enough of the belt out of the
retractor leading it through the belt
path of the protection device. Slide theBefore Starting
2
76