2019 MASERATI LEVANTE light
[x] Cancel search: lightPage 135 of 436
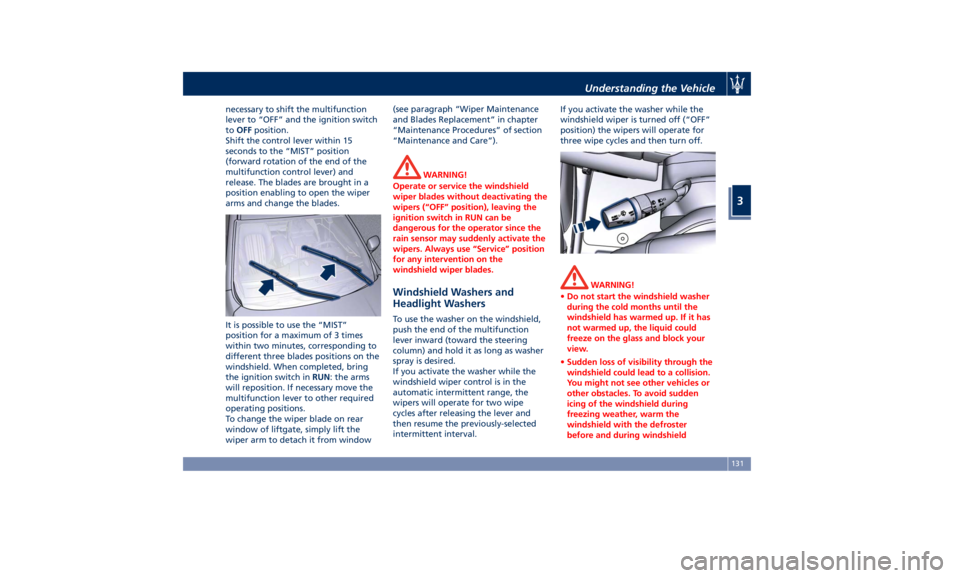
necessary to shift the multifunction
lever to “OFF” and the ignition switch
to OFF position.
Shift the control lever within 15
seconds to the “MIST” position
(forward rotation of the end of the
multifunction control lever) and
release. The blades are brought in a
position enabling to open the wiper
arms and change the blades.
It is possible to use the “MIST”
position for a maximum of 3 times
within two minutes, corresponding to
different three blades positions on the
windshield. When completed, bring
the ignition switch in RUN : the arms
will reposition. If necessary move the
multifunction lever to other required
operating positions.
To change the wiper blade on rear
window of liftgate, simply lift the
wiper arm to detach it from window (see paragraph “Wiper Maintenance
and Blades Replacement” in chapter
“Maintenance Procedures” of section
“Maintenance and Care”).
WARNING!
Operate or service the windshield
wiper blades without deactivating the
wipers (“OFF” position), leaving the
ignition switch in RUN can be
dangerous for the operator since the
rain sensor may suddenly activate the
wipers. Always use “Service” position
for any intervention on the
windshield wiper blades.
Windshield Washers and
Headlight Washers To use the washer on the windshield,
push the end of the multifunction
lever inward (toward the steering
column) and hold it as long as washer
spray is desired.
If you activate the washer while the
windshield wiper control is in the
automatic intermittent range, the
wipers will operate for two wipe
cycles after releasing the lever and
then resume the previously-selected
intermittent interval. If you activate the washer while the
windshield wiper is turned off (“OFF”
position) the wipers will operate for
three wipe cycles and then turn off.
WARNING!
• Do not start the windshield washer
during the cold months until the
windshield has warmed up. If it has
not warmed up, the liquid could
freeze on the glass and block your
view.
• Sudden loss of visibility through the
windshield could lead to a collision.
You might not see other vehicles or
other obstacles. To avoid sudden
icing of the windshield during
freezing weather, warm the
windshield with the defroster
before and during windshieldUnderstanding the Vehicle
3
131
Page 136 of 436
(Continued)
washer use.
WARNING!
California Proposition 65
Operating, servicing and maintaining
a passenger vehicle or off-road vehicle
can expose you to chemicals including
such as, engine exhaust, carbon
monoxide, phthalates and lead, that
which are known to the State of
California to cause cancer and birth
defects or other reproductive harm. To
minimize exposure, avoid breathing
exhaust, do not idle the engine except
as necessary, service your vehicle in a
well-ventilated area and wear gloves
or wash your hands frequently when
servicing your vehicle. For more
information go to:
www.P65Warnings.ca.gov/passenger-
vehicle
Headlight Washers (if provided)
The
multifunction lever also
operates
the headlight washers when the
ignition switch is in RUN position and
the headlights are turned on.
The headlight washers will spray a
timed high-pressure spray of washer fluid onto each headlight lens every 11
windshield wipers cycles.
Heated Windshield Washer Nozzles
(optional)
To avoid fluid freezing inside at low
external temperatures, a fluid supply
nozzles can be heated by internal
resistors.
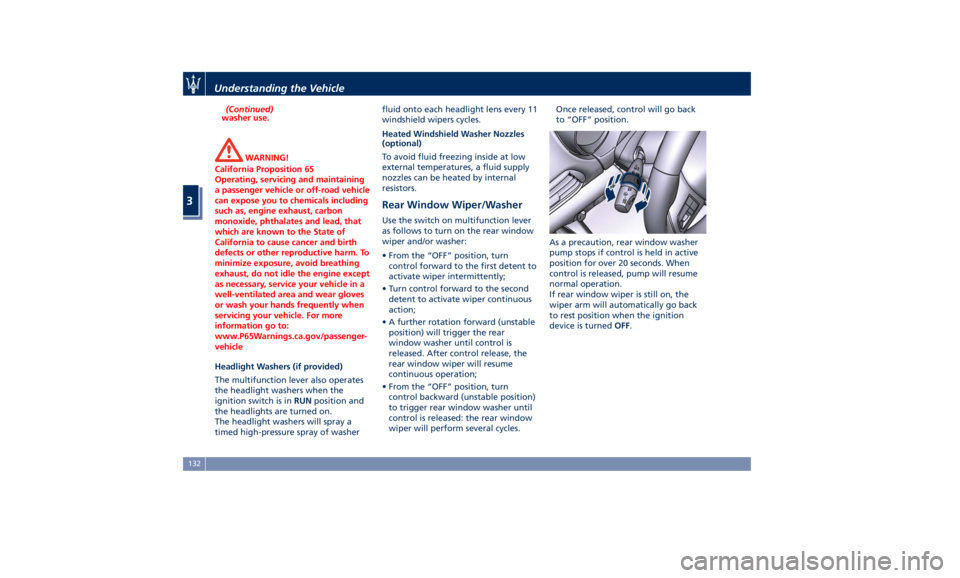
Rear Window Wiper/Washer Use the switch on multifunction lever
as follows to turn on the rear window
wiper and/or washer:
• From the “OFF” position, turn
control forward to the first detent to
activate wiper intermittently;
• Turn control forward to the second
detent to activate wiper continuous
action;
• A further rotation forward (unstable
position) will trigger the rear
window washer until control is
released. After control release, the
rear window wiper will resume
continuous operation;
• From the “OFF” position, turn
control backward (unstable position)
to trigger rear window washer until
control is released: the rear window
wiper will perform several cycles. Once released, control will go back
to “OFF” position.
As a precaution, rear window washer
pump stops if control is held in active
position for over 20 seconds. When
control is released, pump will resume
normal operation.
If rear window wiper is still on, the
wiper arm will automatically go back
to rest position when the ignition
device is turned OFF .Understanding the Vehicle
3
132
Page 137 of 436

Interior Features Electric Power Outlets The vehicle is equipped with four 12
Volt (13 Amp) electric power outlets,
two available for the front seat
passengers, one for rear seat
passengers and one fitted in the trunk
compartment.
In vehicles equipped with “Smoking
Kit” the electric power outlet inside
the cupholder is replaced with a
cigarette lighter.
All power outlets are supplied only
when the engine is started or the
ignition device set to ACC or RUN .
Power outlets are protected by a fuse.
Insert a cigar lighter or accessory plug
into the power outlets to ensure
proper operation. Otherwise, check
the matching fuse integrity, see “Fuse
Replacement” in section
“Maintenance and Care” for further
information.
CAUTION!
• Do not plug in accessories that
exceed the maximum power of 160
Watts (13 Amps) at 12 Volts.
• Power outlets are designed for
accessory plugs only. Do not insert any other object in the power
outlets as this will damage the outlet
and blow the fuse. Damages caused
by improper use of the power outlet
are not covered by the New Vehicle
Limited Warranty.
WARNING!
To avoid serious injury or death:
• Only devices designed for use in this
type of outlet should be inserted
into any 12 Volt outlet.
• Replacing the fuses that protect
power outlets with others of higher
amperage, there is the risk of fire.
• Do not touch with wet hands.
• Close the lids when the plug is not
used and while driving the vehicle.
• If this outlet is mishandled, it may
cause an electric shock and failure.
Power Outlet inside the Cupholder
Compartment
To access the power outlet inside the
cupholder beside the shift lever, press
the cover as indicated to open it
completely. Remove the cigarette
lighter and use its socket as power
outlet. WARNING!
High power consumption items
plugged into this outlet for long
periods may discharge the battery
and/or prevent the engine from
starting.Understanding the Vehicle
3
133
Page 138 of 436
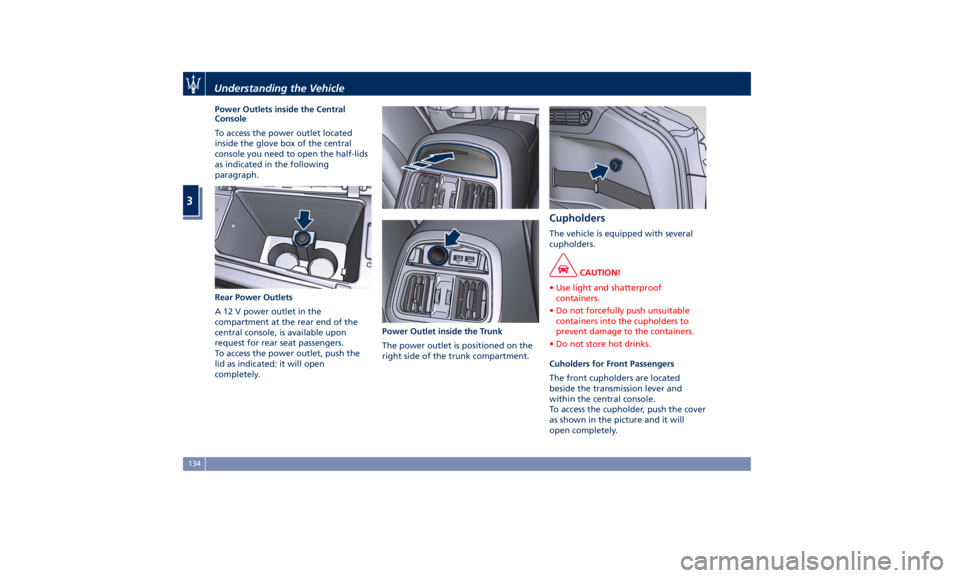
Power Outlets inside the Central
Console
To access the power outlet located
inside the glove box of the central
console you need to open the half-lids
as indicated in the following
paragraph.
Rear Power Outlets
A 12 V power outlet in the
compartment at the rear end of the
central console, is available upon
request for rear seat passengers.
To access the power outlet, push the
lid as indicated: it will open
completely. Power Outlet inside the Trunk
The power outlet is positioned on the
right side of the trunk compartment. Cupholders The vehicle is equipped with several
cupholders.
CAUTION!
• Use light and shatterproof
containers.
• Do not forcefully push unsuitable
containers into the cupholders to
prevent damage to the containers.
• Do not store hot drinks.
Cuholders for Front Passengers
The
front cupholders are located
beside the transmission lever and
within the central console.
To access the cupholder, push the cover
as shown in the picture and it will
open completely.Understanding the Vehicle
3
134
Page 140 of 436

The AUX auxiliary port features:
• typical input impedance between
AUX-IN and AUX_REF: 13 Kohm;
• max. applicable voltage: 0.75 Vrms at
1 kHz;
• input compatible only with 3.5 mm
jack connectors (not included).
Any player with these characteristics
and analogue audio output (headset
output type) can be served by the
MTC+ System. The system can
recognize the connection to a player
outlet autonomously, by enabling
access to the audio functions
connected to this source.
This USB input
can be used for
data exchange (refer to the MTC+
guide for further details).
Two other USB ports for charging of
connected source (CHARGE ONLY
label) are present inside the glove box
compartment of the dashboard. In the compartment of the central
console there is also a SD memory card
input. Once inserted into the slot, to
extract it, press lightly on the card.
For rear seat passengers, there are two
USB ports inside the compartment
located on the rear end of the central
console, above the air vents.
To access the USB ports open the
outside cover. This USB ports allow charging
(CHARGE ONLY label) the connected
source.
Following conditions can create USB
inputs damage or malfunction:
• Usage of non-original lightning
cables.
• Usage of defective rechargeable
devices (smartphone, tablet, mass
storage devices or other generic USB
devices).
• ONLY insert media (eg., USB or SD
card), into your vehicle if it came
from a trusted source.
• Usage of damaged or defective
cables.
iPod ®
Connection An iPod ®
can be connected to the
system via USB and AUX ports by
means of a special cable (optional).
The MTC+ will then control the
following functions: play, pause, fast
forward, rewind, next track, previous
track, random or repeat mode,
selection and navigation of
playlist/genre/singer/album/Podcast.
CAUTION!
Do not leave your USB device, iPod ®
or
an external audio source in the vehicleUnderstanding the Vehicle
3
136
Page 141 of 436
for extended periods of time: extreme
temperatures and humidity can occur
in the vehicle.
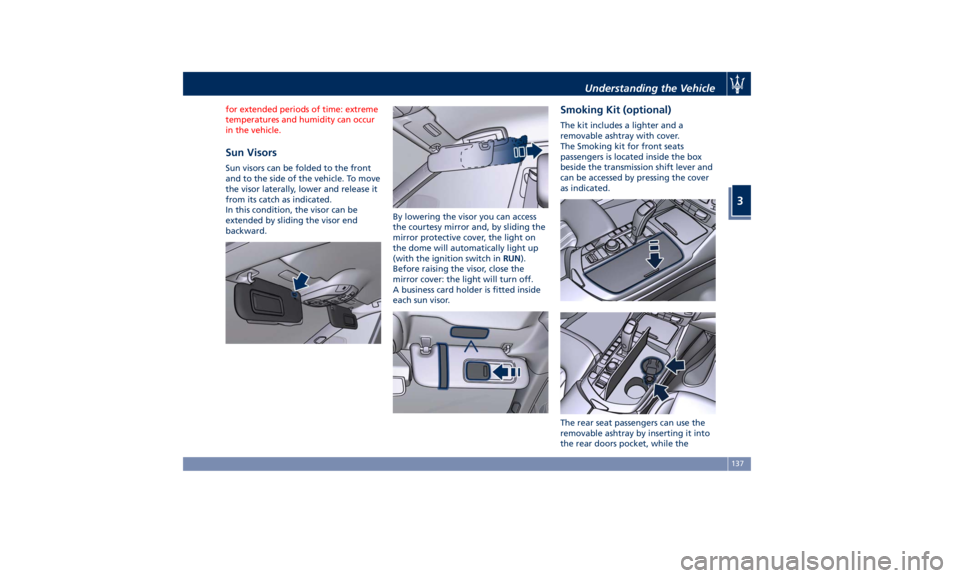
Sun Visors Sun visors can be folded to the front
and to the side of the vehicle. To move
the visor laterally, lower and release it
from its catch as indicated.
In this condition, the visor can be
extended by sliding the visor end
backward. By lowering the visor you can access
the courtesy mirror and, by sliding the
mirror protective cover, the light on
the dome will automatically light up
(with the ignition switch in RUN ).
Before raising the visor, close the
mirror cover: the light will turn off.
A business card holder is fitted inside
each sun visor. Smoking Kit (optional) The kit includes a lighter and a
removable ashtray with cover.
The Smoking kit for front seats
passengers is located inside the box
beside the transmission shift lever and
can be accessed by pressing the cover
as indicated.
The rear seat passengers can use the
removable ashtray by inserting it into
the rear doors pocket, while theUnderstanding the Vehicle
3
137
Page 142 of 436
lighter can be inserted into the power
outlet at the end of the central
console.
Press the central button to activate the
cigarette lighter. After about 20
seconds the button returns
automatically to the initial position
and stops the heating: from this time
the cigarette lighter is ready for use.
CAUTION!
After use, always make sure that the
cigarette lighter is switched off.
WARNING!
• The cigarette lighter reaches high
temperatures. Handle it carefully and
do not allow children to use it so as
to avoid risk of fire and injury!
• The cigarette lighter may not be
used as a power outlet.
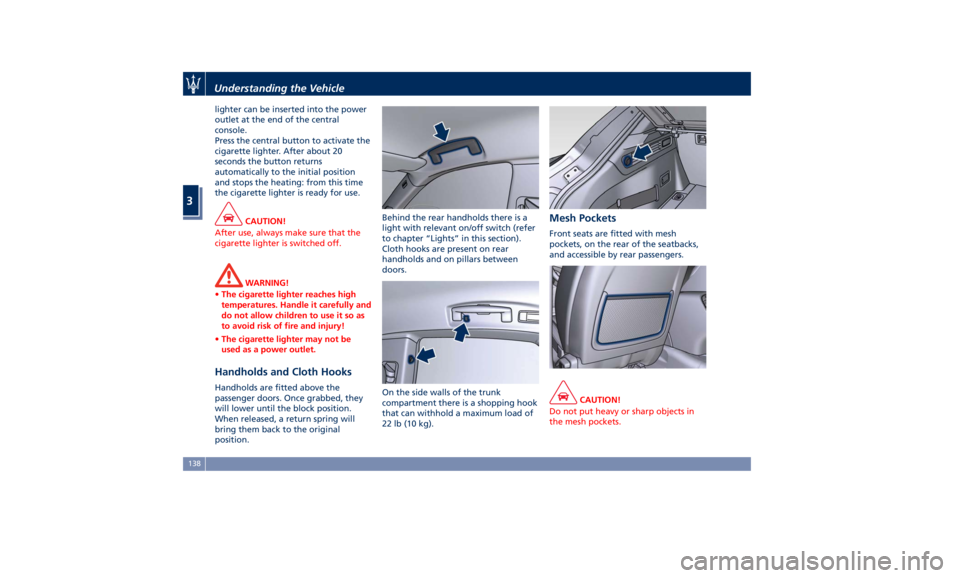
Handholds and Cloth Hooks Handholds are fitted above the
passenger doors. Once grabbed, they
will lower until the block position.
When released, a return spring will
bring them back to the original
position. Behind the rear handholds there is a
light with relevant on/off switch (refer
to chapter “Lights” in this section).
Cloth hooks are present on rear
handholds and on pillars between
doors.
On the side walls of the trunk
compartment there is a shopping hook
that can withhold a maximum load of
22 lb (10 kg). Mesh Pockets Front seats are fitted with mesh
pockets, on the rear of the seatbacks,
and accessible by rear passengers.
CAUTION!
Do not put heavy or sharp objects in
the mesh pockets.Understanding the Vehicle
3
138
Page 144 of 436
To load your vehicle properly, store
heavier items below and be sure you
distribute their weight as evenly as
possible.
Stow all loose items securely before
start driving as they could move during
the trip.
To separate trunk from passenger
compartment, the vehicle is equipped
with a rigid horizontal panel, fitted
behind the rear seat backrest. When
vehicle is at a standstill, cargo area
cover can withstand a maximum static
load of 260 lb (120 kg).
Apart from cargo area cover, the
vehicle can be also equipped with a
vertical rolling Cargo Net, to be used
to separate the cargo area from the
passenger area.
The Authorized Maserati Dealer can
provide you with any information
about the items dedicated to the
usage of the trunk (luggage
compartment mat, net, foldable
box,...), available in the "Genuine
Accessories" range.
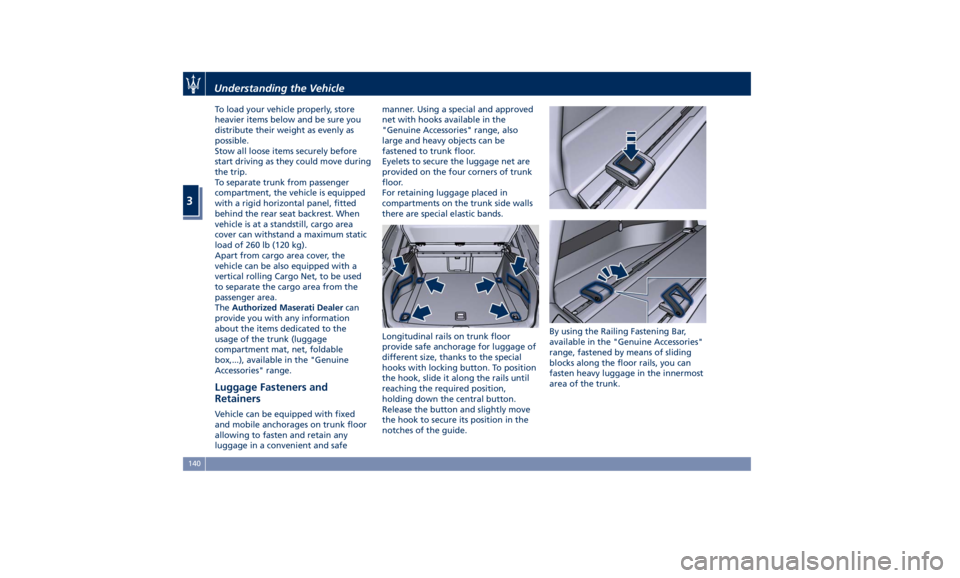
Luggage Fasteners and
Retainers Vehicle can be equipped with fixed
and mobile anchorages on trunk floor
allowing to fasten and retain any
luggage in a convenient and safe manner. Using a special and approved
net with hooks available in the
"Genuine Accessories" range, also
large and heavy objects can be
fastened to trunk floor.
Eyelets to secure the luggage net are
provided on the four corners of trunk
floor.
For retaining luggage placed in
compartments on the trunk side walls
there are special elastic bands.
Longitudinal rails on trunk floor
provide safe anchorage for luggage of
different size, thanks to the special
hooks with locking button. To position
the hook, slide it along the rails until
reaching the required position,
holding down the central button.
Release the button and slightly move
the hook to secure its position in the
notches of the guide. By using the Railing Fastening Bar,
available in the "Genuine Accessories"
range, fastened by means of sliding
blocks along the floor rails, you can
fasten heavy luggage in the innermost
area of the trunk.Understanding the Vehicle
3
140