2019 MASERATI LEVANTE lock
[x] Cancel search: lockPage 131 of 436
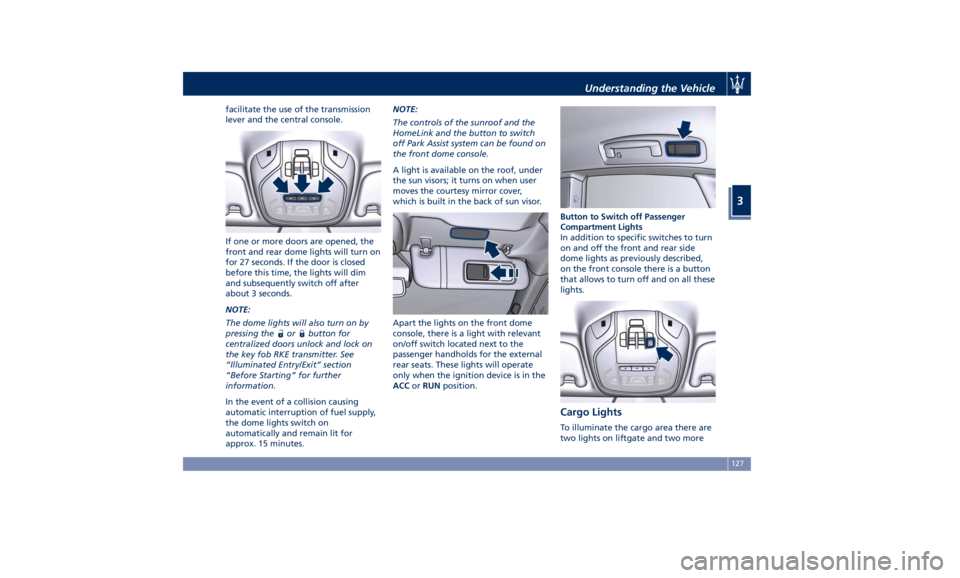
facilitate the use of the transmission
lever and the central console.
If one or more doors are opened, the
front and rear dome lights will turn on
for 27 seconds. If the door is closed
before this time, the lights will dim
and subsequently switch off after
about 3 seconds.
NOTE:
The dome lights will also turn on by
pressing the
or button for
centralized doors unlock and lock on
the key fob RKE transmitter. See
“Illuminated Entry/Exit” section
“Before Starting” for further
information.
In the event of a collision causing
automatic interruption of fuel supply,
the dome lights switch on
automatically and remain lit for
approx. 15 minutes. NOTE:
The controls of the sunroof and the
HomeLink and the button to switch
off Park Assist system can be found on
the front dome console.
A light is available on the roof, under
the sun visors; it turns on when user
moves the courtesy mirror cover,
which is built in the back of sun visor.
Apart the lights on the front dome
console, there is a light with relevant
on/off switch located next to the
passenger handholds for the external
rear seats. These lights will operate
only when the ignition device is in the
ACC or RUN position. Button to Switch off Passenger
Compartment Lights
In addition to specific switches to turn
on and off the front and rear side
dome lights as previously described,
on the front console there is a button
that allows to turn off and on all these
lights.
Cargo Lights To illuminate the cargo area there are
two lights on liftgate and two moreUnderstanding the Vehicle
3
127
Page 135 of 436
necessary to shift the multifunction
lever to “OFF” and the ignition switch
to OFF position.
Shift the control lever within 15
seconds to the “MIST” position
(forward rotation of the end of the
multifunction control lever) and
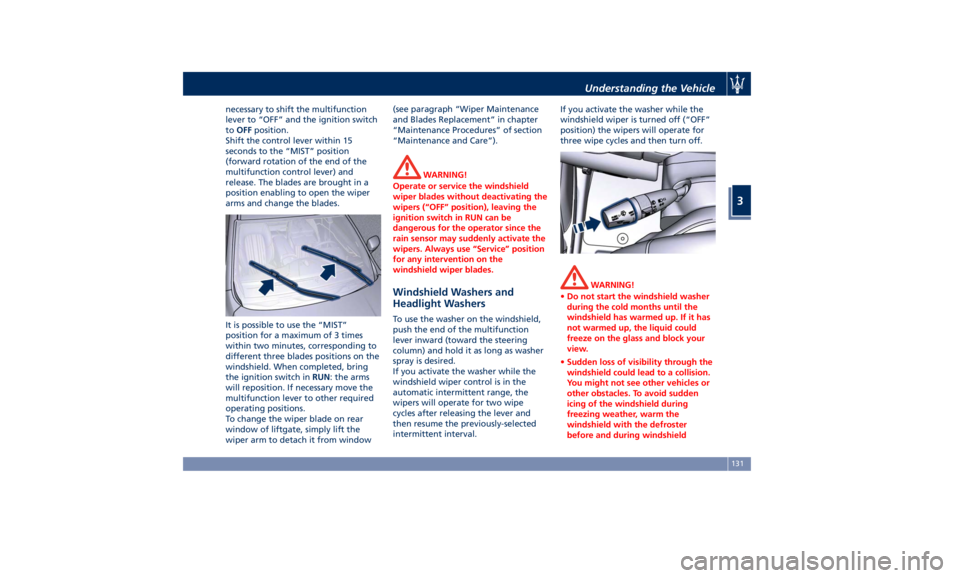
release. The blades are brought in a
position enabling to open the wiper
arms and change the blades.
It is possible to use the “MIST”
position for a maximum of 3 times
within two minutes, corresponding to
different three blades positions on the
windshield. When completed, bring
the ignition switch in RUN : the arms
will reposition. If necessary move the
multifunction lever to other required
operating positions.
To change the wiper blade on rear
window of liftgate, simply lift the
wiper arm to detach it from window (see paragraph “Wiper Maintenance
and Blades Replacement” in chapter
“Maintenance Procedures” of section
“Maintenance and Care”).
WARNING!
Operate or service the windshield
wiper blades without deactivating the
wipers (“OFF” position), leaving the
ignition switch in RUN can be
dangerous for the operator since the
rain sensor may suddenly activate the
wipers. Always use “Service” position
for any intervention on the
windshield wiper blades.
Windshield Washers and
Headlight Washers To use the washer on the windshield,
push the end of the multifunction
lever inward (toward the steering
column) and hold it as long as washer
spray is desired.
If you activate the washer while the
windshield wiper control is in the
automatic intermittent range, the
wipers will operate for two wipe
cycles after releasing the lever and
then resume the previously-selected
intermittent interval. If you activate the washer while the
windshield wiper is turned off (“OFF”
position) the wipers will operate for
three wipe cycles and then turn off.
WARNING!
• Do not start the windshield washer
during the cold months until the
windshield has warmed up. If it has
not warmed up, the liquid could
freeze on the glass and block your
view.
• Sudden loss of visibility through the
windshield could lead to a collision.
You might not see other vehicles or
other obstacles. To avoid sudden
icing of the windshield during
freezing weather, warm the
windshield with the defroster
before and during windshieldUnderstanding the Vehicle
3
131
Page 139 of 436

By pressing the indicated button on
the central console, the half-lids will
rise completely enabling access to the
inner compartment where the two
cupholders are located. The storage and passenger
compartment share the same air
conditioning even though you may
exclude the air conditioning of the
cupholder compartment by moving
the indicated button.
To close one or both of the half-lids,
push them down to the locking
position. Cupholders for Rear Passengers
Two cupholders are available in the
front side of the rear seats central
armrest.
AUX, USB and SD Memory Card
Ports The inputs are located inside the
compartment at the front end of the
central console. To access the inputs,
push the lid as indicated: it will open
completely.Understanding the Vehicle
3
135
Page 142 of 436
lighter can be inserted into the power
outlet at the end of the central
console.
Press the central button to activate the
cigarette lighter. After about 20
seconds the button returns
automatically to the initial position
and stops the heating: from this time
the cigarette lighter is ready for use.
CAUTION!
After use, always make sure that the
cigarette lighter is switched off.
WARNING!
• The cigarette lighter reaches high
temperatures. Handle it carefully and
do not allow children to use it so as
to avoid risk of fire and injury!
• The cigarette lighter may not be
used as a power outlet.
Handholds and Cloth Hooks Handholds are fitted above the
passenger doors. Once grabbed, they
will lower until the block position.
When released, a return spring will
bring them back to the original
position. Behind the rear handholds there is a
light with relevant on/off switch (refer
to chapter “Lights” in this section).
Cloth hooks are present on rear
handholds and on pillars between
doors.
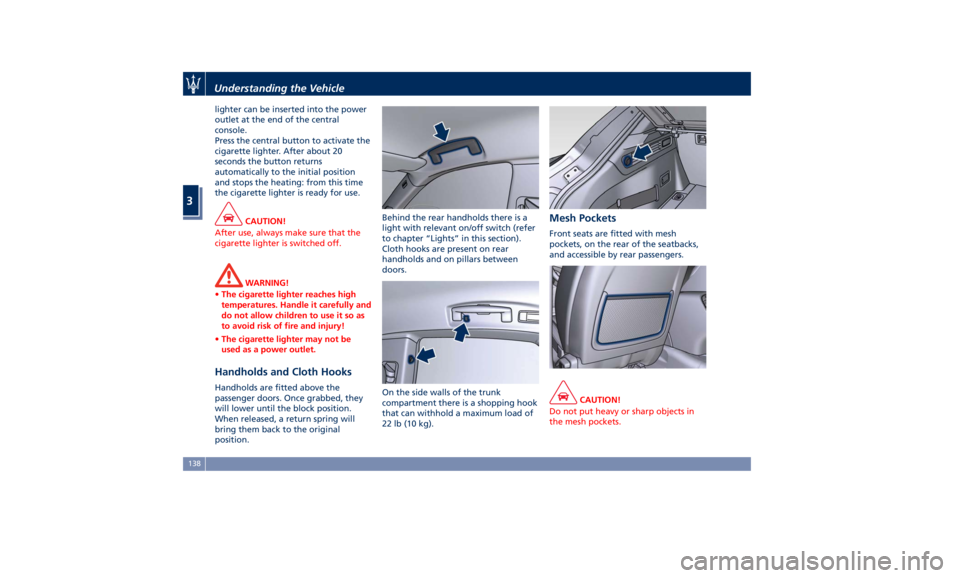
On the side walls of the trunk
compartment there is a shopping hook
that can withhold a maximum load of
22 lb (10 kg). Mesh Pockets Front seats are fitted with mesh
pockets, on the rear of the seatbacks,
and accessible by rear passengers.
CAUTION!
Do not put heavy or sharp objects in
the mesh pockets.Understanding the Vehicle
3
138
Page 144 of 436
To load your vehicle properly, store
heavier items below and be sure you
distribute their weight as evenly as
possible.
Stow all loose items securely before
start driving as they could move during
the trip.
To separate trunk from passenger
compartment, the vehicle is equipped
with a rigid horizontal panel, fitted
behind the rear seat backrest. When
vehicle is at a standstill, cargo area
cover can withstand a maximum static
load of 260 lb (120 kg).
Apart from cargo area cover, the
vehicle can be also equipped with a
vertical rolling Cargo Net, to be used
to separate the cargo area from the
passenger area.
The Authorized Maserati Dealer can
provide you with any information
about the items dedicated to the
usage of the trunk (luggage
compartment mat, net, foldable
box,...), available in the "Genuine
Accessories" range.
Luggage Fasteners and
Retainers Vehicle can be equipped with fixed
and mobile anchorages on trunk floor
allowing to fasten and retain any
luggage in a convenient and safe manner. Using a special and approved
net with hooks available in the
"Genuine Accessories" range, also
large and heavy objects can be
fastened to trunk floor.
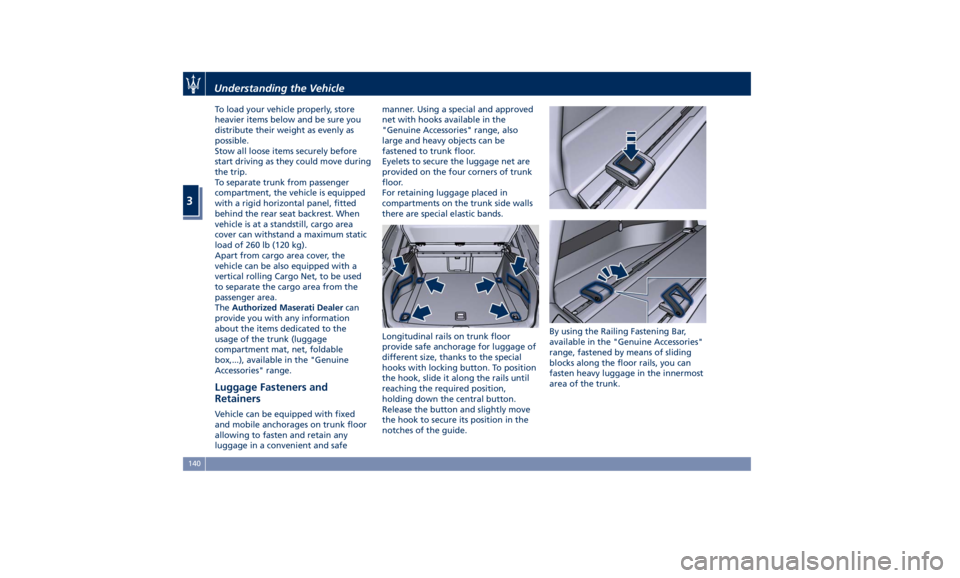
Eyelets to secure the luggage net are
provided on the four corners of trunk
floor.
For retaining luggage placed in
compartments on the trunk side walls
there are special elastic bands.
Longitudinal rails on trunk floor
provide safe anchorage for luggage of
different size, thanks to the special
hooks with locking button. To position
the hook, slide it along the rails until
reaching the required position,
holding down the central button.
Release the button and slightly move
the hook to secure its position in the
notches of the guide. By using the Railing Fastening Bar,
available in the "Genuine Accessories"
range, fastened by means of sliding
blocks along the floor rails, you can
fasten heavy luggage in the innermost
area of the trunk.Understanding the Vehicle
3
140
Page 145 of 436
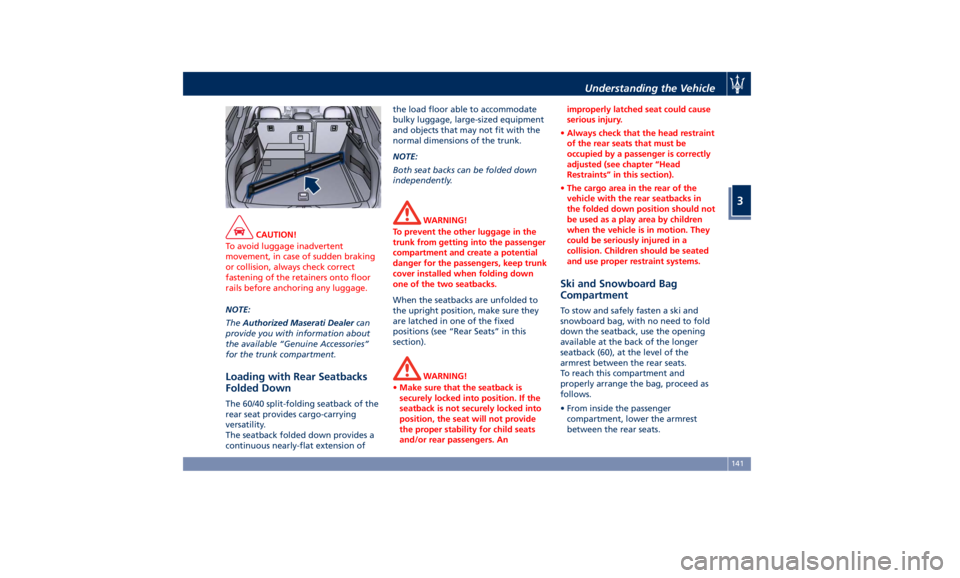
CAUTION!
To avoid luggage inadvertent
movement, in case of sudden braking
or collision, always check correct
fastening of the retainers onto floor
rails before anchoring any luggage.
NOTE:
The Authorized
Maserati Dealer can
provide you with information about
the available “Genuine Accessories”
for the trunk compartment.
Loading with Rear Seatbacks
Folded Down The 60/40 split-folding seatback of the
rear seat provides cargo-carrying
versatility.
The seatback folded down provides a
continuous nearly-flat extension of the load floor able to accommodate
bulky luggage, large-sized equipment
and objects that may not fit with the
normal dimensions of the trunk.
NOTE:
Both seat backs can be folded down
independently.
WARNING!
To prevent the other luggage in the
trunk from getting into the passenger
compartment and create a potential
danger for the passengers, keep trunk
cover installed when folding down
one of the two seatbacks.
When the seatbacks are unfolded to
the
upright position, make
sure they
are latched in one of the fixed
positions (see “Rear Seats” in this
section).
WARNING!
• Make sure that the seatback is
securely locked into position. If the
seatback is not securely locked into
position, the seat will not provide
the proper stability for child seats
and/or rear passengers. An improperly latched seat could cause
serious injury.
• Always check that the head restraint
of the rear seats that must be
occupied by a passenger is correctly
adjusted (see chapter “Head
Restraints” in this section).
• The cargo area in the rear of the
vehicle with the rear seatbacks in
the folded down position should not
be used as a play area by children
when the vehicle is in motion. They
could be seriously injured in a
collision. Children should be seated
and use proper restraint systems.
Ski and Snowboard Bag
Compartment To stow and safely fasten a ski and
snowboard bag, with no need to fold
down the seatback, use the opening
available at the back of the longer
seatback (60), at the level of the
armrest between the rear seats.
To reach this compartment and
properly arrange the bag, proceed as
follows.
• From inside the passenger
compartment, lower the armrest
between the rear seats.Understanding the Vehicle
3
141
Page 147 of 436
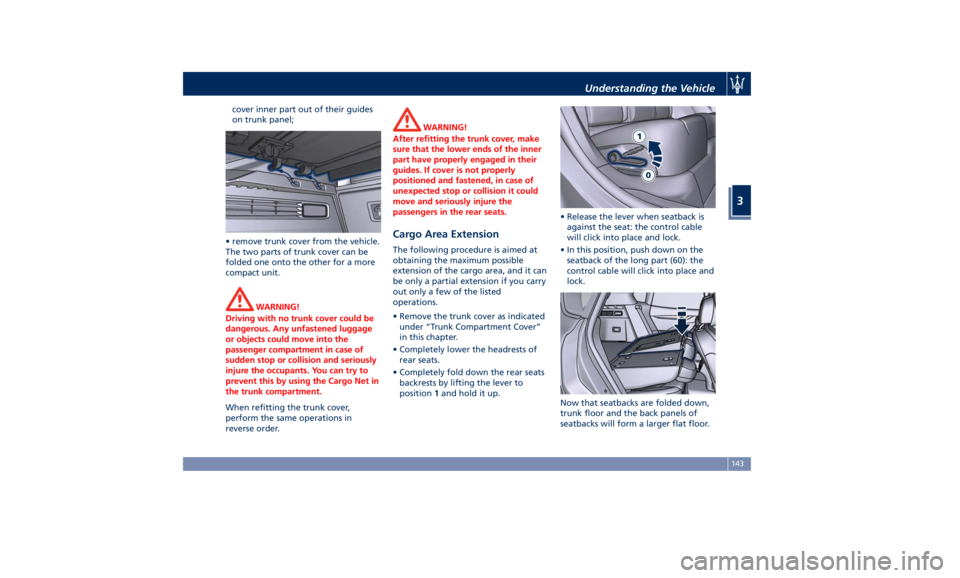
cover inner part out of their guides
on trunk panel;
• remove trunk cover from the vehicle.
The two parts of trunk cover can be
folded one onto the other for a more
compact unit.
WARNING!
Driving with no trunk cover could be
dangerous. Any unfastened luggage
or objects could move into the
passenger compartment in case of
sudden stop or collision and seriously
injure the occupants. You can try to
prevent this by using the Cargo Net in
the trunk compartment.
When refitting the trunk cover,
perform
the same operations in
reverse order. WARNING!
After refitting the trunk cover, make
sure that the lower ends of the inner
part have properly engaged in their
guides. If cover is not properly
positioned and fastened, in case of
unexpected stop or collision it could
move and seriously injure the
passengers in the rear seats.
Cargo Area Extension The following procedure is aimed at
obtaining the maximum possible
extension of the cargo area, and it can
be only a partial extension if you carry
out only a few of the listed
operations.
• Remove the trunk cover as indicated
under “Trunk Compartment Cover”
in this chapter.
• Completely lower the headrests of
rear seats.
• Completely fold down the rear seats
backrests by lifting the lever to
position 1 and hold it up. • Release the lever when seatback is
against the seat: the control cable
will click into place and lock.
• In this position, push down on the
seatback of the long part (60): the
control cable will click into place and
lock.
Now that seatbacks are folded down,
trunk floor and the back panels of
seatbacks will form a larger flat floor.Understanding the Vehicle
3
143
Page 148 of 436
CAUTION!
Seatback rear panel is not suitable to
support heavy loads and metal objects
with protruding elements that might
scratch its surface. If necessary, protect
the seatback rear panel surface using
rigid panels.
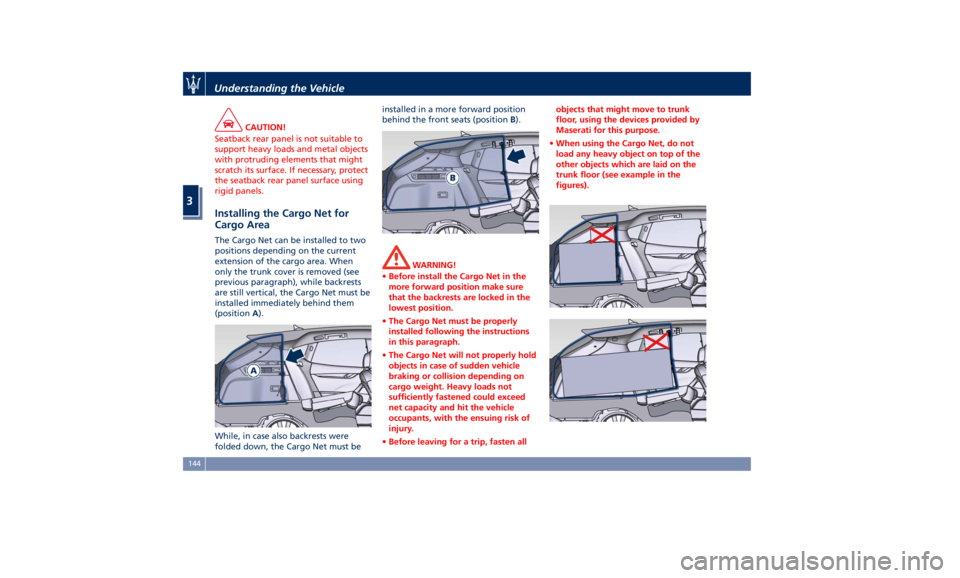
Installing the Cargo Net for
Cargo Area The Cargo Net can be installed to two
positions depending on the current
extension of the cargo area. When
only the trunk cover is removed (see
previous paragraph), while backrests
are still vertical, the Cargo Net must be
installed immediately behind them
(position A ).
While, in case also backrests were
folded down, the Cargo Net must be installed in a more forward position
behind the front seats (position B ).
WARNING!
• Before install the Cargo Net in the
more forward position make sure
that the backrests are locked in the
lowest position.
• The Cargo Net must be properly
installed following the instructions
in this paragraph.
• The Cargo Net will not properly hold
objects in case of sudden vehicle
braking or collision depending on
cargo weight. Heavy loads not
sufficiently fastened could exceed
net capacity and hit the vehicle
occupants, with the ensuing risk of
injury.
• Before leaving for a trip, fasten all objects that might move to trunk
floor, using the devices provided by
Maserati for this purpose.
• When using the Cargo Net, do not
load any heavy object on top of the
other objects which are laid on the
trunk floor (see example in the
figures).Understanding the Vehicle
3
144