Page 452 of 593
 Jack")
69
What to do in an emergency
IF YOU HAVE A FLAT TIRE
Jack and tools
The jack and wheel lug nut wrench
are stored in the luggage compart-
ment.
Remove the panel indicated in the
illustration.
(1) Jack
(2) Wheel lug nut wrench(Jack handle)
Jacking instructions
The jack is provided for emergency
tire changing only.
To prevent the jack from “rattling”
while the vehicle is in motion, store it
properly.
Follow jacking instructions to reduce
the possibility of personal injury. Always move the vehicle complete-
ly off the road and onto the shoul-
der before trying to change a tire.
The jack should be used on a firm
level ground. If you cannot find a
firm, level place off the road, call a
towing service company for assis-
tance.
Be sure to use the correct front and rear jacking positions on the vehi-
cle; never use the bumpers or any
other part of the vehicle for jack
support.
Do not allow anyone to remain in the vehicle while it is on the jack.
Make sure any children present are in a secure place away from
the road and from the vehicle to be
raised with the jack.
WARNING- Changing tires
Never attempt vehicle repairs in
the traffic lanes of a public road
or highway.
OYP064029N
WARNING- Tire Jack
Do not place any portion of your
body under a vehicle that is only
supported by a jack since the
vehicle can easily roll off the
jack. Use vehicle support stands.
Page 453 of 593
What to do in an emergency
10
6
Removing the spare tire
Your spare tire is stored underneath
your vehicle, directly below the right
sliding door.
1. Open the right sliding door and
find the plastic hex bolt cover on
the floor.
2. Remove the cover. 3. Use the wheel lug nut wrench to
loosen the bolt enough to lower
the spare tire.
Turn the wrench counterclockwise until the spare tire reaches the
ground.
OYP054167N
OYP054163N
WARNING
- Running vehicle on jack
Do not start or run the engine of
the vehicle while the vehicle is
on the jack as this may cause
the vehicle to fall off the jack.
Page 454 of 593
611
What to do in an emergency
4. After the spare tire reaches theground, continue to turn the
wrench counterclockwise, and
draw the spare tire outside. Never
rotate the wrench excessively, oth-
erwise the spare tire carrier may
be damaged.
5. Remove the retainer from the cen- ter of the spare tire.
6. Remove the cover from the spare tire.
Storing the spare tire
1. Assemble the cover and spare tirewith valve center aligning together.
2. Lay the tire on the ground with the valve stem facing down. 3. Place the wheel under the vehicle
and install the retainer through the
wheel center.
4. Turn the wrench clockwise until it clicks.
Ensure the spare tire retainer is
properly aligned with the center of
the spare tire to prevent the spare
tire from "rattling".
Otherwise, it may cause the spare
tire to fall off the carrier and lead to
an accident.
OYP054164N
OYP054165N
OYP054166N
Page 455 of 593
What to do in an emergency
12
6
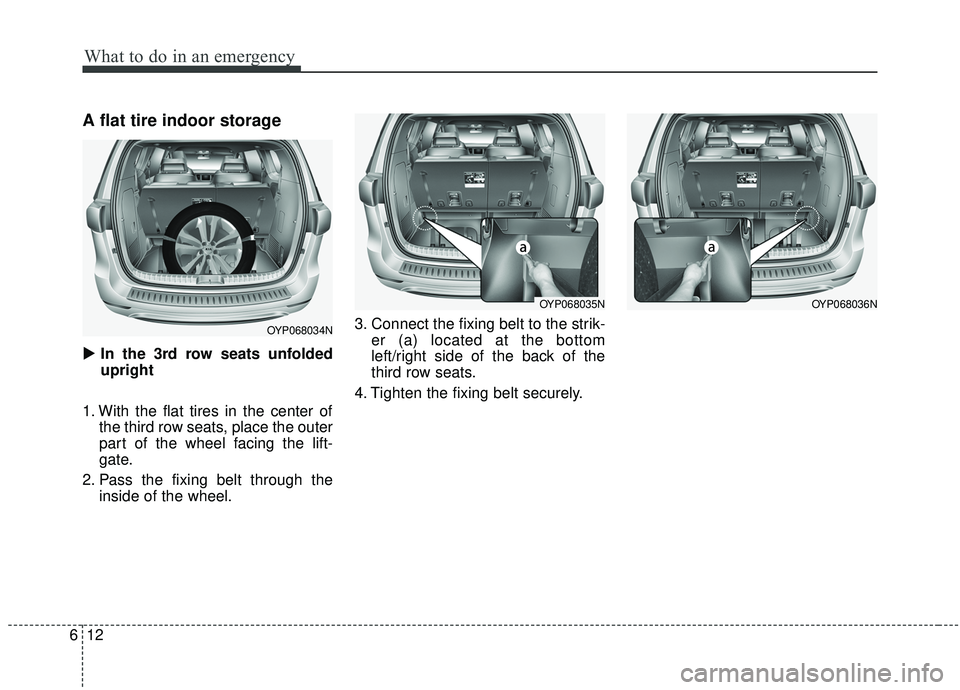
A flat tire indoor storage
� In the 3rd row seats unfolded
upright
1. With the flat tires in the center of the third row seats, place the outer
part of the wheel facing the lift-
gate.
2. Pass the fixing belt through the inside of the wheel. 3. Connect the fixing belt to the strik-
er (a) located at the bottom
left/right side of the back of the
third row seats.
4. Tighten the fixing belt securely.
OYP068034N
OYP068035NOYP068036N
Page 456 of 593
613
What to do in an emergency
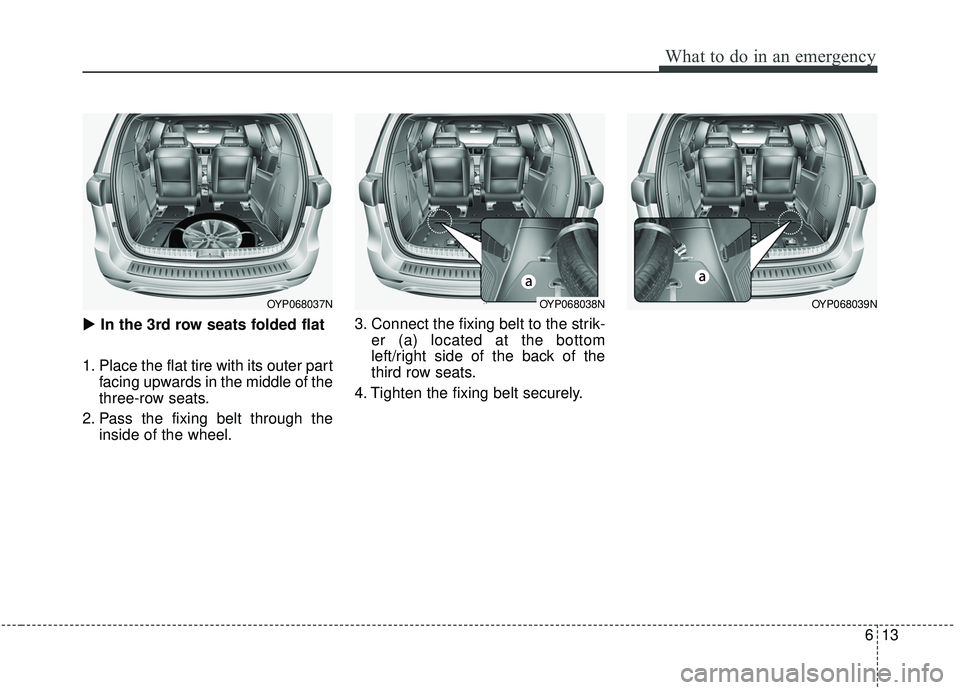
�In the 3rd row seats folded flat
1. Place the flat tire with its outer part facing upwards in the middle of the
three-row seats.
2. Pass the fixing belt through the inside of the wheel. 3. Connect the fixing belt to the strik-
er (a) located at the bottom
left/right side of the back of the
third row seats.
4. Tighten the fixing belt securely.
OYP068037NOYP068038NOYP068039N
Page 457 of 593
What to do in an emergency
14
6
If the flat tire is contaminated,
cover the tire with anti-pollution
cover before keeping it indoors.
This is to prevent indoor contami-
nation.
Changing tires
1.Park on a level surface and applythe parking brake firmly.
2.Place the transaxle shift lever in P (Park) with automatic transaxle.
3.Activate the hazard warning flash- ers. 4.Remove the wheel lug nut wrench,
jack and spare tire from the vehi-
cle.
5.Block both the front and rear of the wheel that is diagonally opposite
from the jack position.
OYP068042NOYP064030N
1VQA4022
anti-pollution cover
Page 458 of 593
615
What to do in an emergency
To prevent vehicle movement whilechanging a tire, always set the
parking brake fully, and always
block the wheel diagonally oppo-
site the wheel being changed.
We recommend that the wheels of the vehicle be blocked, and that no
person remain in a vehicle that is
being jacked.
6.Loosen the wheel lug nuts counter-clockwise one turn each, but do
not remove any nut until the tire
has been raised off the ground.
7.Place the jack at the front (1) orrear (2) jacking position closest to
the tire you are changing. Place the
jack at the designated locations
under the frame. The jacking posi-
tions are plates welded to the
frame with two tabs and a raised
dot to index with the jack.
OYP068028N
OYP064023N/Q
OYP064022N
Page 459 of 593

What to do in an emergency
16
6
8.Insert the wheel lug nut wrench
into the jack and turn it clockwise,
raising the vehicle until the tire just
clears the ground. This measure-
ment is approximately 1 in. (30
mm).
Before removing the wheel lug
nuts, make sure the vehicle is sta-
ble and that there is no chance for
movement or slippage. 9.Loosen the wheel nuts and remove
them with your fingers. Slide the
wheel off the studs and lay it flat so
it cannot roll away. To put the wheel
on the hub, pick up the spare tire,
line up the holes with the studs and
slide the wheel onto them. If this is
difficult, tip the wheel slightly and
get the top hole in the wheel lined
up with the top stud. Then jiggle the
wheel back and forth until the
wheel can slide over the other
studs. Wheels may have sharp edges.
Handle them carefully to avoid possi-
ble severe injury. Before putting the
wheel into place, be sure that there
is nothing on the hub or wheel (such
as mud, tar, gravel, etc.) that pre-
vents the wheel from fitting solidly
against the hub.
WARNING- Installing a
wheel
Make sure the wheel makes
good contact with the hub when
installed. If the contact of the
mounting surface between the
wheel and hub is not good, the
wheel nuts could come loose
and cause the loss of a wheel.
Loss of a wheel may result in
loss of control of the vehicle.
OYP064021N