2019 KIA SEDONA child lock
[x] Cancel search: child lockPage 56 of 593
Safety features of your vehicle
40
3
Seat belts - Front passenger and
rear seat 3-point system withcombination locking retractor
To fasten your seat belt:
Combination retractor type seat belts
are installed in the rear seat posi-
tions to help accommodate the
installation of child restraint systems.
Although a combination retractor is
also installed in the front passenger
seat position, it is strongly recom-
mended that children always be
seated in the rear seat. NEVER
place any infant restraint system in
the front seat of the vehicle.
This type of seat belt combines the
features of both an emergency lock-
ing retractor seat belt and an auto-
matic locking retractor seat belt. To
fasten your seat belt, pull it out of the
retractor and insert the metal tab into
the buckle. There will be an audible
"click" when the tab locks into the
buckle. When not securing a child
restraint, the seat belt operates in the
same way as the driver's seat belt
(Emergency Locking Retractor Type). It automatically adjusts to the proper
length only after the lap belt portion
of the seat belt is adjusted manually
so that it fits snugly around your hips.
When the seat belt is fully extended
from the retractor to allow the instal-
lation of a child restraint system, the
seat belt operation changes to allow
the belt to retract, but not to extend
(Automatic Locking Retractor Type).
Refer to “Using a child restraint sys-
tem” in this section.
WARNING- Shoulder belt
positioning
Never position the shoulder belt
across your neck or face.
WARNING- Seat belt replacement
Replace your seat belts after
being in an accident. Failure to
replace seat belts after an acci-
dent could leave you with dam-
aged seat belts that will not pro-
vide protection in the event of
another collision.
Page 57 of 593
341
Safety features of your vehicle
✽ ✽NOTICE
Although the combination retractor
provides the same level of protection
for seated passengers in either emer-
gency or automatic locking modes,
have the seated passengers use the
emergency locking feature for
improved convenience. The auto-
matic locking function is intended to
facilitate child restraint installation.
To convert from the automatic lock-
ing feature to the emergency locking
operation mode, allow the unbuck-
led seat belt to fully retract.
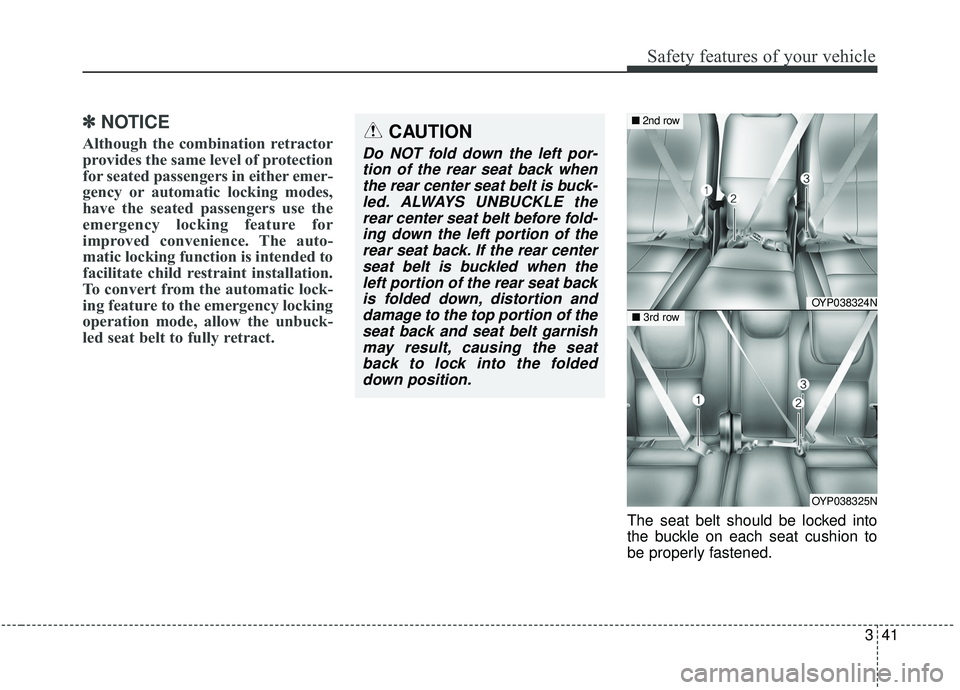
The seat belt should be locked into
the buckle on each seat cushion to
be properly fastened.
CAUTION
Do NOT fold down the left por-
tion of the rear seat back whenthe rear center seat belt is buck-led. ALWAYS UNBUCKLE therear center seat belt before fold-ing down the left portion of therear seat back. If the rear centerseat belt is buckled when theleft portion of the rear seat backis folded down, distortion anddamage to the top portion of theseat back and seat belt garnishmay result, causing the seatback to lock into the foldeddown position.
OYP038324N
OYP038325N
■ 2nd row
■ 3rd row
Page 71 of 593
355
Safety features of your vehicle
For safety reasons, we recommend
that the child restraint system be
used in the rear seats.
Never place a rear-facing child
restraint in the front passenger seat,
because of the danger an inflating
passenger-side air bag could impact
the rear-facing child restraint and kill
the child.
Since all passenger seat belts move
freely under normal conditions and
only lock under extreme or emer-
gency conditions (emergency lock
mode), you must manually change
these seat belts to the auto lock
mode to secure a child restraint.
If the seat belt does not operate as
described in this section, have the
system checked immediately by your
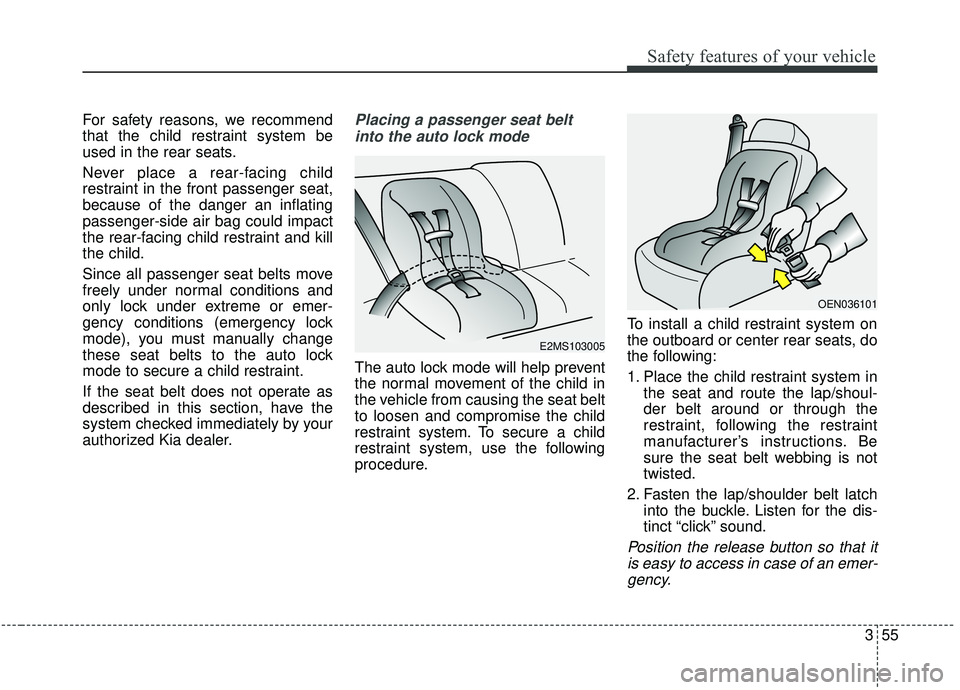
authorized Kia dealer.Placing a passenger seat beltinto the auto lock mode
The auto lock mode will help prevent
the normal movement of the child in
the vehicle from causing the seat belt
to loosen and compromise the child
restraint system. To secure a child
restraint system, use the following
procedure. To install a child restraint system on
the outboard or center rear seats, do
the following:
1. Place the child restraint system in
the seat and route the lap/shoul-
der belt around or through the
restraint, following the restraint
manufacturer’s instructions. Be
sure the seat belt webbing is not
twisted.
2. Fasten the lap/shoulder belt latch into the buckle. Listen for the dis-
tinct “click” sound.
Position the release button so that itis easy to access in case of an emer-gency.
E2MS103005
OEN036101
Page 72 of 593

Safety features of your vehicle
56
3
If the vehicle headrest prevents prop-
er installation of a child seat (as
described in the child seat system
manual), the headrest of the respec-
tive seating position shall be read-
justed or entirely removed.
3. Pull the shoulder portion of theseat belt all the way out. When the
shoulder portion of the seat belt is
fully extended, it will shift the
retractor to the “Auto Lock” (child
restraint) mode. 4. Slowly allow the shoulder portion
of the seat belt to retract and listen
for an audible “clicking” or “ratchet-
ing” sound. This indicates that the
retractor is in the “Auto Lock”
mode. If no distinct sound is
heard, repeat steps 3 and 4.
OEN036103OEN036102
Page 73 of 593
357
Safety features of your vehicle
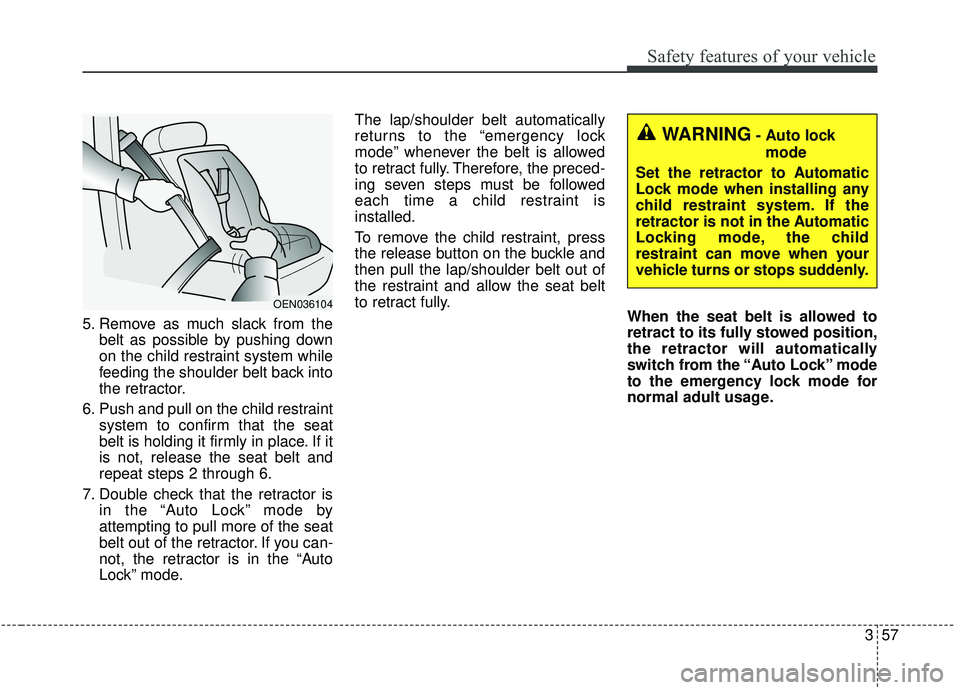
5. Remove as much slack from thebelt as possible by pushing down
on the child restraint system while
feeding the shoulder belt back into
the retractor.
6. Push and pull on the child restraint system to confirm that the seat
belt is holding it firmly in place. If it
is not, release the seat belt and
repeat steps 2 through 6.
7. Double check that the retractor is in the “Auto Lock” mode by
attempting to pull more of the seat
belt out of the retractor. If you can-
not, the retractor is in the “Auto
Lock” mode. The lap/shoulder belt automatically
returns to the “emergency lock
mode” whenever the belt is allowed
to retract fully. Therefore, the preced-
ing seven steps must be followed
each time a child restraint is
installed.
To remove the child restraint, press
the release button on the buckle and
then pull the lap/shoulder belt out of
the restraint and allow the seat belt
to retract fully.
When the seat belt is allowed to
retract to its fully stowed position,
the retractor will automatically
switch from the “Auto Lock” mode
to the emergency lock mode for
normal adult usage.
OEN036104
WARNING- Auto lock
mode
Set the retractor to Automatic
Lock mode when installing any
child restraint system. If the
retractor is not in the Automatic
Locking mode, the child
restraint can move when your
vehicle turns or stops suddenly.
Page 105 of 593
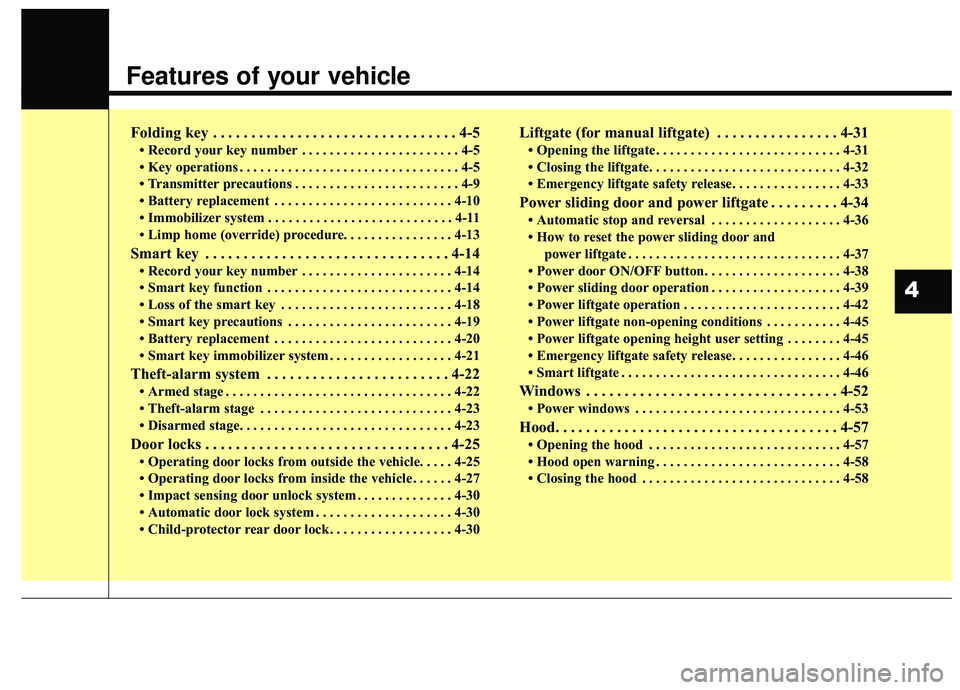
Features of your vehicle
Folding key . . . . . . . . . . . . . . . . . . . . . . . . . . . . . . . . 4-5
• Record your key number . . . . . . . . . . . . . . . . . . . . . . . 4-5
• Key operations . . . . . . . . . . . . . . . . . . . . . . . . . . . . . . . . 4-5
• Transmitter precautions . . . . . . . . . . . . . . . . . . . . . . . . 4-9
• Battery replacement . . . . . . . . . . . . . . . . . . . . . . . . . . 4-10
• Immobilizer system . . . . . . . . . . . . . . . . . . . . . . . . . . . 4-11
• Limp home (override) procedure. . . . . . . . . . . . . . . . 4-13
Smart key . . . . . . . . . . . . . . . . . . . . . . . . . . . . . . . . 4-14
• Record your key number . . . . . . . . . . . . . . . . . . . . . . 4-14
• Smart key function . . . . . . . . . . . . . . . . . . . . . . . . . . . 4-14
• Loss of the smart key . . . . . . . . . . . . . . . . . . . . . . . . . 4-18
• Smart key precautions . . . . . . . . . . . . . . . . . . . . . . . . 4-19
• Battery replacement . . . . . . . . . . . . . . . . . . . . . . . . . . 4-20
• Smart key immobilizer system . . . . . . . . . . . . . . . . . . 4-21
Theft-alarm system . . . . . . . . . . . . . . . . . . . . . . . . 4-22
• Armed stage . . . . . . . . . . . . . . . . . . . . . . . . . . . . . . . . . 4-22
• Theft-alarm stage . . . . . . . . . . . . . . . . . . . . . . . . . . . . 4-23
• Disarmed stage. . . . . . . . . . . . . . . . . . . . . . . . . . . . . . . 4-23
Door locks . . . . . . . . . . . . . . . . . . . . . . . . . . . . . . . . 4-25
• Operating door locks from outside the vehicle. . . . . 4-25
• Operating door locks from inside the vehicle . . . . . . 4-27
• Impact sensing door unlock system . . . . . . . . . . . . . . 4-30
• Automatic door lock system . . . . . . . . . . . . . . . . . . . . 4-30
• Child-protector rear door lock. . . . . . . . . . . . . . . . . . 4-30
Liftgate (for manual liftgate) . . . . . . . . . . . . . . . . 4-31
• Opening the liftgate . . . . . . . . . . . . . . . . . . . . . . . . . . . 4-31
• Closing the liftgate. . . . . . . . . . . . . . . . . . . . . . . . . . . . 4-32
• Emergency liftgate safety release. . . . . . . . . . . . . . . . 4-33
Power sliding door and power liftgate . . . . . . . . . 4-34
• Automatic stop and reversal . . . . . . . . . . . . . . . . . . . 4-36
• How to reset the power sliding door and power liftgate . . . . . . . . . . . . . . . . . . . . . . . . . . . . . . . 4-37
• Power door ON/OFF button. . . . . . . . . . . . . . . . . . . . 4-38
• Power sliding door operation . . . . . . . . . . . . . . . . . . . 4-39
• Power liftgate operation . . . . . . . . . . . . . . . . . . . . . . . 4-42
• Power liftgate non-opening conditions . . . . . . . . . . . 4-45
• Power liftgate opening height user setting . . . . . . . . 4-45
• Emergency liftgate safety release. . . . . . . . . . . . . . . . 4-46
• Smart liftgate . . . . . . . . . . . . . . . . . . . . . . . . . . . . . . . . 4-46
Windows . . . . . . . . . . . . . . . . . . . . . . . . . . . . . . . . . 4-52
• Power windows . . . . . . . . . . . . . . . . . . . . . . . . . . . . . . 4-53
Hood. . . . . . . . . . . . . . . . . . . . . . . . . . . . . . . . . . . . \
. 4-57
• Opening the hood . . . . . . . . . . . . . . . . . . . . . . . . . . . . 4-57
• Hood open warning . . . . . . . . . . . . . . . . . . . . . . . . . . . 4-58
• Closing the hood . . . . . . . . . . . . . . . . . . . . . . . . . . . . . 4-58
4
Page 110 of 593
Features of your vehicle
64
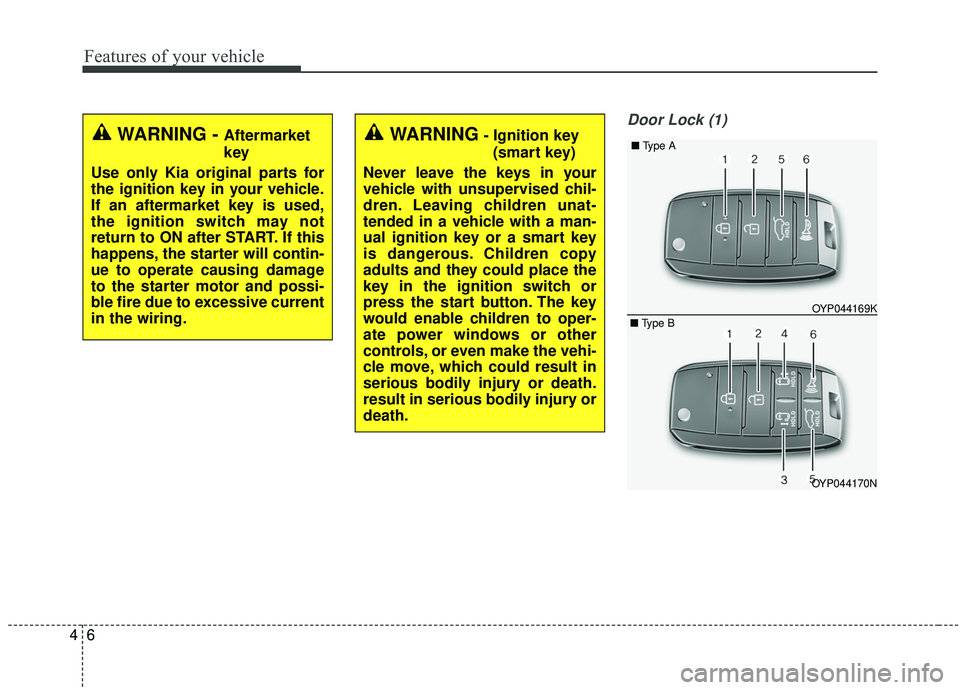
Door Lock (1)
WARNING - Aftermarket
key
Use only Kia original parts for
the ignition key in your vehicle.
If an aftermarket key is used,
the ignition switch may not
return to ON after START. If this
happens, the starter will contin-
ue to operate causing damage
to the starter motor and possi-
ble fire due to excessive current
in the wiring.WARNING- Ignition key (smart key)
Never leave the keys in your
vehicle with unsupervised chil-
dren. Leaving children unat-
tended in a vehicle with a man-
ual ignition key or a smart key
is dangerous. Children copy
adults and they could place the
key in the ignition switch or
press the start button. The key
would enable children to oper-
ate power windows or other
controls, or even make the vehi-
cle move, which could result in
serious bodily injury or death.
result in serious bodily injury or
death.
OYP044170N OYP044169K
■
Type A
■ Type B
Page 118 of 593
Features of your vehicle
14
4
Record your key number
The key code number
is stamped on the bar
code tag attached to
the key set. Should
you lose your keys,
this number will enable an author-
ized Kia dealer to duplicate the keys
easily. Remove the bar code tag and
store it in a safe place. Also, record
the code number and keep it in a
safe and handy place, but not in the
vehicle.
Smart key function
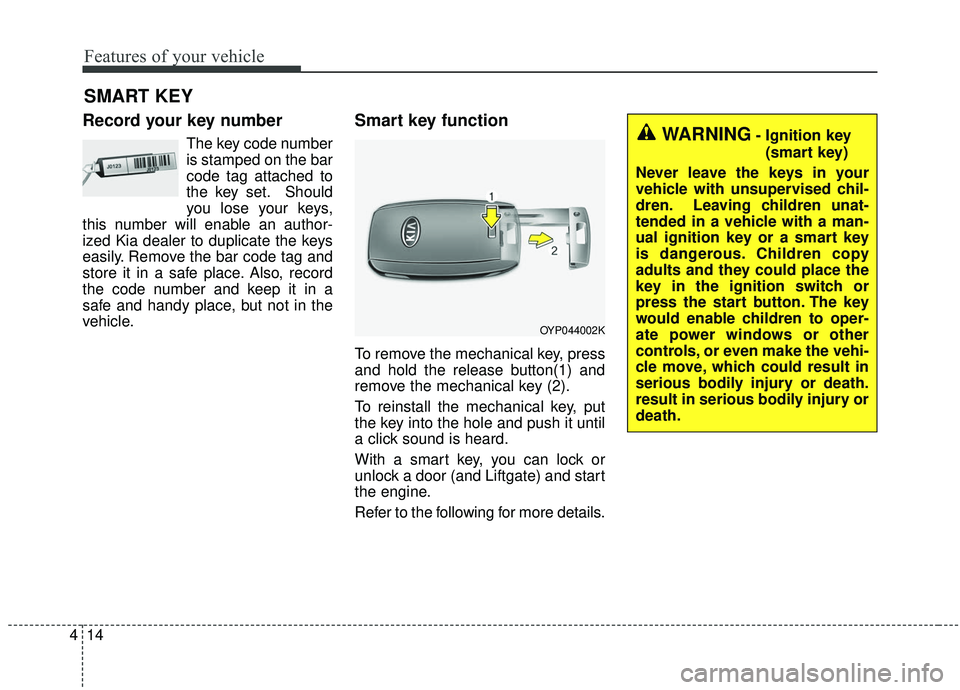
To remove the mechanical key, press
and hold the release button(1) and
remove the mechanical key (2).
To reinstall the mechanical key, put
the key into the hole and push it until
a click sound is heard.
With a smart key, you can lock or
unlock a door (and Liftgate) and start
the engine.
Refer to the following for more details.
SMART KEY
OYP044002K
WARNING- Ignition key
(smart key)
Never leave the keys in your
vehicle with unsupervised chil-
dren. Leaving children unat-
tended in a vehicle with a man-
ual ignition key or a smart key
is dangerous. Children copy
adults and they could place the
key in the ignition switch or
press the start button. The key
would enable children to oper-
ate power windows or other
controls, or even make the vehi-
cle move, which could result in
serious bodily injury or death.
result in serious bodily injury or
death.