2019 INFINITI QX50 ignition
[x] Cancel search: ignitionPage 84 of 288
5. Hands-Free Phone
BLUETOOTH® HANDS-FREE
PHONE SYSTEM
WARNING
.Use a phone after stopping your
vehicle in a safe location. If you have
to use a phone while driving, exercise
extreme caution at all times so full
attention may be given to vehicle
operation.
. If you find yourself unable to devote
full attention to vehicle operation
while talking on the phone, pull off
the road to a safe location and stop
your vehicle before doing so.
CAUTION
To avoid draining the vehicle battery, use
a phone after starting the engine.
Your vehicle is equipped with Bluetooth®
Hands-Free Phone System. If you are an
owner of a compatible Bluetooth® enabled
cellular phone, you can set up the wireless
connection between your cellular phone and
the in-vehicle phone module. With Blue- tooth® wireless technology, you can make
or receive a telephone call with your cellular
phone in your pocket.
Once a cellular phone is connected to the in-
vehicle phone module, the procedure for
connecting the phone does not need to be
performed again. Your phone is automati-
cally selected with the in-vehicle phone
module when the ignition switch is pushed
to the “ON” position with the selected
cellular phone turned on and carried in the
vehicle.
You can register up to 5 different Blue-
tooth® cellular phones in the in-vehicle
phone module. However, you can talk on
only one cellular phone at a time.
The Voice Recognition system supports
phone commands, so dialing a phone number
using your voice is possible.“10. Voice recognition”
Before using the Bluetooth® Hands-Free
Phone System, refer to the following notes.
. Wireless LAN (Wi-Fi) and the Blue-
tooth® functions share the same fre-
quency band (2.4 GHz). Using the
Bluetooth® and the wireless LAN func-
tions at the same time may slow down or
disconnect the communication and cause undesired noise. It is recommended that
you turn off the wireless LAN (Wi-Fi)
when using the Bluetooth® functions.
. Set up the wireless connection between
a compatible cellular phone and the in-
vehicle phone module before using the
Bluetooth® Hands-Free Phone System.
. Some Bluetooth® enabled cellular
phones may not be recognized by the
in-vehicle phone module.
Please visit www.infinitiusa.com/blue-
tooth/search for a recommended phone
list.
. You will not be able to use a hands-free
phone under the following conditions:
— Your vehicle is outside of the tele- phone service area.
— Your vehicle is in an area where it is difficult to receive radio waves; such
as in a tunnel, in an underground
parking garage, behind a tall building
or in a mountainous area.
— Your cellular phone is locked in order to prevent dialing.
. When the radio wave condition is not
ideal or ambient sound is too loud, it may
be difficult to hear the other person’s
5-2
Page 85 of 288

voice during a call.
. This Bluetooth® system supports Wide-
band Speech, which enhances the sound
quality of phone calls placed over Blue-
tooth®. To take advantage of this fea-
ture, the mobile device should be used on
a carrier supporting Adaptive Multi-Rate
Wideband (AMR-WB) or HD Voice
technology. The performance of AMR-
WB may vary by carrier and calling area.
Consult your mobile carrier if you experi-
ence issues with call quality or connec-
tion.
. Immediately after the ignition switch is
pushed to the “ON” position, it may be
impossible to receive a call for a short
period of time.
. Do not place the cellular phone in an area
surrounded by metal or far away from
the in-vehicle phone module to prevent
tone quality degradation and wireless
connection disruption.
. While a cellular phone is connected
through the Bluetooth® wireless con-
nection, the battery power of the cellular
phone may discharge quicker than usual. .
If the Bluetooth® Hands-Free Phone
System seems to be malfunctioning,
please visit www.infinitiusa.com/blue-
tooth for troubleshooting help.
. Some cellular phones or other devices
may cause interference or a buzzing
noise to come from the audio system
speakers. Storing the device in a differ-
ent location may reduce or eliminate the
noise.
. Refer to the cellular phone Owner’s
Manual regarding the telephone pairing
procedure specific to your phone, bat-
tery charging, cellular phone antenna,
etc.
. The antenna display on the monitor may
not coincide with the antenna display of
some cellular phones.
. The battery display on the monitor may
not coincide with the battery display of
some cellular phones.
. Keep the interior of the vehicle as quiet
as possible to hear the caller’s voice
clearly as well as to minimize its echoes.
. If reception between callers is unclear,
adjusting the incoming or outgoing call
volume may improve the clarity. .
The microphone is located near the map
light.
PHONE
Connecting Bluetooth® Hands-
Free Phone
A cellular phone device must be connected
to the Bluetooth® Hands-Free Phone Sys-
tem before operation. Up to 5 cellular
phones can be connected to the system.
“Connecting Bluetooth® device”
(page 2-22)
Phone selection
Select one of the connected devices for
operation.
1. Push
Page 89 of 288
Models without navigation system:
Push
>on
the steering-wheel to display the phone screen again.
HANDS-FREE TEXT MESSAGING
ASSISTANT
WARNING
Use the text messaging feature after
parking your vehicle in a safe location. If
you have to use the feature while driving,
exercise extreme caution at all times so
full attention may be given to vehicle
operation.
CAUTION
This feature is disabled if the connected
device does not support the Message
Access Profile (MAP). See the phone’s
Owner’s Manual for details and instruc-
tions.
Laws in some jurisdictions may restrict the
use of “Text-to-Speech.” Check local regula-
tions before using this feature.
The system allows for the sending and
receiving of text messages through the vehicle interface.
Depending on the device that is connected
to the vehicle, some of the items/functions
may not be displayed or used.
Receiving a message
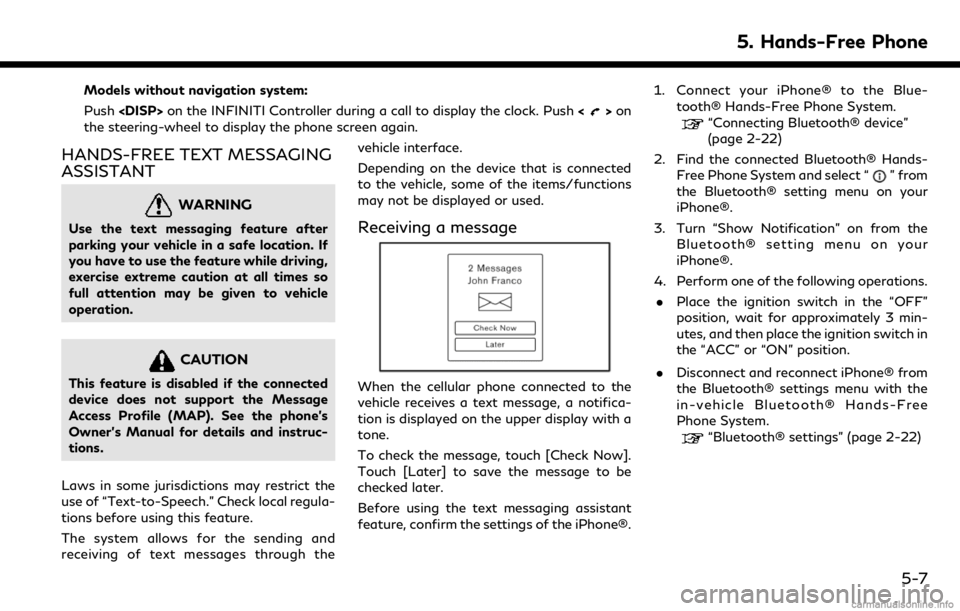
When the cellular phone connected to the
vehicle receives a text message, a notifica-
tion is displayed on the upper display with a
tone.
To check the message, touch [Check Now].
Touch [Later] to save the message to be
checked later.
Before using the text messaging assistant
feature, confirm the settings of the iPhone®.1. Connect your iPhone® to the Blue-
tooth® Hands-Free Phone System.
“Connecting Bluetooth® device”
(page 2-22)
2. Find the connected Bluetooth® Hands- Free Phone System and select “
” from
the Bluetooth® setting menu on your
iPhone®.
3. Turn “Show Notification” on from the Bluetooth® setting menu on your
iPhone®.
4. Perform one of the following operations. . Place the ignition switch in the “OFF”
position, wait for approximately 3 min-
utes, and then place the ignition switch in
the “ACC” or “ON” position.
. Disconnect and reconnect iPhone® from
the Bluetooth® settings menu with the
in-vehicle Bluetooth® Hands-Free
Phone System.
“Bluetooth® settings” (page 2-22)
5. Hands-Free Phone
5-7
Page 98 of 288
6. INFINITI InTouchTMApps
INFINITI INTOUCHTMAPPS
OVERVIEW
Laws in some jurisdictions may restrict the
use of some applications and features.
Check local regulations for any require-
ments.
CAUTION
. While driving, some operations are
limited in order to prevent distracting
the driver. While driving, avoid keep-
ing a close watch on the display.
. Some application services may be
subject to change or termination
without prior notice.
USING APPLICATIONS
NOTE:
To use APP functions on the models with-
out navigation system, calendar setting is
necessary for checking SSL expiration date.
“Clock settings” (page 2-21)
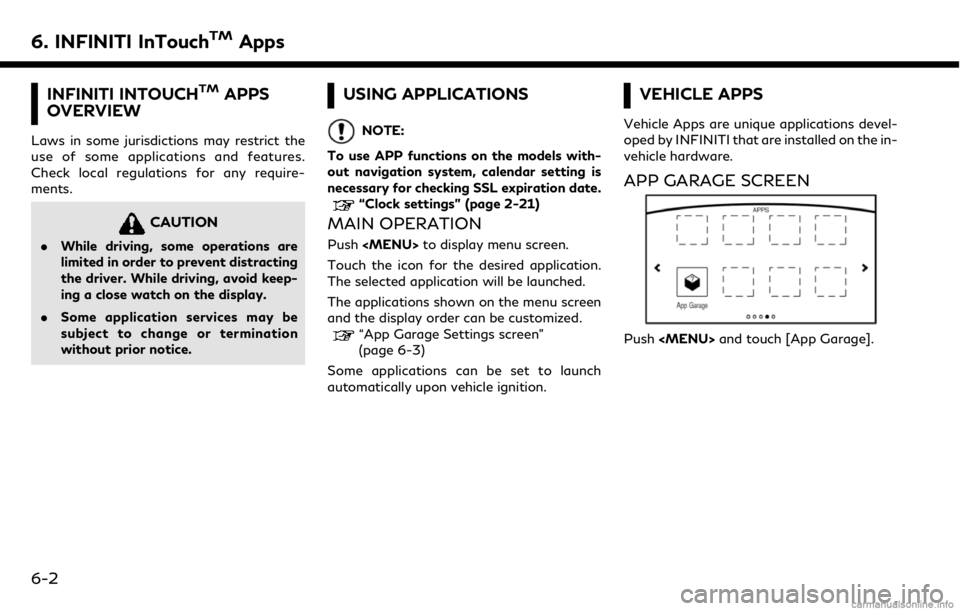
MAIN OPERATION
Push
Page 99 of 288
![INFINITI QX50 2019 Navigation Manual Available settings. [App Garage Settings]
Touch to view Apps information, man-
age Apps, customize shortcuts on the
menu screen and set notifications.
. Available application list
Displays the install INFINITI QX50 2019 Navigation Manual Available settings. [App Garage Settings]
Touch to view Apps information, man-
age Apps, customize shortcuts on the
menu screen and set notifications.
. Available application list
Displays the install](/manual-img/42/34995/w960_34995-98.png)
Available settings. [App Garage Settings]
Touch to view Apps information, man-
age Apps, customize shortcuts on the
menu screen and set notifications.
. Available application list
Displays the installed Vehicle Apps.
When a listed application is selected, the
application will start.
App Garage Settings screen
You can use various application settings.
1. Push
2. Touch [App Garage Settings].
Available items may vary depending on the
models and the specifications.
Menu Item Action
[All Apps] Show all applications. Select an application from the list to
modify additional application-specific settings.
[Running Apps] Applications listDisplay all running applications. To display application
information or stop an application, select the desired
application from the list.
[Stop All] Stop all running applications.
[Menu Icon Lo-
cation Setting] Applications
listShow or hide the application icon on the menu screen.
[Delete All] Delete all application icons on menu screen.
[Auto Start Setting] Enable this setting to automatically launch the application
upon vehicle ignition.
[System Information] Display system information.
[Install Apps via USB] Install an application via USB from the INFINITI portal site.
[Network Notification] This function is not applied.
[Installation Notification] If [Installation Notification] is on, a pop-up message is
displayed when a new application is installed.
[Factory Data Reset] Discard the stored application data.
NOTE:
. Depending on the type of application,
some applications may not be displayed
in the [Running Apps] field even if they
are running.
. After resetting the data by using [Fac-
tory Data Reset], the system will re- spond slowly because of the high work
load of the system. Place the ignition
switch in the “OFF” position and wait 5
minutes. Then place the ignition switch
in the “ON” position again.
. Vehicle Apps may not work for 30
seconds after placing the ignition switch
6. INFINITI InTouchTMApps
6-3
Page 104 of 288

7. Monitor system
REARVIEW MONITOR (if so
equipped)
WARNING
Failure to follow the warnings and in-
structions for proper use of the RearView
Monitor system could result in serious
injury or death.. The RearView Monitor is a conveni-
ence but it is not a substitute for
proper backing. Always turn and look
out the windows, and check mirrors to
be sure that it is safe to move before
operating the vehicle. Always back up
slowly.
. The system is designed as an aid to
the driver in showing large stationary
objects directly behind the vehicle, to
help avoid damaging the vehicle.
. The distance guide line and the vehicle
width line should be used as a refer-
ence only when the vehicle is on a level
paved surface. The distance viewed
on the monitor is for reference only
and may be different than the actual
distance between the vehicle and displayed objects.
CAUTION
Do not scratch the camera lens when
cleaning dirt or snow from the front of
camera.
When the shift lever is shifted into the R
(Reverse) position, the upper touch screen
display (upper display) shows the view to the
rear of the vehicle.
The radio can still be heard while the Rear-
View Monitor is active.
To display the rear view, the RearView
Monitor system uses a cameralocated
just above the vehicle’s license plate.
REARVIEW MONITOR SYSTEM
OPERATION
With the ignition switch in the “ON” position,
move the shift lever to the “R” (Reverse)
position to operate the RearView Monitor.
HOW TO READ DISPLAYED
LINES
Guiding lines that indicate the vehicle width
and distances to objects with reference to
the bumper line
are displayed on the
monitor.
7-2
Page 111 of 288
the front of the vehicle.
. Front-Wide View
An approximately 180-degree view of
the front of the vehicle.
. Rear View
An approximately 150-degree view of
the rear of the vehicle.
. Rear-Wide View (if so equipped)
An approximately 180-degree view of
the rear of the vehicle.
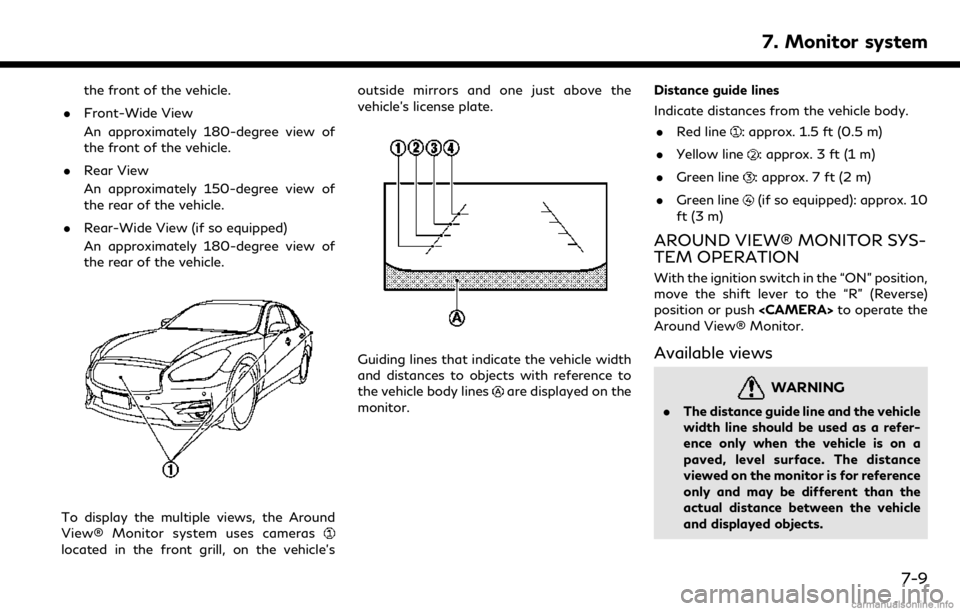
To display the multiple views, the Around
View® Monitor system uses cameras
located in the front grill, on the vehicle’s outside mirrors and one just above the
vehicle’s license plate.
Guiding lines that indicate the vehicle width
and distances to objects with reference to
the vehicle body lines
are displayed on the
monitor. Distance guide lines
Indicate distances from the vehicle body.
. Red line
: approx. 1.5 ft (0.5 m)
. Yellow line
: approx. 3 ft (1 m)
. Green line
: approx. 7 ft (2 m)
. Green line
(if so equipped): approx. 10
ft (3 m)
AROUND VIEW® MONITOR SYS-
TEM OPERATION
With the ignition switch in the “ON” position,
move the shift lever to the “R” (Reverse)
position or push
Around View® Monitor.
Available views
WARNING
. The distance guide line and the vehicle
width line should be used as a refer-
ence only when the vehicle is on a
paved, level surface. The distance
viewed on the monitor is for reference
only and may be different than the
actual distance between the vehicle
and displayed objects.
7. Monitor system
7-9
Page 114 of 288
7. Monitor system
the first time after the ignition switch is
placed in the “ON” position.
The driver can check the approximate direc-
tion and angle of the tire on the display by
tire icon
when driving the vehicle forward
or backward.
Predictive course lines (
and) indicate
the predictive course when operating the
vehicle. The predictive course lines will be
displayed on the monitor when the steering
wheel is turned. The predictive course lines
will move depending on how much the
steering wheel is turned and will not be
displayed while the steering wheel is in the
neutral position.
WARNING
. Objects in the bird’s-eye view will
appear further than the actual dis-
tance.
. Tall objects, such as a curb or vehicle,
may be misaligned or not displayed at
the seam of the views.
. Objects that are above the camera
cannot be displayed.
. The view for the bird’s-eye view may
be misaligned when the camera posi- tion alters.
. A line on the ground may be mis-
aligned and is not seen as being
straight at the seam of the views.
The misalignment will increase as the
line proceeds away from the vehicle.
. Tire angle display does not indicate
the actual tire angle
Front-side view:
Guiding lines:
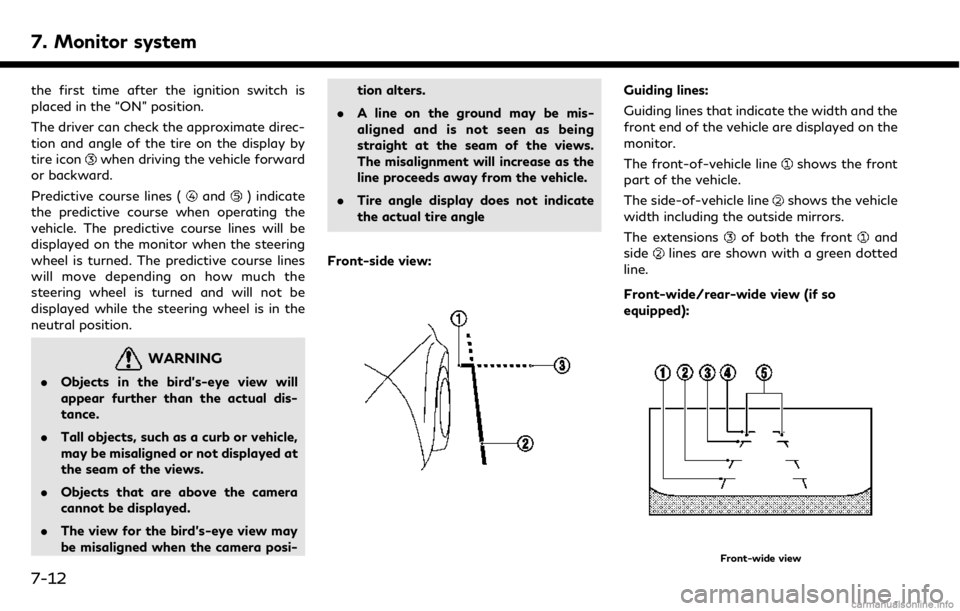
Guiding lines that indicate the width and the
front end of the vehicle are displayed on the
monitor.
The front-of-vehicle line
shows the front
part of the vehicle.
The side-of-vehicle line
shows the vehicle
width including the outside mirrors.
The extensions
of both the frontand
sidelines are shown with a green dotted
line.
Front-wide/rear-wide view (if so
equipped):
Front-wide view
7-12