Page 115 of 685

3-23
Convenient features of your vehicle
3
Tilt steering / Telescope steeringInformation
After adjustment, sometimes the lock-
release lever may not lock the steering
wheel.
It is not a malfunction. This occurs
when two gears are not engaged cor-
rectly. In this case, adjust the steering
wheel again and then lock the steering
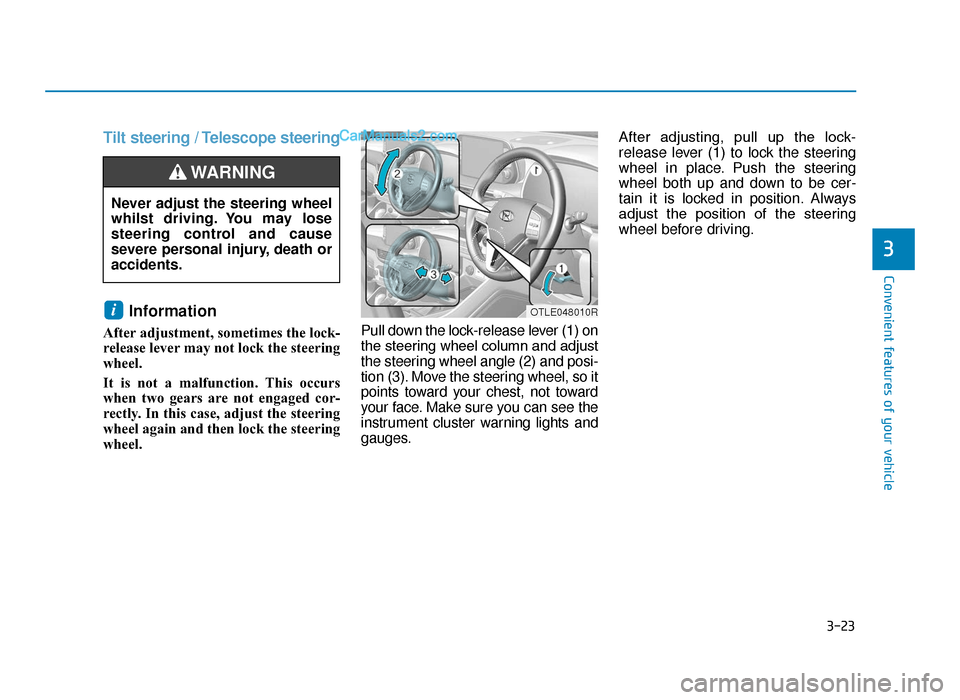
wheel. Pull down the lock-release lever (1) on
the steering wheel column and adjust
the steering wheel angle (2) and posi-
tion (3). Move the steering wheel, so it
points toward your chest, not toward
your face. Make sure you can see the
instrument cluster warning lights and
gauges.After adjusting, pull up the lock-
release lever (1) to lock the steering
wheel in place. Push the steering
wheel both up and down to be cer-
tain it is locked in position. Always
adjust the position of the steering
wheel before driving.
i
Never adjust the steering wheel
whilst driving. You may lose
steering control and cause
severe personal injury, death or
accidents.
WARNING
OTLE048010R
TLe UK 3a(~109).qxp 6/12/2018 2:21 PM Page 23
Page 117 of 685

3-25
Convenient features of your vehicle
3
MIRRORS
Inside rearview mirror
Before you start driving, adjust the
rearview mirror to the centre on the
view through the rear window.When cleaning the mirror, use a
paper towel or similar material
dampened with glass cleaner. Do
not spray glass cleaner directly on
the mirror as that may cause the
liquid cleaner to enter the mirror
housing.
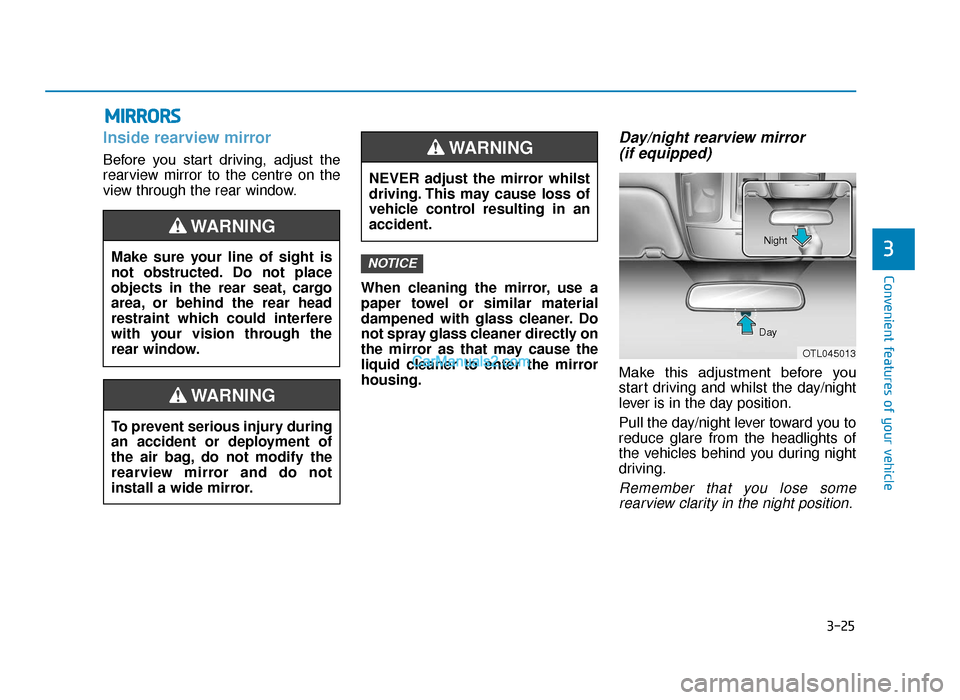
Day/night rearview mirror (if equipped)
Make this adjustment before you
start driving and whilst the day/night
lever is in the day position.
Pull the day/night lever toward you to
reduce glare from the headlights of
the vehicles behind you during night
driving.
Remember that you lose some
rearview clarity in the night position.
NOTICEMake sure your line of sight is
not obstructed. Do not place
objects in the rear seat, cargo
area, or behind the rear head
restraint which could interfere
with your vision through the
rear window.
WARNING
To prevent serious injury during
an accident or deployment of
the air bag, do not modify the
rearview mirror and do not
install a wide mirror.
WARNING
NEVER adjust the mirror whilst
driving. This may cause loss of
vehicle control resulting in an
accident.
WARNING
OTL045013
Day Night
TLe UK 3a(~109).qxp 6/12/2018 2:22 PM Page 25
Page 118 of 685

3-26
Convenient features of your vehicle
Electric Chromic Mirror (ECM) (if equipped)
The electric rearview mirror automati-
cally controls the glare from the head-
lamp of the car behind you in night-
time or low light driving conditions.
When the engine is running, the
glare is automatically controlled by
the sensor mounted in the rearview
mirror. The sensor detects the light
level around the vehicle, and auto-
matically adjusts to control the head-
lamp glare from vehicles behind you.
Whenever the shift lever is placed in
R (Reverse), the mirror will automat-
ically go to the brightest setting in
order to improve the drivers view
behind the vehicle.
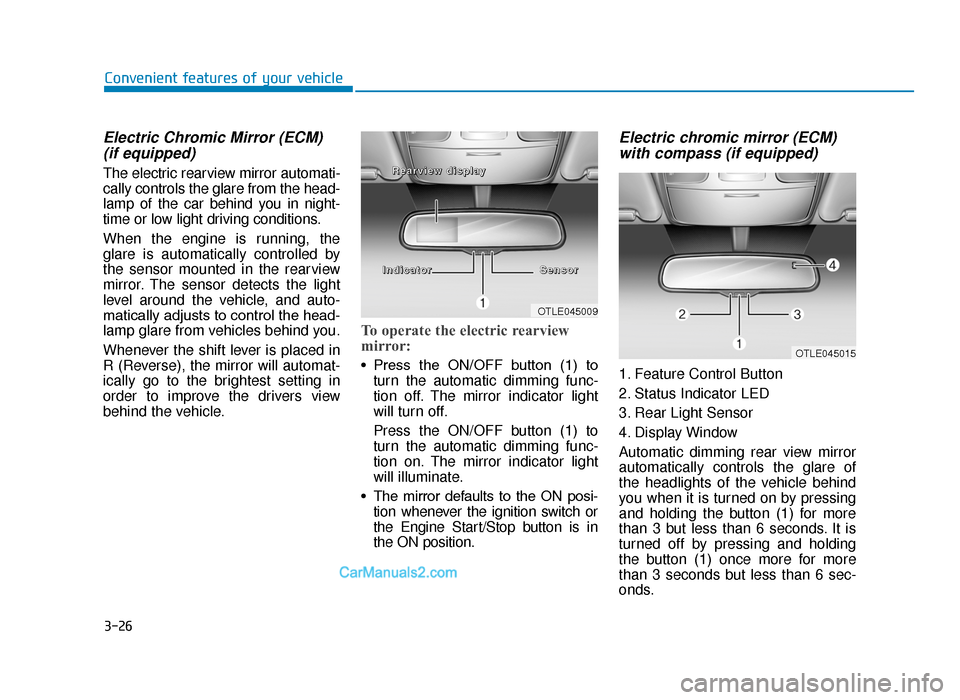
To operate the electric rearview
mirror:
• Press the ON/OFF button (1) to
turn the automatic dimming func-
tion off. The mirror indicator light
will turn off.
Press the ON/OFF button (1) to
turn the automatic dimming func-
tion on. The mirror indicator light
will illuminate.
• The mirror defaults to the ON posi- tion whenever the ignition switch or
the Engine Start/Stop button is in
the ON position.
Electric chromic mirror (ECM)with compass (if equipped)
1. Feature Control Button
2. Status Indicator LED
3. Rear Light Sensor
4. Display Window
Automatic dimming rear view mirror
automatically controls the glare of
the headlights of the vehicle behind
you when it is turned on by pressing
and holding the button (1) for more
than 3 but less than 6 seconds. It is
turned off by pressing and holding
the button (1) once more for more
than 3 seconds but less than 6 sec-
onds.
OTLE045009
I
InnddiiccaattoorrSSeennssoorr
RReeaarrvviieeww
ddiissppllaayy
OTLE045015
TLe UK 3a(~109).qxp 6/12/2018 2:22 PM Page 26
Page 149 of 685
3-57
Convenient features of your vehicle
1. Setting
To activate the Smart Tailgate, go to
User Settings Mode and select
Smart Tailgate on the LCD display.
❈For more details, refer to "LCD
Display" in this chapter.
2. Detect and Alert
If you are positioned in the detecting
area (50 ~100 cm (20 ~ 40 in.) behind
the vehicle) carrying a smart key, the
hazard warning lights will blink and
chime will sound to alert you the
smart key has been detected and the
tailgate will open.
Information
Do not approach the detecting area if
you do not want the tailgate to open. If
you have unintentionally entered the
detecting area and the hazard warning
lights and chime starts to operate,
leave the detecting area with the smart
key. The tailgate will stay closed. 3. Automatic opening
The hazard warning lights will blink
and chime will sound 6 times and
then the tailgate will slowly open.
i
3
OTLE048044OTLE048045
TLe UK 3a(~109).qxp 6/12/2018 2:25 PM Page 57
Page 152 of 685
3-60
INSTRUMENT CLUSTER
Convenient features of your vehicle
1. Tachometer
2. Speedometer
3. Engine coolant temperature gauge
4. Fuel gauge
5. Warning and indicator lights
6. LCD display (including Trip computer)
OTLE048600R
■Type AThe actual cluster in the vehicle may differ
from the illustration.
For more details, refer to the "Gauges" in
this chapter.
TLe UK 3a(~109).qxp 6/12/2018 2:25 PM Page 60
Page 153 of 685
3-61
Convenient features of your vehicle
3
1. Tachometer
2. Speedometer
3. Engine coolant temperature gauge
4. Fuel gauge
5. Warning and indicator lights
6. LCD display (including Trip computer)
OTLE048640R
■Type B The actual cluster in the vehicle may differ
from the illustration.
For more details, refer to the "Gauges" in
this chapter.
TLe UK 3a(~109).qxp 6/12/2018 2:25 PM Page 61
Page 154 of 685
3-62
Convenient features of your vehicle
Instrument cluster control
Instrument panel illumination
When the vehicle's parking lights or
headlights are on, press the illumina-
tion control button to adjust the
brightness of the instrument panel
illumination.
When pressing the illumination con-
trol button, the interior switch illumi-
nation intensity is also adjusted.• The brightness of the instrument
panel illumination is displayed.
• If the brightness reaches to the maximum or minimum level, an
alarm will sound.
Gauges
Speedometer
The speedometer indicates the
speed of the vehicle and is calibrated
in kilometers per hour (km/h) and/or
miles per hour (MPH).
Never adjust the instrument clus-
ter whilst driving. This could
result in loss of control and lead
to an accident that may cause
death, serious injury, or property
damage.
WARNING
OTLE048070ROTLE045103
TLe UK 3a(~109).qxp 6/12/2018 2:25 PM Page 62
Page 164 of 685

3-72
Convenient features of your vehicle
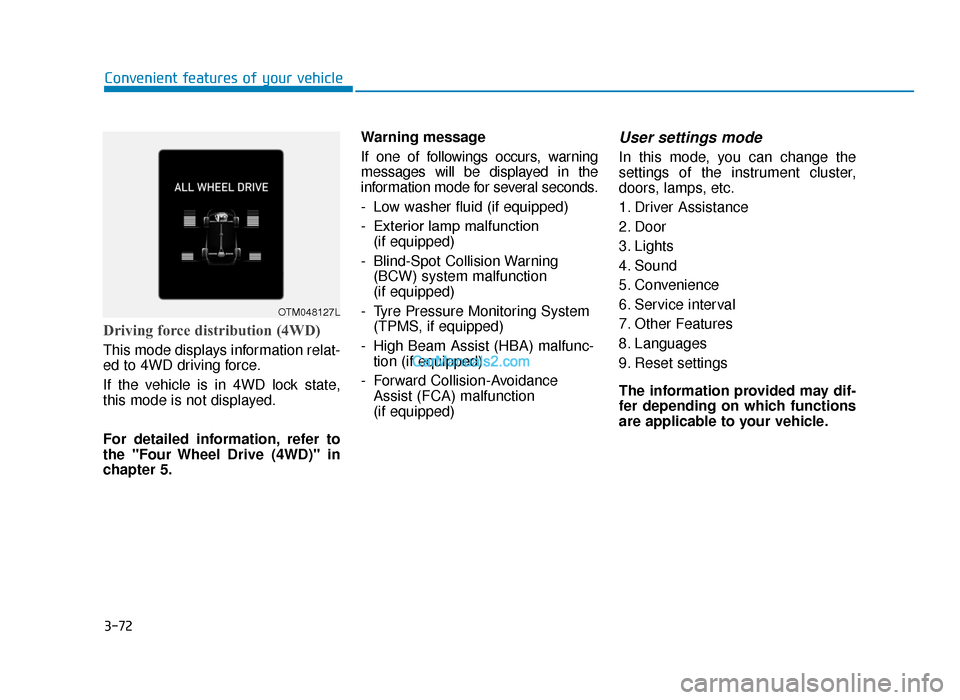
Driving force distribution (4WD)
This mode displays information relat-
ed to 4WD driving force.
If the vehicle is in 4WD lock state,
this mode is not displayed.
For detailed information, refer to
the "Four Wheel Drive (4WD)" in
chapter 5.Warning message
If one of followings occurs, warning
messages will be displayed in the
information mode for several seconds.
- Low washer fluid (if equipped)
- Exterior lamp malfunction
(if equipped)
- Blind-Spot Collision Warning (BCW) system malfunction
(if equipped)
- Tyre Pressure Monitoring System (TPMS, if equipped)
- High Beam Assist (HBA) malfunc- tion (if equipped)
- Forward Collision-Avoidance Assist (FCA) malfunction
(if equipped)
User settings mode
In this mode, you can change the
settings of the instrument cluster,
doors, lamps, etc.
1. Driver Assistance
2. Door
3. Lights
4. Sound
5. Convenience
6. Service interval
7. Other Features
8. Languages
9. Reset settings
The information provided may dif-
fer depending on which functions
are applicable to your vehicle.
OTM048127L
TLe UK 3a(~109).qxp 6/12/2018 2:27 PM Page 72