2019 Hyundai Santa Fe Driver info
[x] Cancel search: Driver infoPage 99 of 557
3-10
Convenient features of your vehicle
Power liftgate
To unlock and open the liftgate:
1. Make sure you have the smart keyin your possession.
2. Press either the liftgate handle release switch on the vehicle or
press and hold the Liftgate Unlock
button on the smart key for more
than one second. The hazard
warning lights will blink two times
and the liftgate latch will open.
3. Once the liftgate is opened and then closed, the liftgate will auto-
matically re-lock after 30 seconds.
Information
The liftgate handle switch will only
operate when the smart key is within
28 inches (0.7 m) from the liftgate
handle.
Panic button
Press and hold the Panic button (4)
for more than one second. The horn
sounds and hazard warning lights
blink for about 30 seconds. To cancel
the panic mode, press any button on
the Smart Key.
Start-up
You can start the vehicle without
inserting the key.
For information, refer to the
"Engine Start/Stop Button" sec-
tion in chapter 5.
To prevent damaging the smart key:
Keep the smart key in a cool, dryplace to avoid damage or mal-
function. Exposure to moisture
or high temperature may cause
the internal circuit of the smart
key to malfunction which may
not be covered under warranty.
Avoid dropping or throwing the smart key.
Protect the smart key from extreme temperatures.
Mechanical key
If the Smart Key does not operate
normally, you can lock or unlock the
driver's door by using the mechanical
key.
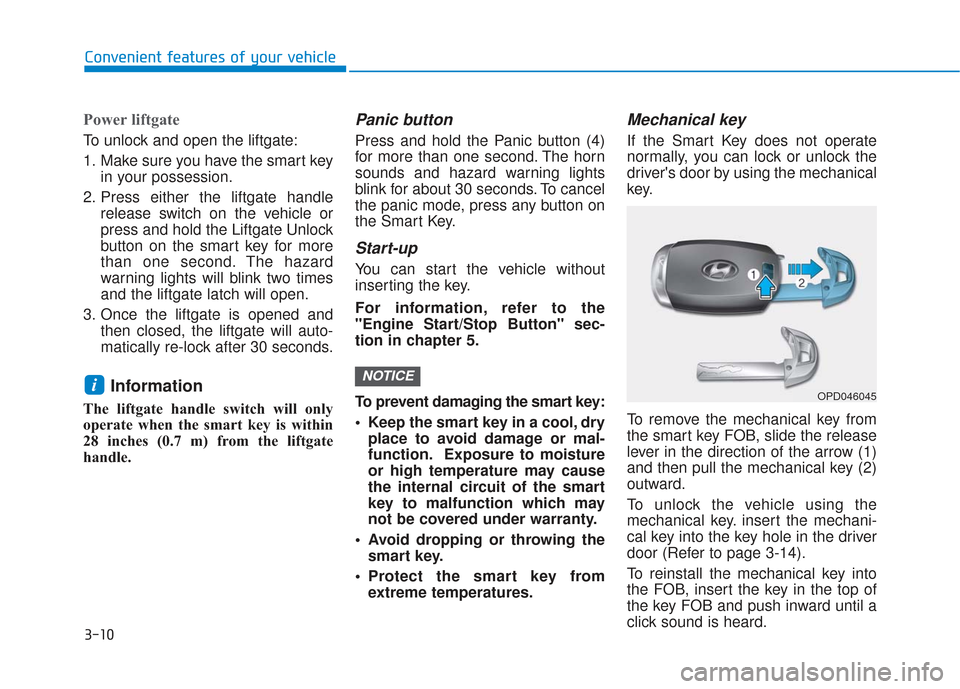
To remove the mechanical key from
the smart key FOB, slide the release
lever in the direction of the arrow (1)
and then pull the mechanical key (2)
outward.
To unlock the vehicle using the
mechanical key. insert the mechani-
cal key into the key hole in the driver
door (Refer to page 3-14).
To reinstall the mechanical key into
the FOB, insert the key in the top of
the key FOB and push inward until a
click sound is heard.
NOTICEiOPD046045
Page 104 of 557
3-15
Convenient features of your vehicle
3
Smart key
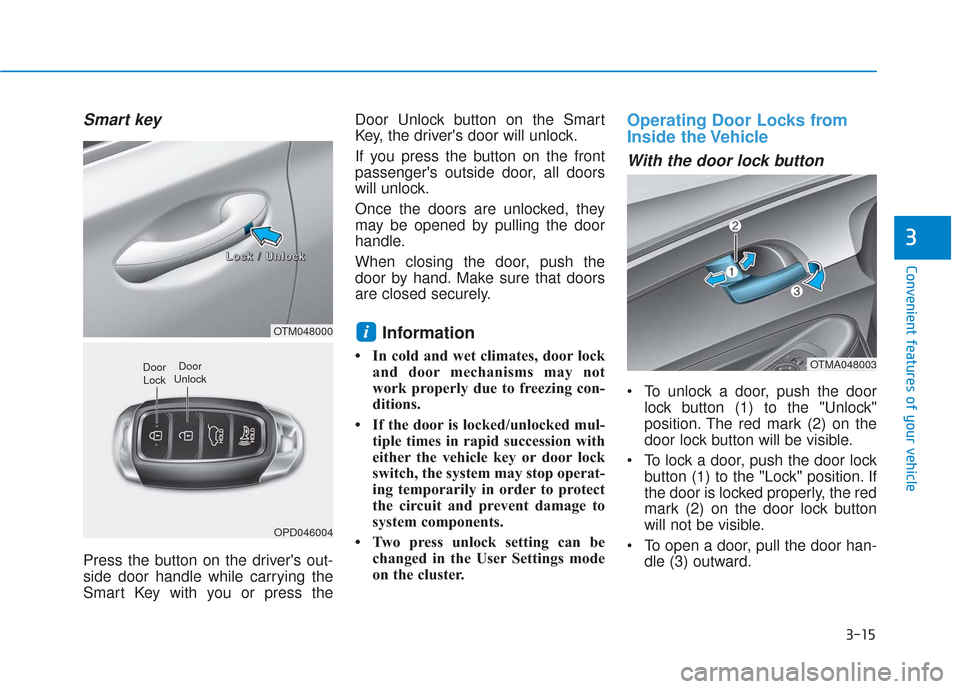
Press the button on the driver's out-
side door handle while carrying the
Smart Key with you or press theDoor Unlock button on the Smart
Key, the driver's door will unlock.
If you press the button on the front
passenger's outside door, all doors
will unlock.
Once the doors are unlocked, they
may be opened by pulling the door
handle.
When closing the door, push the
door by hand. Make sure that doors
are closed securely.
Information
• In cold and wet climates, door lock
and door mechanisms may not
work properly due to freezing con-
ditions.
• If the door is locked/unlocked mul- tiple times in rapid succession with
either the vehicle key or door lock
switch, the system may stop operat-
ing temporarily in order to protect
the circuit and prevent damage to
system components.
• Two press unlock setting can be changed in the User Settings mode
on the cluster.
Operating Door Locks from
Inside the Vehicle
With the door lock button
To unlock a door, push the doorlock button (1) to the "Unlock"
position. The red mark (2) on the
door lock button will be visible.
To lock a door, push the door lock button (1) to the "Lock" position. If
the door is locked properly, the red
mark (2) on the door lock button
will not be visible.
To open a door, pull the door han- dle (3) outward.
iOTM048000
OPD046004
Door
UnlockDoor Lock
L
L
L
L
o
o
o
o
c
c
c
c
k
k
k
k
/
/
/
/
U
U
U
U
n
n
n
n
l
l
l
l
o
o
o
o
c
c
c
c
k
k
k
k
OTMA048003
Page 105 of 557
3-16
Convenient features of your vehicle
If the inner door handle of either the driver door or passenger door
is pulled when the door lock button
is in the lock position, the button is
unlocked and the door will open.
For Key Start Vehicles (with Remote Key)
The front doors cannot be locked if
the remote key is in the ignition
switch and either of the front doors
are open.
For Push Button Start Vehicles (with Smart Key)
The doors cannot be locked if the
smart key is inside the vehicle and
any of the doors are open.
Information
If a power door lock ever fails to func-
tion while you are in the vehicle try
one or more of the following tech-
niques to exit:
• Operate the door unlock featurerepeatedly (both electronic and
manual) while simultaneously
pulling on the door handle.
• Operate the other door locks and handles, front and rear.
• Lower a front window and use the mechanical key to unlock the door
from outside.
Information
When the vehicle’s battery run out
and you leave the vehicle, make sure
all the doors are locked. You can lock
the driver’s door with a key and the
rest of the doors with the lock button
above the door inside handle.
With the central door lockswitch
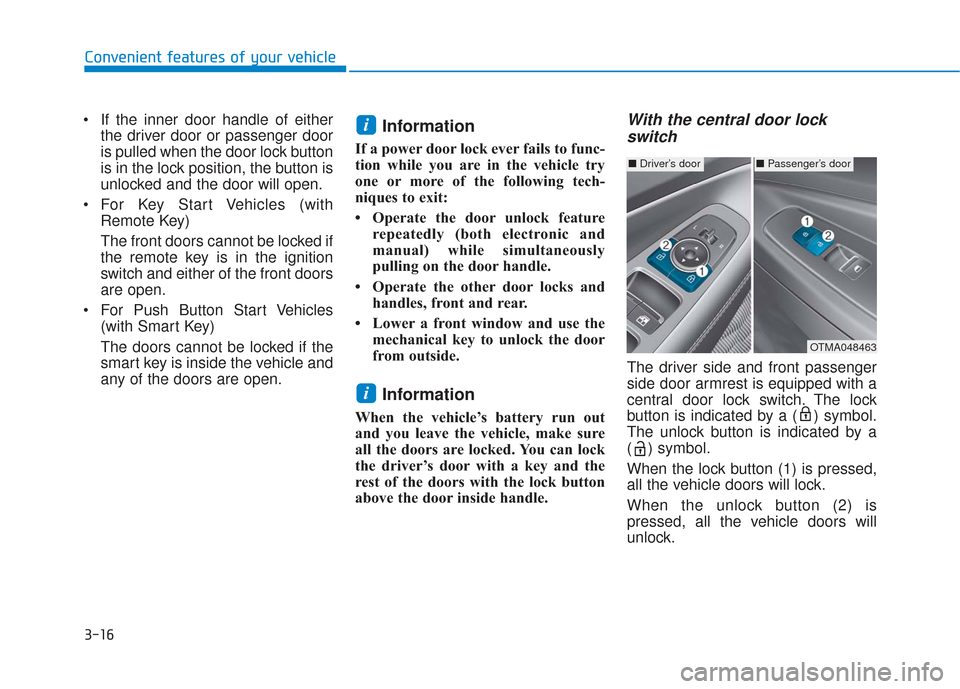
The driver side and front passenger
side door armrest is equipped with a
central door lock switch. The lock
button is indicated by a ( ) symbol.
The unlock button is indicated by a
( ) symbol.
When the lock button (1) is pressed,
all the vehicle doors will lock.
When the unlock button (2) is
pressed, all the vehicle doors will
unlock.
i
i
■ Driver’s door■Passenger’s door
OTMA048463
Page 114 of 557
3-25
Convenient features of your vehicle
3
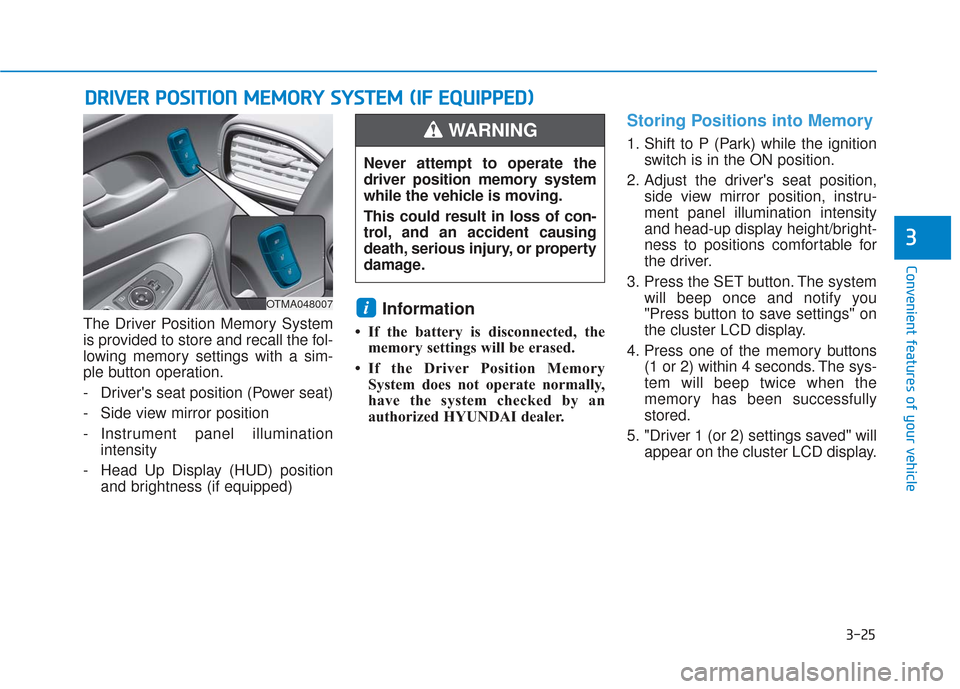
The Driver Position Memory System
is provided to store and recall the fol-
lowing memory settings with a sim-
ple button operation.
- Driver's seat position (Power seat)
- Side view mirror position
- Instrument panel illuminationintensity
- Head Up Display (HUD) position and brightness (if equipped)Information
• If the battery is disconnected, thememory settings will be erased.
• If the Driver Position Memory System does not operate normally,
have the system checked by an
authorized HYUNDAI dealer.
Storing Positions into Memory
1. Shift to P (Park) while the ignition switch is in the ON position.
2. Adjust the driver's seat position, side view mirror position, instru-
ment panel illumination intensity
and head-up display height/bright-
ness to positions comfortable for
the driver.
3. Press the SET button. The system will beep once and notify you
"Press button to save settings" on
the cluster LCD display.
4. Press one of the memory buttons (1 or 2) within 4 seconds. The sys-
tem will beep twice when the
memory has been successfully
stored.
5. "Driver 1 (or 2) settings saved" will appear on the cluster LCD display.
i
D DR
RI
IV
V E
ER
R
P
P O
O S
SI
IT
T I
IO
O N
N
M
M E
EM
M O
OR
RY
Y
S
S Y
Y S
ST
T E
EM
M
(
( I
IF
F
E
E Q
Q U
UI
IP
P P
PE
ED
D )
)
OTMA048007
Never attempt to operate the
driver position memory system
while the vehicle is moving.
This could result in loss of con-
trol, and an accident causing
death, serious injury, or property
damage.
WARNING
Page 115 of 557
3-26
Convenient features of your vehicle
Recalling Positions from
Memory
1. Shift to P (Park) while the ignitionswitch is in the ON position.
2. Press the desired memory button (1 or 2). The system will beep
once, and then the driver's seat
position, side view mirror position,
instrument panel illumination
intensity and head-up display
height/brightness will automatical-
ly adjust to the stored positions.
3. "Driver 1 (or 2) settings applied" will appear on the cluster LCD dis-
play.
Information
• While recalling the "1" memoryposition, pressing the SET or 1 but-
ton temporarily stops the adjust-
ment of the recalled memory posi-
tion. Pressing the 2 button recalls
the "2" memory position. • While recalling the "2" memory
position, pressing the SET or 2 but-
ton temporarily stops the adjust-
ment of the recalled memory posi-
tion. Pressing the 1 button recalls
the "1" memory position.
• While recalling the stored positions, pressing one of the control buttons
for the driver's seat, side view mir-
ror, instrument panel illumination
or head-up display will cause the
movement of that component to stop
and move in the direction that the
control button is pressed.
Resetting the Driver's Seat
Memory System
Take the following procedures to reset
the driver's seat memory system,
when it does not operate properly.
To reset the driver's seat memo-ry system
1. Place the ignition switch to the ON
position, shift to P (Park), and
open the driver's door. 2. Operate the control switch to set
the driver's seat and seatback to
the foremost position.
3. Simultaneously press the SET button and push forward the seat
movement switch over 2 seconds.
While resetting the driver's seatmemory system
1. It starts with the notification sound.
2. The driver's seat and seatback is
adjusted to the rearward position
with the notification sound.
3. The driver's seat and seatback is re-adjusted to the default position
(central position) with the notifica-
tion sound.
However, in the following cases, the
resetting procedure and the notifica-
tion sound may stop.
- The memory button is pressed.
- The control switch is operated.
- The gear is shifted out of P (Park).
- The driving speed exceeds 2 mph (3 km/h).
- The driver's door is closed.
i
Page 133 of 557
3-44
Convenient features of your vehicle
Power Windows
The ignition switch must be in the ON
position to be able to raise or lower
the windows. Each door has a Power
Window switch to control that door’s
window. The driver has a Power
Window Lock switch which can block
the operation of passenger windows.
The power windows will operate for
approximately 10 minutes after the
ignition switch is placed in the ACC
or LOCK/OFF position. However, if
the front doors are opened, the
Power Windows will not operate even
within the 10 minutes period.
Information
• In cold and wet climates, powerwindows may not work properly
due to freezing conditions.
• While driving with the rear win- dows down or with the sunroof (if
equipped) opened (or partially
opened), your vehicle may demon-
strate a wind buffeting or pulsation
noise. This noise is normal and can
be reduced or eliminated by taking
the following actions. If the noise
occurs with one or both of the rear
windows down, partially lower
both front windows approximately
one inch. If you experience the
noise with the sunroof open, slight-
ly close the sunroof.
Window opening and closing
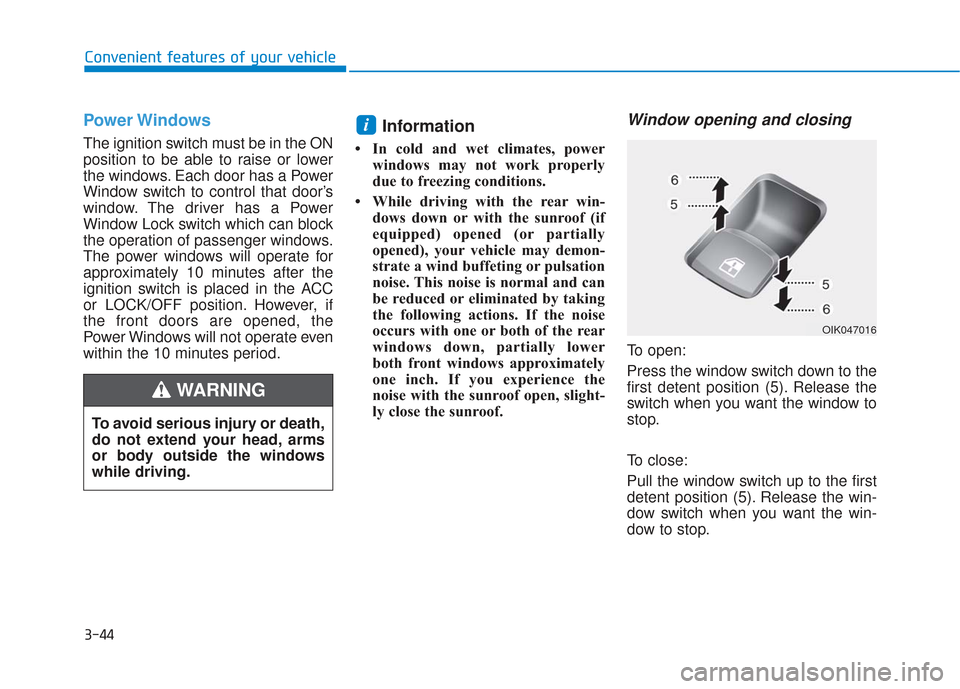
To open:
Press the window switch down to the
first detent position (5). Release the
switch when you want the window to
stop.
To close:
Pull the window switch up to the first
detent position (5). Release the win-
dow switch when you want the win-
dow to stop.
i
To avoid serious injury or death,
do not extend your head, arms
or body outside the windows
while driving.
WARNING
OIK047016
Page 135 of 557
3-46
Convenient features of your vehicle
Information
The automatic reverse feature is only
active when the "Auto Up" feature is
used by fully pulling up the switch to
the second detent.
Do not install any accessories on
the windows. The automatic reverse
feature may not operate.
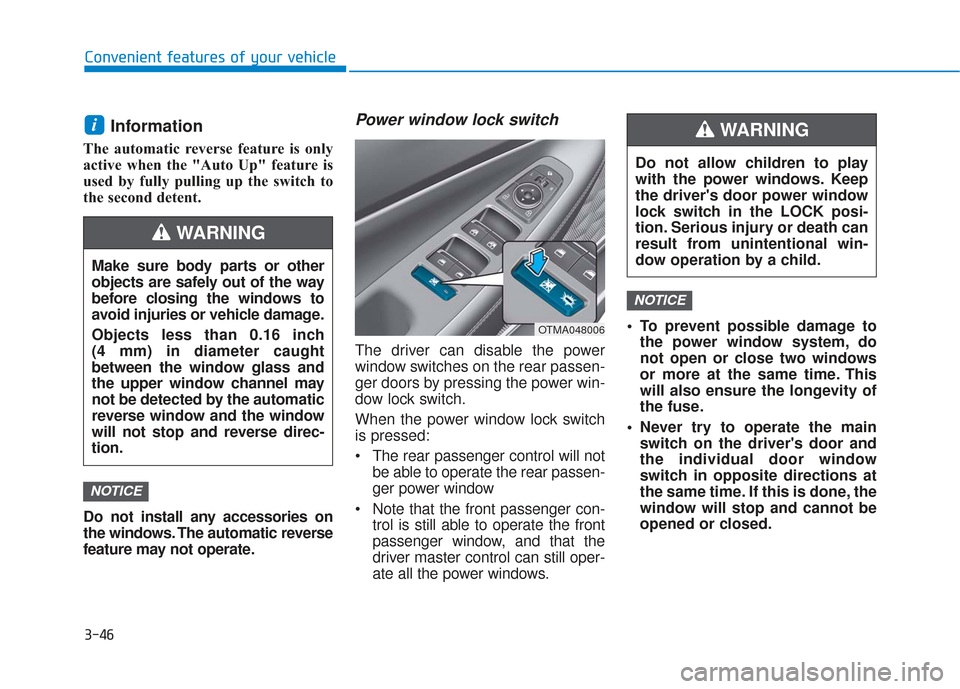
Power window lock switch
The driver can disable the power
window switches on the rear passen-
ger doors by pressing the power win-
dow lock switch.
When the power window lock switch
is pressed:
The rear passenger control will notbe able to operate the rear passen-
ger power window
Note that the front passenger con- trol is still able to operate the front
passenger window, and that the
driver master control can still oper-
ate all the power windows. To prevent possible damage to
the power window system, do
not open or close two windows
or more at the same time. This
will also ensure the longevity of
the fuse.
Never try to operate the main switch on the driver's door and
the individual door window
switch in opposite directions at
the same time. If this is done, the
window will stop and cannot be
opened or closed.
NOTICE
NOTICE
i
Do not allow children to play
with the power windows. Keep
the driver's door power window
lock switch in the LOCK posi-
tion. Serious injury or death can
result from unintentional win-
dow operation by a child.
WARNING
Make sure body parts or other
objects are safely out of the way
before closing the windows to
avoid injuries or vehicle damage.
Objects less than 0.16 inch
(4 mm) in diameter caught
between the window glass and
the upper window channel may
not be detected by the automatic
reverse window and the window
will not stop and reverse direc-
tion.
WARNING
OTMA048006
Page 139 of 557
3-50
Convenient features of your vehicle
Periodically remove any dirt that may accumulate on the sunroof
guide rail or between the sun-
roof and roof panel which can
make a noise.
Do not try to open the sunroof when the temperature is below
freezing or when the sunroof is
covered with snow or ice, other-
wise the motor could be dam-
aged. In cold and wet climates, the
sunroof may not work properly.
Resetting the Sunroof
The sunroof may need to be reset if
the following conditions occur:
The battery is discharged or dis-connected or the sunroof fuse has
been replaced or disconnected
The sunroof control lever is not operating correctly
To reset the sunroof, perform the fol-
lowing steps:
1. Turn the engine on and close the sunroof glass and sunshade com-
pletely. 2. Release the control lever.
3. Push and hold the sunroof control
lever forward (to close the sun-
shade) for about 10 seconds until
the sunroof moves slightly, then
release the control lever.
4. Push and hold the sunroof control lever forward until the sunroof
operates as follows:
Sunshade Open → Glass Tilt Open
→ Glass Slide Open → Glass Slide
Close → Sunshade Close
Then, release the control lever.
When this is complete, the sunroof
system is reset.
For more information, contact an
authorized HYUNDAI dealer.
Information
If you do not reset the sunroof, it may
not work properly.
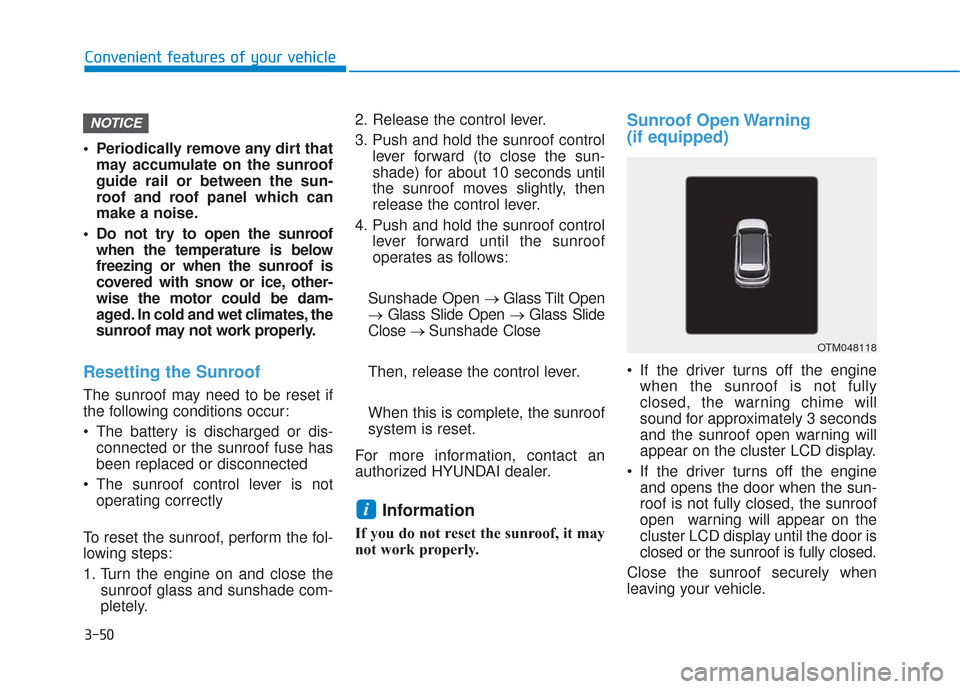
Sunroof Open Warning
(if equipped)
If the driver turns off the engine when the sunroof is not fully
closed, the warning chime will
sound for approximately 3 seconds
and the sunroof open warning will
appear on the cluster LCD display.
If the driver turns off the engine and opens the door when the sun-
roof is not fully closed, the sunroof
open warning will appear on the
cluster LCD display until the door is
closed or the sunroof is fully closed.
Close the sunroof securely when
leaving your vehicle.
i
NOTICE
OTM048118