Page 153 of 557

3-64
Convenient features of your vehicle
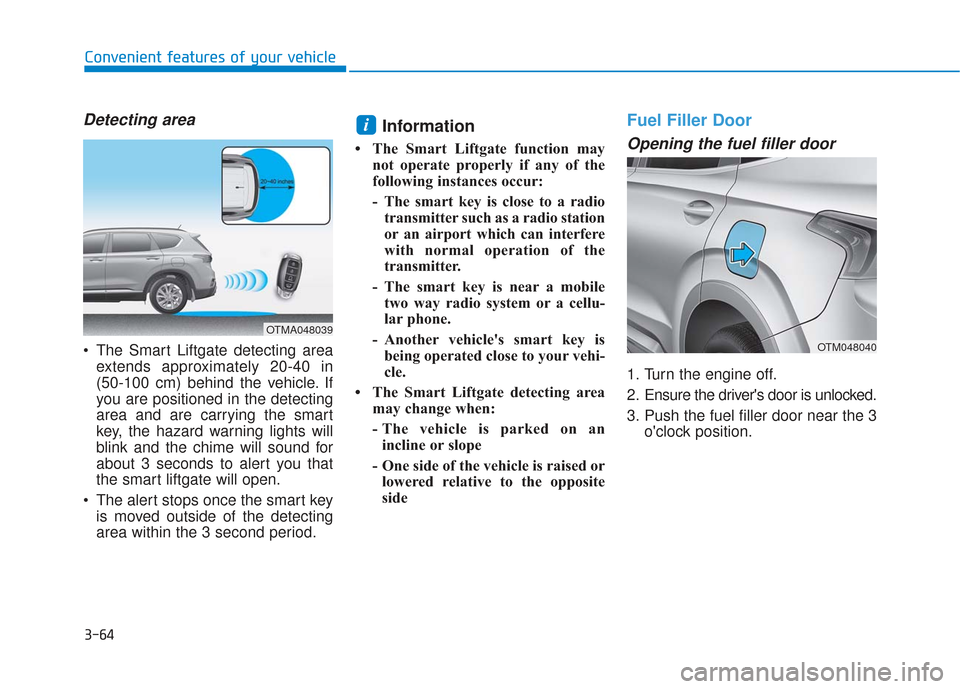
Detecting area
The Smart Liftgate detecting areaextends approximately 20-40 in
(50-100 cm) behind the vehicle. If
you are positioned in the detecting
area and are carrying the smart
key, the hazard warning lights will
blink and the chime will sound for
about 3 seconds to alert you that
the smart liftgate will open.
The alert stops once the smart key is moved outside of the detecting
area within the 3 second period.
Information
• The Smart Liftgate function may not operate properly if any of the
following instances occur:
- The smart key is close to a radiotransmitter such as a radio station
or an airport which can interfere
with normal operation of the
transmitter.
- The smart key is near a mobile two way radio system or a cellu-
lar phone.
- Another vehicle's smart key is being operated close to your vehi-
cle.
• The Smart Liftgate detecting area may change when:
- The vehicle is parked on anincline or slope
- One side of the vehicle is raised or lowered relative to the opposite
side
Fuel Filler Door
Opening the fuel filler door
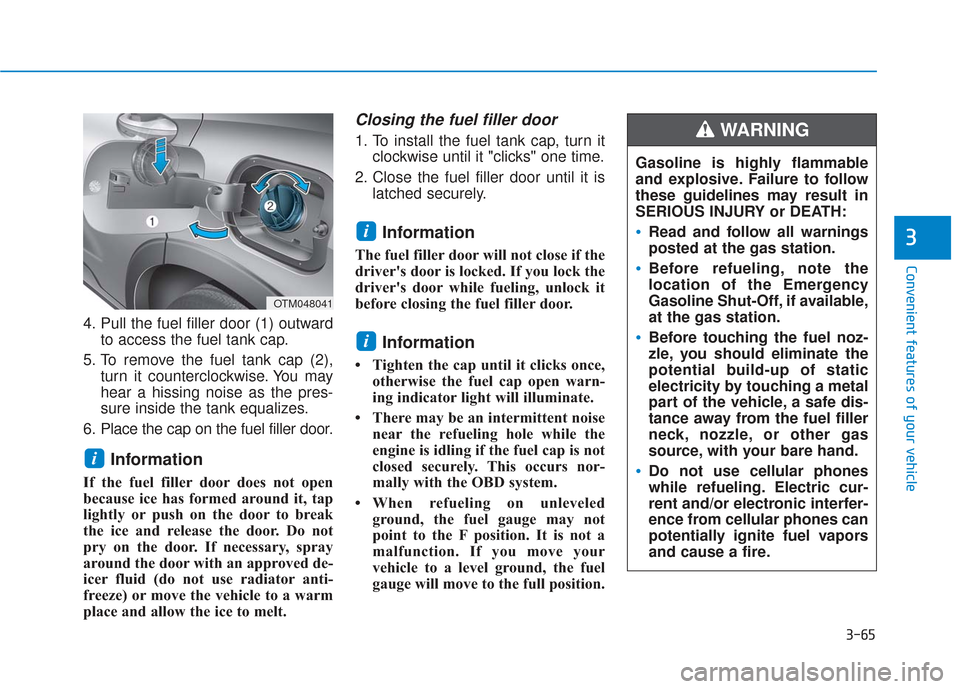
1. Turn the engine off.
2. Ensure the driver's door is unlocked.
3. Push the fuel filler door near the 3 o'clock position.
i
OTMA048039
OTM048040
Page 154 of 557

3-65
Convenient features of your vehicle
3
Gasoline is highly flammable
and explosive. Failure to follow
these guidelines may result in
SERIOUS INJURY or DEATH:
Read and follow all warnings
posted at the gas station.
Before refueling, note the
location of the Emergency
Gasoline Shut-Off, if available,
at the gas station.
Before touching the fuel noz-
zle, you should eliminate the
potential build-up of static
electricity by touching a metal
part of the vehicle, a safe dis-
tance away from the fuel filler
neck, nozzle, or other gas
source, with your bare hand.
Do not use cellular phones
while refueling. Electric cur-
rent and/or electronic interfer-
ence from cellular phones can
potentially ignite fuel vapors
and cause a fire.
WARNING
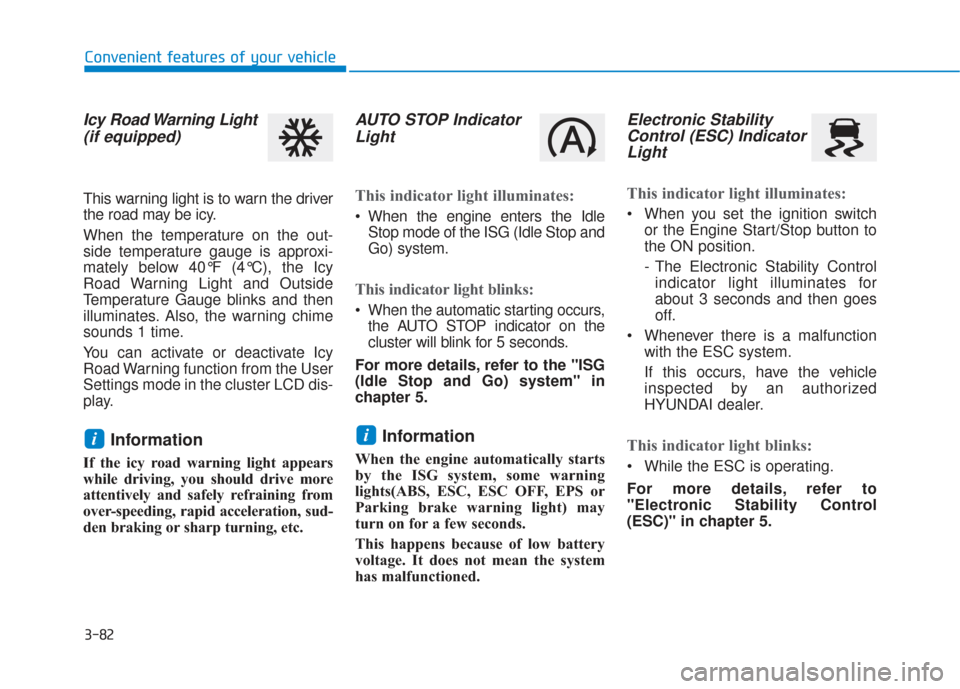
4. Pull the fuel filler door (1) outwardto access the fuel tank cap.
5. To remove the fuel tank cap (2), turn it counterclockwise. You may
hear a hissing noise as the pres-
sure inside the tank equalizes.
6. Place the cap on the fuel filler door.
Information
If the fuel filler door does not open
because ice has formed around it, tap
lightly or push on the door to break
the ice and release the door. Do not
pry on the door. If necessary, spray
around the door with an approved de-
icer fluid (do not use radiator anti-
freeze) or move the vehicle to a warm
place and allow the ice to melt.
Closing the fuel filler door
1. To install the fuel tank cap, turn it clockwise until it "clicks" one time.
2. Close the fuel filler door until it is latched securely.
Information
The fuel filler door will not close if the
driver's door is locked. If you lock the
driver's door while fueling, unlock it
before closing the fuel filler door.
Information
• Tighten the cap until it clicks once,otherwise the fuel cap open warn-
ing indicator light will illuminate.
• There may be an intermittent noise near the refueling hole while the
engine is idling if the fuel cap is not
closed securely. This occurs nor-
mally with the OBD system.
• When refueling on unleveled ground, the fuel gauge may not
point to the F position. It is not a
malfunction. If you move your
vehicle to a level ground, the fuel
gauge will move to the full position.
i
i
i
OTM048041
Page 158 of 557
3-69
Convenient features of your vehicle
3
Instrument Cluster Control
Adjusting instrument clusterillumination
When the vehicle's position lights or
headlights are on, press the illumina-
tion control button to adjust the
brightness of the instrument panel
illumination.
When pressing the illumination con-
trol button, the interior switch illumi-
nation intensity is also adjusted. The brightness of the instrument
panel illumination is displayed.
If the brightness reaches the max- imum or minimum level, a chime
will sound.
For information regarding the illu-
mination setting on your audio dis-
play, refer to the "Setup" section of
your Audio or Navigation manual.
Never adjust the instrument
cluster while driving. Doing so
could lead to driver distraction
which may cause an accident
and lead to vehicle damage,
serious injury, or death.
WARNING
OTM048042
OIK047144L
Page 163 of 557

3-74
Convenient features of your vehicle
Shift indicator pop-up (if equipped)
The pop-up indicates the current
gear position displayed in the cluster
for about 2 seconds when shifting
into other positions (P/R/N/D).
The shift indicator pop-up function
can be activated or deactivated from
the User Settings mode in the cluster
LCD display.
Warning and Indicator LightsInformation
Make sure that all warning lights are
OFF after starting the engine. If any
light is still ON, this indicates a situa-
tion that needs attention.
Seat Belt Warning Light
This warning light informs the driver
that the seat belt is not fastened.
For more information, refer to
"Seat Belts" in chapter 2.
Air Bag Warning Light
This warning light illuminates:
When you set the ignition switch orthe Engine Start/Stop button to the
ON position.
- The air bag warning light illumi-nates for about 6 seconds and
then turns off when all checks
have been performed
The air bag warning light will remain illuminated if there is a
malfunction with the Safety
Restraint System (SRS) air bag
operation.
If this occurs, have the vehicle
inspected by an authorized
HYUNDAI dealer.
i
OIK047141
Page 171 of 557

3-82
Convenient features of your vehicle
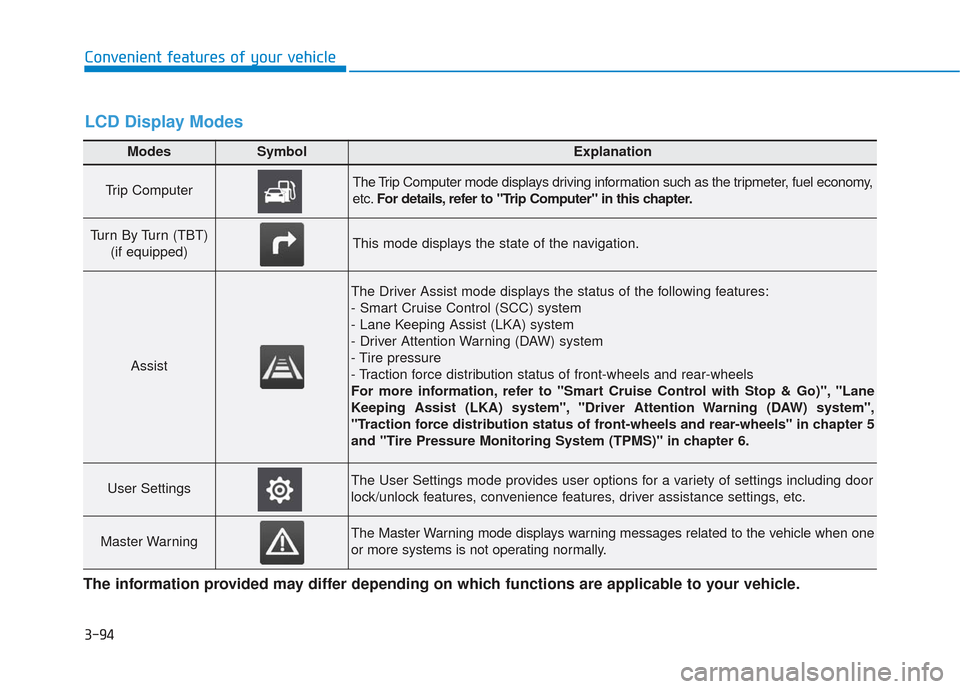
Icy Road Warning Light(if equipped)
This warning light is to warn the driver
the road may be icy.
When the temperature on the out-
side temperature gauge is approxi-
mately below 40°F (4°C), the Icy
Road Warning Light and Outside
Temperature Gauge blinks and then
illuminates. Also, the warning chime
sounds 1 time.
You can activate or deactivate Icy
Road Warning function from the User
Settings mode in the cluster LCD dis-
play.
Information
If the icy road warning light appears
while driving, you should drive more
attentively and safely refraining from
over-speeding, rapid acceleration, sud-
den braking or sharp turning, etc.
AUTO STOP IndicatorLight
This indicator light illuminates:
When the engine enters the Idle
Stop mode of the ISG (Idle Stop and
Go) system.
This indicator light blinks:
When the automatic starting occurs,the AUTO STOP indicator on the
cluster will blink for 5 seconds.
For more details, refer to the "ISG
(Idle Stop and Go) system" in
chapter 5.
Information
When the engine automatically starts
by the ISG system, some warning
lights(ABS, ESC, ESC OFF, EPS or
Parking brake warning light) may
turn on for a few seconds.
This happens because of low battery
voltage. It does not mean the system
has malfunctioned.
Electronic Stability Control (ESC) IndicatorLight
This indicator light illuminates:
When you set the ignition switch
or the Engine Start/Stop button to
the ON position.
- The Electronic Stability Controlindicator light illuminates for
about 3 seconds and then goes
off.
Whenever there is a malfunction with the ESC system.
If this occurs, have the vehicle
inspected by an authorized
HYUNDAI dealer.
This indicator light blinks:
While the ESC is operating.
For more details, refer to
"Electronic Stability Control
(ESC)" in chapter 5.
ii
Page 183 of 557

3-94
Convenient features of your vehicle
Modes SymbolExplanation
Trip Computer The Trip Computer mode displays driving information such as the tripmeter, fuel economy,
etc.For details, refer to "Trip Computer" in this chapter.
Turn By Turn (TBT)
(if equipped)This mode displays the state of the navigation.
Assist
The Driver Assist mode displays the status of the following features:
- Smart Cruise Control (SCC) system
- Lane Keeping Assist (LKA) system
- Driver Attention Warning (DAW) system
- Tire pressure
- Traction force distribution status of front-wheels and rear-wheels
For more information, refer to "Smart Cruise Control with Stop & Go)", "Lane
Keeping Assist (LKA) system", "Driver Attention Warning (DAW) system",
"Traction force distribution status of front-wheels and rear-wheels" in chapter 5
and "Tire Pressure Monitoring System (TPMS)" in chapter 6.
User SettingsThe User Settings mode provides user options for a variety of settings including door
lock/unlock features, convenience features, driver assistance settings, etc.
Master WarningThe Master Warning mode displays warning messages related to the vehicle when one
or more systems is not operating normally.
The information provided may differ depending on which functions are applicable to your vehicle.
LCD Display Modes
Page 184 of 557
3-95
Convenient features of your vehicle
3
Trip computer mode
The trip computer mode displays
information related to vehicle driving
parameters including fuel economy,
tripmeter information and vehicle
speed.
For more details, refer to "Trip
Computer" in this chapter.
Turn By Turn (TBT) mode
This mode displays the state of the
navigation.
Assist mode
SCC/LKA/DAW
This mode displays the state of the
Smart Cruise Control (SCC), Lane
Keeping Assist (LKA) and Driver
Attention Warning (DAW).
For more details, refer to each
system information in chapter 5.
OIK047124NOIK047147NOTM048124R
Page 185 of 557
3-96
Convenient features of your vehicle
Tire Pressure
This mode displays information relat-
ed to Tire Pressure.
For more details, refer to "Tire
Pressure Monitoring System
(TPMS)" in chapter 6.
Driving force distribution (AWD)
This mode displays information relat-
ed to AWD driving force.
If the vehicle is in AWD lock state,
this mode is not displayed.
For more details, refer to the "All
Wheel Drive" in the chapter 5.
Master warning mode
This warning light informs the driver
the following situations.
- LED headlamp malfunction(if equipped)
- Forward Collision-Avoidance Assist system malfunction
(if equipped)
- Forward Collision-Avoidance Assist radar blocked (if equipped)
- Blind-Spot Collision Warning system malfunction (if equipped)
- Blind-Spot Collision Warning radar blocked (if equipped)
- Smart Cruise Control with Stop & Go malfunction (if equipped)
OTM048125LOTM048127L
■ Type B
■ Type A
OIK047173L/OTMA048126