2019 Hyundai Santa Fe ECO mode
[x] Cancel search: ECO modePage 267 of 682
3-176
Convenient features of your vehicle
Information
Using the system in the fresh air posi-
tion is recommended.
Prolonged operation of the heater in
the recirculated air position (without
air conditioning selected) can cause
fogging of the windscreen and side
windows and the air within the passen-
ger compartment will become stale.
In addition, prolonged use of the air
conditioning with the recirculated air
position selected will result in exces-
sively dry air in the passenger com-
partment.
Fan speed control (8)
The fan speed can be set as desired
by pushing the fan speed control but-
ton.
More air is delivered with higher fan
speeds.
Pressing the OFF button turns off the
fan.
Operating the fan when the ignition
switch is in the ON position could
cause the battery to discharge.
Operate the fan when the engine is
running.
Air conditioning (6)
Push the A/C button to turn the air
conditioning system on (indicator
light will illuminate).
Push the button again to turn the air
conditioning system off.
OFF mode (5)
Push the OFF button to turn the cli-
mate control system off. However,
you can still operate the mode and air
intake buttons as long as the ignition
switch is in the ON position.
NOTICE
i
•Continued climate control
system operation in the recir-
culated air position may allow
humidity to increase inside
the vehicle which may fog the
glass and obscure visibility.
•Do not sleep in a vehicle with
the air conditioning or heating
system on. It may cause seri-
ous harm or death due to a
drop in the oxygen level
and/or body temperature.
•Continued climate control sys-
tem operation in the recirculat-
ed air position can cause
drowsiness or sleepiness, and
loss of vehicle control. Set the
air intake control to the outside
(fresh) air position as much as
possible whilst driving.
WARNING
Page 270 of 682
3-179
Convenient features of your vehicle
• If you operate the air conditioner
excessively, the difference between
the temperature of the outside air
and that of the windscreen could
cause the outer surface of the wind-
screen to fog up, causing loss of
visibility. In this case, set the mode
selection button to the position
and set the fan speed control knob
to the lowest speed setting.
System maintenance
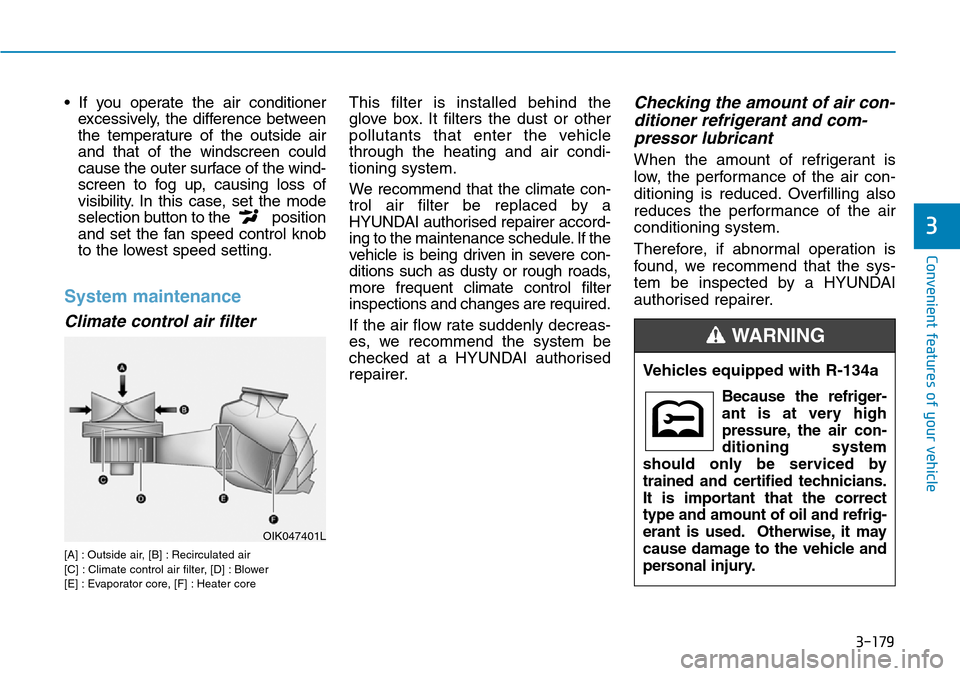
Climate control air filter
[A] : Outside air, [B] : Recirculated air
[C] : Climate control air filter, [D] : Blower
[E] : Evaporator core, [F] : Heater core
This filter is installed behind the
glove box. It filters the dust or other
pollutants that enter the vehicle
through the heating and air condi-
tioning system.
We recommend that the climate con-
trol air filter be replaced by a
HYUNDAI authorised repairer accord-
ing to the maintenance schedule. If the
vehicle is being driven in severe con-
ditions such as dusty or rough roads,
more frequent climate control filter
inspections and changes are required.
If the air flow rate suddenly decreas-
es, we recommend the system be
checked at a HYUNDAI authorised
repairer.Checking the amount of air con-
ditioner refrigerant and com-
pressor lubricant
When the amount of refrigerant is
low, the performance of the air con-
ditioning is reduced. Overfilling also
reduces the performance of the air
conditioning system.
Therefore, if abnormal operation is
found, we recommend that the sys-
tem be inspected by a HYUNDAI
authorised repairer.
3
Vehicles equipped with R-134a
Because the refriger-
ant is at very high
pressure, the air con-
ditioning system
should only be serviced by
trained and certified technicians.
It is important that the correct
type and amount of oil and refrig-
erant is used. Otherwise, it may
cause damage to the vehicle and
personal injury.
WARNING
OIK047401L
Page 272 of 682
3-181
Convenient features of your vehicle
3
WINDSCREEN DEFROSTING AND DEFOGGING
• For maximum windscreen defrost-
ing, set the temperature control
knob to the highest temperature
setting and the fan control knob to
the highest fan speed. Select the
front defrost button on the climate
control display. After the engine
warm-up period, warm air will be
directed to the front windscreen.
• If warm air to the floor is desired
whilst defrosting or defogging, set
the mode to the floor-defrost posi-
tion.
• Before driving, clear all snow and
ice from the windscreen, rear win-
dow, outside rear view mirrors, and
all side windows.
• Clear all snow and ice from the bon-
net and air inlet in the cowl grill to
improve heater and defroster effi-
ciency and to reduce the probability
of fogging up inside of the wind-
screen.
Information
If the engine temperature is still cold
after starting, then a brief engine warm
up period may be required for the
vented air flow to become warm or hot.
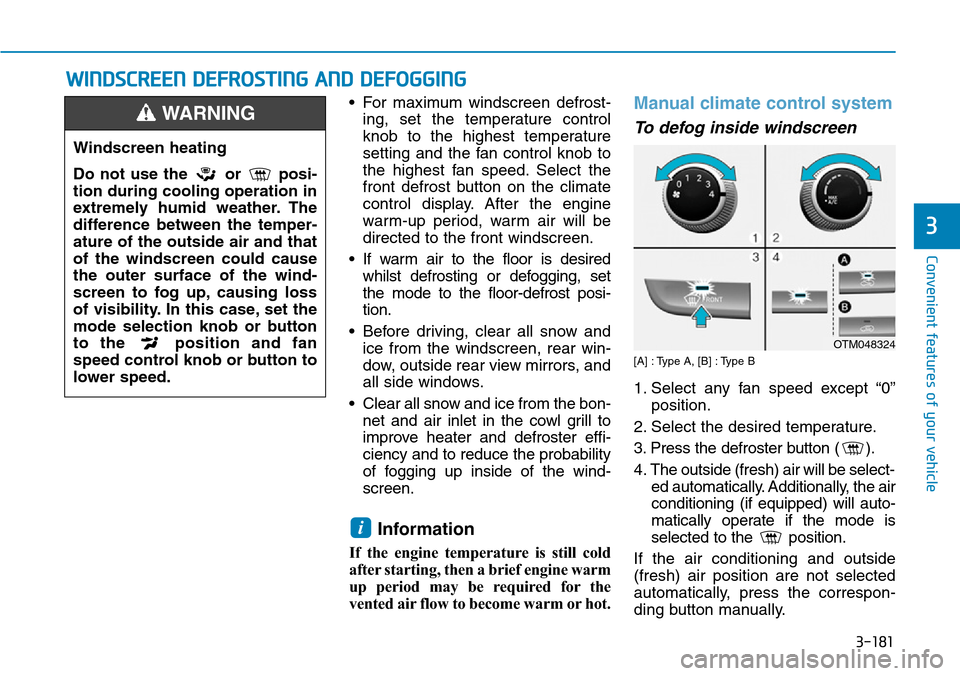
Manual climate control system
To defog inside windscreen
[A] : Type A, [B] : Type B
1. Select any fan speed except “0”
position.
2. Select the desired temperature.
3. Press the defroster button ( ).
4. The outside (fresh) air will be select-
ed automatically. Additionally, the air
conditioning (if equipped) will auto-
matically operate if the mode is
selected to the position.
If the air conditioning and outside
(fresh) air position are not selected
automatically, press the correspon-
ding button manually.
i
Windscreen heating
Do not use the or posi-
tion during cooling operation in
extremely humid weather. The
difference between the temper-
ature of the outside air and that
of the windscreen could cause
the outer surface of the wind-
screen to fog up, causing loss
of visibility. In this case, set the
mode selection knob or button
to the position and fan
speed control knob or button to
lower speed.
WARNING
OTM048324
Page 275 of 682
3-184
Convenient features of your vehicle
Automatic ventilation
(if equipped)
To increase cabin air quality and
reduce windscreen misting, air recir-
culation mode switches off automati-
cally after about 5 to 30 minutes,
depending on outside temperature,
and the air intake will change to out-
side (fresh) mode.
To cancel or set the automatic venti-
lation feature, select Face level mode
and whilst pressing toe air con-
ditioning button (A/C), press the air
recirculation mode button at least 5
times within 3 seconds.
When the automatic ventilation is
set, the air recirculation indicator will
blink 6 times. When cancelled, the
indicator will blink 3 times.
Sunroof inside air recirculation
(if equipped)
When the heater or air conditioning
system is on with the sunroof opened,
the outside (fresh) air position will be
automatically selected. At this time, if
you press the recirculated air position
button, the recirculated air position
will be selected but will change back
to the outside (fresh) air position after
3 minutes.
When the sunroof is closed, the air
intake position will return to the orig-
inal position that was selected.
CLIMATE CONTROL ADDITIONAL FEATURES
Page 285 of 682
3-194
Convenient features of your vehicle
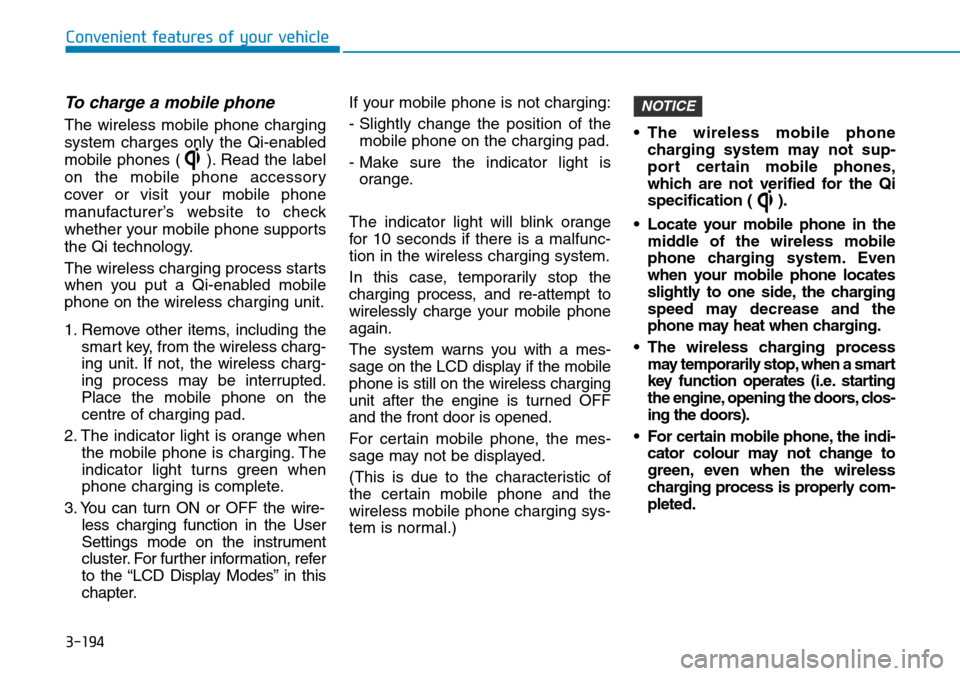
To charge a mobile phone
The wireless mobile phone charging
system charges only the Qi-enabled
mobile phones ( ). Read the label
on the mobile phone accessory
cover or visit your mobile phone
manufacturer’s website to check
whether your mobile phone supports
the Qi technology.
The wireless charging process starts
when you put a Qi-enabled mobile
phone on the wireless charging unit.
1. Remove other items, including the
smart key, from the wireless charg-
ing unit. If not, the wireless charg-
ing process may be interrupted.
Place the mobile phone on the
centre of charging pad.
2. The indicator light is orange when
the mobile phone is charging. The
indicator light turns green when
phone charging is complete.
3. You can turn ON or OFF the wire-
less charging function in the User
Settings mode on the instrument
cluster. For further information, refer
to the “LCD Display Modes” in this
chapter.If your mobile phone is not charging:
- Slightly change the position of the
mobile phone on the charging pad.
- Make sure the indicator light is
orange.
The indicator light will blink orange
for 10 seconds if there is a malfunc-
tion in the wireless charging system.
In this case, temporarily stop the
charging process, and re-attempt to
wirelessly charge your mobile phone
again.
The system warns you with a mes-
sage on the LCD display if the mobile
phone is still on the wireless charging
unit after the engine is turned OFF
and the front door is opened.
For certain mobile phone, the mes-
sage may not be displayed.
(This is due to the characteristic of
the certain mobile phone and the
wireless mobile phone charging sys-
tem is normal.)• The wireless mobile phone
charging system may not sup-
port certain mobile phones,
which are not verified for the Qi
specification ( ).
• Locate your mobile phone in the
middle of the wireless mobile
phone charging system. Even
when your mobile phone locates
slightly to one side, the charging
speed may decrease and the
phone may heat when charging.
• The wireless charging process
may temporarily stop, when a smart
key function operates (i.e. starting
the engine, opening the doors, clos-
ing the doors).
• For certain mobile phone, the indi-
cator colour may not change to
green, even when the wireless
charging process is properly com-
pleted.
NOTICE
Page 294 of 682
4-3
Multimedia System
4
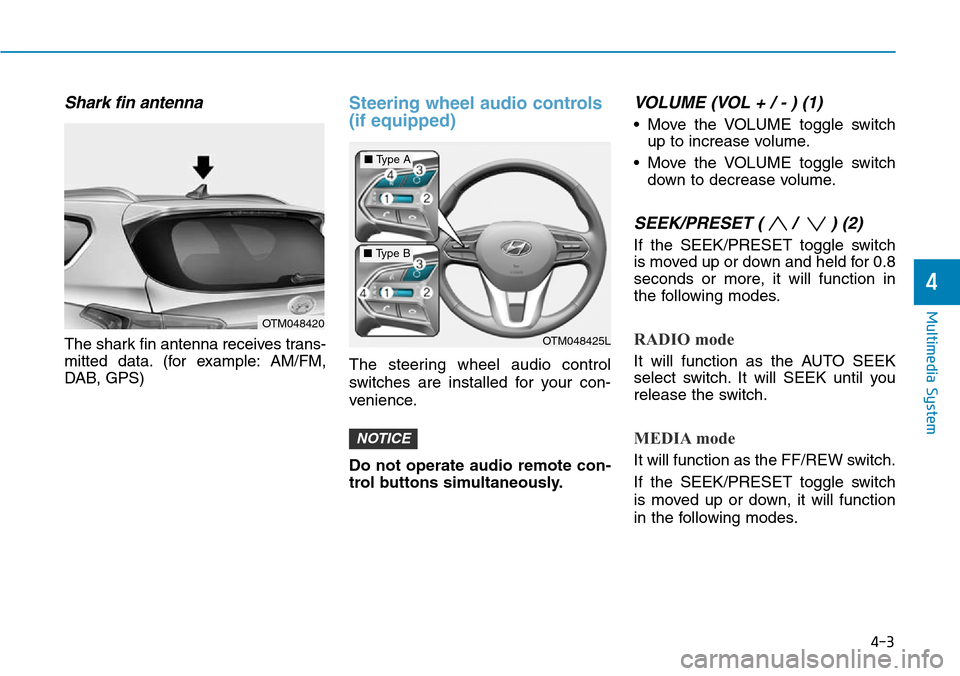
Shark fin antenna
The shark fin antenna receives trans-
mitted data. (for example: AM/FM,
DAB, GPS)
Steering wheel audio controls
(if equipped)
The steering wheel audio control
switches are installed for your con-
venience.
Do not operate audio remote con-
trol buttons simultaneously.
VOLUME (VOL + / - ) (1)
• Move the VOLUME toggle switch
up to increase volume.
• Move the VOLUME toggle switch
down to decrease volume.
SEEK/PRESET ( / ) (2)
If the SEEK/PRESET toggle switch
is moved up or down and held for 0.8
seconds or more, it will function in
the following modes.
RADIO mode
It will function as the AUTO SEEK
select switch. It will SEEK until you
release the switch.
MEDIA mode
It will function as the FF/REW switch.
If the SEEK/PRESET toggle switch
is moved up or down, it will function
in the following modes.
NOTICE
OTM048420
OTM048425L
■Type A
■Type B
Page 306 of 682
![Hyundai Santa Fe 2019 Owners Manual - RHD (UK, Australia) 4-15
Multimedia System
4
RADIO
Turning on the radio
On the control panel, press the
[RADIO] button.
FM/AM Mode
(1) Current radio mode
(2) Radio station information
(3) Preset list
Press the [MENU] but](/manual-img/35/16317/w960_16317-305.png "Hyundai Santa Fe 2019 Owners Manual - RHD (UK, Australia) 4-15
Multimedia System
4
RADIO
Turning on the radio
On the control panel, press the
[RADIO] button.
FM/AM Mode
(1) Current radio mode
(2) Radio station information
(3) Preset list
Press the [MENU] but")
4-15
Multimedia System
4
RADIO
Turning on the radio
On the control panel, press the
[RADIO] button.
FM/AM Mode
(1) Current radio mode
(2) Radio station information
(3) Preset list
Press the [MENU] button on the con-
trol panel to access the following
menu options:
•List: Display all available radio sta-
tions.
•Scan: The system searches for
radio stations with strong radio sig-
nals and plays each option for
about five seconds.
•Sound Settings: Customise the
system sound settings.
FM/AM Mode (With RDS)
(1) Current radio mode
(2) Radio station information
(3) Preset list
Press the [MENU] button on the con-
trol panel to access the following
menu options:
•List: Display all available radio sta-
tions.
•Traffic Announcement (TA) (if
equipped): Activate or deactivate traffic
announcements. Announcements and
programmes will be received automat-
ically if available.
•Scan: The system searches for
radio stations with strong radio sig-
nals and plays each option for
about five seconds•Sound Settings: Audio sound set-
tings can be changed.
DAB/FM Mode (With DAB)
(1) Current radio mode
(2) Radio station information
(3) Preset list
Press the [MENU] button on the con-
trol panel to access the following
menu options:
•List: Display all available radio sta-
tions.
•Traffic Announcement (TA):
Activate or deactivate traffic
announcements. Announcements
and programmes will be received
automatically if available.
•Region: Enable or disable auto-
matic switching between regional
stations.
Page 307 of 682
4-16
Multimedia System
•Sound Settings: Customise the
system sound settings.
•Scan: The system searches for
radio stations with strong radio sig-
nals and plays each option for
about five seconds.
•Manual tune FM: Tune the radio
frequency manually.
Changing the radio mode
Alternatively, press the [RADIO] but-
ton on the control panel or the
[MODE] button on the steering
wheel. Each time you press the but-
ton, the radio mode switches.
Scanning for available radio
stations
You can listen to each radio station
for a few seconds to test the recep-
tion and select the one you want.
1. From the radio screen, press the
[MENU] button on the control panel.
2. Turn the [TUNE] knob to select
Scan, and then press the knob.
• The system searches for radio
stations with strong radio sig-
nals and plays each option for
about 5 seconds.3. When you find the radio station
you want to listen to, press the
[TUNE] knob.
• You can continue listening to the
selected station.
Searching for radio stations
To search for the previous or next
available radio station, press the
[
∨ SEEK∧] button on the control
panel.
• You can also press and hold the
[
∨ SEEK∧] button to search for fre-
quencies quickly. When you
release the button, a radio station
with a strong signal is selected
automatically.
If you know the exact frequency of
the radio station you want to listen to,
turn the [TUNE] knob on the control
panel to change the frequency.
Saving radio stations
You can save your favourite radio
stations and listen to them by select-
ing them from the preset list.Whilst listening to the radio, press
the number button for an empty pre-
set slot on the radio screen.
• The radio station you are listening
to will be added to the selected
number.
• You can save up to 36 radio sta-
tions.
• If the preset list is full, you can
replace one of your favourite
stations with the station you are
listening to. On the control
panel, press and hold the
desired number button.
Listening to saved radio sta-
tions
1. Confirm the preset number for the
radio station you want to listen to.
2. On the control panel, press the
desired number button.
• Alternatively, push the Up/Down
lever on the steering wheel to
change the station.
NOTICE