2019 Hyundai Ioniq Plug-in Hybrid display
[x] Cancel search: displayPage 258 of 599

3-112
Convenient features of your vehicle
Headlamp delay function (if equipped)
If you place the ignition switch to the
ACC or OFF position with the head-
lamps ON, the headlamps (and/or
position lamps) remain on for about 5
minutes. However, with the engine off
if the driver’s door is opened and
closed, the headlamps (and/or posi-
tion lamps) are turned off after 15
seconds.
The headlamps (and/or position
lamps) can be turned off by pressing
the lock button on the remote key or
smart key twice or turning the light
switch to the OFF or AUTO position.
However, if you turn the light switch
to the AUTO position when it is dark
outside, the headlamps will not be
turned off.
You can activate or deactivate the
Headlamp Delay function from the
User Settings Mode on the LCD dis-
play. For more information, refer to
"LCD Display" in this chapter. If the driver gets out of the vehicle
through other doors (except dri-
ver's door), the battery saver func-
tion does not operate and the
headlamp delay function does not
turn off automatically. Therefore, It
causes the battery to be dis-
charged. In this case, make sure to
turn off the lamp before getting out
of the vehicle.
Daytime running light (DRL)
The Daytime Running Lights (DRL)
can make it easier for others to see
the front of your vehicle during the
day, especially after dawn and before
sunset.
The DRL system will turn the dedi-
cated lamp OFF when:
1. The headlamps are in the ON
position.
2. The engine is turned off.
Headlamp levelling device
Manual type
To adjust the headlamp beam level
according to the number of the pas-
sengers and loading weight in the
luggage area, turn the beam levelling
switch.
The higher the number on the switch
position, the lower the headlamp
beam level. Always keep the head-
light beam at the proper levelling
position, or headlamps may dazzle
other road users.
NOTICE
OAE046408R
Page 260 of 599

3-114
Convenient features of your vehicle
Also, if the outside rearview mirror
folding switch is in the AUTO position,
the outside rearview mirror will unfold
automatically.
Door handle lamp (if equipped)
When all the doors (and tailgate) are
closed and locked, the door handle
lamp will come on for about 15 sec-
onds if any of the below is performed.
When the door unlock button is pressed on the remote key or smart
key.
When the button of the outside door handle is pressed with the smart
key in possession.
When the vehicle is approached with the smart key in possession.
Headlamp and Position lamp
When the headlamp (lamp switch in
the headlamp or AUTO position) is
on and all doors (and tailgate) are
locked and closed, the position lamp
and headlamp will come on for 15
seconds if/or any of the below is per-
formed.
When the door unlock button ispressed on the remote key or smart
key.
At this time, if you press the door lock
or unlock button, the position lamp and
headlamp will turn off immediately.
You can activate or deactivate the
Welcome Light from the User
Settings Mode on the LCD display.
For more information, refer to
"LCD Display" in this chapter.
Interior lamp
When the interior lamp switch is in
the DOOR position and all doors (and
tailgate) are closed and locked, the
room lamp will come on for 30 sec-
onds if any of the below is performed.
When the door unlock button is pressed on the remote key or
smart key.
When the button of the outside door handle is pressed.
At this time, if you press the door lock
or unlock button, the room lamp will
turn off immediately.
Page 267 of 599
3-121
Convenient features of your vehicle
3
Rear View Monitor
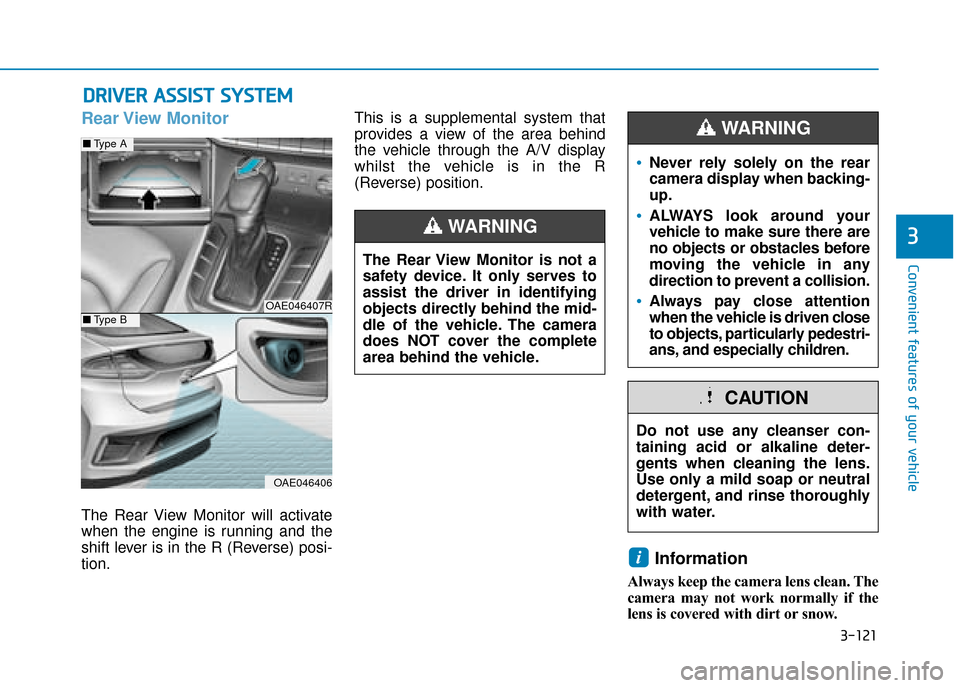
The Rear View Monitor will activate
when the engine is running and the
shift lever is in the R (Reverse) posi-
tion.This is a supplemental system that
provides a view of the area behind
the vehicle through the A/V display
whilst the vehicle is in the R
(Reverse) position.
Information
Always keep the camera lens clean. The
camera may not work normally if the
lens is covered with dirt or snow.
i
D D
R
RI
IV
V E
ER
R
A
A S
SS
SI
IS
S T
T
S
S Y
Y S
ST
T E
EM
M
The Rear View Monitor is not a
safety device. It only serves to
assist the driver in identifying
objects directly behind the mid-
dle of the vehicle. The camera
does NOT cover the complete
area behind the vehicle.
WARNING
Do not use any cleanser con-
taining acid or alkaline deter-
gents when cleaning the lens.
Use only a mild soap or neutral
detergent, and rinse thoroughly
with water.
CAUTION
Never rely solely on the rear
camera display when backing-
up.
ALWAYS look around your
vehicle to make sure there are
no objects or obstacles before
moving the vehicle in any
direction to prevent a collision.
Always pay close attention
when the vehicle is driven close
to objects, particularly pedestri-
ans, and especially children.
WARNING
OAE046407R
OAE046406
■ Type A
■Type B
Page 275 of 599

3-129
Convenient features of your vehicle
3
Automatic heating and air con-
ditioning
1. Press the AUTO button.
The modes, fan speeds, air intake
and air-conditioning will be controlled
automatically according to the tem-
perature setting.2. Turn the temperature control knob
to set the desired temperature.
Information
• To turn the automatic operation off,select any button of the following:
- Mode selection button
- Front windscreen defrost button(Press the button one more time to
deselect the front windscreen
defroster function. The 'AUTO'
sign will illuminate on the infor-
mation display once again.)
- Fan speed control button
The selected function will be con-
trolled manually whilst other func-
tions operate automatically.
• For your convenience, use the AUTO button and set the tempera-
ture to 23°C (73°F).
i
OAE046303R
OAE046302R
Page 280 of 599
3-134
Convenient features of your vehicle
Adjusting the driver and passenger
side temperature individually
Press the “SYNC” button again to
adjust the driver and passenger side
temperature individually. The button
indicator will turn off.
Temperature unit conversion
If the battery has been discharged or
disconnected, the temperature mode
display will reset to Centigrade.
To change the temperature unit from
°C to °F or °F to °C :
- Automatic climate control systemPress the AUTO button for 3 sec-
onds whilst pressing the OFF but-
ton.
- Instrument cluster Go to User Settings Mode → Other
Features →Temperature Unit.
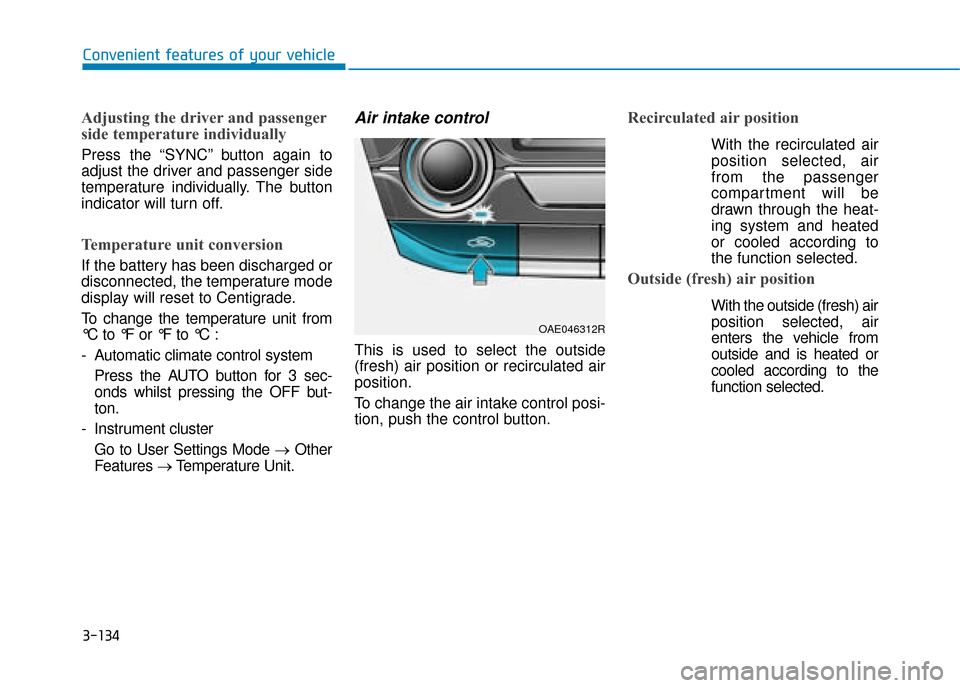
Air intake control
This is used to select the outside
(fresh) air position or recirculated air
position.
To change the air intake control posi-
tion, push the control button.
Recirculated air position
With the recirculated air
position selected, air
from the passenger
compartment will be
drawn through the heat-
ing system and heated
or cooled according to
the function selected.
Outside (fresh) air position
With the outside (fresh) air position selected, air
enters the vehicle from
outside and is heated or
cooled according to the
function selected.
OAE046312R
Page 290 of 599

3-144
Convenient features of your vehicle
Auto defogging system
(if equipped)
Auto defogging reduces the possibili-
ty of fogging up the inside of the wind-
screen by automatically sensing the
moisture on inside the windscreen.
The auto defogging system operates
when the heater or air conditioning is
on.
Information
The auto defogging system may not
operate normally, when the outside
temperature is below -10 °C.When the Auto Defogging
System operates, the indi-
cator will illuminate.
If high levels of moisture are sensed
in the vehicle, the Auto Defogging
System will operate in the following
order:
Step 1 : Outside air position
Step 2 : Operating the air conditioning
Step 3 : Blowing air toward the wind- screen
Step 4 : Increasing air flow toward the windscreen
If the air conditioning is off or recircu-
lated air position is manually selected
whilst Auto Defogging System is ON,
the Auto Defogging System Indicator
will blink 3 times to signal that the
manual operation has been can-
celled.To cancel or reset the Auto Defogging
System
Press the front windscreen defroster
button for 3 seconds when the igni-
tion switch is in the ON position. When the Auto Defogging System is
cancelled, the ADS OFF symbol will
blink 3 times and the ADS OFF will
be displayed on the climate control
information screen.
When the Auto Defogging System is
reset, the ADS OFF symbol will blink
6 times without a signal.
Information
• When the air conditioning is turned
on by Auto defogging system, if you
try to turn off the air conditioning, the
indicator will blink 3 times and the air
conditioning will not be turned off.
• For efficiency, do not select recircu- lated air position whilst the Auto
defogging system is operating.
Do not remove the sensor cover
located on the upper end of the
windscreen glass.
Damage to system parts could
occur and may not be covered by
your vehicle warranty.
NOTICE
i
i
OAE046320
Page 298 of 599

3-152
Convenient features of your vehicle
Wireless mobile phone charg-
ing system (if equipped)
There is a wireless mobile phone
charger inside the front console.
The system is available when all
doors are closed, and when the igni-
tion switch is in the ACC, ON or
START position.
To charge a mobile phone
The wireless mobile phone charging
system charges only the Qi-enabled
mobile phones ( ). Read the label
on the mobile phone accessory
cover or visit your mobile phone
manufacturer’s website to check
whether your mobile phone supports
the Qi technology.
The wireless charging process starts
when you put a Qi-enabled mobile
phone on the wireless charging unit.
1. Remove other items, including thesmart key, from the wireless charg-
ing unit. If not, the wireless charg-
ing process may be interrupted.
Place the mobile phone on the
centre of charging pad.
2. The indicator light is orange when the mobile phone is chargeing.
The indicator light turns green
when phone charging is complet-
ed.
3. You can turn ON or OFF the wire- less charging function in the user
settings mode on the instrument
cluster. For further information,
refer to the “LCD Modes” in this
chapter. If your mobile phone is not charging:
- Slightly change the position of the
mobile phone on the charging pad.
- Make sure the indicator light is orange.
The indicator light will blink orange
for 10 seconds if there is a malfunc-
tion in the wireless charging system.
In this case, temporarily stop the
charging process, and re-attempt to
wirelessly charge your mobile phone
again.
The system warns you with a mes-
sage on the LCD display if the mobile
phone is still on the wireless charg-
ing unit after the ignition switch in the
LOCK/OFF position.
Information
For some manufacturers' mobile
phones, the system may not warn you
even though the mobile phone is left
on the wireless charging unit. This is
due to the particular characteristic of
the mobile phone and not a malfunc-
tion of the wireless charging.
i
OAE046444R
Page 300 of 599

3-154
Convenient features of your vehicle
Cigarette lighter (if equipped)
To use the cigarette lighter, the igni-
tion switch must be in the ACC or ON
position.
Push the cigarette lighter all the way
into its socket. When the element is
heated, the lighter will pop out to the
“ready” position.
We recommend that you use
replacement parts from a HYUNDAI
authorised repairer.Only a genuine HYUNDAI lighter
should be used in the cigarette
lighter socket. The use of plug-in
accessories (shavers, hand-held
vacuums, and coffee pots, etc.)
may damage the socket or cause
electrical failure.
Clock
Vehicles with Audio system
Select the [SETUP]
button on the
audio system ➟ Select [Date/Time].
Set time: Set the time displayed on the audio screen.
Time format: Choose between 12- hour and 24-hour time formats.
Vehicles with Navigation system
Select the Settings menu on the
Navigation system ➟Select
[Date/Time].
GPS time: Displays time according to the received GNSS time.
24-hour: Switches to 12 hour or 24 hour.
NOTICE
Do not adjust the clock whilst
driving. You may lose your steer-
ing control and cause severe
personal injury or accidents.
WARNING Do not hold the lighter in after
it is already heated because it
will overheat.
If the lighter does not pop out
within 30 seconds, remove it
to prevent overheating.
Do not insert foreign objects
into the socket of the cigarette
lighter. It may damage the cig-
arette lighter.
WARNING
OAE046472R