Page 152 of 526
3-5
Convenient features of your vehicle
Start-up
You can start the vehicle without
inserting the key.For detailed infor-
mation, refer to the POWER button
in chapter 5.
To prevent damaging the smart
key:
• Keep the smart key away from water or any liquid and fire. If the
inside of the smart key gets
damp (due to drinks or moisture),
or is heated, internal circuit may
malfunction, excluding the car
from the warranty.
Avoid dropping or throwing the smart key.
Protect the smart key from extreme temperatures.
Always have the smart key with
you when leaving the vehicle. If
the smart key is left near the vehi-
cle, the vehicle battery may be dis-
charged.
Mechanical key
If the Smart Key does not operate
normally, you can lock or unlock the
door by using the mechanical key.
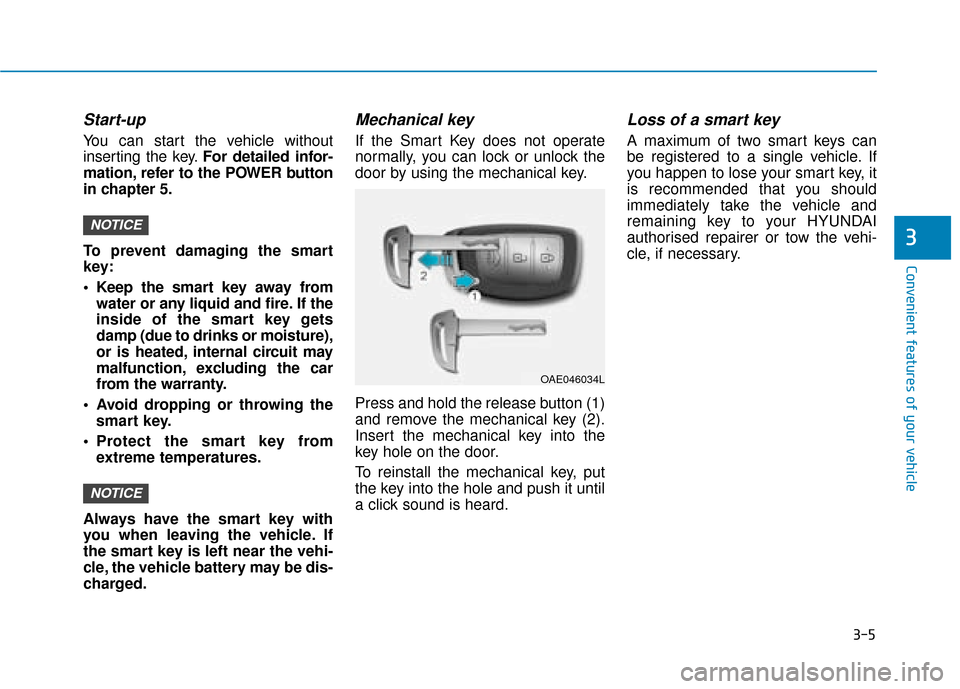
Press and hold the release button (1)
and remove the mechanical key (2).
Insert the mechanical key into the
key hole on the door.
To reinstall the mechanical key, put
the key into the hole and push it until
a click sound is heard.
Loss of a smart key
A maximum of two smart keys can
be registered to a single vehicle. If
you happen to lose your smart key, it
is recommended that you should
immediately take the vehicle and
remaining key to your HYUNDAI
authorised repairer or tow the vehi-
cle, if necessary.
NOTICE
NOTICE3
OAE046034L
Page 155 of 526
3-8
Operating door locks from
outside the vehicle
Mechanical key
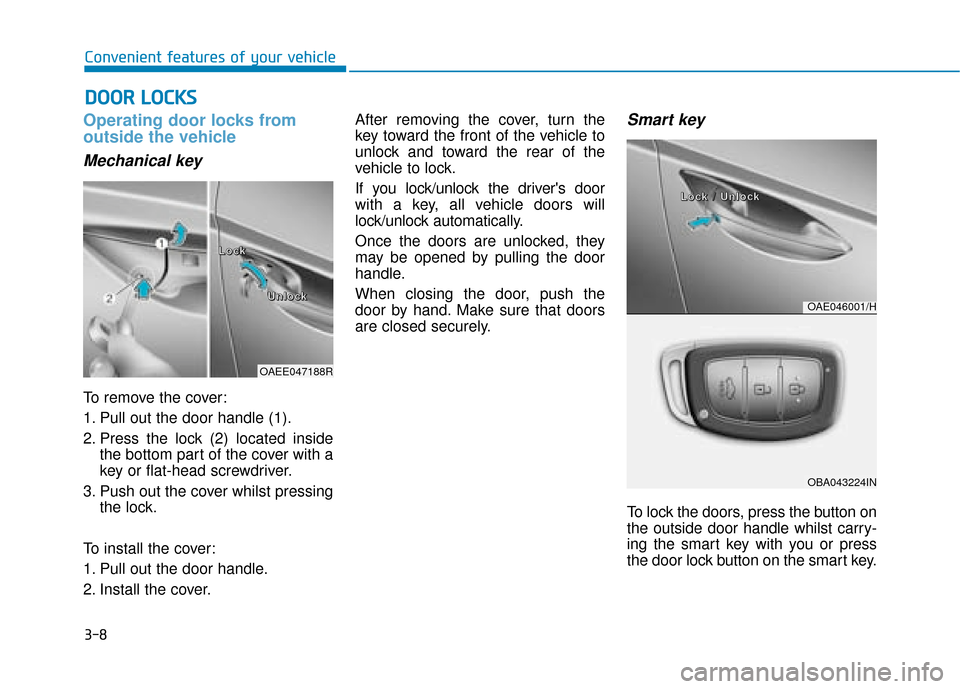
To remove the cover:
1. Pull out the door handle (1).
2. Press the lock (2) located insidethe bottom part of the cover with a
key or flat-head screwdriver.
3. Push out the cover whilst pressing the lock.
To install the cover:
1. Pull out the door handle.
2. Install the cover. After removing the cover, turn the
key toward the front of the vehicle to
unlock and toward the rear of the
vehicle to lock.
If you lock/unlock the driver's door
with a key, all vehicle doors will
lock/unlock automatically.
Once the doors are unlocked, they
may be opened by pulling the door
handle.
When closing the door, push the
door by hand. Make sure that doors
are closed securely.
Smart key
To lock the doors, press the button on
the outside door handle whilst carry-
ing the smart key with you or press
the door lock button on the smart key.
D D
O
O O
OR
R
L
L O
O C
CK
K S
S
Convenient features of your vehicle
OAEE047188R
L
L
L
L
o
o
o
o
c
c
c
c
k
k
k
k
U
U
U
U
n
n
n
n
l
l
l
l
o
o
o
o
c
c
c
c
k
k
k
k
OAE046001/H
OBA043224IN
L
L
L
L
o
o
o
o
c
c
c
c
k
k
k
k
/
/
/
/
U
U
U
U
n
n
n
n
l
l
l
l
o
o
o
o
c
c
c
c
k
k
k
k
Page 164 of 526
3-17
Convenient features of your vehicle
3
Tilt steering / Telescope steeringInformation
After adjustment, sometimes the lock-
release lever may not lock the steering
wheel.
It is not a malfunction. This occurs
when two gears are not engaged cor-
rectly. In this case, adjust the steering
wheel again and then lock the steering
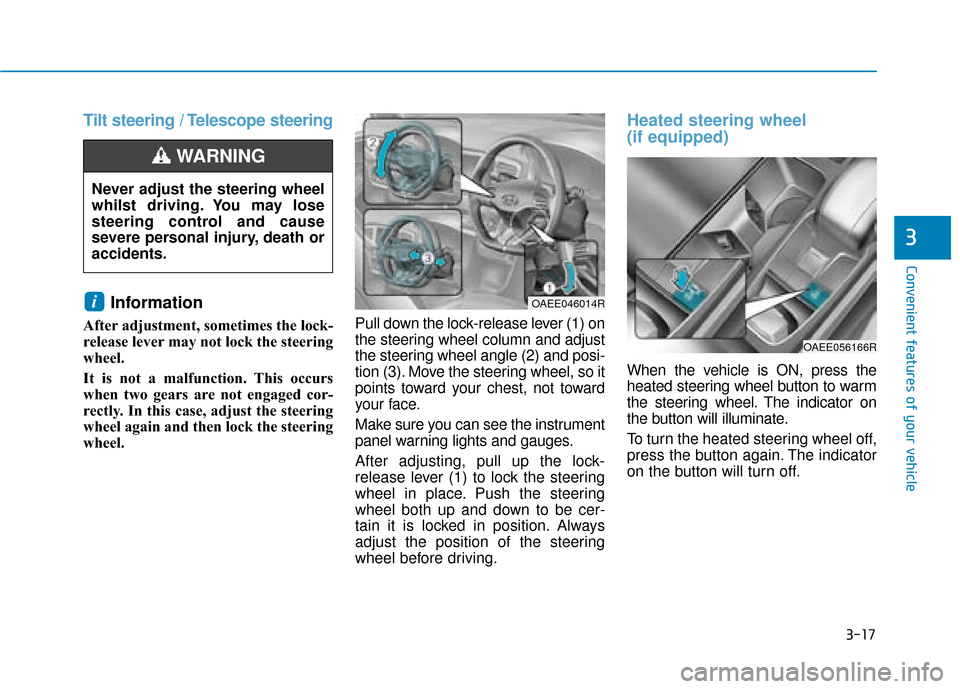
wheel. Pull down the lock-release lever (1) on
the steering wheel column and adjust
the steering wheel angle (2) and posi-
tion (3). Move the steering wheel, so it
points toward your chest, not toward
your face.
Make sure you can see the instrument
panel warning lights and gauges.
After adjusting, pull up the lock-
release lever (1) to lock the steering
wheel in place. Push the steering
wheel both up and down to be cer-
tain it is locked in position. Always
adjust the position of the steering
wheel before driving.
Heated steering wheel
(if equipped)
When the vehicle is ON, press the
heated steering wheel button to warm
the steering wheel. The indicator on
the button will illuminate.
To turn the heated steering wheel off,
press the button again. The indicator
on the button will turn off.
i
Never adjust the steering wheel
whilst driving. You may lose
steering control and cause
severe personal injury, death or
accidents.
WARNING
OAEE056166R
OAEE046014R
Page 166 of 526
3-19
Convenient features of your vehicle
3
When cleaning the mirror, use a
paper towel or similar material
dampened with glass cleaner. Do
not spray glass cleaner directly on
the mirror as that may cause the
liquid cleaner to enter the mirror
housing.
Day/night rearview mirror (if equipped)
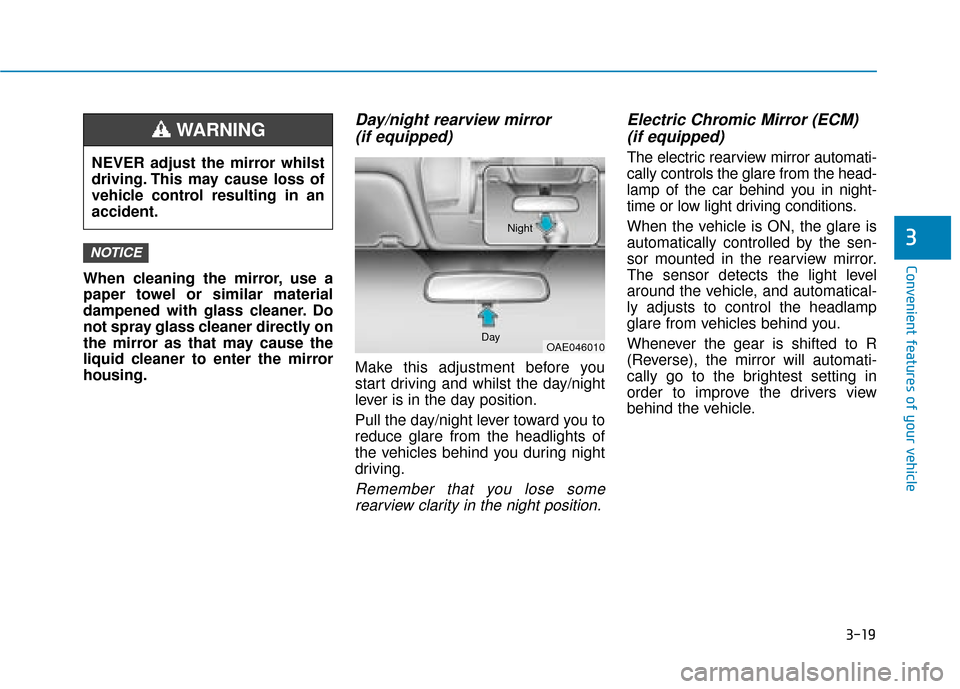
Make this adjustment before you
start driving and whilst the day/night
lever is in the day position.
Pull the day/night lever toward you to
reduce glare from the headlights of
the vehicles behind you during night
driving.
Remember that you lose some
rearview clarity in the night position.
Electric Chromic Mirror (ECM) (if equipped)
The electric rearview mirror automati-
cally controls the glare from the head-
lamp of the car behind you in night-
time or low light driving conditions.
When the vehicle is ON, the glare is
automatically controlled by the sen-
sor mounted in the rearview mirror.
The sensor detects the light level
around the vehicle, and automatical-
ly adjusts to control the headlamp
glare from vehicles behind you.
Whenever the gear is shifted to R
(Reverse), the mirror will automati-
cally go to the brightest setting in
order to improve the drivers view
behind the vehicle.
NOTICE
NEVER adjust the mirror whilst
driving. This may cause loss of
vehicle control resulting in an
accident.
WARNING
OAE046010
Day Night
Page 169 of 526
3-22
Convenient features of your vehicle
Folding the outside rearviewmirror
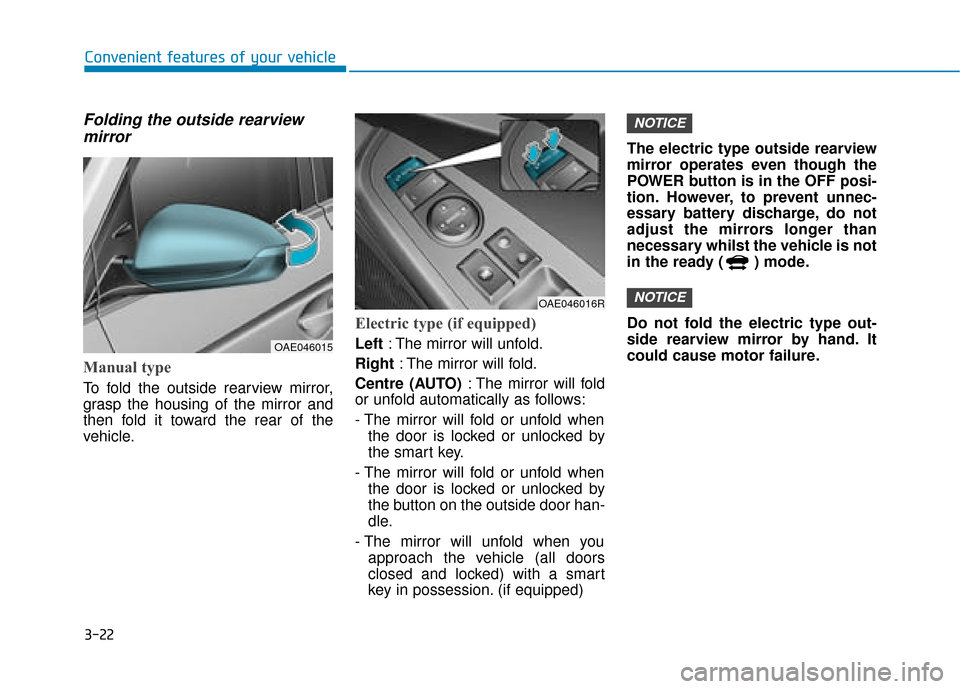
Manual type
To fold the outside rearview mirror,
grasp the housing of the mirror and
then fold it toward the rear of the
vehicle.
Electric type (if equipped)
Left : The mirror will unfold.
Right : The mirror will fold.
Centre (AUTO) : The mirror will fold
or unfold automatically as follows:
- The mirror will fold or unfold when
the door is locked or unlocked by
the smart key.
- The mirror will fold or unfold when the door is locked or unlocked by
the button on the outside door han-
dle.
- The mirror will unfold when you approach the vehicle (all doors
closed and locked) with a smart
key in possession. (if equipped) The electric type outside rearview
mirror operates even though the
POWER button is in the OFF posi-
tion. However, to prevent unnec-
essary battery discharge, do not
adjust the mirrors longer than
necessary whilst the vehicle is not
in the ready ( ) mode.
Do not fold the electric type out-
side rearview mirror by hand. It
could cause motor failure.
NOTICE
NOTICE
OAE046015
OAE046016R
Page 207 of 526
3-60
Convenient features of your vehicle
Aux. Battery Saver+ used whileparked
This message is displayed when the
Aux. Battery Saver+ function has
been completed.
For more details, refer to “Aux.
Battery Saver+” in the Electric
Vehicle Guide.
Stop vehicle and check brakes
This warning message is displayed
when a failure occurs in the brake
system.
In this case, park the vehicle in a
safe location and recommend that
you tow your vehicle to the nearest
HYUNDAI authorised repairer and
have the vehicle inspected.
Check brakes
This warning message is displayed
when the brake performance is low
or the regenerative brake does not
work properly due to a failure in the
brake system.
In this case, it may take longer for the
brake pedal to operate and the brak-
ing distance may become longer.
OLFH044234LOLFH044250L
OAEE046143L
Page 210 of 526
3-63
Convenient features of your vehicle
3
When this warning message is
displayed, do not accelerate or
start the vehicle suddenly.
Charge the battery immediately
when the high voltage battery
level is not enough.
Stop vehicle and check powersupply
This warning message is displayed
when a failure occurs in the power
supply system.
In this case, park the vehicle in a
safe location and we recommend
that you tow your vehicle to the near-
est HYUNDAI authorised repairer
and have the vehicle inspected.
Check Active Air Flap System
This warning message is displayed
in the following situations:
- There is a malfunction with the
actuator flap
- There is a malfunction with the actuator air flap controller
- The air flap does not open
When all of the above conditions are
fixed, the warning will disappear.
NOTICE
OLFH044230L
OLFH044262L
Page 226 of 526
3-79
Convenient features of your vehicle
3
To turn off the high beam headlamp,
pull the lever towards you. The low
beams will turn on.To flash the high beam headlamp,
pull the lever towards you, then
release the lever. The high beams
will remain ON as long as you hold
the lever towards you.Turn signals and lane changesignals
To signal a turn, push down on the
lever for a left turn or up for a right
turn in position (A). To signal a lane
change, move the turn signal lever
slightly and hold it in position (B).
The lever will return to the O (off)
position when released or when the
turn is completed.
If an indicator stays on and does not
flash or if it flashes abnormally, one of
the turn signal bulbs may be burned
out and will require replacement.
Do not use high beam when there
are other vehicles approaching
you. Using high beam could
obstruct the other driver's vision.
WARNING
OAE046455L
OAE046457L