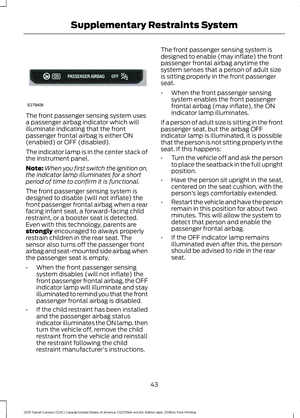
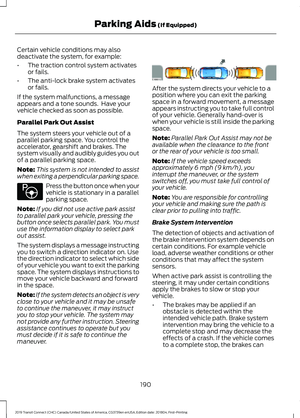
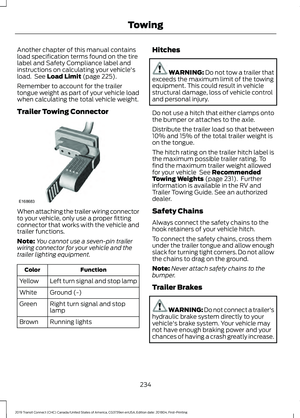
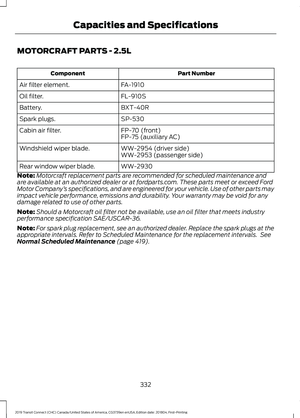
Page 297 of 493

Engine
•
Change the engine oil and filter prior to
storage because used engine oil
contains contaminates which may
cause engine damage.
• Start the engine every 15 days for a
minimum of 15 minutes. Run at fast idle
with the climate controls set to defrost
until the engine reaches normal
operating temperature.
• With your foot on the brake, shift
through all the gears while the engine
is running.
• We recommend that you change the
engine oil before you use your vehicle
again.
Fuel system
• Fill the fuel tank with high-quality fuel
until the first automatic shutoff of the
fuel pump nozzle.
Cooling system
• Protect against freezing temperatures.
• When removing your vehicle from
storage, check coolant fluid level.
Confirm that there are no cooling
system leaks and that fluid is at the
recommended level.
Battery
• Check and recharge as necessary. Keep
connections clean.
• If storing your vehicle for more than 30
days without recharging the battery,
we recommend that you disconnect
the battery cables to maintain battery
charge for quick starting.
Note: It is necessary to reset memory
features if battery cables are disconnected. Brakes
•
Make sure the brakes and parking brake
release fully.
Tires
• Maintain recommended air pressure.
Miscellaneous
• Make sure all linkages, cables, levers
and pins under your vehicle are covered
with grease to prevent rust.
• Move vehicles at least 25 ft (7.5 m)
every 15 days to lubricate working parts
and prevent corrosion.
Removing Vehicle From Storage
When your vehicle is ready to come out of
storage, do the following:
• Wash your vehicle to remove any dirt
or grease film build-up on window
surfaces.
• Check windshield wipers for any
deterioration.
• Check under the hood for any foreign
material that may have collected
during storage such as mice or squirrel
nests.
• Check the exhaust for any foreign
material that may have collected
during storage.
• Check tire pressures and set tire
inflation per the Tire Label.
• Check brake pedal operation. Drive
your vehicle
15 ft (4.5 m) back and
forth to remove rust build-up.
• Check fluid levels (including coolant,
oil and gas) to make sure there are no
leaks, and fluids are at recommended
levels.
• If you remove the battery, clean the
battery cable ends and check for
damage.
293
2019 Transit Connect (CHC) Canada/United States of America, CG3739en enUSA, Edition date: 201804, First-Printing Vehicle Care
Page 298 of 493
Contact an authorized dealer if you have
any concerns or issues.
294
2019 Transit Connect (CHC) Canada/United States of America, CG3739en enUSA, Edition date: 201804, First-Printing Vehicle Care
Page 299 of 493

GENERAL INFORMATION
Notice to Utility Vehicle, Van and
Truck Owners
WARNING: Utility vehicles have a
significantly higher rollover rate than other
types of vehicles. To reduce the risk of
serious injury or death from a rollover or
other crash you must avoid sharp turns and
abrupt maneuvers, drive at safe speeds for
the conditions, keep tires properly inflated,
never overload or improperly load your
vehicle, and make sure every passenger is
properly restrained. WARNING:
In a rollover crash, an
unbelted person is significantly more likely
to die than a person wearing a seat belt.
All occupants must wear seat belts.
Children and infants must use appropriate
restraints to minimize the risk of injury or
ejection. Utility vehicles and trucks handle
differently than passenger cars in the
various driving conditions that are
encountered on streets, highways and
off-road. Utility vehicles and trucks are not
designed for cornering at speeds as high
as passenger cars any more than low-slung
sports cars are designed to perform
satisfactorily under off-road conditions. How Your Vehicle Differs from
Other Vehicles
Sport-utility vehicles, vans and trucks can
differ from some other vehicles in a few
noticeable ways. Your vehicle may be:
295
2019 Transit Connect (CHC) Canada/United States of America, CG3739en enUSA, Edition date: 201804, First-Printing Wheels and TiresE145298 E145299
Page 300 of 493

•
Higher - to allow higher load carrying
capacity and to allow it to travel over
rough terrain without getting hung up
or damaging underbody components.
• Shorter - to give it the capability to
approach inclines and drive over the
crest of a hill without getting hung up
or damaging underbody components.
All other things held equal, a shorter
wheelbase may make your vehicle
quicker to respond to steering inputs
than a vehicle with a longer wheelbase.
• Narrower - to provide greater
maneuverability in tight spaces,
particularly in off-road use. As a result of the above dimensional
differences, sport-utility vehicles, vans and
trucks often will have a higher center of
gravity and a greater difference in center
of gravity between the loaded and
unloaded condition.
These differences that make your vehicle
so versatile also make it handle differently
than an ordinary passenger car. TIRE SEALANT AND INFLATOR
KIT WARNING: Do not use the inflator
kit on run flat tires. This could cause loss
of vehicle control. WARNING:
Depending on the type
and extent of tire damage, some tires can
only be partially sealed or not sealed at all.
Loss of tire pressure can affect vehicle
handling, leading to loss of vehicle control. WARNING:
Do not use the kit on a
previously damaged tire, for example when
it has been driven under inflated. This could
cause loss of vehicle control, personal
injury or death.
If your vehicle does not have a spare wheel
it has a tire sealant and inflator kit. The kit
is in the luggage compartment. Only use
the kit supplied with your vehicle.
Note: The kit can only temporarily repair
one tire puncture with a maximum puncture
size of up to
0.24 in (6 mm).
296
2019 Transit Connect (CHC) Canada/United States of America, CG3739en enUSA, Edition date: 201804, First-Printing Wheels and TiresE166373
Page 301 of 493

Pressure Gauge.
A
Sealant bottle access cap.
B
Warning label.
C
Power switch.
D
Sealant bottle.
E
Tire inflation pipe.
F
12 volt DC power point
connector.
G
Note: Make sure you regularly check the
expiry date on the sealant bottle. If the low tire pressure warning
lamp illuminates do the
following:
1. Gradually reduce the vehicle speed and
stop your vehicle as soon as it is safe
to do so.
2. Apply the parking brake and switch the
ignition off. 3. Check for a punctured tire.
Note:
Do not remove objects, for example
nails or screws from a punctured tire.
Using the Tire Sealant and Inflator
Kit WARNING: Check the sidewall of
the tire prior to inflation. If there are any
cracks, bumps or similar damage, do not
attempt to inflate the tire. This could cause
personal injury. WARNING:
Watch the sidewall of
the tire when inflating. If any cracks, bumps
or similar damage appears, switch the
compressor off and let the air out by
means of the pressure relief valve. Do not
continue driving with this tire. This could
cause loss of vehicle control. WARNING:
Do not stand directly
beside the tire while the compressor is
operating. This could cause personal injury
if the tire bursts. WARNING:
Do not leave the kit
unattended when it is in use. Failure to
follow this instruction could result in
personal injury or death. WARNING:
Do not keep the
compressor operating for more than 10
minutes. This could cause the compressor
to malfunction causing serious personal
injury.
To temporarily repair a punctured tire, do
the following:
297
2019 Transit Connect (CHC) Canada/United States of America, CG3739en enUSA, Edition date: 201804, First-Printing Wheels and TiresABDC
GFE
E257262
Page 302 of 493
1. Release the tire inflation pipe and the
12 volt DC power point connector from
the underside of the compressor. 2. Turn the sealant bottle access cap
counterclockwise and remove it. 3.
Remove the sealant bottle cap. Do not
pierce or remove the seal. 4. Attach the sealant bottle to the
compressor. Turn the sealant bottle
clockwise until you feel a strong
resistance.
Note: Attaching the sealant bottle to the
compressor pierces the seal. Do not loosen
the bottle as sealant could escape.
298
2019 Transit Connect (CHC) Canada/United States of America, CG3739en enUSA, Edition date: 201804, First-Printing Wheels and TiresE257263 E257264 x
E256963 E257265
Page 303 of 493
5. Remove the tire valve dust cap and
attach the tire inflation pipe. 6. Plug the 12 volt DC power point
connector into the 12 volt DC socket.
See Auxiliary Power Points (page
131).
7. Start the engine. 8. Switch the compressor on.
9. Inflate the tire to between 29–44 psi
(2 –3 bar).
Note: If the tire pressure does not reach
26 psi (1.8 bar)
within 10 minutes, the tire
could be damaged beyond a temporary
repair. Have your vehicle immediately
checked. Do not drive your vehicle.
10. When the tire reaches the recommended tire pressure of
between 29–44 psi (2 –3 bar), switch
the compressor and the ignition off.
299
2019 Transit Connect (CHC) Canada/United States of America, CG3739en enUSA, Edition date: 201804, First-Printing Wheels and TiresE257006 E257022 E257266 E257121
Page 304 of 493

11.
Disconnect the tire inflation pipe and
the 12 volt DC power point connector.
Note: Do not remove the sealant bottle
from the compressor.
12. Reinstall the tire valve dust cap.
13. Place the warning label on the steering wheel and correctly stow the
kit.14. Immediately drive your vehicle for
2–6 mi (3– 10 km). Do not exceed
50 mph (80 km/h). 15. After driving between
2
–6 mi
(3– 10 km), stop your vehicle and
recheck the tire pressure. See Tire
Pressures (page 324).
Note: If the tire pressure has dropped to
26 psi (1.8 bar)
or below, the tire could be
damaged beyond a temporary repair. Have
your vehicle immediately checked. Do not
drive your vehicle.
Note: If the tire pressure has dropped but
is still above
26 psi (1.8 bar), use the kit to
inflate the tire again.
After Using the Tire Sealant and
Inflator Kit WARNING:
If you experience heavy
vibrations, unsteady steering behavior or
noises while driving, reduce your speed
gradually and stop your vehicle as soon as
it is safe to do so. Recheck the tire and its
pressure. If the tire pressure is less than
18.9 psi (1.3 bar)
or if there are any cracks,
bumps or similar damage visible, do not
continue driving with this tire. This could
cause loss of vehicle control.
The kit only provides temporary mobility.
Regulations concerning tire repair or
replacement after using the kit could differ
from country to country. We recommend
you consult a tire specialist.
After using the kit:
• Do not drive your vehicle more than
124 mi (200 km)
before repairing or
replacing the punctured tire.
• Inform all other users of your vehicle
that a tire was sealed using the kit.
Make them aware of the special driving
conditions that must be observed.
300
2019 Transit Connect (CHC) Canada/United States of America, CG3739en enUSA, Edition date: 201804, First-Printing Wheels and TiresE257942 E257121