2019 FORD TAURUS door lock
[x] Cancel search: door lockPage 138 of 515
temperatures, and be clearly marked
Suitable for Use with Outdoor
Appliances. Do not use an indoor
extension cord outdoors. This could
result in an electric shock or become a
fire hazard.
• Use as short an extension cord as
possible.
• Do not use multiple extension cords.
• Make sure that when in operation, the
extension cord plug and heater cord
plug connections are free and clear of
water. This could cause an electric
shock or fire.
• Make sure your vehicle is parked in a
clean area, clear of combustibles.
• Make sure the heater, heater cord and
extension cord are firmly connected.
• Check for heat anywhere in the
electrical hookup once the system has
been operating for approximately 30
minutes.
• Make sure the system is unplugged and
properly stowed before starting and
driving your vehicle. Make sure the
protective cover seals the prongs of the
block heater cord plug when not in use.
• Make sure the heater system is
checked for proper operation before
winter.
Using the Engine Block Heater
Make sure the receptacle terminals are
clean and dry prior to use. Clean them with
a dry cloth if necessary.
The heater uses 0.4 to 1.0 kilowatt-hours
of energy per hour of use. The system does
not have a thermostat. It achieves
maximum temperature after
approximately three hours of operation.
Using the heater longer than three hours
does not improve system performance and
unnecessarily uses electricity.
135
Taurus (CPH) Canada/United States of America, enUSA, Edition date: 201806, First-Printing Starting and Stopping the Engine
Page 187 of 515
System Warnings
Note:
The system does not issue warnings
below approximately 40 mph (64 km/h).
The warning system has two stages. First,
the system issues a temporary warning
stating that you need to take a rest. This
message only appears for a short time. If
the system detects your driving alertness
reduces further, it may issue another
warning which remains in the information
display for a longer time. Press
OK on the
steering wheel control to clear the warning.
System Display
When active, the system runs
automatically in the background and only
issues a warning if required. You can view
the status at any time in the information
display.
See General Information (page
85).
Note: If you receive a warning you should
consider resting, even if the current
assessment is within the typical range.
Note: If the camera sensor cannot track the
road lane markings or if your vehicle speed
drops below approximately
40 mph
(64 km/h), the alertness level changes to
grey for a short time and the information
display informs you that the system is
unavailable.
Resetting the System
You can reset the system by either:
• Switching the ignition off and on.
• Stopping the vehicle and then opening
and closing the driver ’s door. LANE KEEPING SYSTEM
(If
Equipped) WARNING:
You are responsible
for controlling your vehicle at all times.
The system is designed to be an aid and
does not relieve you of your responsibility
to drive with due care and attention.
Failure to follow this instruction could
result in the loss of control of your
vehicle, personal injury or death. WARNING:
Always drive with due
care and attention when using and
operating the controls and features on
your vehicle. WARNING:
In cold and severe
weather conditions the system may not
function. Rain, snow and spray can all
limit sensor performance. WARNING:
The system will not
operate if the sensor cannot track the
road lane markings. WARNING:
The sensor may
incorrectly track lane markings as other
structures or objects. This can result in
a false or missed warning. WARNING:
Large contrasts in
outside lighting can limit sensor
performance. WARNING:
The system may not
operate properly if the sensor is blocked.
Keep the windshield free from
obstruction.
184
Taurus (CPH) Canada/United States of America, enUSA, Edition date: 201806, First-Printing Driving Aids
Page 188 of 515
WARNING: If damage occurs in
the immediate area surrounding the
sensor, have your vehicle checked as
soon as possible. WARNING:
The system may not
correctly operate if your vehicle is fitted
with a suspension kit not approved by
us.
Note: The system works above
40 mph
(64 km/h).
Note: The system works as long as the
camera can detect one lane marking.
Note: When aid or alert and aid modes are
selected and the system detects no steering
activity for a short period, the system alerts
you to put your hands on the steering wheel.
The system may detect a light grip or touch
on the steering wheel as hands off driving.
Note: The system may not function if the
camera is blocked, or if the windshield is
damaged or dirty. When you switch the system on and it
detects an unintentional drift out of your
lane is likely to occur, the system notifies
or assists you to stay in your lane through
the steering system and information
display. In Alert mode, the system provides
a warning by vibrating the steering wheel.
In Aid mode, the system provides steering
assistance by gently counter steering your
vehicle back into the lane.
When the system is functioning in the
combined Alert and Aid mode, the system
first provides steering assistance by gently
counter steering your vehicle back into the
lane, followed by a warning by vibrating
the steering wheel if the vehicle is still out
of the lane marking.
Switching the System On and Off
Note:
The system stores the on or off
setting until you manually change it, unless
it detects a MyKey ™. If the system detects
a MyKey, it defaults to on and the mode is
set to alert.
Note: If the system detects a MyKey ™,
pressing the button does not affect the on
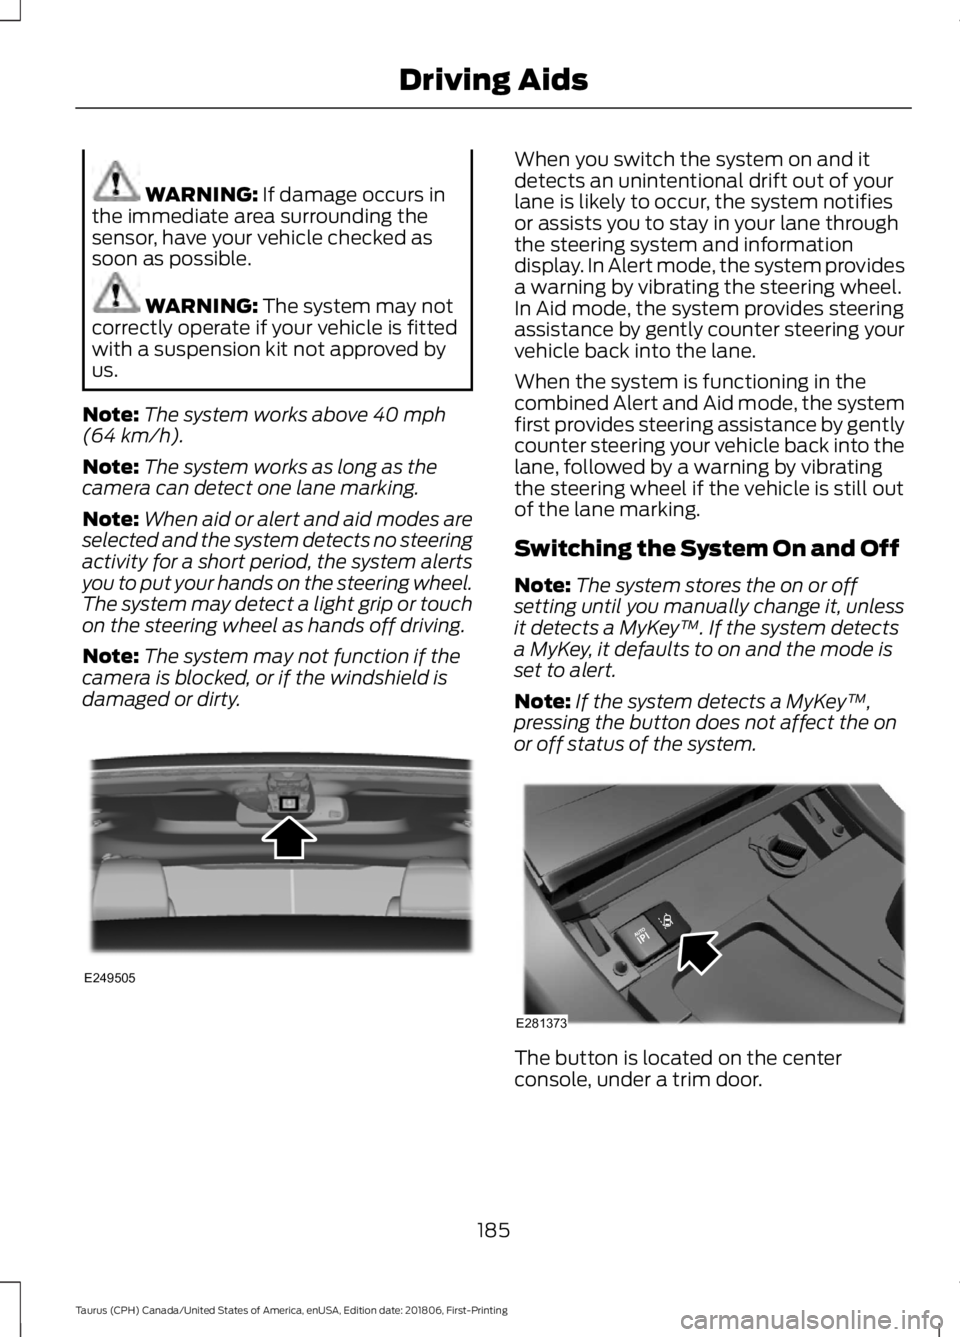
or off status of the system. The button is located on the center
console, under a trim door.
185
Taurus (CPH) Canada/United States of America, enUSA, Edition date: 201806, First-Printing Driving AidsE249505 E281373
Page 260 of 515
WAXING
Regular waxing is necessary to protect your
car's paint from the elements. We
recommend that you wash and wax the
painted surface once or twice a year.
When washing and waxing, park your
vehicle in a shaded area out of direct
sunlight. Always wash your vehicle before
applying wax.
•
Use a quality wax that does not contain
abrasives.
• Follow the manufacturer ’s instructions
to apply and remove the wax.
• Apply a small amount of wax in a
back-and-forth motion, not in circles.
• Do not allow wax to come in contact
with any non-body (low-gloss black)
colored trim. The wax will discolor or
stain the parts over time.
•Roof racks.
• Bumpers.
• Grained door handles.
• Side moldings.
• Mirror housings.
• Windshield cowl area.
• Do not apply wax to glass areas.
• After waxing, your car's paint should
feel smooth, and be free of streaks and
smudges.
CLEANING THE ENGINE
Engines are more efficient when they are
clean because grease and dirt buildup keep
the engine warmer than normal. When washing:
•
Take care when using a power washer
to clean the engine. The high-pressure
fluid could penetrate the sealed parts
and cause damage.
• Do not spray a hot engine with cold
water to avoid cracking the engine
block or other engine components.
• Spray Motorcraft Engine Shampoo and
Degreaser on all parts that require
cleaning and pressure rinse clean. In
Canada, use Motorcraft Engine
Shampoo.
• Never wash or rinse the engine while it
is hot or running; water in the running
engine may cause internal damage.
• Never wash or rinse any ignition coil,
spark plug wire or spark plug well, or
the area in and around these locations.
• Cover the battery, power distribution
box, and air filter assembly to prevent
water damage when cleaning the
engine.
CLEANING THE WINDOWS AND
WIPER BLADES
Car wash chemicals and environmental
fallout can result in windshield and wiper
blade contamination. Dirty windshield and
wipers will result in poor windshield wiper
operation. Keep the windshield and wiper
blades clean to maintain windshield wiper
performance.
257
Taurus (CPH) Canada/United States of America, enUSA, Edition date: 201806, First-Printing Vehicle Care
Page 268 of 515

•
When inflating a tire or other objects,
use the black air hose only. Do not use
the transparent hose which is designed
for sealant application only.
• Operating the kit could cause an
electrical disturbance in radio, CD, and
DVD player operation.
What to do when a Tire Is
Punctured
A tire puncture within the tire tread area
can be repaired in two stages with the kit.
• In the first stage, the tire will be
reinflated with a sealing compound
and air. After the tire has been
reinflated, you will need to drive the
vehicle a short distance 4 mi (6 km) to
distribute the sealant in the tire.
• In the second stage, you will need to
check the tire pressure and adjust, if
necessary, to the vehicle tire inflation
pressure.
First Stage: Reinflating the Tire
with Sealing Compound and Air WARNING: Do not stand directly
over the kit while inflating the tire. If you
notice any unusual bulges or
deformations in the tire's sidewall during
inflation, stop and call roadside
assistance. WARNING:
If the tire does not
inflate to the recommended tire pressure
within 15 minutes, stop and call roadside
assistance.
Preparation: Park the vehicle in a safe, level
and secure area, away from moving traffic.
Turn the hazard lights on. Apply the parking
brake and turn the engine off. Inspect the
flat tire for visible damage. Sealant compound contains latex. To
avoid any allergic reactions, use the
non-latex gloves in the accessory box on
the underside of the kit housing.
Do not remove any foreign object that has
pierced the tire. If a puncture is in the tire
sidewall, stop and call roadside assistance.
1. Remove the valve cap from the tire
valve.
2. Unwrap the clear tube from the compressor housing.
3. Remove the tube cap and fasten the metal connector of the tube to the tire
valve, turning clockwise. Make sure the
connection is tightly fastened. 4. Plug the power cable into the 12-volt
power point in the vehicle.
5. Remove the warning sticker on the canister and place it on the top of the
instrument panel or the center of the
dash.
6. Start the vehicle only if the vehicle is outdoors or in a well-ventilated area.
265
Taurus (CPH) Canada/United States of America, enUSA, Edition date: 201806, First-Printing Wheels and TiresE144619
Page 269 of 515

7. Push and turn dial (A)
counterclockwise to the sealant
position. Turn on the kit by pressing the
on/off button (B). 8.
Inflate the tire to the pressure specified
by the tire label on the driver's door or
the door jamb area. When the sealant
compound is being pumped into the
tire, the air pressure gauge will indicate
a pressure above the actual tire
pressure. This is normal and should be
no reason for concern. The pressure
gauge will provide a correct tire
pressure reading after about 30
seconds of operation. The tire pressure
has to be checked with the compressor
in the OFF position to get an accurate
tire pressure reading. 9. When the recommended tire pressure
is reached, turn off the kit by pressing
the on button. Disconnect the kit from
the tire valve and the power point.
Re-install the valve cap on the tire
valve, place the tube cap on the metal
connector, and return the kit to the
stowage area
10. Immediately and cautiously, drive the
vehicle 4 mi (6 km) to distribute the
sealant evenly inside the tire. Do not
exceed
50 mph (80 km/h).
11. After 4 mi (6 km), stop and check the
tire pressure. See Second stage:
Checking tire pressure.
Note: If you experience any unusual
vibration, ride disturbance or noise while
driving, reduce your speed until you can
safely pull off to the side of the road to call
for roadside assistance. Note: Do not
proceed to the second stage of this
operation.
Second Stage: Checking Tire
Pressure
Note: If you are proceeding from the First
stage: Re–inflating the tire with sealing
compound and air section and have injected
sealant in the tire and the pressure is below
20 psi (1.4 bar)
, stop and call roadside
assistance. If tire pressure is above 20 psi
(1.4 bar), continue to the next step. WARNING:
The power plug may
get hot after use and should be handled
carefully when unplugging.
Check the air pressure of your tires as
follows:
1. Remove the valve cap from the tire valve.
2. Unhook the black hose from the side of the compressor and fasten firmly on
the valve stem by turning clockwise.
266
Taurus (CPH) Canada/United States of America, enUSA, Edition date: 201806, First-Printing Wheels and TiresE144924 E144621
Page 270 of 515
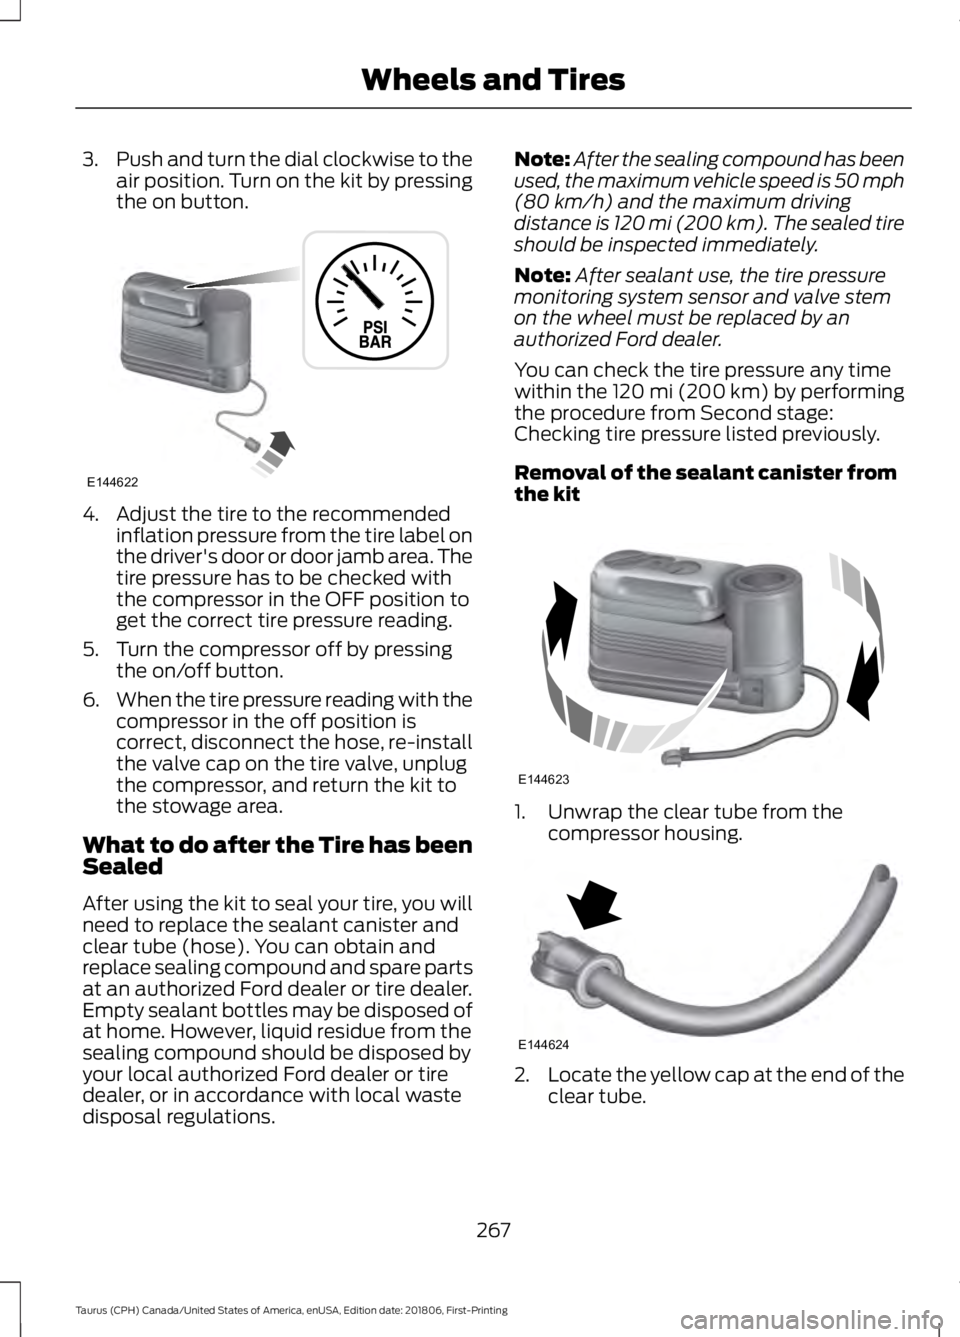
3.
Push and turn the dial clockwise to the
air position. Turn on the kit by pressing
the on button. 4. Adjust the tire to the recommended
inflation pressure from the tire label on
the driver's door or door jamb area. The
tire pressure has to be checked with
the compressor in the OFF position to
get the correct tire pressure reading.
5. Turn the compressor off by pressing the on/off button.
6. When the tire pressure reading with the
compressor in the off position is
correct, disconnect the hose, re-install
the valve cap on the tire valve, unplug
the compressor, and return the kit to
the stowage area.
What to do after the Tire has been
Sealed
After using the kit to seal your tire, you will
need to replace the sealant canister and
clear tube (hose). You can obtain and
replace sealing compound and spare parts
at an authorized Ford dealer or tire dealer.
Empty sealant bottles may be disposed of
at home. However, liquid residue from the
sealing compound should be disposed by
your local authorized Ford dealer or tire
dealer, or in accordance with local waste
disposal regulations. Note:
After the sealing compound has been
used, the maximum vehicle speed is 50 mph
(80 km/h) and the maximum driving
distance is 120 mi (200 km). The sealed tire
should be inspected immediately.
Note: After sealant use, the tire pressure
monitoring system sensor and valve stem
on the wheel must be replaced by an
authorized Ford dealer.
You can check the tire pressure any time
within the 120 mi (200 km) by performing
the procedure from Second stage:
Checking tire pressure listed previously.
Removal of the sealant canister from
the kit 1. Unwrap the clear tube from the
compressor housing. 2.
Locate the yellow cap at the end of the
clear tube.
267
Taurus (CPH) Canada/United States of America, enUSA, Edition date: 201806, First-Printing Wheels and TiresE144622 E144623 E144624
Page 365 of 515

Action and Description
Menu Item
Item
This bar displays icons and messages pertaining to current
system activities including climate settings, voice
commands and phone functions such as text messages.
Status Bar
A
This button is available on the main screens. Pressing it
takes you to the home screen view.
Home
B
This shows the current time. You can set the clock manually
or have it controlled by the vehicle's GPS location. See
Settings (page 410).
Clock
C
This displays the current outside temperature.
Outside
Temperature
D
You can touch any of the buttons on this bar to select a
feature.
Feature Bar
E
The touchscreen allows you quick access
to all of your comfort, navigation,
communication and entertainment
options. Using the status and feature bar
you can quickly select the feature you want
to use.
Note: Your system is equipped with a
feature that allows you to access and
control audio features for 10 minutes after
you switch the ignition off (and no doors
open). The Status Bar
Additional icons also display in the status
bar depending on market, vehicle options
and current operation. If a feature is not
active, the icon does not display. Certain
icons may move to the left or right
depending on what options are active.
362
Taurus (CPH) Canada/United States of America, enUSA, Edition date: 201806, First-Printing SYNC™ 3