Page 249 of 495

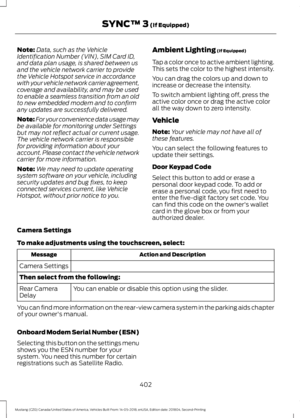
Headlamp Aiming Target
8 feet (2.4 meters)
A
Center height of lamp to ground
B
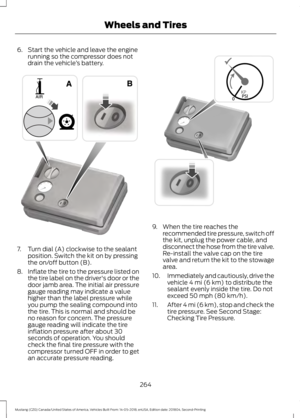
25 feet (7.6 meters)
C
Horizontal reference line
D
Vertical Aim Adjustment
1. Park the vehicle directly in front of a wall or screen on a level surface,
approximately 25 ft (7.6 m) away.
2. Measure the height from the center of your headlamp indicated by a 3mm
circle on the lens to the ground and
mark an
8 ft (2.4 m) horizontal
reference line on the vertical wall or
screen at this height, a piece of
masking tape works well.
Note: To see a clearer light pattern for
adjusting, you may want to block the light
from one headlamp while adjusting the
other.
3. Turn on the low beam headlamps to illuminate the wall or screen and open
the hood. Cover one of the headlamps
so no light hits the wall. 4. On the wall or screen you will observe
a flat zone of high intensity light
located at the top of the right hand
portion of the beam pattern. If the top
edge of the high intensity light zone is
not at the horizontal reference line, the
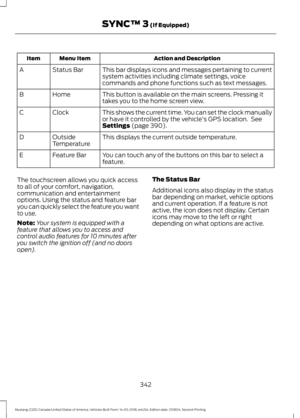
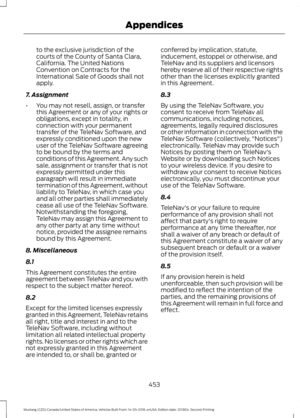
headlamp will need to be adjusted. 5. Locate the vertical adjuster on each
headlamp. Use a Phillips #2
screwdriver to turn the adjuster either
clockwise or counterclockwise to
adjust the vertical aim of the
headlamp.
6. Repeat steps 3 through 7 to adjust the other headlamp.
7. Close the hood and turn off the lamps.
246
Mustang (CZG) Canada/United States of America, Vehicles Built From: 14-05-2018, enUSA, Edition date: 201804, Second-Printing MaintenanceE142592 E142465 E250054
Page 250 of 495

Horizontal Aim Adjustment
The horizontal aim does not require any
adjustment for this vehicle. If a fault
occurs, have the system checked by an
authorized dealer.
CHANGING A BULB
Replacing Reverse Lamp Bulbs
1. Make sure the lighting control is in the
off position.
2. Locate the reverse lamp bulb under the
rear bumper of your vehicle. To access
the bulb, reach behind the bumper.
3. Disconnect the electrical sensor from the bulb by pulling it straight off. 4. Rotate the bulb counterclockwise and
remove it from the reverse lamp
assembly.
LED Lamps
LED lamps are not serviceable items.
Contact an authorized dealer if they fail.
The following are LED lamps:
• Headlamps.
• Rear lamp.
• Brake lamp.
• Front fog lamp.
• Front sidemarker •
Daytime running lamp.
• Central high mounted brake lamp.
• Front direction indicator.
• Rear direction indicator lamp.
• License plate lamp.
CHANGING THE ENGINE AIR
FILTER - 2.3L ECOBOOST™/
5.0L WARNING: To reduce the risk of
vehicle damage and personal burn
injuries, do not start your engine with the
air cleaner removed and do not remove
it while the engine is running.
Note: Failure to use the correct air filter
element may result in severe engine
damage. Your warranty may not cover
these damages.
Only use the specified replacement air
filter. See
Motorcraft Parts (page 295).
For EcoBoost equipped vehicles: When
servicing the air cleaner, it is important that
no foreign material enter the air induction
system. The engine and turbocharger are
susceptible to damage from even small
particles.
Change the air filter element at the proper
intervals. See
Scheduled Maintenance
(page 422).
247
Mustang (CZG) Canada/United States of America, Vehicles Built From: 14-05-2018, enUSA, Edition date: 201804, Second-Printing MaintenanceE177487
Page 251 of 495

1. Release the two clamps that secure
the air filter housing cover.
2. Carefully lift the air filter housing cover.
3. Remove the air filter element from the
air filter housing.
4. Wipe any dirt or debris from the air filter
housing and cover to make sure no dirt
gets in the engine and that you have a
good seal.
5. Install a new air filter element. Be careful not to crimp the filter element
edges between the air filter housing
and cover. This could cause filter
damage and allow unfiltered air to
enter the engine if it is not properly
seated.
6. Replace the air filter housing cover.
7. Engage the clamps to secure the air filter housing cover to the air filter
housing.
CHANGING THE ENGINE AIR
FILTER - 5.0L, BULLITT WARNING: To reduce the risk of
vehicle damage and personal burn
injuries, do not start your engine with the
air cleaner removed and do not remove
it while the engine is running. See the scheduled maintenance
information for the appropriate intervals
for changing the air filter element.
When changing the air filter element, use
only the Motorcraft™ air filter element
listed. See the Motorcraft part numbers in
the Capacities and Specifications chapter.
1. Remove the two sensor wire harness
retainers from the air box studs located
on the front side of the air box.
2. Remove the four studs that fasten the upper air box housing to the lower air
box housing.
3. Separate the upper air box housing from the lower air box housing.
4. Loosen the air filter clamp enough to allow the filter to slip off the housing
easily.
248
Mustang (CZG) Canada/United States of America, Vehicles Built From: 14-05-2018, enUSA, Edition date: 201804, Second-Printing MaintenanceE175951 E272660 E272661
Page 252 of 495
5. Remove the air filter from the air filter
housing.
6. Wipe the newly-exposed air filter outlet
tube clamping area clean to remove
any dirt or debris.
7. Install a new air filter, taking care not to damage the air filter element. Align
the tab on the closed end of the filter
with the notch in the air filter housing.
8. Tighten the air filter clamp down.
Note: Do not overtighten the clamp or studs
when reinstalling.
9. Reinstall the upper air box piece to the
lower air box piece. Tighten the 4 studs
down.
10. Reinstall the two sensor wire harness
retainers to the mating air box studs.
249
Mustang (CZG) Canada/United States of America, Vehicles Built From: 14-05-2018, enUSA, Edition date: 201804, Second-Printing Maintenance
Page 253 of 495

WARNING:
Track Apps™ is for
track use only. Remember that even
advanced technology cannot defy the
laws of physics. It is always possible to
lose control of a vehicle due to
inappropriate driver input for the
conditions. Aggressive driving on any
road condition can cause you to lose
control of your vehicle increasing the risk
of personal injury or property damage.
Appropriately change the engine oil for
racing and other track events:
• 2.3L: Prior to the track event, drain the
engine oil, replace the oil filter and
change the engine oil to 5W-50. After
the track event, drain the engine oil,
replace the oil filter and refill the engine
oil with 5W-30.
See Capacities and
Specifications (page 300).
• 5.0L: Prior to the track event, drain the
engine oil, replace the oil filter and
change the engine oil to 5W-30. After
the track event, drain the engine oil,
replace the oil filter and refill the engine
oil with 5W-20.
See Capacities and
Specifications (page 300).
Regularly check the engine oil level during
the event. Maintain the engine oil level at
or near the max mark on the engine oil
dipstick. See Engine Oil Check (page 235).
Track Apps
This information display driven feature
provides a suite of menu options to record
and optimize your track performances.
See
General Information (page 88).
Note: Track Apps
are for track use only.
Do not use them under any other driving
conditions. Note:
You cannot view or clear your results
unless your vehicle is at a complete stop
with the right arrow on the display menu
inactive. If your vehicle does not reach
100 mph (160 km/h)
during the track run,
your display may not show your selected
interval's results.
Note: The pre-collision assist system turns
off when using
Track Apps or when you
switch off your stability control system.
Acceleration Timer
Displays your vehicle's rate of acceleration
for a given speed or distance range.
Accelerometer
Displays your vehicle's rate of acceleration
or deceleration. A dot moves toward the
area of acceleration or deceleration.
LEFT Acceleration or Deceleration
When accelerating or decelerating left, the
dot moves to the right on the
accelerometer.
RIGHT Acceleration or Deceleration
When accelerating or decelerating right,
the dot moves to the left on the
accelerometer.
Brake Performance
Displays your vehicle's rate of deceleration
for a given speed range.
Exhaust Mode
Gives the driver the ability to choose the
vehicle's exhaust mode.
250
Mustang (CZG) Canada/United States of America, Vehicles Built From: 14-05-2018, enUSA, Edition date: 201804, Second-Printing Track Use
Page 254 of 495

Note:
The Track Exhaust Mode setting is
only for use at tracks and not for use on
public roadways. Use of this setting results
in increased exterior noise, which may not
meet state and local laws and regulations.
It is the obligation of the driver to operate
the vehicle in a manner that complies with
state and local requirements. Only use the
Track Exhaust Mode
setting at a
competition track or an off-road course
where elevated exterior vehicle noise is
acceptable.
Lap Timer
Gives you the ability to record lap times at
three separate tracks.
Launch Control (If Equipped)
Maximizes your vehicle's traction from a
standing start.
Use launch control, follow these steps:
1. Bring your vehicle to a complete stop.
2. Make sure launch control is enabled. The indicator illuminates in the
instrument display when launch control
is enabled.
See Warning Lamps and
Indicators (page 84).
3. Fully depress the clutch pedal.
4. Shift the transmission into 1st gear.
5. Fully depress the accelerator pedal and
allow the engine RPM to stabilize.
6. Release the clutch pedal.
Line Lock
Line lock is a feature intended for use at
tracks only and should not be used on
public roadways. Use of this feature may
result in significantly increased rear tire
wear. It is intended to condition the rear
tires to maximize traction prior to track use.
Line lock maintains brake force at the front
wheels, allowing the rear wheels to spin
with minimal vehicle movement. This feature is located in the
Track Apps
menu. Make selections through the 5-way
information display control and OK button
located on the steering wheel.
Using
Line Lock
There are three line lock stages:
• Initiated.
• Engaged.
• Off.
Initiating
Line Lock
The initiation stage verifies that the vehicle
is ready for line lock function, and confirms
driver intent. Follow the prompts in the
information display to initiate line lock.
The following conditions must be met to
initialize line lock:
• The vehicle is on a level surface.
• The engine is running.
• The vehicle is traveling less than
25 mph (40 km/h)
.
• Selectable drive mode is not in wet
mode (if equipped).
• There are no electronic stability control
faults.
If you want to cancel line lock once it is
initialized, press the left information
display control. Once initiated, line lock is
prepared for activation and remains
initiated up to 25 mph (40 km/h). If vehicle
speed exceeds 25 mph (40 km/h), line lock
automatically cancels.
251
Mustang (CZG) Canada/United States of America, Vehicles Built From: 14-05-2018, enUSA, Edition date: 201804, Second-Printing Track Use
Page 255 of 495

Engaging Line Lock
Follow the prompts in the information
display to engage line lock after it is
initialized. To engage, firmly apply the
brakes. Then press the OK button. Once
engaged, release the brake pedal. The
front brakes remain applied and the rear
brakes release. At this point, the
engagement timer is initiated and shown
on the driver information display.
The following conditions must be met to
engage line lock:
• The vehicle is on a level surface.
• The engine is running.
• The vehicle is stopped.
• The parking brake is not applied.
• The driver door is closed.
• The transmission is in a forward gear.
• Selectable drive mode is not in wet
mode (if equipped).
• There are no electronic stability control
faults.
• The steering wheel must be in the
straight ahead position.
Releasing
Line Lock
While line lock is engaged, you can exit
(release) the feature using the OK button.
When you press the OK button, line lock
releases immediately and normal vehicle
function resumes. When line lock engages,
a countdown timer shows the remaining
time before line lock is released
automatically. If you exceed the time limit,
or another vehicle condition requires line
lock to release, the system safely
disengages and normal vehicle function
resumes.
Note: If you apply the brake pedal while
line lock is engaged, line lock automatically
cancels and normal brake function resumes. Start Option
Allows you to select the type of countdown
the information display shows before
starting an event.
Status Screen
Provides the status of your chosen
performance-related settings.
View/Clear Results
Allows you to view and clear the last and
saved results of the
Acceleration Timer,
Brake Performance, and All Time Best
results.
252
Mustang (CZG) Canada/United States of America, Vehicles Built From: 14-05-2018, enUSA, Edition date: 201804, Second-Printing Track Use
Page 256 of 495

GENERAL INFORMATION
Your dealer has many quality products
available to clean your vehicle and protect
its finishes.
CLEANING PRODUCTS
Materials
For best results, use the following products
or products of equivalent quality: Specification
Name
Motorcraft® Bug and Tar Remover, ZC-42 (U.S. & Canada) ESR-M5B194-B
Motorcraft® Custom Bright Metal Cleaner, ZC-15 (U.S. & Canada)
ESR-M14P4-A
Motorcraft® Detail Wash, ZC-3-A (U.S. & Canada)
ESR-M14P3-A
Motorcraft® Engine Shampoo and Degreaser, ZC-20 (U.S.)
Motorcraft® Engine Shampoo, CXC-66-A (Canada)
Motorcraft® Premium Leather and Vinyl Cleaner, ZC-56 (U.S. &
Canada)
Motorcraft® Multi-Purpose Cleaner, CXC-101 (Canada)
WSS-M14P19-A
Motorcraft® Premium Windshield Wash Concentrate with
Bitterant, ZC-32-B2 (U.S.)
WSS-M14P19-A
Motorcraft® Premium Quality Windshield Washer Fluid, CXC-37-
A/B/D/F (Canada)
Motorcraft® Professional Strength Carpet & Upholstery Cleaner,
ZC-54 (U.S. & Canada)
ESR-M14P5-A
Motorcraft® Premium Glass Cleaner, CXC-100 (Canada)
Motorcraft® Spot and Stain Remover, ZC-14 (U.S.)
ESR-M14P5-A
Motorcraft® Ultra-Clear Spray Glass Cleaner, ZC-23 (U.S.)
Motorcraft® Wheel and Tire Cleaner, ZC-37-A (U.S. & Canada)
CLEANING THE EXTERIOR
Wash your vehicle regularly with cool or
lukewarm water and a neutral pH
shampoo, we recommend Motorcraft
Detail Wash. •
Never use strong household detergents
or soap, for example dish washing or
laundry liquid. These products can
discolor and spot painted surfaces.
• Never wash your vehicle when it is hot
to the touch, or during strong or direct
sunlight.
253
Mustang (CZG) Canada/United States of America, Vehicles Built From: 14-05-2018, enUSA, Edition date: 201804, Second-Printing Vehicle Care