2019 FORD FIESTA ignition
[x] Cancel search: ignitionPage 182 of 443

Protected Component
Fuse Rating
Fuse Number
Ignition.
Windshield wipers.
Passive anti-theft system.
Accelerator pedal position sensor.
7.5A
F22 Powertrain control module.
Anti-lock brake system.
Stability assist.
Transmission control unit.
7.5A
F23
Audio unit.
7.5A
F24
Heated exterior mirrors.
7.5A
F25
Central locking system.
7.5A
F26
Not used.
-
F27
Not used.
-
F28
Not used.
-
F29
Not used.
-
F30
Rear power windows.
30A
F31
Battery back-up sounder.
20A
F32 Rear auxiliary power points.
Front auxiliary power points.
20A
F33
Front power windows.
30A
F34
Moonroof.
20A
F35
Not used.
-
F36 Protected Component
Relay Number
Ignition relay.
R1
Not used.
R2
Not used.
R3
Driver heated seat.
R4
Passenger heated seat.
R5
179
2019 Fiesta (CCT) Canada/United States of America, KE8J 19A321 AA enUSA, Edition date: 201806, Second-Printing Fuses
Page 183 of 443
Protected Component
Relay Number
Accessory mode remote keyless starting.
R6
Ignition mode remote keyless starting.
R7
Battery back-up sounder.
R8 Battery saver.
Accessory delay.
R9
CHANGING A FUSE
Fuses WARNING: Always replace a fuse
with one that has the specified
amperage rating. Using a fuse with a
higher amperage rating can cause severe
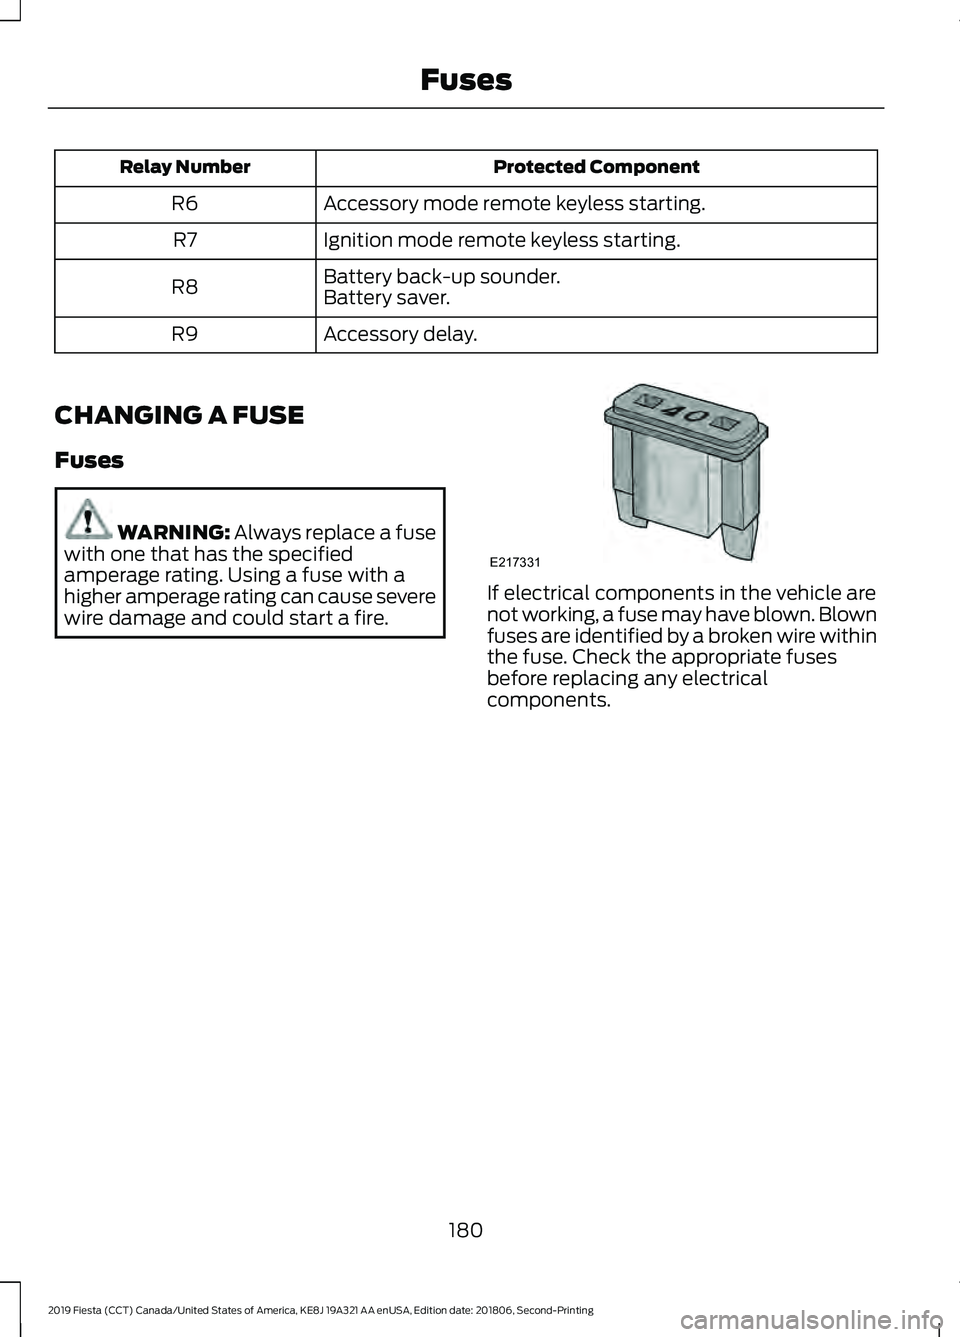
wire damage and could start a fire. If electrical components in the vehicle are
not working, a fuse may have blown. Blown
fuses are identified by a broken wire within
the fuse. Check the appropriate fuses
before replacing any electrical
components.
180
2019 Fiesta (CCT) Canada/United States of America, KE8J 19A321 AA enUSA, Edition date: 201806, Second-Printing FusesE217331
Page 189 of 443
Only use oils certified for gasoline engines
by the American Petroleum Institute (API).
An oil with this trademark symbol
conforms to the current engine and
emission system protection standards and
fuel economy requirements of the
International Lubricants Specification
Advisory Committee (ILSAC).
To top up the engine oil level do the
following:
1. Clean the area surrounding the engine
oil filler cap before you remove it.
2. Remove the engine oil filler cap. See Under Hood Overview (page 183).
Turn it counterclockwise and remove
it.
3. Add engine oil that meets Ford specifications. See
Capacities and
Specifications (page 248). See
Capacities and Specifications (page
248
). You may have to use a funnel to
pour the engine oil into the opening.
4. Recheck the oil level.
5. If the oil level is correct, replace the dipstick and make sure it is fully seated.
6. Replace the engine oil filler cap. Turn it clockwise until you feel a strong
resistance.
Note: Do not add oil further than the
maximum mark. Oil levels above the
maximum mark may cause engine damage. Note:
Make sure you install the oil filler cap
correctly.
Note: Soak up any spillage with an
absorbent cloth immediately.
OIL CHANGE INDICATOR
RESET
(IF EQUIPPED)
Only reset the system after changing the
engine oil and oil filter.
Resetting the Oil Life Monitoring
System
1. Switch the ignition on. Do not start the
engine.
2. Fully press the accelerator and brake pedals at the same time.
3. Keep the accelerator and brake pedals
fully pressed.
4. After three seconds, a message appears confirming that the reset is in
progress.
5. After 25 seconds, a message appears confirming that the reset is complete.
6. Release the accelerator and brake pedals.
7. Switch the ignition off.
ENGINE COOLING FAN WARNING:
Keep your hands and
clothing clear of the engine cooling fan.
Under certain conditions, the engine
cooling fan may continue to run for several
minutes after you switch your vehicle off.
186
2019 Fiesta (CCT) Canada/United States of America, KE8J 19A321 AA enUSA, Edition date: 201806, Second-Printing MaintenanceE142732
Page 196 of 443
WARNING: This vehicle may have
more than one battery. Removing the
battery cables from only one battery
does not disconnect your vehicle
electrical system. Make sure you
disconnect the battery cables from all
batteries when disconnecting power.
Failure to do so may cause serious
personal injury or property damage. WARNING: For vehicles with
Auto-Start-Stop the battery requirement
is different. You must replace the battery
with one of exactly the same
specification.
The battery is located in the engine
compartment. See
Under Hood
Overview (page 183).
Your vehicle has a maintenance-free
battery. It does not require additional
water during service.
If your vehicle battery has a cover, make
sure you correctly install it after cleaning
or replacing the battery.
For longer, trouble-free operation, keep the
top of the battery clean and dry and the
battery cables tightly fastened to the
battery terminals. If any corrosion is
present on the battery or terminals, remove
the cables from the terminals and clean
with a wire brush. You can neutralize the
acid with a solution of baking soda and
water.
We recommend that you disconnect the
negative battery cable terminal from the
battery if you plan to store your vehicle for
an extended period. To maintain correct operation of the
battery management system, if you add
any electrical devices to your vehicle, do
not connect the ground connection directly
to the negative battery terminal. A
connection at the negative battery terminal
can cause inaccurate measurements of
the battery condition and potential
incorrect system operation.
Note:
Electrical accessories or components
added to your vehicle by you or an
authorized dealer, may adversely affect
battery performance, durability and the
performance of other electrical systems on
your vehicle.
If a replacement battery is required, we
recommend you use a Ford replacement
battery that matches the electrical
requirements of your vehicle.
If you disconnect or replace the battery
and your vehicle has an automatic
transmission, transmission must relearn
its adaptive strategy. Because of this, the
transmission may shift firmly when first
driven. This is normal operation while the
transmission fully updates its operation to
optimum shift feel.
Remove and Reinstall the Battery
To disconnect or remove the battery, do
the following:
1. Apply the parking brake and switch the
ignition off.
2. Switch all electrical equipment off, for
example lights and radio.
3. Wait a minimum of two minutes before
disconnecting the battery.
Note: The engine management system has
a power hold function and remains powered
for a period after you switch the ignition off.
This is to allow diagnostic and adaptive
tables to be stored. Disconnecting the
battery without waiting can cause damage
not covered by the vehicle Warranty.
193
2019 Fiesta (CCT) Canada/United States of America, KE8J 19A321 AA enUSA, Edition date: 201806, Second-Printing Maintenance
Page 197 of 443
4. Disconnect the negative (-) battery
cable terminal first.
5. Disconnect the positive (+) battery cable terminal last.
6. Remove the battery securing clamp.
7. Remove the battery.
8. Install in the reverse order.
Note: Before reconnecting the battery,
make sure the ignition remains switched off.
Note: If you only disconnect the negative
battery cable terminal, make sure it is
isolated or placed away from the battery
terminal to avoid un-intended connection
or arcing.
Note: Make sure the battery cable terminals
are fully tightened.
Note: If you disconnect or replace the
battery, you must reset the clock and the
pre-set radio stations once the battery is
reconnected.
Battery Disposal Make sure that you dispose of
old batteries in an
environmentally friendly way.
Seek advice from your local authority
about recycling old batteries.
CHECKING THE WIPER
BLADES Run the tip of your fingers over the edge of
the blade to check for roughness. Clean the wiper blades with washer fluid
or water applied with a soft sponge or
cloth.
CHANGING THE FRONT WIPER
BLADES
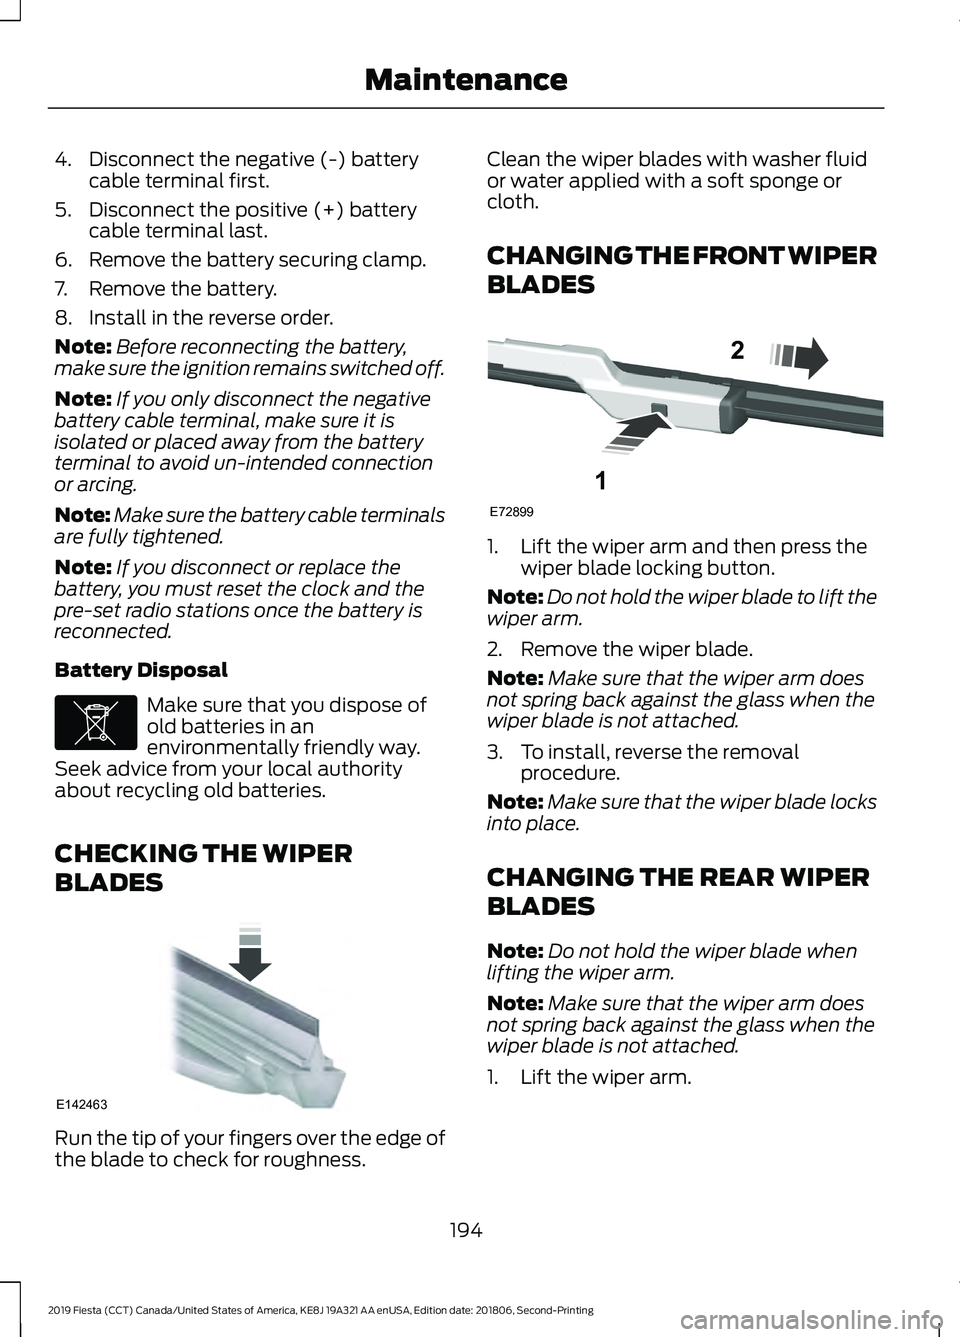
1. Lift the wiper arm and then press the
wiper blade locking button.
Note: Do not hold the wiper blade to lift the
wiper arm.
2. Remove the wiper blade.
Note: Make sure that the wiper arm does
not spring back against the glass when the
wiper blade is not attached.
3. To install, reverse the removal procedure.
Note: Make sure that the wiper blade locks
into place.
CHANGING THE REAR WIPER
BLADES
Note: Do not hold the wiper blade when
lifting the wiper arm.
Note: Make sure that the wiper arm does
not spring back against the glass when the
wiper blade is not attached.
1. Lift the wiper arm.
194
2019 Fiesta (CCT) Canada/United States of America, KE8J 19A321 AA enUSA, Edition date: 201806, Second-Printing MaintenanceE107998 E142463 E72899
1
2
Page 200 of 443

3. Disconnect the electrical connector.
4. Remove the headlamp.
Note:
When fitting the headlamp, make
sure that you reconnect the electrical
connector correctly.
Note: When fitting the headlamp, make
sure that you fully engage the headlamp in
the retaining clips.
CHANGING A BULB - 4-DOOR WARNING: Switch the lamps and
the ignition off. WARNING: Let the bulb cool down
before removing it. WARNING:
Do not touch the glass
of the bulb.
Note: Only fit bulbs of the correct
specification.
Note: The following instructions describe
how to remove the bulbs. Fit replacements
in the reverse order unless otherwise stated. Headlamp
Note:
Remove the covers to gain access to
the bulbs. Side marker
A
Headlamp low beam
B
Headlamp high beam
C
Direction indicator
D
Side Marker
1. Remove the headlamp. See Removing a Headlamp
(page 196). 2. Remove the bulb holder.
3. Remove the bulb.
Headlamp Low Beam
1. Remove the headlamp. See
Removing a Headlamp
(page 196).
197
2019 Fiesta (CCT) Canada/United States of America, KE8J 19A321 AA enUSA, Edition date: 201806, Second-Printing MaintenanceE102590
3
4 BACD
E159827 E161707
A
Page 205 of 443

Reading Lamps
1. Carefully remove the lamp.
2.
Turn the bulb holder counterclockwise
and remove it.
3. Remove the bulb.
Luggage Compartment Lamp,
Footwell Lamp and Liftgate Lamp 1. Carefully pry out the lamp.
2. Remove the bulb. CHANGING A BULB - 5-DOOR WARNING: Switch the lamps and
the ignition off. WARNING: Let the bulb cool down
before removing it. WARNING:
Do not touch the glass
of the bulb.
Note: Only fit bulbs of the correct
specification.
Note: The following instructions describe
how to remove the bulbs. Fit replacements
in the reverse order unless otherwise stated.
Headlamp
Note: Remove the covers to gain access to
the bulbs. Side marker
A
Headlamp low beam
B
Headlamp high beam
C
Direction indicator
D
Side Marker
1. Remove the headlamp. See Removing a Headlamp
(page 196).
202
2019 Fiesta (CCT) Canada/United States of America, KE8J 19A321 AA enUSA, Edition date: 201806, Second-Printing MaintenanceE99453
2
3
1 E72784 BACD
E159827
Page 217 of 443
CLEANING THE ENGINE
Engines are more efficient when they are
clean because grease and dirt buildup keep
the engine warmer than normal.
When washing:
•
Take care when using a power washer
to clean the engine. The high-pressure
fluid could penetrate the sealed parts
and cause damage.
• Do not spray a hot engine with cold
water to avoid cracking the engine
block or other engine components.
• Spray Motorcraft Engine Shampoo and
Degreaser on all parts that require
cleaning and pressure rinse clean. In
Canada, use Motorcraft Engine
Shampoo.
• Never wash or rinse the engine while it
is hot or running; water in the running
engine may cause internal damage.
• Never wash or rinse any ignition coil,
spark plug wire or spark plug well, or
the area in and around these locations.
• Cover the battery, power distribution
box, and air filter assembly to prevent
water damage when cleaning the
engine.
CLEANING THE WINDOWS AND
WIPER BLADES
Car wash chemicals and environmental
fallout can result in windshield and wiper
blade contamination. Dirty windshield and
wipers will result in poor windshield wiper
operation. Keep the windshield and wiper
blades clean to maintain windshield wiper
performance. To clean the windshield and wiper blades:
•
Clean the windshield with a
non-abrasive glass cleaner. When
cleaning the interior of the windshield,
avoid getting any glass cleaner on the
instrument panel or door panels. Wipe
any glass cleaner off these surfaces
immediately.
• For windshields contaminated with
tree sap, chemicals, wax or bugs, clean
the entire windshield using steel wool
(no greater than 0000 grade) in a
circular motion and rinse with water.
• Clean the wiper blades with isopropyl
rubbing alcohol or windshield washer
concentrate.
Note: Do not use razor blades or other
sharp objects to clean or remove decals
from the inside of the heated rear window.
The vehicle warranty does not cover
damage caused to the heated rear window
grid lines.
CLEANING THE INTERIOR WARNING: Do not use cleaning
solvents, bleach or dye on the vehicle's
seatbelts, as these actions may weaken
the belt webbing. WARNING:
On vehicles equipped
with seat-mounted airbags, do not use
chemical solvents or strong detergents.
Such products could contaminate the
side airbag system and affect
performance of the side airbag in a crash.
214
2019 Fiesta (CCT) Canada/United States of America, KE8J 19A321 AA enUSA, Edition date: 201806, Second-Printing Vehicle Care