2019 FORD FIESTA clock
[x] Cancel search: clockPage 5 of 443

Wipers and Washers
Windshield Wipers
........................................70
Windshield Washers ....................................
70
Rear Window Wiper and Washers ...........
71
Lighting
General Information .....................................
72
Lighting Control ..............................................
72
Autolamps ........................................................
73
Instrument Lighting Dimmer .....................
74
Headlamp Exit Delay ...................................
74
Front Fog Lamps ...........................................
74
Direction Indicators .......................................
74
Interior Lamps .................................................
75
Ambient Lighting ...........................................
76
Windows and Mirrors
Power Windows ..............................................
77
Exterior Mirrors ...............................................
78
Interior Mirror ...................................................
79
Moonroof .........................................................
80
Instrument Cluster
Gauges ...............................................................
81
Warning Lamps and Indicators ................
82
Audible Warnings and Indicators ............
85
Information Displays
General Information ....................................
86
Clock ..................................................................
87
Trip Computer .................................................
87
Personalized Settings .................................
88
Information Messages ................................
88
Climate Control
Manual Climate Control .............................
96
Automatic Climate Control .......................
96
Hints on Controlling the Interior Climate ........................................................................\
..
98 Heated Windows and Mirrors
..................
101
Cabin Air Filter ..............................................
102
Remote Start ................................................
102
Seats
Sitting in the Correct Position .................
103
Head Restraints ...........................................
103
Manual Seats ................................................
105
Rear Seats ......................................................
106
Heated Seats .................................................
107
Auxiliary Power Points
Auxiliary Power Points ..............................
109
Cigar Lighter ..................................................
109
Storage Compartments
Center Console ...............................................
111
Overhead Console .........................................
111
Starting and Stopping the Engine
General Information ....................................
112
Ignition Switch ...............................................
112
Keyless Starting .............................................
113
Starting a Gasoline Engine ........................
114
Switching Off the Engine ...........................
115
Engine Block Heater ....................................
115
Fuel and Refueling
Safety Precautions .......................................
117
Fuel Quality .....................................................
117
Fuel Filler Funnel Location ........................
118
Running Out of Fuel ....................................
118
Refueling .........................................................
120
Fuel Consumption .......................................
122
Engine Emission Control
Emission Law ................................................
124
Catalytic Converter .....................................
125
2
2019 Fiesta (CCT) Canada/United States of America, KE8J 19A321 AA enUSA, Edition date: 201806, Second-Printing Table of Contents
Page 32 of 443
Note:
The child restraint must rest tightly
against the vehicle seat upon which it is
installed. It may be necessary to lift or
remove the head restraint. See Seats (page
103).
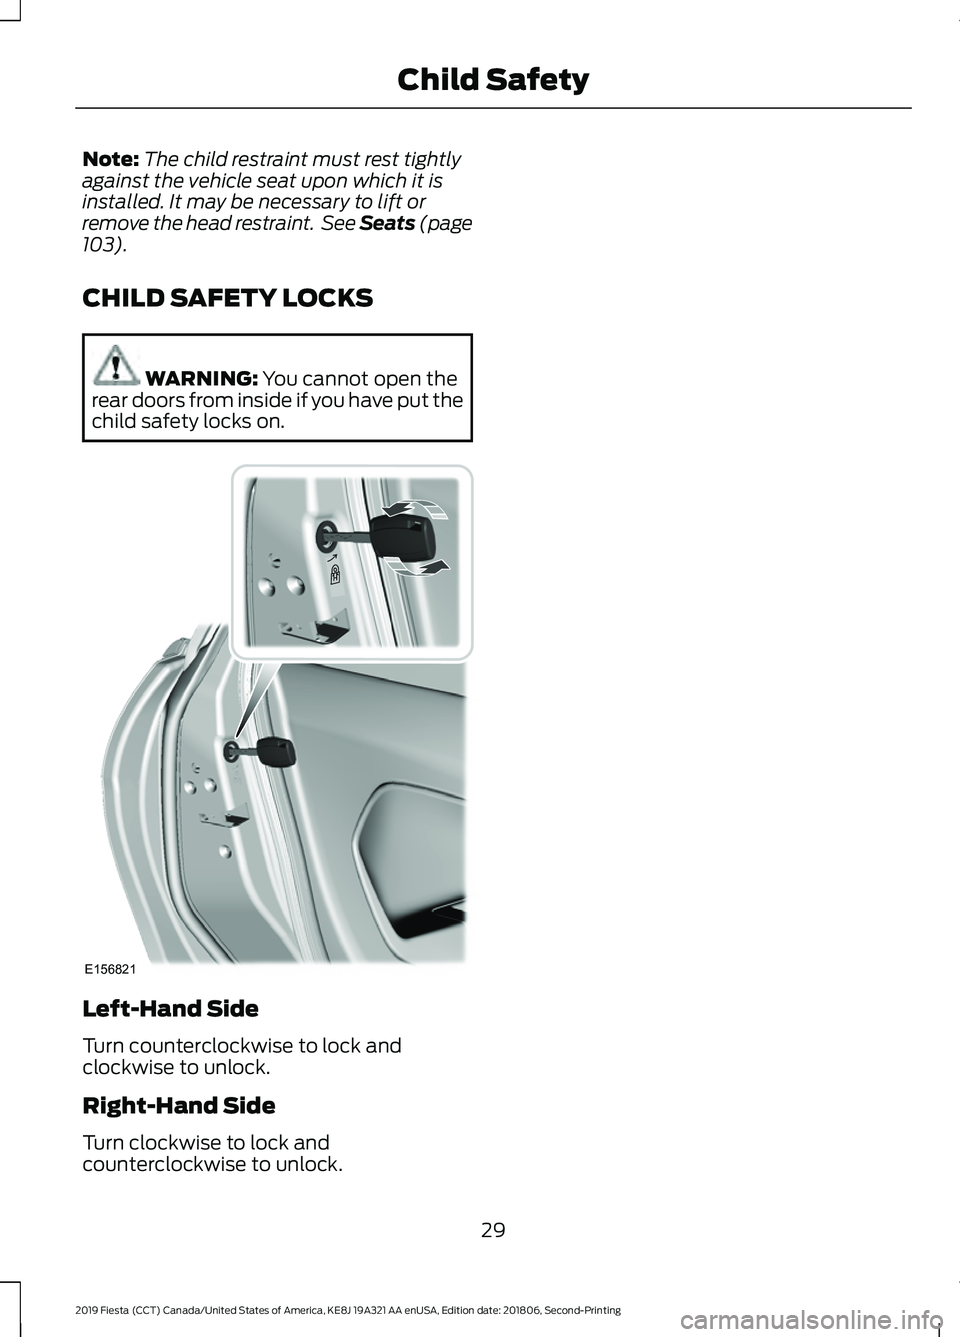
CHILD SAFETY LOCKS WARNING:
You cannot open the
rear doors from inside if you have put the
child safety locks on. Left-Hand Side
Turn counterclockwise to lock and
clockwise to unlock.
Right-Hand Side
Turn clockwise to lock and
counterclockwise to unlock.
29
2019 Fiesta (CCT) Canada/United States of America, KE8J 19A321 AA enUSA, Edition date: 201806, Second-Printing Child SafetyE156821
Page 62 of 443
Auto Unlock Feature
The auto unlock feature will unlock all the
doors when all of the following conditions
have been met:
•
The ignition is on, all doors are closed,
and your vehicle is moving at a speed
greater than 12 mph (20 km/h) for
more than two seconds.
• Your vehicle has come to a stop and
you switch the ignition off or to the
accessory position.
• The driver door is opened within 10
minutes of you switching the ignition
off or to the accessory position.
Note: The doors will not auto unlock if your
vehicle has been electronically locked after
the ignition is switched off and before the
driver door is opened.
Enabling or Disabling Auto Unlock
Note: See an authorized dealer to enable
or disable the auto unlock feature or carry
out the following procedure.
Note: You will have 30 seconds to
complete the procedure.
1. Switch the ignition on.
2. Press the power door lock button three
times.
3. Switch the ignition off.
4. Press the power door lock button three
times.
5. Switch the ignition on. The system alerts you with a tone to indicate your
vehicle is in programming mode.
6. Press the power door lock button for less than one second and release.
A tone sounds to confirm the change.
After programming the feature, switch the
ignition off to exit the programming mode. Emergency Locking With the Key
Note:
If the child safety locks are on and
you pull the interior handle, you will only
turn off the emergency locking, not the child
safety lock. You can only open the doors
using the external door handle.
Note: If the doors have been unlocked using
this method, the doors must be locked
individually until the central locking function
has been repaired.
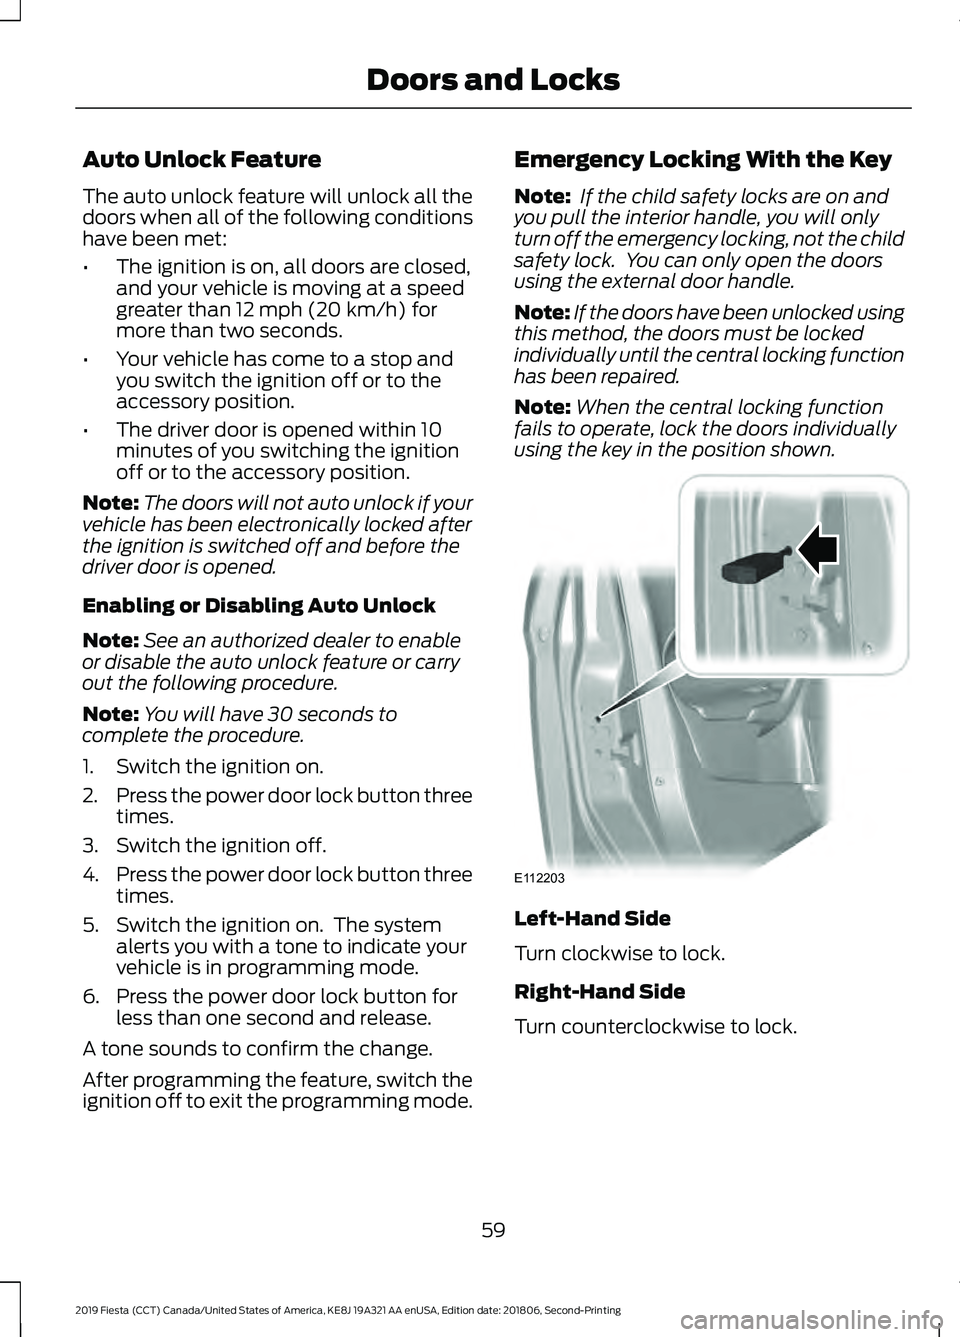
Note: When the central locking function
fails to operate, lock the doors individually
using the key in the position shown. Left-Hand Side
Turn clockwise to lock.
Right-Hand Side
Turn counterclockwise to lock.
59
2019 Fiesta (CCT) Canada/United States of America, KE8J 19A321 AA enUSA, Edition date: 201806, Second-Printing Doors and LocksE112203
Page 90 of 443
Reset all settings
Adaptive volume
Audio settings
Sound
Nav audio mixing
DSP settings
DSP equaliser
Traffic
News
Alt. frequency
RDS regional
Traction control
Vehicle settings
Hill start assist
Alarm system
Power mirror
Indicator
Ambient light
Chimes
Auto time (GPS)
Clock settings
Set time
Set date
Set time zone
24-hour mode
Measure unit
Display settings
Language
Dimming
Create MyKey
MyKey
Traction control
ESC Max Speed
Speed warning
MyKey Volume
limit
Information
Clear MyKeys
CLOCK
Type 1
To adjust the clock, switch the ignition on
and press buttons H or M on the
information and entertainment display as
necessary.
Type 2
Note: Use the information display to adjust
the clock. See General Information (page
86).
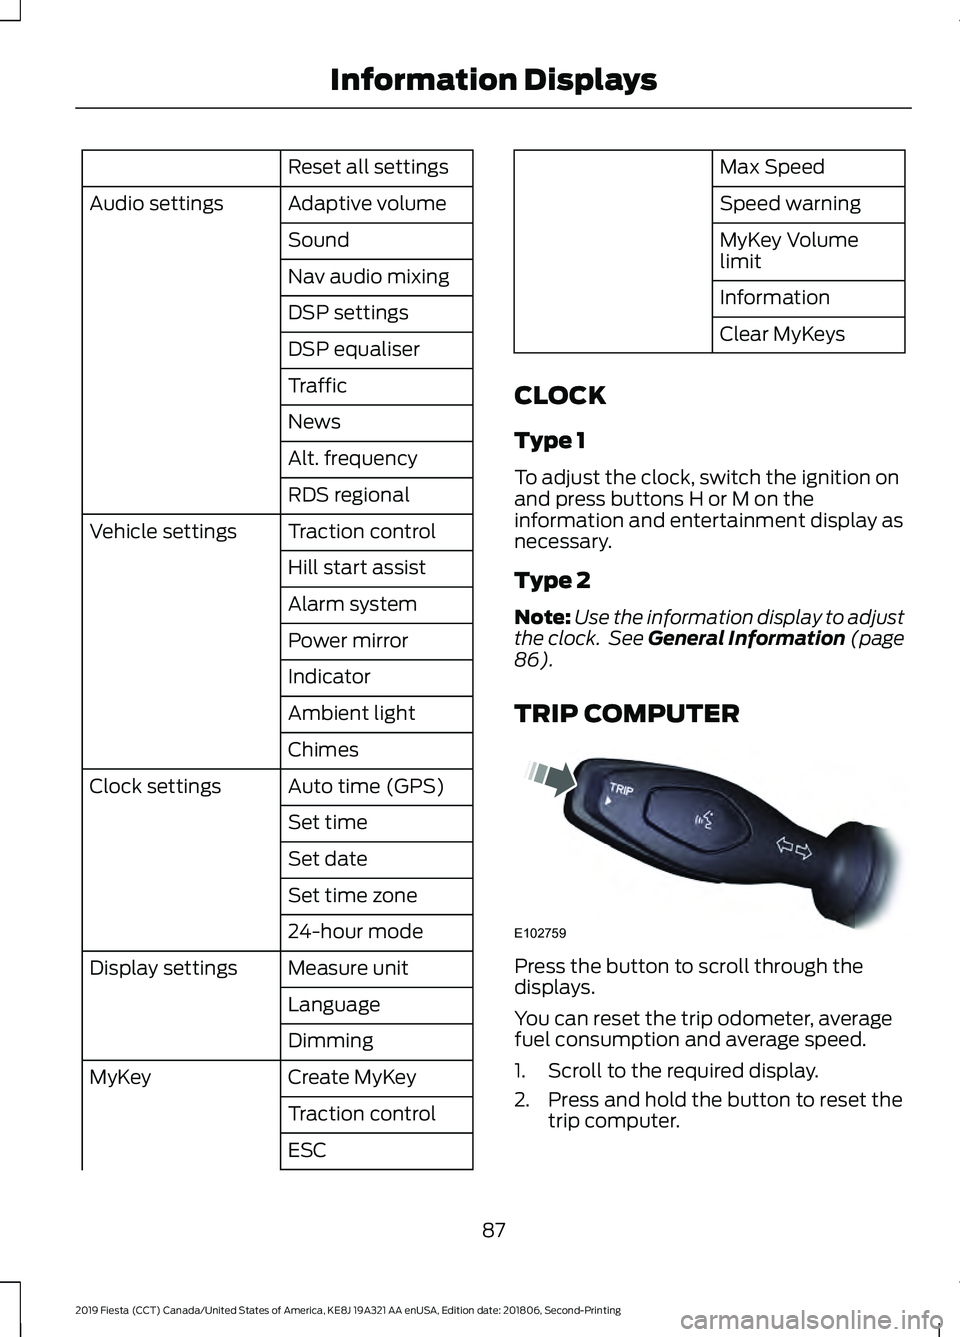
TRIP COMPUTER Press the button to scroll through the
displays.
You can reset the trip odometer, average
fuel consumption and average speed.
1. Scroll to the required display.
2. Press and hold the button to reset the
trip computer.
87
2019 Fiesta (CCT) Canada/United States of America, KE8J 19A321 AA enUSA, Edition date: 201806, Second-Printing Information DisplaysE102759
Page 189 of 443
Only use oils certified for gasoline engines
by the American Petroleum Institute (API).
An oil with this trademark symbol
conforms to the current engine and
emission system protection standards and
fuel economy requirements of the
International Lubricants Specification
Advisory Committee (ILSAC).
To top up the engine oil level do the
following:
1. Clean the area surrounding the engine
oil filler cap before you remove it.
2. Remove the engine oil filler cap. See Under Hood Overview (page 183).
Turn it counterclockwise and remove
it.
3. Add engine oil that meets Ford specifications. See
Capacities and
Specifications (page 248). See
Capacities and Specifications (page
248
). You may have to use a funnel to
pour the engine oil into the opening.
4. Recheck the oil level.
5. If the oil level is correct, replace the dipstick and make sure it is fully seated.
6. Replace the engine oil filler cap. Turn it clockwise until you feel a strong
resistance.
Note: Do not add oil further than the
maximum mark. Oil levels above the
maximum mark may cause engine damage. Note:
Make sure you install the oil filler cap
correctly.
Note: Soak up any spillage with an
absorbent cloth immediately.
OIL CHANGE INDICATOR
RESET
(IF EQUIPPED)
Only reset the system after changing the
engine oil and oil filter.
Resetting the Oil Life Monitoring
System
1. Switch the ignition on. Do not start the
engine.
2. Fully press the accelerator and brake pedals at the same time.
3. Keep the accelerator and brake pedals
fully pressed.
4. After three seconds, a message appears confirming that the reset is in
progress.
5. After 25 seconds, a message appears confirming that the reset is complete.
6. Release the accelerator and brake pedals.
7. Switch the ignition off.
ENGINE COOLING FAN WARNING:
Keep your hands and
clothing clear of the engine cooling fan.
Under certain conditions, the engine
cooling fan may continue to run for several
minutes after you switch your vehicle off.
186
2019 Fiesta (CCT) Canada/United States of America, KE8J 19A321 AA enUSA, Edition date: 201806, Second-Printing MaintenanceE142732
Page 191 of 443
It is very important to use prediluted
coolant approved to the correct
specification in order to avoid plugging the
small passageways in the engine cooling
system. See Capacities and
Specifications (page 243). Do not mix
different colors or types of coolant in your
vehicle. Mixing of engine coolants or using
an incorrect coolant may harm the engine
or cooling system components and may
not be covered by the vehicle Warranty.
Note: If prediluted coolant is not available,
use the approved concentrated coolant
diluting it to 50/50 with distilled water. See
Capacities and Specifications (page 243).
Using water that has not been deionised
may contribute to deposit formation,
corrosion and plugging of the small cooling
system passageways.
Note: Coolants marketed for all makes and
models may not be approved to our
specifications and may cause damage to
the cooling system. Resulting component
damage may not be covered by the vehicle
Warranty.
If the coolant level is at or below the
minimum mark, add prediluted coolant
immediately.
To top up the coolant level do the
following:
1. Unscrew the cap slowly. Any pressure escapes as you unscrew the cap.
2. Add prediluted coolant approved to the correct specification. See
Capacities and Specifications (page
243
).
3. Add enough prediluted coolant to reach the correct level.
4. Replace the coolant reservoir cap, turn
it clockwise until you feel a strong
resistance. 5. Check the coolant level in the coolant
reservoir the next few times you drive
your vehicle. If necessary, add enough
prediluted engine coolant to bring the
coolant level to the correct level.
If you have to add more than
1.1 qt (1 L) of
engine coolant per month, have your
vehicle checked as soon as possible.
Operating an engine with a low level of
coolant can result in engine overheating
and possible engine damage.
Note: During normal vehicle operation, the
coolant may change color from orange to
pink or light red. As long as the coolant is
clear and uncontaminated, this color change
does not indicate the coolant has degraded
nor does it require the coolant to be drained,
the system to be flushed, or the coolant to
be replaced.
In case of emergency, you can add a large
amount of water without engine coolant
in order to reach a vehicle service location.
In this instance, qualified personnel:
1. Must drain the cooling system.
2. Chemically clean the coolant system.
3. Refill with engine coolant as soon as possible.
Water alone, without engine coolant, can
cause engine damage from corrosion,
overheating or freezing.
Do not use the following as a coolant
substitute:
• Alcohol.
• Methanol.
• Brine.
• Any coolant mixed with alcohol or
methanol antifreeze.
Alcohol and other liquids can cause engine
damage from overheating or freezing.
188
2019 Fiesta (CCT) Canada/United States of America, KE8J 19A321 AA enUSA, Edition date: 201806, Second-Printing Maintenance
Page 197 of 443
4. Disconnect the negative (-) battery
cable terminal first.
5. Disconnect the positive (+) battery cable terminal last.
6. Remove the battery securing clamp.
7. Remove the battery.
8. Install in the reverse order.
Note: Before reconnecting the battery,
make sure the ignition remains switched off.
Note: If you only disconnect the negative
battery cable terminal, make sure it is
isolated or placed away from the battery
terminal to avoid un-intended connection
or arcing.
Note: Make sure the battery cable terminals
are fully tightened.
Note: If you disconnect or replace the
battery, you must reset the clock and the
pre-set radio stations once the battery is
reconnected.
Battery Disposal Make sure that you dispose of
old batteries in an
environmentally friendly way.
Seek advice from your local authority
about recycling old batteries.
CHECKING THE WIPER
BLADES Run the tip of your fingers over the edge of
the blade to check for roughness. Clean the wiper blades with washer fluid
or water applied with a soft sponge or
cloth.
CHANGING THE FRONT WIPER
BLADES
1. Lift the wiper arm and then press the
wiper blade locking button.
Note: Do not hold the wiper blade to lift the
wiper arm.
2. Remove the wiper blade.
Note: Make sure that the wiper arm does
not spring back against the glass when the
wiper blade is not attached.
3. To install, reverse the removal procedure.
Note: Make sure that the wiper blade locks
into place.
CHANGING THE REAR WIPER
BLADES
Note: Do not hold the wiper blade when
lifting the wiper arm.
Note: Make sure that the wiper arm does
not spring back against the glass when the
wiper blade is not attached.
1. Lift the wiper arm.
194
2019 Fiesta (CCT) Canada/United States of America, KE8J 19A321 AA enUSA, Edition date: 201806, Second-Printing MaintenanceE107998 E142463 E72899
1
2
Page 199 of 443

4. On the wall or screen you will observe
a flat zone of high intensity light
located at the top of the right hand
portion of the beam pattern. If the top
edge of the high intensity light zone is
not at the horizontal reference line,
adjust the headlamp. 5. Locate the vertical adjuster on each
headlamp. Using a Phillips #2
screwdriver, turn the adjuster either
clockwise or counterclockwise in order
to adjust the vertical aim of the
headlamp. The horizontal edge of the
brighter light should touch the
horizontal reference line.
6. Close the hood and turn the lamps off.
Horizontal Aim Adjustment
Horizontal aim is not required for this
vehicle and is not adjustable.
REMOVING A HEADLAMP
1. Open the hood. See Opening and
Closing the Hood (page 182). 2. Remove the screws.
196
2019 Fiesta (CCT) Canada/United States of America, KE8J 19A321 AA enUSA, Edition date: 201806, Second-Printing MaintenanceE142465 E156848 E146878
2