2019 FORD F650/750 trailer
[x] Cancel search: trailerPage 119 of 387
•
Allows upshifts by moving gearshift
lever.
• Does not downshift into first (1) gear
at high speeds; allows for first (1) gear
when vehicle reaches slower speeds.
Forced downshifts
• Allowed in drive (D) with the tow/haul
feature on or off.
• Press the accelerator to the floor.
• Allows transmission to select an
appropriate gear.
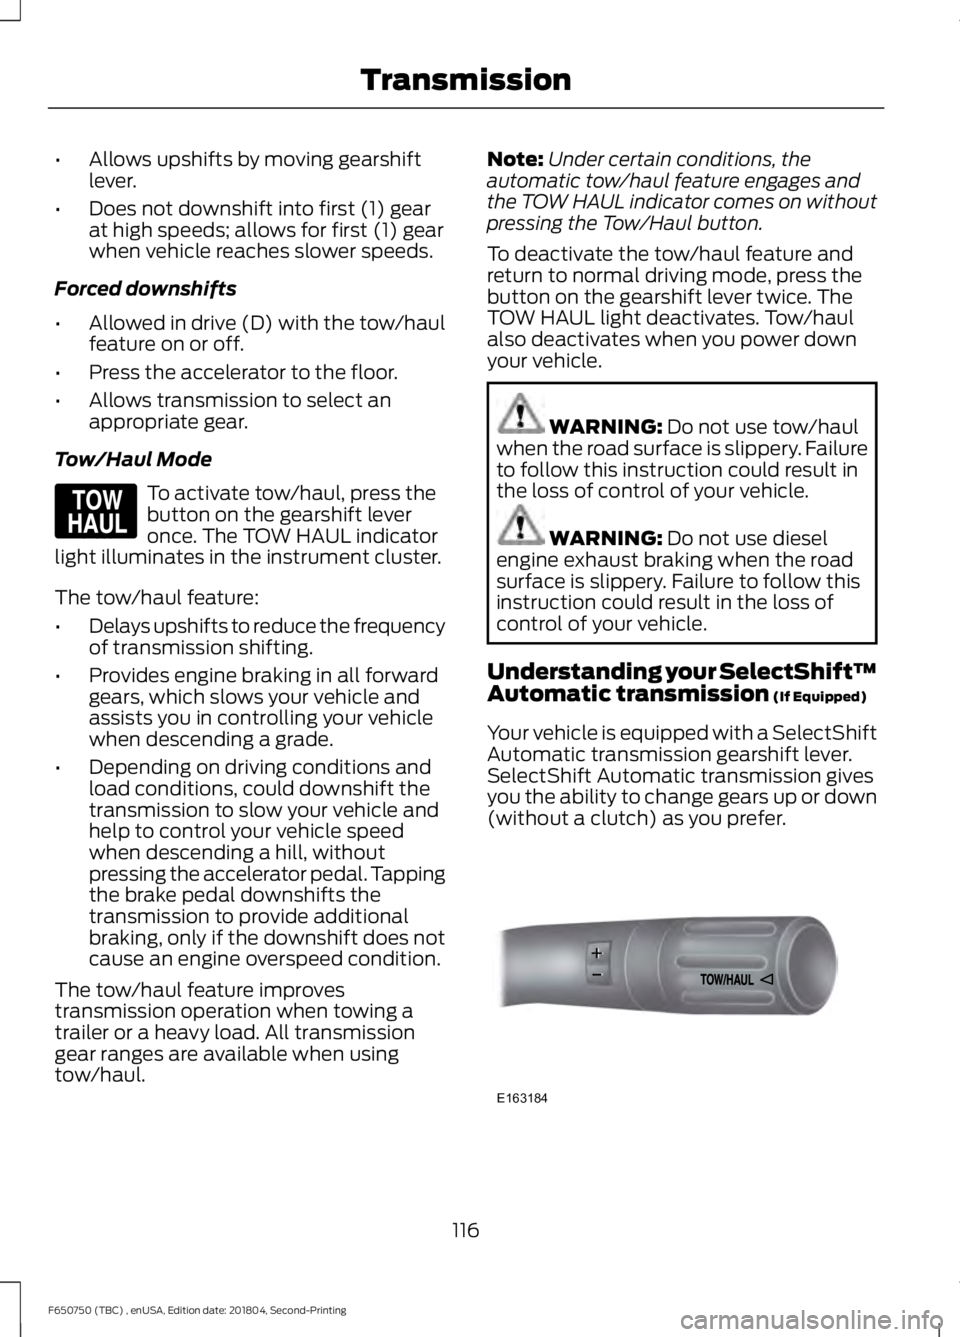
Tow/Haul Mode To activate tow/haul, press the
button on the gearshift lever
once. The TOW HAUL indicator
light illuminates in the instrument cluster.
The tow/haul feature:
• Delays upshifts to reduce the frequency
of transmission shifting.
• Provides engine braking in all forward
gears, which slows your vehicle and
assists you in controlling your vehicle
when descending a grade.
• Depending on driving conditions and
load conditions, could downshift the
transmission to slow your vehicle and
help to control your vehicle speed
when descending a hill, without
pressing the accelerator pedal. Tapping
the brake pedal downshifts the
transmission to provide additional
braking, only if the downshift does not
cause an engine overspeed condition.
The tow/haul feature improves
transmission operation when towing a
trailer or a heavy load. All transmission
gear ranges are available when using
tow/haul. Note:
Under certain conditions, the
automatic tow/haul feature engages and
the TOW HAUL indicator comes on without
pressing the Tow/Haul button.
To deactivate the tow/haul feature and
return to normal driving mode, press the
button on the gearshift lever twice. The
TOW HAUL light deactivates. Tow/haul
also deactivates when you power down
your vehicle. WARNING: Do not use tow/haul
when the road surface is slippery. Failure
to follow this instruction could result in
the loss of control of your vehicle. WARNING:
Do not use diesel
engine exhaust braking when the road
surface is slippery. Failure to follow this
instruction could result in the loss of
control of your vehicle.
Understanding your SelectShift™
Automatic transmission
(If Equipped)
Your vehicle is equipped with a SelectShift
Automatic transmission gearshift lever.
SelectShift Automatic transmission gives
you the ability to change gears up or down
(without a clutch) as you prefer. 116
F650750 (TBC) , enUSA, Edition date: 201804, Second-Printing TransmissionE161509 E163184
Page 125 of 387
GENERAL INFORMATION
WARNING: Do not apply the brake
pedal and accelerator pedal
simultaneously. Applying both pedals
simultaneously for more than a few
seconds will limit engine performance,
which may result in difficulty maintaining
speed in traffic and could lead to serious
injury.
Note: Occasional brake noise is normal. If
a metal-to-metal, continuous grinding or
continuous squeal sound is present, the
brake linings may be worn-out. Have the
system checked as soon as possible. If your
vehicle has continuous vibration or shudder
in the steering wheel while braking, have it
checked by an authorized dealer.
All standard equipment brakes are
self-adjusting. Automatic adjustment,
when required, occurs whenever you apply
and release the brakes during forward or
reverse operation.
Know the required stopping distances for
all driving conditions you may encounter.
For longer brake lining life, take full
advantage of engine braking power when
coming to a stop.
Wet brakes result in reduced braking
efficiency. Gently press the brake pedal a
few times when driving from a car wash or
standing water to dry the brakes.
If the brakes do not grip well:
• Check brake adjustment.
• Check the brake linings for excessive
wear.
• Check the system air pressure on
vehicles with air brakes. •
Let the brakes cool if you have been
using them excessively, as in mountain
driving or after several fast, high-speed
stops.
• If you have been driving through deep
water, gently apply the brakes several
times while your vehicle is moving
slowly.
Brake Over Accelerator
In the event the accelerator pedal
becomes stuck or entrapped, apply steady
and firm pressure to the brake pedal to
slow the vehicle and reduce engine power.
If you experience this condition, apply the
brakes and bring your vehicle to a safe
stop. Move the transmission to park (P),
switch the engine off and apply the parking
brake. Inspect the accelerator pedal for
any interference. If none are found and the
condition persists, have your vehicle towed
to the nearest authorized dealer
Anti-lock Brake System
This system helps you maintain steering
control during emergency stops by keeping
the brakes from locking. This lamp momentarily
illuminates when you switch the
ignition on. If the light does not
illuminate during start up, remains on or
flashes, the system may be disabled. Have
the system checked by an authorized
dealer. If you connect a PLC trailer with
the ignition on, the trailer ABS
light also illuminates. If the light
fails to illuminate, if it remains on after you
start the vehicle or continues to flash, have
the system serviced immediately.
See
Warning Lamps and Indicators
(page 60).
122
F650750 (TBC) , enUSA, Edition date: 201804, Second-Printing Brakes E210335
Page 132 of 387
•
A retarding force possibly felt acting
against your body during brake
application (depending on the grade
and vehicle load). This force prevents
the vehicle from going much faster.
• Engine temperatures remaining in the
normal operating range.
• A drop in engine RPM (depending on
grade and vehicle load) during a
descent.
• A decrease in road speed when
applying the exhaust brake during a
descent, except when your vehicle is
carrying a heavy load or the grade is
extremely steep. In these instances,
you may need to apply the service
brakes occasionally.
TRAILER BRAKES (IF EQUIPPED)
Trailer Brake Hand Control (If Equipped) WARNING:
The hand control
should never be used to apply the brakes
when the tractor and trailer are parked
unattended. Air may leak from the
system and the vehicle could possibly
move, resulting in possible property
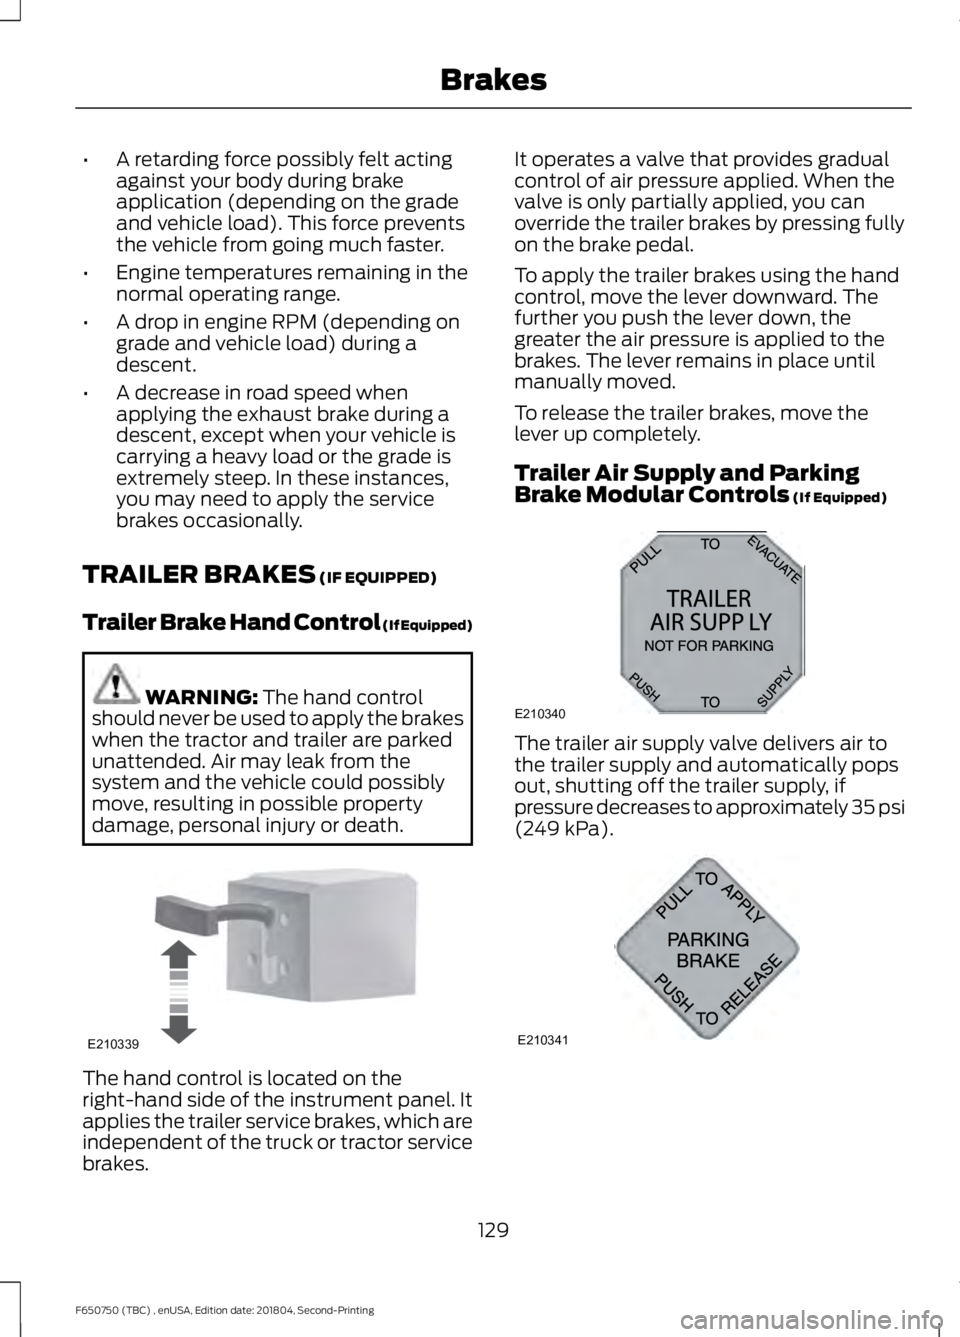
damage, personal injury or death. The hand control is located on the
right-hand side of the instrument panel. It
applies the trailer service brakes, which are
independent of the truck or tractor service
brakes. It operates a valve that provides gradual
control of air pressure applied. When the
valve is only partially applied, you can
override the trailer brakes by pressing fully
on the brake pedal.
To apply the trailer brakes using the hand
control, move the lever downward. The
further you push the lever down, the
greater the air pressure is applied to the
brakes. The lever remains in place until
manually moved.
To release the trailer brakes, move the
lever up completely.
Trailer Air Supply and Parking
Brake Modular Controls
(If Equipped)
The trailer air supply valve delivers air to
the trailer supply and automatically pops
out, shutting off the trailer supply, if
pressure decreases to approximately 35 psi
(249 kPa)
.
129
F650750 (TBC) , enUSA, Edition date: 201804, Second-Printing BrakesE210339 E210340
A
B
12
A320
A E210341
Page 133 of 387
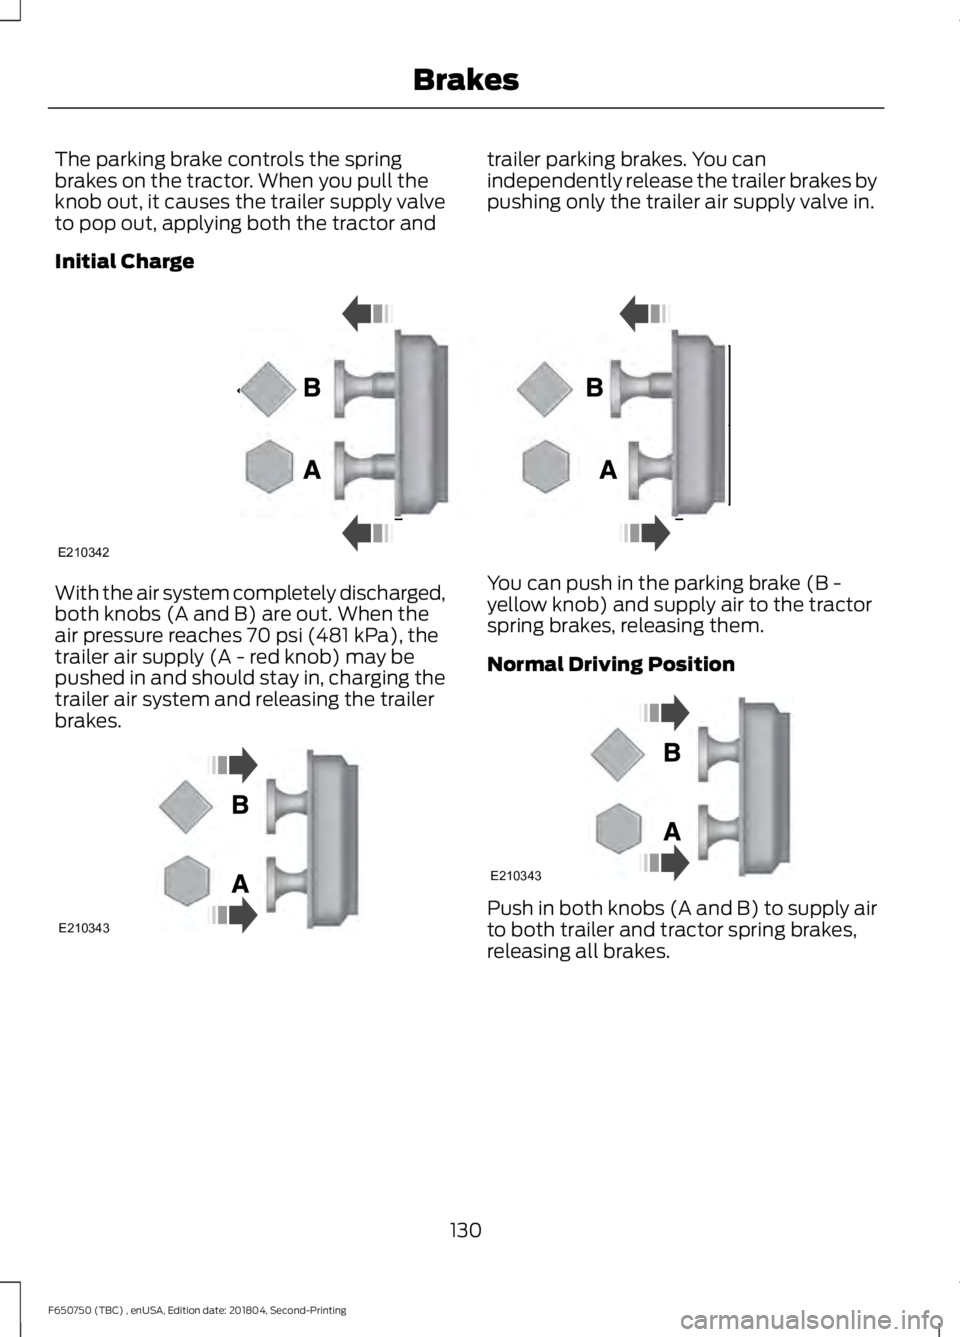
The parking brake controls the spring
brakes on the tractor. When you pull the
knob out, it causes the trailer supply valve
to pop out, applying both the tractor and
trailer parking brakes. You can
independently release the trailer brakes by
pushing only the trailer air supply valve in.
Initial Charge With the air system completely discharged,
both knobs (A and B) are out. When the
air pressure reaches 70 psi (481 kPa), the
trailer air supply (A - red knob) may be
pushed in and should stay in, charging the
trailer air system and releasing the trailer
brakes. You can push in the parking brake (B -
yellow knob) and supply air to the tractor
spring brakes, releasing them.
Normal Driving Position
Push in both knobs (A and B) to supply air
to both trailer and tractor spring brakes,
releasing all brakes.
130
F650750 (TBC) , enUSA, Edition date: 201804, Second-Printing BrakesE210342 E210343 E210343
Page 134 of 387
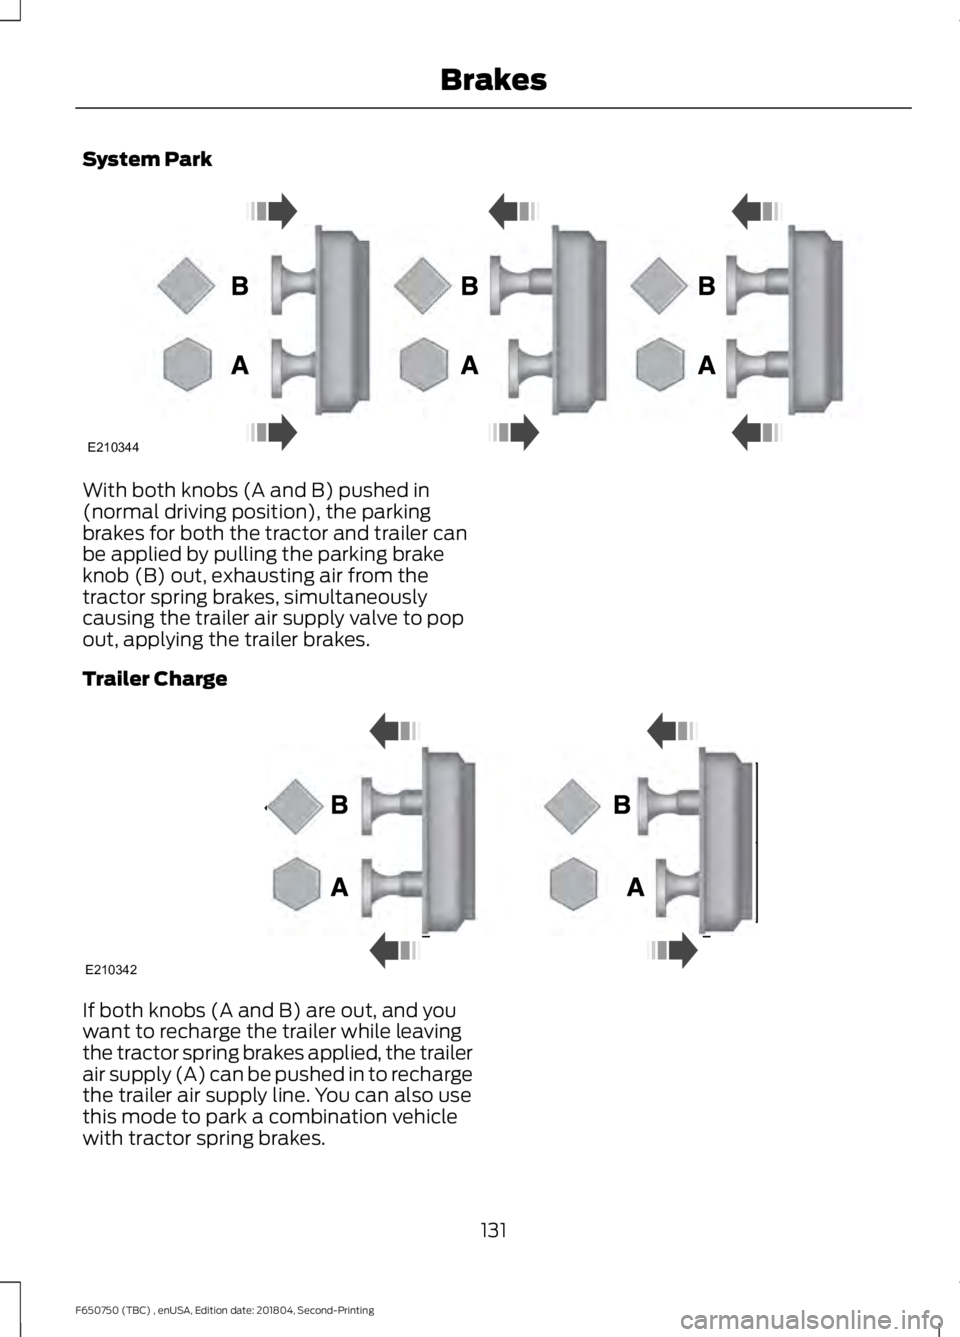
System Park
With both knobs (A and B) pushed in
(normal driving position), the parking
brakes for both the tractor and trailer can
be applied by pulling the parking brake
knob (B) out, exhausting air from the
tractor spring brakes, simultaneously
causing the trailer air supply valve to pop
out, applying the trailer brakes.
Trailer Charge
If both knobs (A and B) are out, and you
want to recharge the trailer while leaving
the tractor spring brakes applied, the trailer
air supply (A) can be pushed in to recharge
the trailer air supply line. You can also use
this mode to park a combination vehicle
with tractor spring brakes.
131
F650750 (TBC) , enUSA, Edition date: 201804, Second-Printing BrakesE210344 E210342
Page 135 of 387
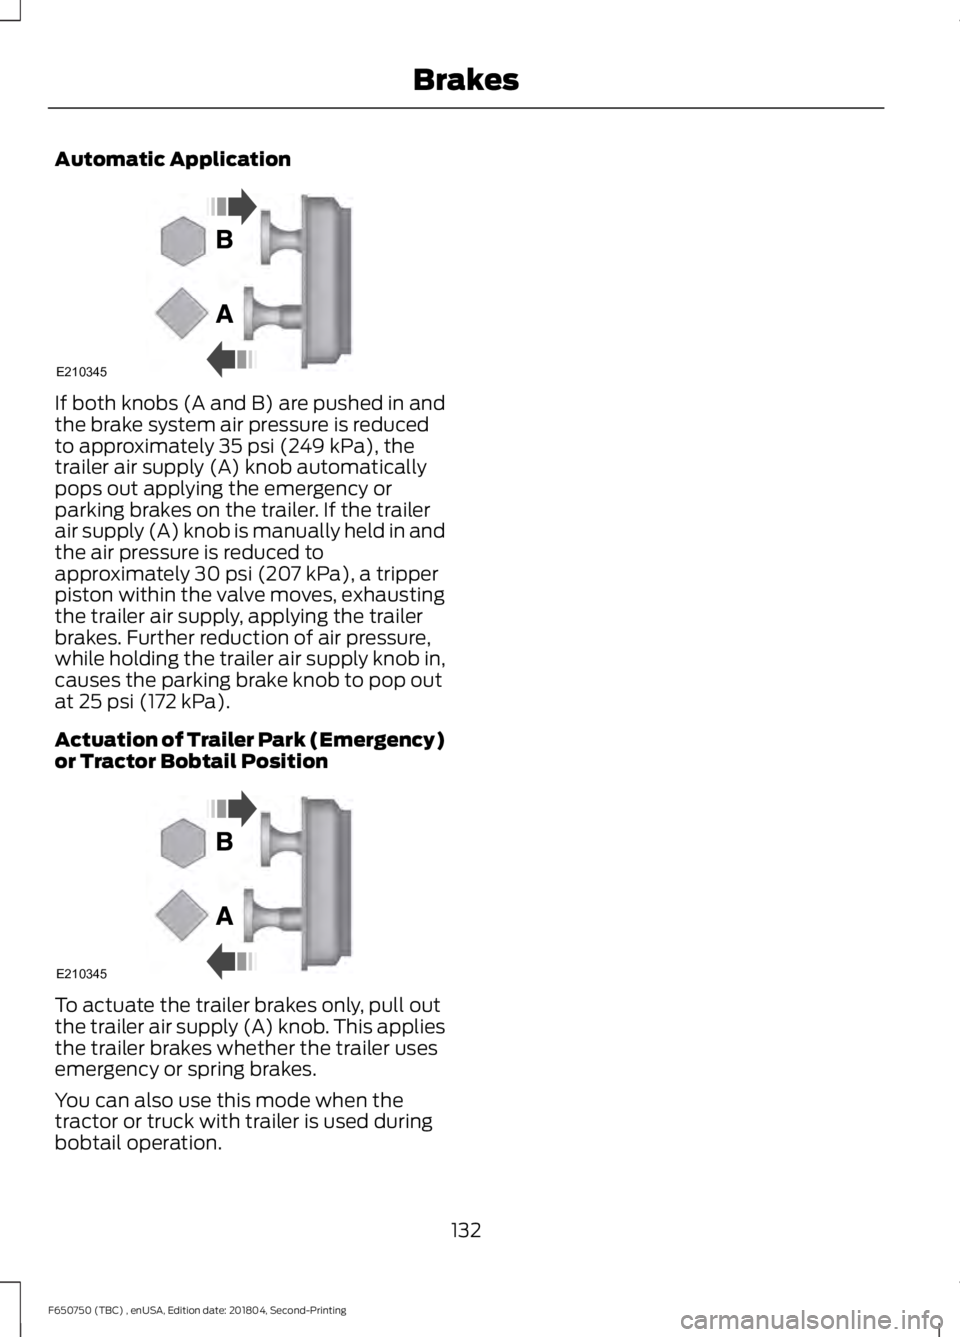
Automatic Application
If both knobs (A and B) are pushed in and
the brake system air pressure is reduced
to approximately 35 psi (249 kPa), the
trailer air supply (A) knob automatically
pops out applying the emergency or
parking brakes on the trailer. If the trailer
air supply (A) knob is manually held in and
the air pressure is reduced to
approximately
30 psi (207 kPa), a tripper
piston within the valve moves, exhausting
the trailer air supply, applying the trailer
brakes. Further reduction of air pressure,
while holding the trailer air supply knob in,
causes the parking brake knob to pop out
at
25 psi (172 kPa).
Actuation of Trailer Park (Emergency)
or Tractor Bobtail Position To actuate the trailer brakes only, pull out
the trailer air supply (A) knob. This applies
the trailer brakes whether the trailer uses
emergency or spring brakes.
You can also use this mode when the
tractor or truck with trailer is used during
bobtail operation.
132
F650750 (TBC) , enUSA, Edition date: 201804, Second-Printing BrakesE210345 E210345
Page 139 of 387
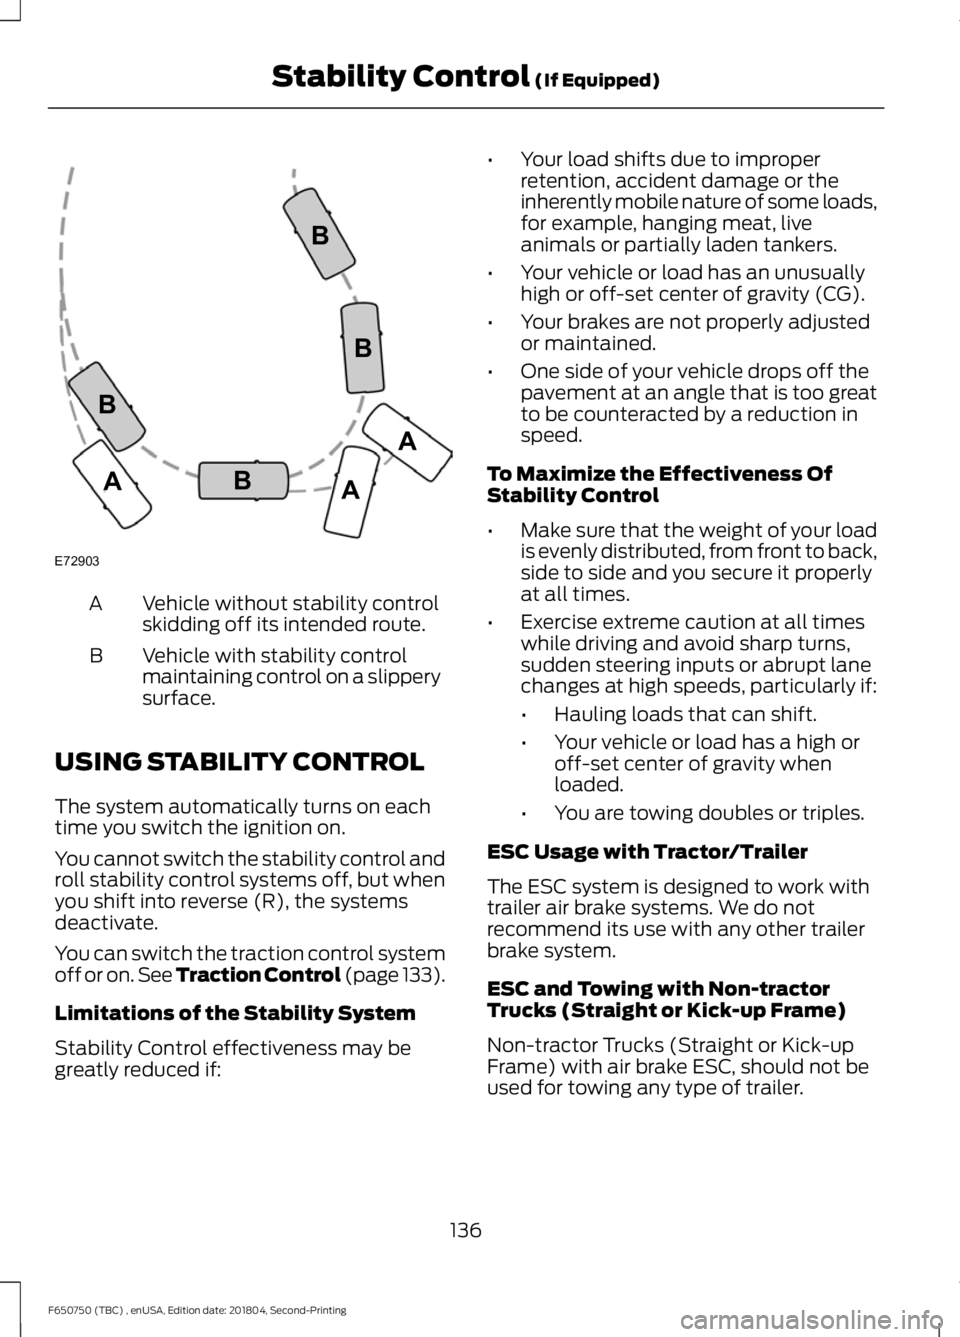
Vehicle without stability control
skidding off its intended route.
A
Vehicle with stability control
maintaining control on a slippery
surface.
B
USING STABILITY CONTROL
The system automatically turns on each
time you switch the ignition on.
You cannot switch the stability control and
roll stability control systems off, but when
you shift into reverse (R), the systems
deactivate.
You can switch the traction control system
off or on. See Traction Control (page 133).
Limitations of the Stability System
Stability Control effectiveness may be
greatly reduced if: •
Your load shifts due to improper
retention, accident damage or the
inherently mobile nature of some loads,
for example, hanging meat, live
animals or partially laden tankers.
• Your vehicle or load has an unusually
high or off-set center of gravity (CG).
• Your brakes are not properly adjusted
or maintained.
• One side of your vehicle drops off the
pavement at an angle that is too great
to be counteracted by a reduction in
speed.
To Maximize the Effectiveness Of
Stability Control
• Make sure that the weight of your load
is evenly distributed, from front to back,
side to side and you secure it properly
at all times.
• Exercise extreme caution at all times
while driving and avoid sharp turns,
sudden steering inputs or abrupt lane
changes at high speeds, particularly if:
•Hauling loads that can shift.
• Your vehicle or load has a high or
off-set center of gravity when
loaded.
• You are towing doubles or triples.
ESC Usage with Tractor/Trailer
The ESC system is designed to work with
trailer air brake systems. We do not
recommend its use with any other trailer
brake system.
ESC and Towing with Non-tractor
Trucks (Straight or Kick-up Frame)
Non-tractor Trucks (Straight or Kick-up
Frame) with air brake ESC, should not be
used for towing any type of trailer.
136
F650750 (TBC) , enUSA, Edition date: 201804, Second-Printing Stability Control (If Equipped)E72903A
AA
B
BB
B
Page 145 of 387
AIR SUSPENSION (IF EQUIPPED)
Note: Do not operate your vehicle without
air in the suspension springs. Operating your
vehicle without air in the suspension springs
damages the suspension, degrades ride
performance and may cause property
damage.
The air suspension system automatically
adjusts to different loads to maintain a
constant frame height, allows for ease of
vehicle loading, provides improved vehicle
ride, and increased driver comfort.
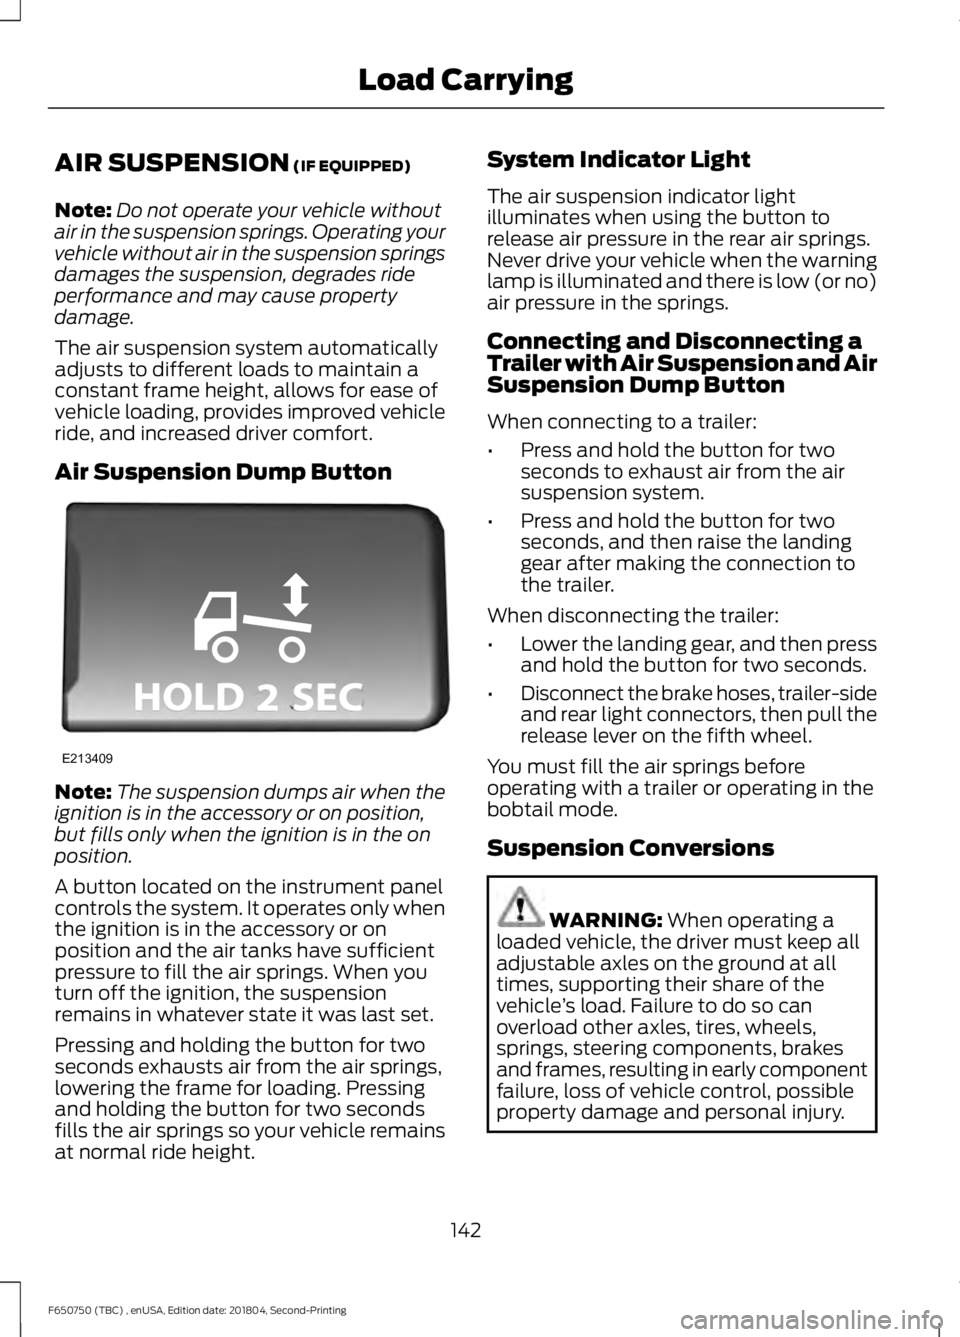
Air Suspension Dump Button Note:
The suspension dumps air when the
ignition is in the accessory or on position,
but fills only when the ignition is in the on
position.
A button located on the instrument panel
controls the system. It operates only when
the ignition is in the accessory or on
position and the air tanks have sufficient
pressure to fill the air springs. When you
turn off the ignition, the suspension
remains in whatever state it was last set.
Pressing and holding the button for two
seconds exhausts air from the air springs,
lowering the frame for loading. Pressing
and holding the button for two seconds
fills the air springs so your vehicle remains
at normal ride height. System Indicator Light
The air suspension indicator light
illuminates when using the button to
release air pressure in the rear air springs.
Never drive your vehicle when the warning
lamp is illuminated and there is low (or no)
air pressure in the springs.
Connecting and Disconnecting a
Trailer with Air Suspension and Air
Suspension Dump Button
When connecting to a trailer:
•
Press and hold the button for two
seconds to exhaust air from the air
suspension system.
• Press and hold the button for two
seconds, and then raise the landing
gear after making the connection to
the trailer.
When disconnecting the trailer:
• Lower the landing gear, and then press
and hold the button for two seconds.
• Disconnect the brake hoses, trailer-side
and rear light connectors, then pull the
release lever on the fifth wheel.
You must fill the air springs before
operating with a trailer or operating in the
bobtail mode.
Suspension Conversions WARNING:
When operating a
loaded vehicle, the driver must keep all
adjustable axles on the ground at all
times, supporting their share of the
vehicle ’s load. Failure to do so can
overload other axles, tires, wheels,
springs, steering components, brakes
and frames, resulting in early component
failure, loss of vehicle control, possible
property damage and personal injury.
142
F650750 (TBC) , enUSA, Edition date: 201804, Second-Printing Load CarryingE213409