2019 FORD F650/750 buttons
[x] Cancel search: buttonsPage 45 of 387
LOCKING AND UNLOCKING
You can use the power door lock control
or the remote control to lock and unlock
your vehicle.
Power Door Locks (If Equipped)
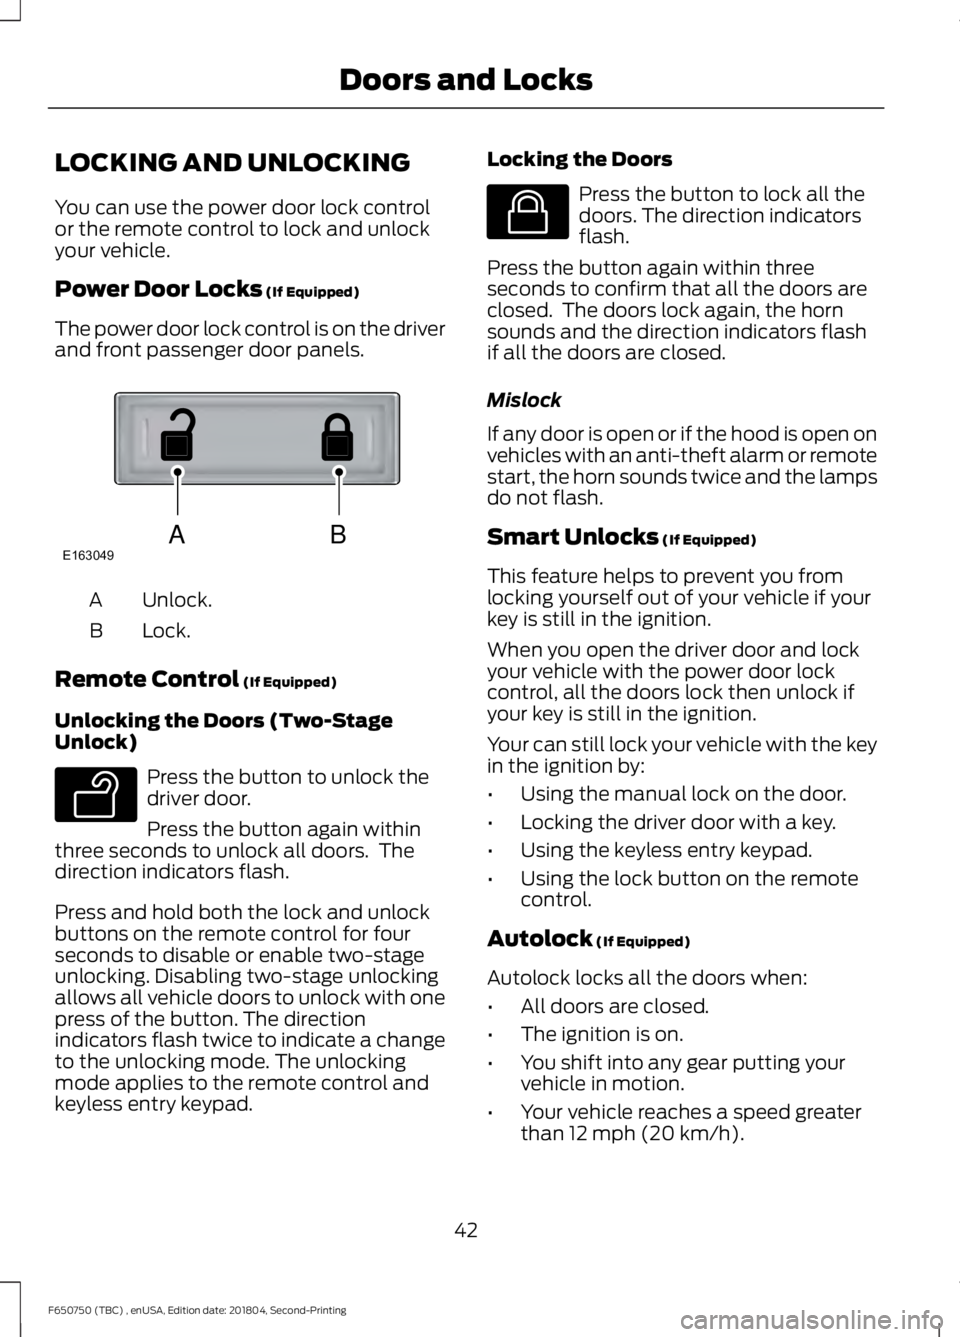
The power door lock control is on the driver
and front passenger door panels. Unlock.
A
Lock.
B
Remote Control
(If Equipped)
Unlocking the Doors (Two-Stage
Unlock) Press the button to unlock the
driver door.
Press the button again within
three seconds to unlock all doors. The
direction indicators flash.
Press and hold both the lock and unlock
buttons on the remote control for four
seconds to disable or enable two-stage
unlocking. Disabling two-stage unlocking
allows all vehicle doors to unlock with one
press of the button. The direction
indicators flash twice to indicate a change
to the unlocking mode. The unlocking
mode applies to the remote control and
keyless entry keypad. Locking the Doors Press the button to lock all the
doors. The direction indicators
flash.
Press the button again within three
seconds to confirm that all the doors are
closed. The doors lock again, the horn
sounds and the direction indicators flash
if all the doors are closed.
Mislock
If any door is open or if the hood is open on
vehicles with an anti-theft alarm or remote
start, the horn sounds twice and the lamps
do not flash.
Smart Unlocks
(If Equipped)
This feature helps to prevent you from
locking yourself out of your vehicle if your
key is still in the ignition.
When you open the driver door and lock
your vehicle with the power door lock
control, all the doors lock then unlock if
your key is still in the ignition.
Your can still lock your vehicle with the key
in the ignition by:
• Using the manual lock on the door.
• Locking the driver door with a key.
• Using the keyless entry keypad.
• Using the lock button on the remote
control.
Autolock
(If Equipped)
Autolock locks all the doors when:
• All doors are closed.
• The ignition is on.
• You shift into any gear putting your
vehicle in motion.
• Your vehicle reaches a speed greater
than
12 mph (20 km/h).
42
F650750 (TBC) , enUSA, Edition date: 201804, Second-Printing Doors and LocksABE163049 E138629 E138623
Page 79 of 387
Front Seat Head Restraint (If
Equipped)
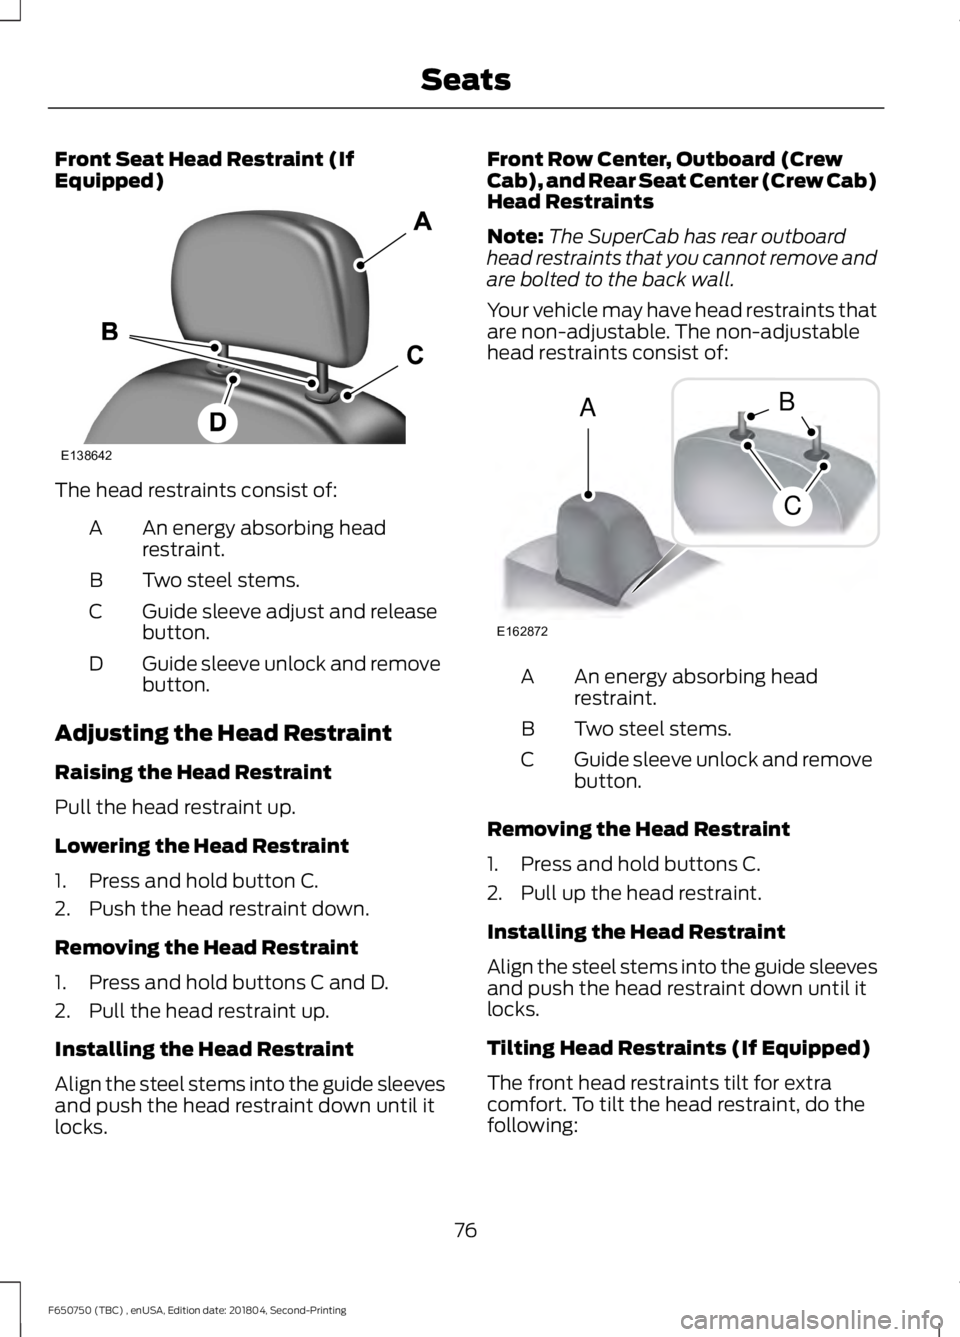
The head restraints consist of:
An energy absorbing head
restraint.
A
Two steel stems.
B
Guide sleeve adjust and release
button.
C
Guide sleeve unlock and remove
button.
D
Adjusting the Head Restraint
Raising the Head Restraint
Pull the head restraint up.
Lowering the Head Restraint
1. Press and hold button C.
2. Push the head restraint down.
Removing the Head Restraint
1. Press and hold buttons C and D.
2. Pull the head restraint up.
Installing the Head Restraint
Align the steel stems into the guide sleeves
and push the head restraint down until it
locks. Front Row Center, Outboard (Crew
Cab), and Rear Seat Center (Crew Cab)
Head Restraints
Note:
The SuperCab has rear outboard
head restraints that you cannot remove and
are bolted to the back wall.
Your vehicle may have head restraints that
are non-adjustable. The non-adjustable
head restraints consist of: An energy absorbing head
restraint.
A
Two steel stems.
B
Guide sleeve unlock and remove
button.
C
Removing the Head Restraint
1. Press and hold buttons C.
2. Pull up the head restraint.
Installing the Head Restraint
Align the steel stems into the guide sleeves
and push the head restraint down until it
locks.
Tilting Head Restraints (If Equipped)
The front head restraints tilt for extra
comfort. To tilt the head restraint, do the
following:
76
F650750 (TBC) , enUSA, Edition date: 201804, Second-Printing SeatsE138642 E162872
A
C
B
Page 118 of 387
AUTOMATIC TRANSMISSION
WARNING: Apply the parking
brake, shift into park (P), switch the
ignition off and remove the key before
you leave your vehicle. Failure to follow
this instruction could result in personal
injury or death.
Understanding the Shift Positions
of a 6– Speed Automatic
Transmission
(If Equipped) Putting your vehicle in or out of gear:
1. Fully press down the brake pedal.
2. Move the gearshift lever into the
preferred gear.
3. When you finish driving, come to a complete stop.
4. Move the gearshift lever and securely latch it in park (P) or neutral (N).
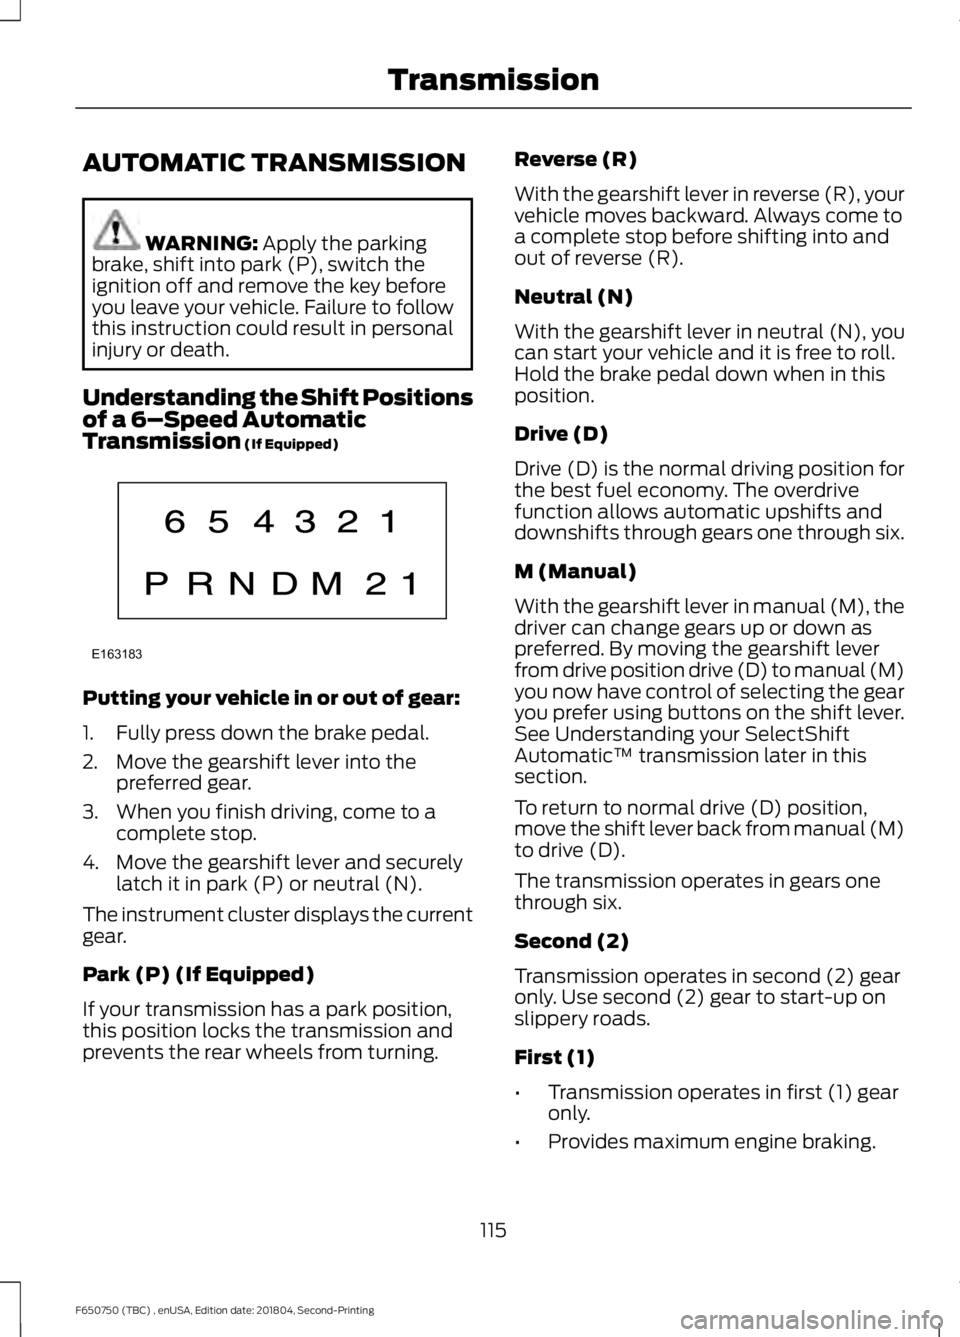
The instrument cluster displays the current
gear.
Park (P) (If Equipped)
If your transmission has a park position,
this position locks the transmission and
prevents the rear wheels from turning. Reverse (R)
With the gearshift lever in reverse (R), your
vehicle moves backward. Always come to
a complete stop before shifting into and
out of reverse (R).
Neutral (N)
With the gearshift lever in neutral (N), you
can start your vehicle and it is free to roll.
Hold the brake pedal down when in this
position.
Drive (D)
Drive (D) is the normal driving position for
the best fuel economy. The overdrive
function allows automatic upshifts and
downshifts through gears one through six.
M (Manual)
With the gearshift lever in manual (M), the
driver can change gears up or down as
preferred. By moving the gearshift lever
from drive position drive (D) to manual (M)
you now have control of selecting the gear
you prefer using buttons on the shift lever.
See Understanding your SelectShift
Automatic
™ transmission later in this
section.
To return to normal drive (D) position,
move the shift lever back from manual (M)
to drive (D).
The transmission operates in gears one
through six.
Second (2)
Transmission operates in second (2) gear
only. Use second (2) gear to start-up on
slippery roads.
First (1)
• Transmission operates in first (1) gear
only.
• Provides maximum engine braking.
115
F650750 (TBC) , enUSA, Edition date: 201804, Second-Printing TransmissionE163183
Page 120 of 387
Use the buttons on the shifter to lock or
unlock gears and manually select gears.
Press the + button to upshift or the –
button to downshift.
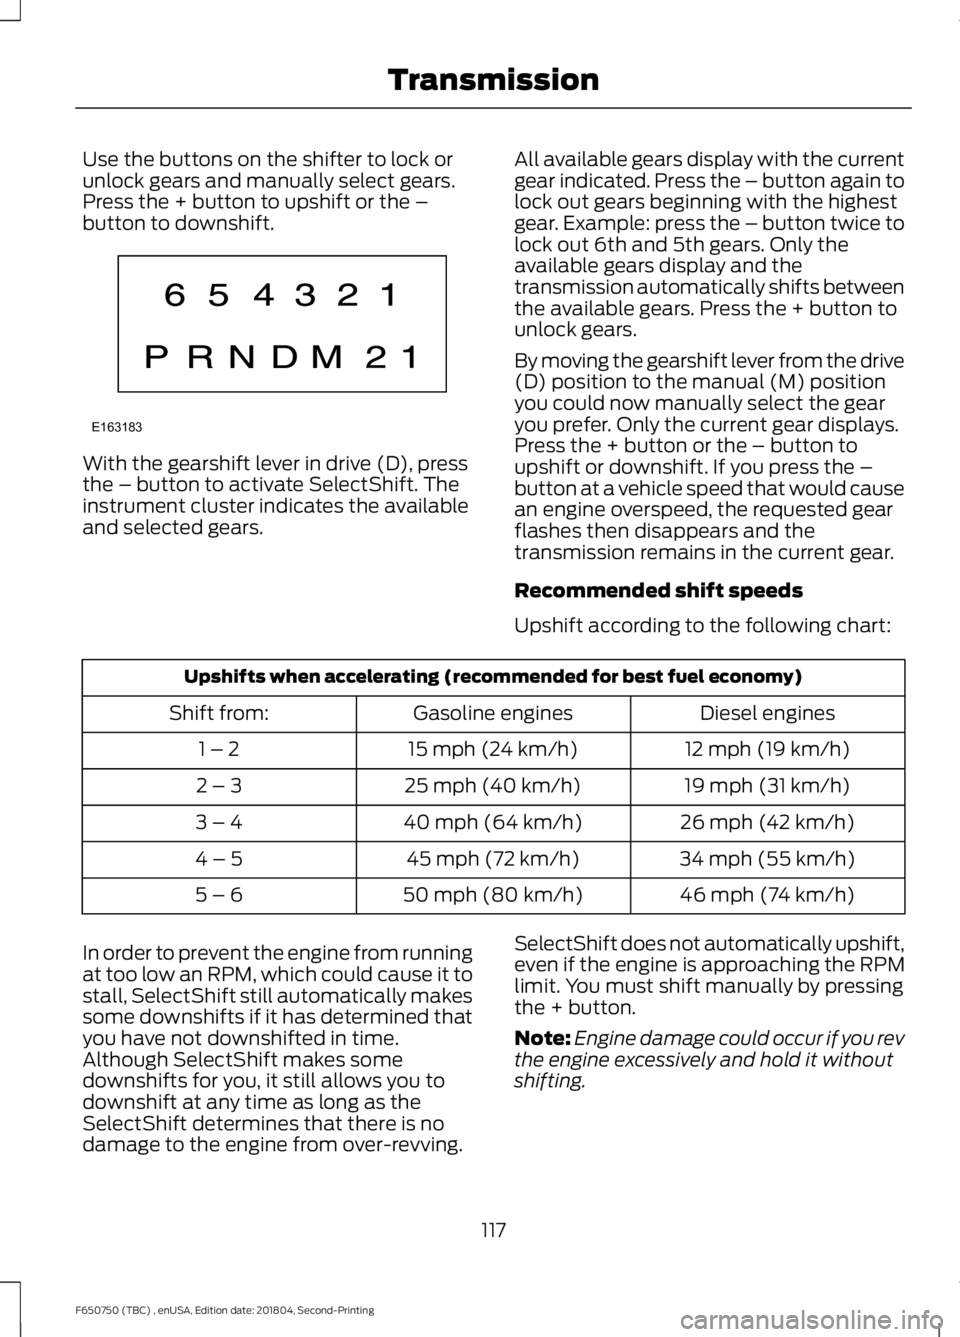
With the gearshift lever in drive (D), press
the – button to activate SelectShift. The
instrument cluster indicates the available
and selected gears.
All available gears display with the current
gear indicated. Press the – button again to
lock out gears beginning with the highest
gear. Example: press the – button twice to
lock out 6th and 5th gears. Only the
available gears display and the
transmission automatically shifts between
the available gears. Press the + button to
unlock gears.
By moving the gearshift lever from the drive
(D) position to the manual (M) position
you could now manually select the gear
you prefer. Only the current gear displays.
Press the + button or the – button to
upshift or downshift. If you press the –
button at a vehicle speed that would cause
an engine overspeed, the requested gear
flashes then disappears and the
transmission remains in the current gear.
Recommended shift speeds
Upshift according to the following chart:Upshifts when accelerating (recommended for best fuel economy)
Diesel engines
Gasoline engines
Shift from:
12 mph (19 km/h)
15 mph (24 km/h)
1 – 2
19 mph (31 km/h)
25 mph (40 km/h)
2 – 3
26 mph (42 km/h)
40 mph (64 km/h)
3 – 4
34 mph (55 km/h)
45 mph (72 km/h)
4 – 5
46 mph (74 km/h)
50 mph (80 km/h)
5 – 6
In order to prevent the engine from running
at too low an RPM, which could cause it to
stall, SelectShift still automatically makes
some downshifts if it has determined that
you have not downshifted in time.
Although SelectShift makes some
downshifts for you, it still allows you to
downshift at any time as long as the
SelectShift determines that there is no
damage to the engine from over-revving. SelectShift does not automatically upshift,
even if the engine is approaching the RPM
limit. You must shift manually by pressing
the + button.
Note:
Engine damage could occur if you rev
the engine excessively and hold it without
shifting.
117
F650750 (TBC) , enUSA, Edition date: 201804, Second-Printing TransmissionE163183
Page 283 of 387
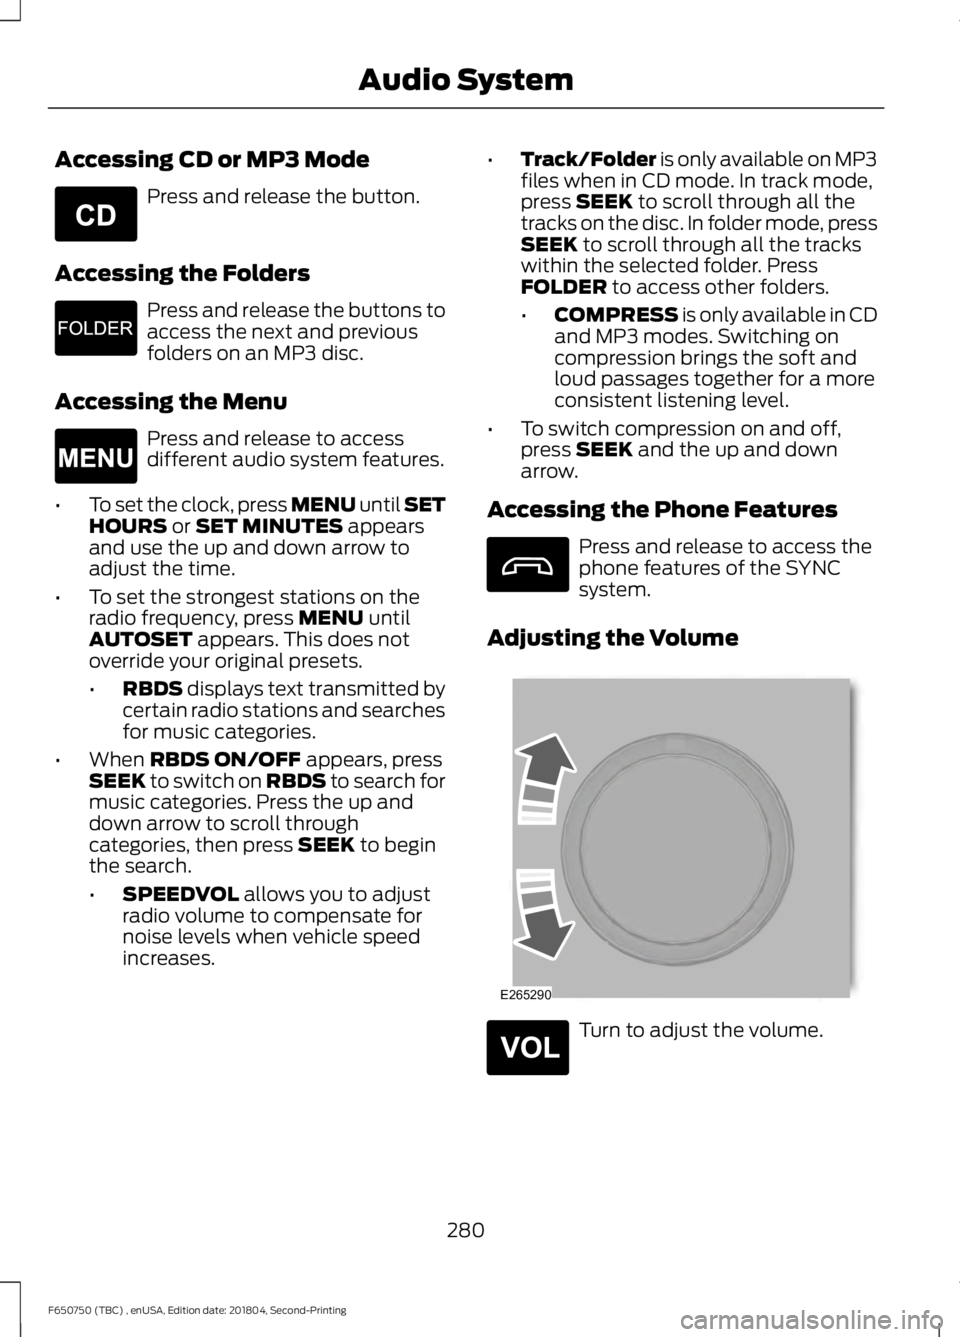
Accessing CD or MP3 Mode
Press and release the button.
Accessing the Folders Press and release the buttons to
access the next and previous
folders on an MP3 disc.
Accessing the Menu Press and release to access
different audio system features.
• To set the clock, press MENU until SET
HOURS or SET MINUTES appears
and use the up and down arrow to
adjust the time.
• To set the strongest stations on the
radio frequency, press
MENU until
AUTOSET appears. This does not
override your original presets.
• RBDS
displays text transmitted by
certain radio stations and searches
for music categories.
• When
RBDS ON/OFF appears, press
SEEK to switch on RBDS to search for
music categories. Press the up and
down arrow to scroll through
categories, then press
SEEK to begin
the search.
• SPEEDVOL
allows you to adjust
radio volume to compensate for
noise levels when vehicle speed
increases. •
Track/Folder is only available on MP3
files when in CD mode. In track mode,
press
SEEK to scroll through all the
tracks on the disc. In folder mode, press
SEEK
to scroll through all the tracks
within the selected folder. Press
FOLDER
to access other folders.
• COMPRESS
is only available in CD
and MP3 modes. Switching on
compression brings the soft and
loud passages together for a more
consistent listening level.
• To switch compression on and off,
press
SEEK and the up and down
arrow.
Accessing the Phone Features Press and release to access the
phone features of the SYNC
system.
Adjusting the Volume Turn to adjust the volume.
280
F650750 (TBC) , enUSA, Edition date: 201804, Second-Printing Audio SystemE265039 E265913 E265038 E265290 E265304
Page 288 of 387
The auxiliary input jack allows you to
connect and play music from your portable
music player through your vehicle speakers.
You can use any portable music player
designed for use with headphones. Your
audio extension cable must have male
connectors at each end.
1. Make sure your vehicle is stationary
with the audio unit and the portable
music player switched off.
2. Plug the extension cable from the device into the audio input jack.
3. Switch on the radio and select either a
tuned FM station or a CD.
4. Adjust the volume as desired.
5. Switch on your device and adjust the volume to half the maximum level.
6. Press AUX until LINE or LINE IN
appears in the display. You should hear
music from your device even if it is low.
7. Adjust the volume on your device until
it reaches the volume level of the FM
station or CD. Do this by switching back
and forth between the AUX and FM or
CD controls.
Use the vehicle audio unit buttons to
restore playback from the vehicle audio
unit, while your device remains connected.
Note: The audio extension cable must be
long enough for you to safely store the
device when your vehicle is moving.
Note: For optimum performance when
using any auxiliary device set the volume on
the device high. This reduces audio
interference when charging the device using
the vehicle power supply.
Note: For safety reasons, do not connect
or adjust the settings on your device while
your vehicle is moving. USB PORT WARNING:
Driving while
distracted can result in loss of vehicle
control, crash and injury. We strongly
recommend that you use extreme
caution when using any device that may
take your focus off the road. Your
primary responsibility is the safe
operation of your vehicle. We
recommend against the use of any
hand-held device while driving and
encourage the use of voice-operated
systems when possible. Make sure you
are aware of all applicable local laws
that may affect the use of electronic
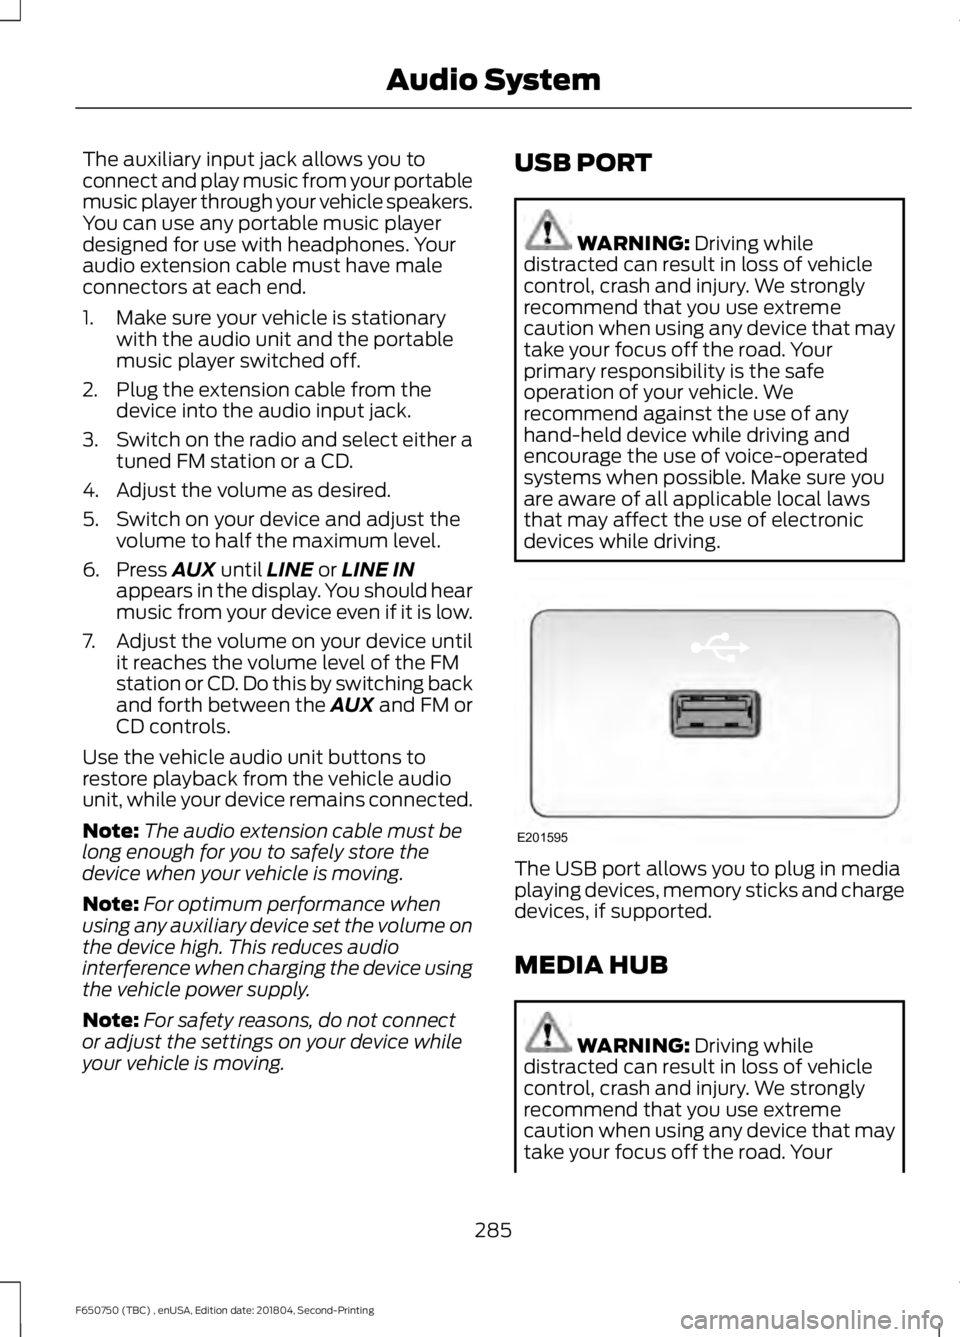
devices while driving. The USB port allows you to plug in media
playing devices, memory sticks and charge
devices, if supported.
MEDIA HUB
WARNING:
Driving while
distracted can result in loss of vehicle
control, crash and injury. We strongly
recommend that you use extreme
caution when using any device that may
take your focus off the road. Your
285
F650750 (TBC) , enUSA, Edition date: 201804, Second-Printing Audio SystemE201595
Page 297 of 387
![FORD F650/750 2019 Owners Manual Voice Command
Text Message Inbox
Send [New] Text Message
You do not need to say word contained
within brackets for the system to
understand your command.
Note: To exit dial mode, press and hold the
ph FORD F650/750 2019 Owners Manual Voice Command
Text Message Inbox
Send [New] Text Message
You do not need to say word contained
within brackets for the system to
understand your command.
Note: To exit dial mode, press and hold the
ph](/manual-img/11/40706/w960_40706-296.png)
Voice Command
Text Message Inbox
Send [New] Text Message
You do not need to say word contained
within brackets for the system to
understand your command.
Note: To exit dial mode, press and hold the
phone button or press MENU to go to the
PHONE menu. Phonebook Commands
When you ask SYNC to access content, for
example the phonebook name or number,
the requested information appears in the
display to view.
Making a Call
Press the voice button and when prompted say: Action and Description
Voice Command
This command is not available until you completely download
your cell phone information using Bluetooth
Call ___
Use to enter a phone number digit by digit.
Dial
When the system confirms the number, say one of the following commands:
To confirm the number and initiate the call.
Dial
To erase the last spoken digit. You can also press the left
arrow button.
delete
To erase all spoken digits. You can also press and hold the
left arrow button.
clear
To end a call, press and hold the red phone button.
Receiving Calls
When receiving a call, you can:
• Answer the call by pressing the phone
button.
• Reject the call by pressing and holding
the red phone button.
• Ignore the call by doing nothing. Phone Options during an Active
Call
During an active call, you have more menu
features that become available, for
example putting a call on hold or joining
calls. Use the arrow buttons to scroll
through the menu options.
294
F650750 (TBC) , enUSA, Edition date: 201804, Second-Printing SYNC™
Page 303 of 387
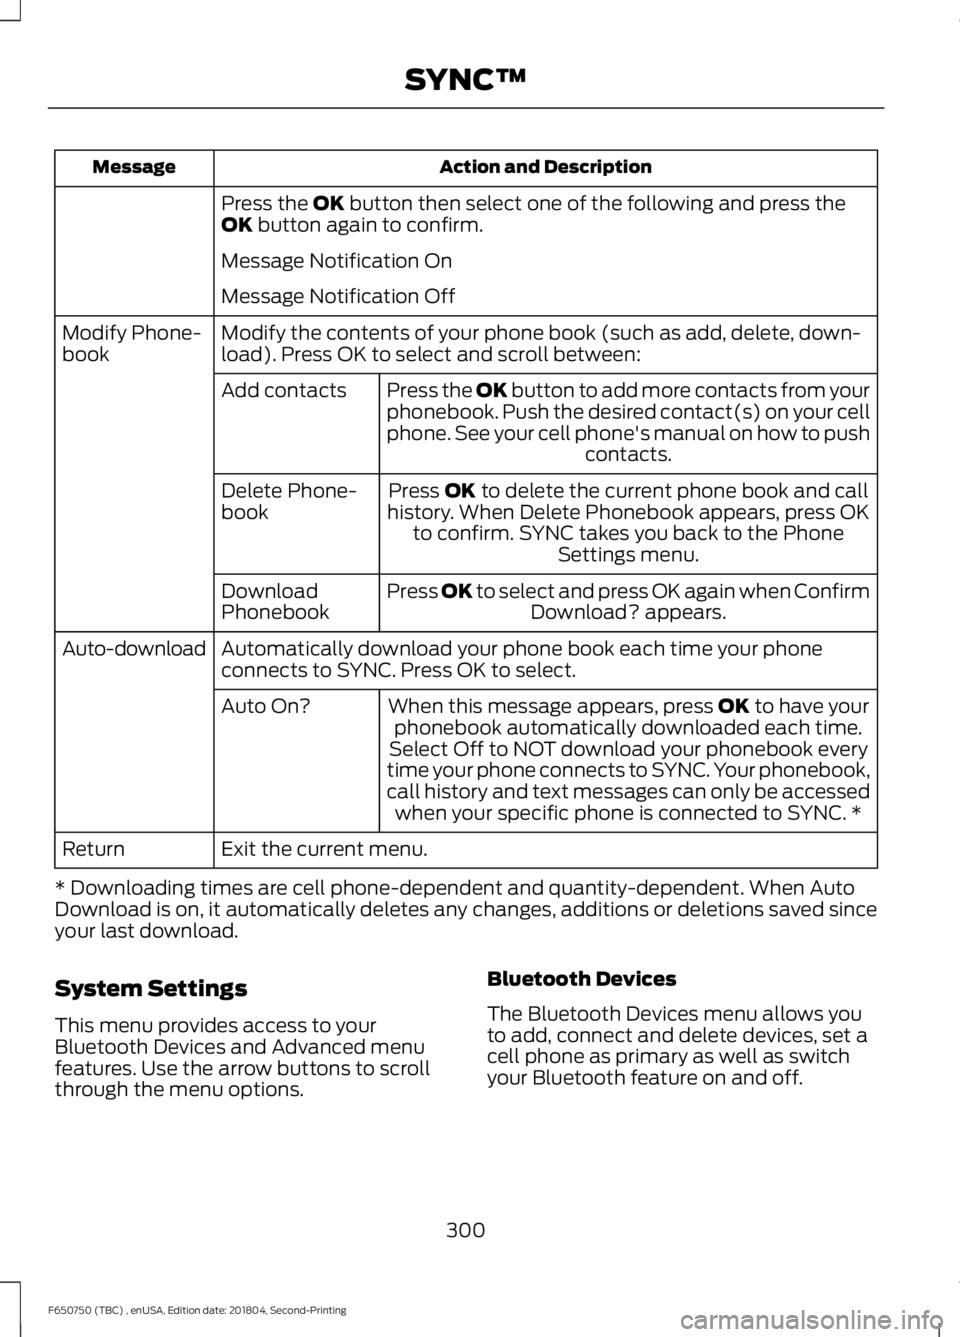
Action and Description
Message
Press the OK button then select one of the following and press the
OK button again to confirm.
Message Notification On
Message Notification Off
Modify the contents of your phone book (such as add, delete, down-
load). Press OK to select and scroll between:
Modify Phone-
book
Press the
OK button to add more contacts from your
phonebook. Push the desired contact(s) on your cell
phone. See your cell phone's manual on how to push contacts.
Add contacts
Press
OK to delete the current phone book and call
history. When Delete Phonebook appears, press OK to confirm. SYNC takes you back to the Phone Settings menu.
Delete Phone-
book
Press
OK to select and press OK again when ConfirmDownload? appears.
Download
Phonebook
Automatically download your phone book each time your phone
connects to SYNC. Press OK to select.
Auto-download
When this message appears, press
OK to have your
phonebook automatically downloaded each time.
Auto On?
Select Off to NOT download your phonebook every
time your phone connects to SYNC. Your phonebook,
call history and text messages can only be accessed when your specific phone is connected to SYNC. *
Exit the current menu.
Return
* Downloading times are cell phone-dependent and quantity-dependent. When Auto
Download is on, it automatically deletes any changes, additions or deletions saved since
your last download.
System Settings
This menu provides access to your
Bluetooth Devices and Advanced menu
features. Use the arrow buttons to scroll
through the menu options. Bluetooth Devices
The Bluetooth Devices menu allows you
to add, connect and delete devices, set a
cell phone as primary as well as switch
your Bluetooth feature on and off.
300
F650750 (TBC) , enUSA, Edition date: 201804, Second-Printing SYNC™