2019 CHRYSLER 300 warning
[x] Cancel search: warningPage 63 of 492
Refer to “Uconnect Settings” in “Multimedia” for further
information.
CAUTION!
To avoid damage to the mirror during cleaning, never
spray any cleaning solution directly onto the mirror.
Apply the solution onto a clean cloth and wipe the
mirror clean.
Outside Mirrors
To receive maximum benefit, adjust the outside mirror(s) to
center on the adjacent lane of traffic and a slight overlap of
the view obtained from the inside mirror.
NOTE:The passenger side convex outside mirror will give
a much wider view to the rear, and especially of the lane
next to your vehicle.
WARNING!
Vehicles and other objects seen in an outside convex
mirror will look smaller and farther away than they
really are. Relying too much on side convex mirrors
could cause you to collide with another vehicle or other
object. Use your inside mirror when judging the size or
distance of a vehicle seen in a side convex mirror.
Driver’s Outside Automatic Dimming Mirror — If
Equipped
The driver ’s outside mirror will automatically adjust for
glare from vehicles behind you. This feature is controlled
by the inside automatic dimming mirror and will automati-
cally adjust for headlight glare when the inside mirror
adjusts.
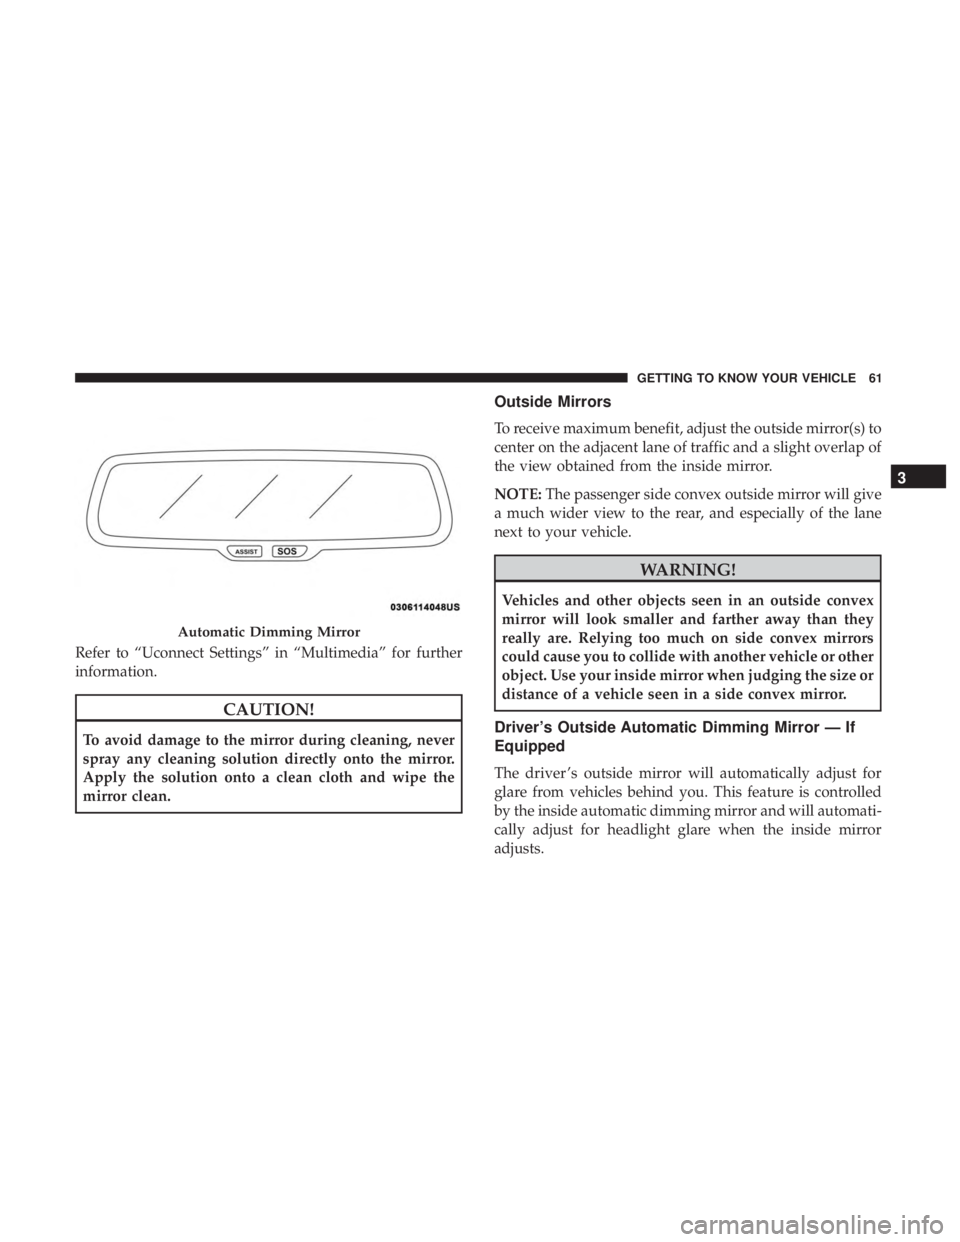
Automatic Dimming Mirror
3
GETTING TO KNOW YOUR VEHICLE 61
Page 64 of 492
Outside Mirrors With Turn Signal And Approach
Lighting — If Equipped
Driver and passenger outside mirrors with turn signal and
approach lighting contain four LEDs, which are located in
the upper outer corner of each mirror.
Three of the LEDs are turn signal indicators, which flash
with the corresponding turn signal lights in the front and
rear of the vehicle. Turning on the Hazard Warning flashers
will also activate these LEDs.
The fourth LED supplies illuminated entry lighting, which
turns on in both mirrors when you use the remote keyless
entry key fob or open any door. This LED shines outward
to illuminate the front and rear door handles. It also shines
downward to illuminate the area in front of the doors.
The illuminated entry lighting fades to off after about 30
seconds or it will fade to off immediately once the ignition
is placed into the ON/RUN position.
NOTE:The approach lighting will not function when the
gear selector is moved out of the PARK position.
Power Mirrors
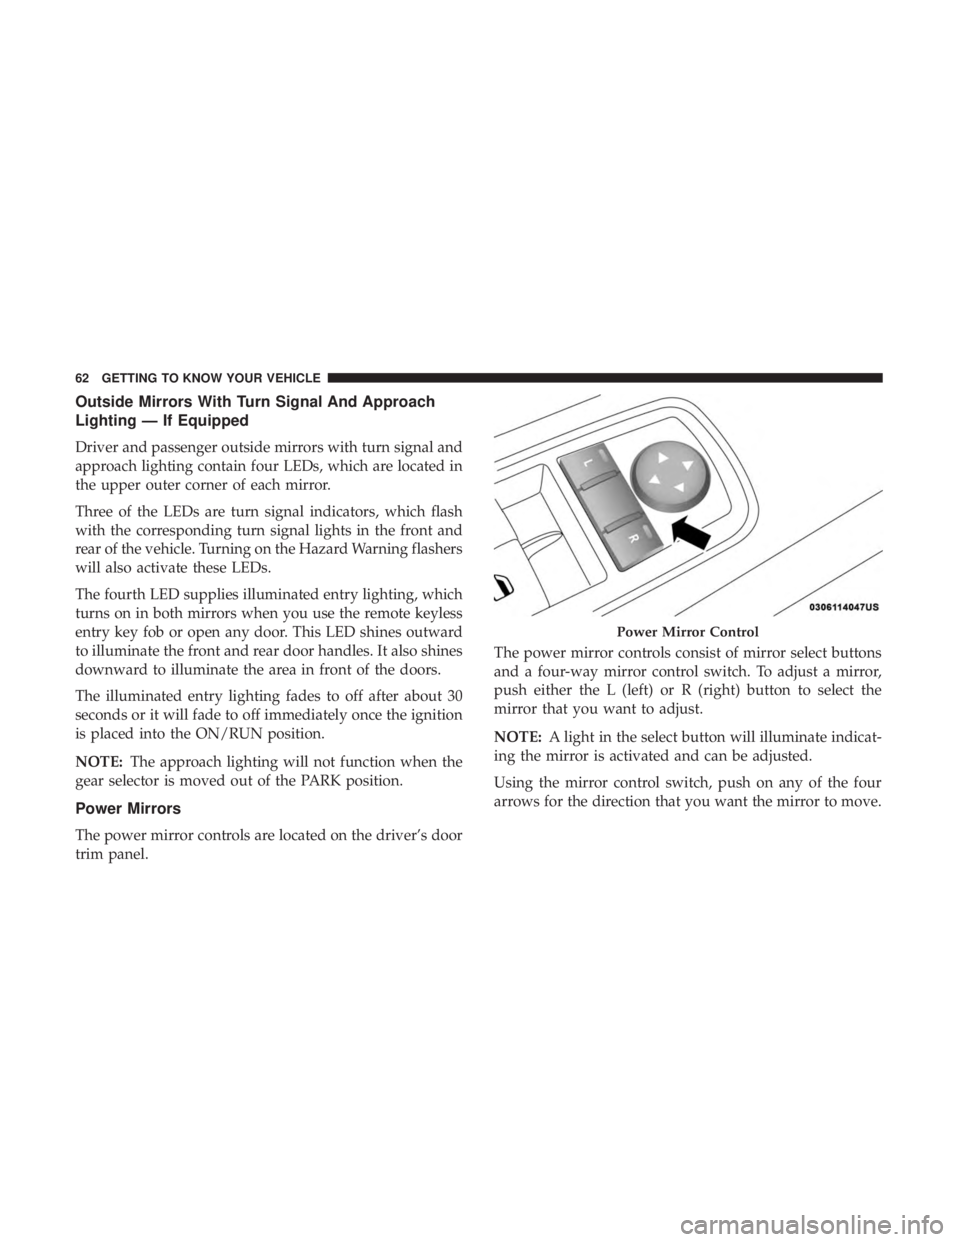
The power mirror controls are located on the driver’s door
trim panel. The power mirror controls consist of mirror select buttons
and a four-way mirror control switch. To adjust a mirror,
push either the L (left) or R (right) button to select the
mirror that you want to adjust.
NOTE:
A light in the select button will illuminate indicat-
ing the mirror is activated and can be adjusted.
Using the mirror control switch, push on any of the four
arrows for the direction that you want the mirror to move.
Power Mirror Control
62 GETTING TO KNOW YOUR VEHICLE
Page 79 of 492

WARNING!
Sudden loss of visibility through the windshield could
lead to a collision. You might not see other vehicles or
other obstacles. To avoid sudden icing of the wind-
shield during freezing weather, warm the windshield
with the defroster before and during windshield
washer use.
Mist Feature
Rotate the end of the lever downward to the MIST position
to activate a single wipe cycle to clear off road mist or spray
from a passing vehicle. The wipers will continue to operate
until you release the multifunction lever.
NOTE:The mist feature does not activate the washer
pump; therefore, no washer fluid will be sprayed on the
windshield. The wash function must be used in order to
spray the windshield with washer fluid.
Rain Sensing Wipers
This feature senses rain or snowfall on the windshield and
automatically activates the wipers for the driver. The
feature is especially useful for road splash or over spray
from the windshield washers of the vehicle ahead. Rotate
the end of the multifunction lever to one of four settings to
activate this feature.
The sensitivity of the system can be adjusted with the
multifunction lever. Wiper delay position 1 is the least
sensitive, and wiper delay position 4 is the most sensitive.
Setting 3 should be used for normal rain conditions.
Settings 1 and 2 can be used if the driver desires less wiper
sensitivity. Setting 4 can be used if the driver desires more
sensitivity. The rain sensing wipers will automatically
change between an intermittent wipe, slow wipe and a fast
wipe depending on the amount of moisture that is sensed
on the windshield. Place the wiper switch in the OFF
position when not using the system.
The Rain Sensing feature can be turned on and off using
the Uconnect System, refer to “Uconnect Settings” in
“Multimedia” for further information.
3
GETTING TO KNOW YOUR VEHICLE 77
Page 90 of 492
NOTE:For vehicles equipped with the Uconnect system,
the power window switches will remain active for up to
ten minutes after the ignition is placed in the OFF position.
Opening either front door will cancel this feature. The time
is programmable. Refer to “Uconnect Settings” in “Multi-
media” for further information.
WARNING!
Never leave children unattended in a vehicle, and do not
let children play with power windows. Do not leave the
key fob in or near the vehicle, or in a location accessible to
children, and do not leave the ignition of a vehicle
equipped with Keyless Enter-N-Go in the ACC or ON/
RUN mode. Occupants, particularly unattended children,
can become entrapped by the windows while operating
the power window switches. Such entrapment may result
in serious injury or death.
Auto-Down Feature
The driver and, in some models, passenger power window
switches have an Auto-Down feature. Push the window
switch to the second detent, release, and the window will
go down automatically. To open the window part way, push the window switch to
the first detent and release it when you want the window
to stop.
To stop the window from going all the way down during
the Auto-Down operation, pull up on the switch briefly.
Auto-Up Feature With Anti-Pinch Protection — If
Equipped
Pull window up switch to second detent for at least a half
of a second and the window will go up automatically.
To stop the window during an Auto-Up operation, push or
pull the window switch again.
To close the window part way, pull and hold the window
switch briefly and release it when you want the window to
stop.
NOTE:
•
If the window runs into any obstacle during Auto-
Closure, it will reverse direction and then go back down.
Remove the obstacle and use the window switch again
to close the window.
88 GETTING TO KNOW YOUR VEHICLE
Page 91 of 492
•Any impact due to rough road conditions may trigger
the Auto-Reverse function unexpectedly during auto-
closure. If this happens, pull and hold the switch to close
the window manually.
WARNING!
There is no anti-pinch protection when the window is
almost closed. Be sure to clear all objects from the
window before closing.
Reset Auto-Up
Should the Auto-Up feature stop working, the window
may need to be reset. To reset Auto-Up:
1. Make sure the door is fully closed.
2. Pull the window switch up to close the window com- pletely and continue to hold the switch up for an
additional two seconds after the window is closed.
3. Push the window switch down firmly to the second detent to open the window completely and continue to
hold the switch down for an additional two seconds
after the window is fully open.
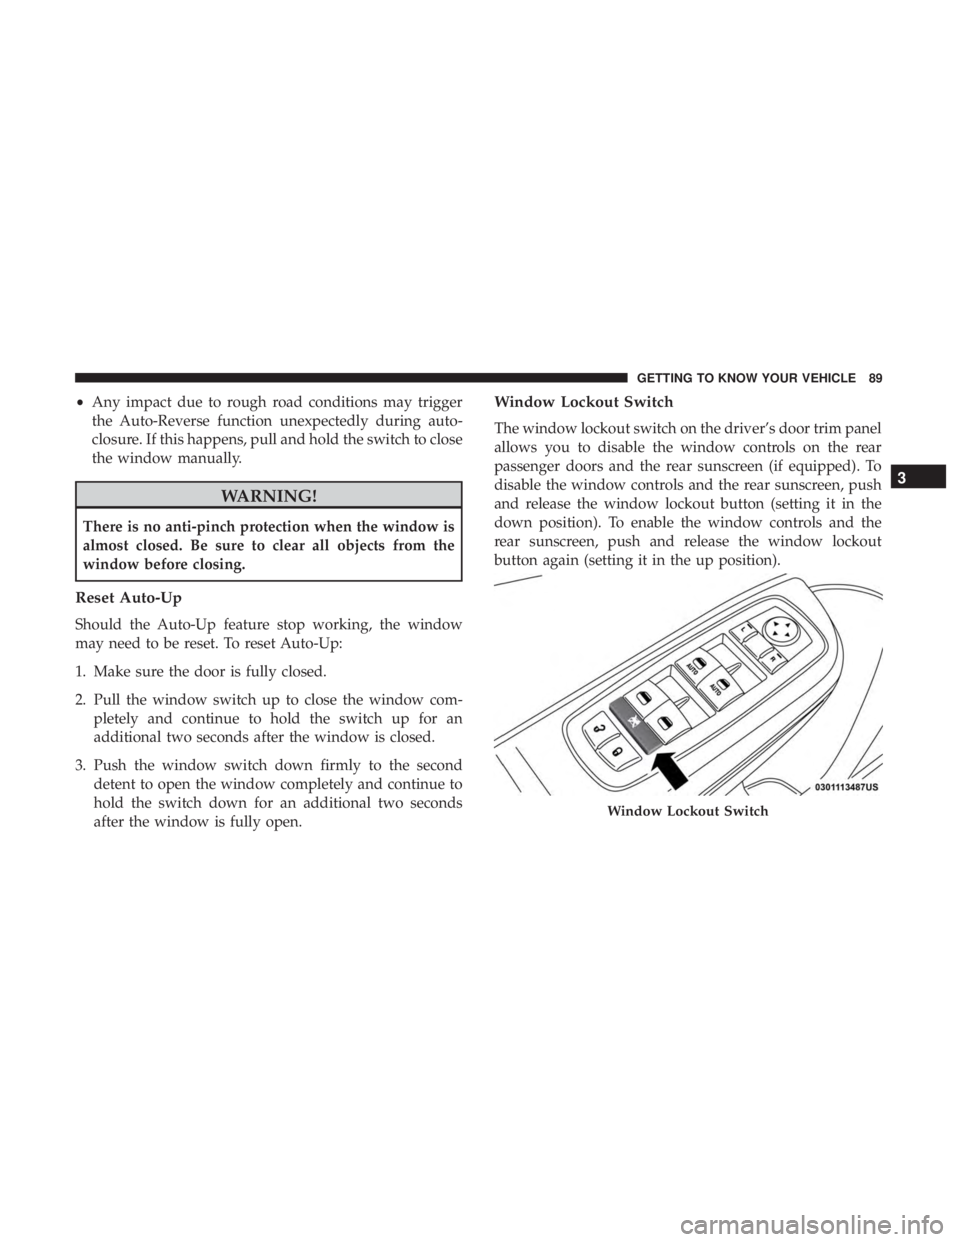
Window Lockout Switch
The window lockout switch on the driver’s door trim panel
allows you to disable the window controls on the rear
passenger doors and the rear sunscreen (if equipped). To
disable the window controls and the rear sunscreen, push
and release the window lockout button (setting it in the
down position). To enable the window controls and the
rear sunscreen, push and release the window lockout
button again (setting it in the up position).
Window Lockout Switch
3
GETTING TO KNOW YOUR VEHICLE 89
Page 93 of 492
WARNING!
•Never leave children unattended in a vehicle, or with
access to an unlocked vehicle. Never leave the key
fob in or near the vehicle, or in a location accessible
to children. Do not leave the ignition of a vehicle
equipped with Keyless Enter-N-Go in the ACC or
ON/RUN mode. Occupants, particularly unattended
children, can become entrapped by the power sun-
roof while operating the power sunroof switch. Such
entrapment may result in serious injury or death.
• In a collision, there is a greater risk of being thrown
from a vehicle with an open sunroof. You could also
be seriously injured or killed. Always fasten your
seat belt properly and make sure all passengers are
also properly secured.
• Do not allow small children to operate the sunroof.
Never allow your fingers, other body parts, or any
object, to project through the sunroof opening. In-
jury may result.
Opening Sunroof
The sunroof has three modes of open operation: Express
Open, Manual Open, and Vent Open. If the sunshade is in
the closed position when initiating a sunroof open or vent
command, the sunshade will automatically open to the half
open position prior to the sunroof opening.
Express Open
Push the switch rearward and release it within one-half
second, the sunroof and sunshade will open automatically
and stop at full open position. During Express Open
operation, any other actuation of the sunroof switches will
stop the sunroof in a partially open position.
Manual Open
Push and hold the switch rearward, the sunroof and
sunshade will open and automatically stop at full open
position. Releasing the switch while the sunroof is in
motion will stop the sunroof in a partially open position.
Vent Open
Push and release the Vent switch within one-half second
and the sunroof will open to the vent position. During
Express Vent operation, any other actuation of the sunroof
switches will stop the sunroof operation.
3
GETTING TO KNOW YOUR VEHICLE 91
Page 97 of 492
WARNING!
Be sure the hood is fully latched before driving your
vehicle. If the hood is not fully latched, it could open
when the vehicle is in motion and block your vision.
Failure to follow this warning could result in serious
injury or death.
CAUTION!
To prevent possible damage, do not slam the hood to
close it. Lower hood to approximately 12 inches (30 cm)
and drop the hood to close. Make sure hood is fully
closed for both latches. Never drive vehicle unless
hood is fully closed, with both latches engaged.
TRUNK
Opening
The trunk can be opened from inside the vehicle using the
power trunk button located on the instrument panel to the
left of the steering wheel.
The trunk lid can be released from outside the vehicle by
pushing the trunk button on the key fob twice within five
seconds or by using the external release switch located onthe underside of the decklid overhang. The release feature
will function only when the vehicle is in the unlock
condition.
With the ignition in the ON/RUN position, the trunk open
symbol will display in the instrument cluster indicating
that the trunk is open. The odometer display will reappear
once the trunk is closed.
With the ignition in the OFF position, the trunk open
symbol will display until the trunk is closed.
NOTE:
Refer to “Keyless Enter-N-Go — Passive Entry” in
”Doors” in “Getting To Know Your Vehicle” for further
information on trunk operation with the Passive Entry
feature.
Opening From Inside The Vehicle
Interior Power Trunk Release
The trunk can be opened from inside the
vehicle using the power trunk release
button located on the instrument panel
to the left of the steering wheel.
NOTE:The transmission must be in
PARK before the button will operate.
Power Trunk
Release
3
GETTING TO KNOW YOUR VEHICLE 95
Page 99 of 492

Trunk Safety
Trunk Emergency Release
As a security measure, a trunk internal emergency release
lever is built into the trunk latching mechanism. In the
event of an individual being locked inside the trunk, the
trunk can be opened by actuating the glow-in-the-dark
handle attached to the trunk latching mechanism.
WARNING!
Do not allow children to have access to the trunk,
either by climbing into the trunk from outside, or
through the inside of the vehicle. Always close the
trunk lid when your vehicle is unattended. Once in the
trunk, young children may not be able to escape, even
if they entered through the rear seat. If trapped in the
trunk, children can die from suffocation or heat stroke.
Cargo Area Features
Cargo Area — Vehicles Equipped With 60/40
Split-Folding Rear Seat
The 60/40 split-folding rear seat provides cargo-carrying
versatility. The seatbacks fold down easily by pulling nylon
tabs between the seatbacks and the bolsters. When the seats
are folded down, they provide a continuous, nearly-flat
extension of the load floor.
When the seatback is folded to the upright position, make
sure it is latched by strongly pulling on the top of the
seatback above the seat strap.
Trunk Emergency Release
3
GETTING TO KNOW YOUR VEHICLE 97