2019 CHEVROLET BOLT EV battery
[x] Cancel search: batteryPage 286 of 371
Chevrolet BOLT EV Owner Manual (GMNA-Localizing-U.S./Canada/Mexico-
12163003) - 2019 - crc - 5/18/18
Vehicle Care 285
government testing procedures.
The ratings are molded into the
sidewall of the tire. SeeUniform
Tire Quality Grading 0295.
Vehicle Capacity Weight
:The
number of designated seating
positions multiplied by
68 kg (150 lbs) plus the rated
cargo load. See Vehicle Load
Limits 0201.
Vehicle Maximum Load on the
Tire
:Load on an individual tire
due to curb weight, accessory
weight, occupant weight, and
cargo weight.
Vehicle Placard
:A label
permanently attached to a
vehicle showing the vehicle's
capacity weight and the original
equipment tire size and
recommended inflation pressure.
See “Tire and Loading
Information Label” underVehicle
Load Limits 0201.
Tire Pressure
Tires need the correct amount of
air pressure to operate
effectively.
{Warning
Neither tire underinflation nor
overinflation is good.
Underinflated tires, or tires
that do not have enough air,
can result in:
.Tire overloading and
overheating which could
lead to a blowout.
.Premature or
irregular wear.
.Poor handling.
.Reduced battery-electric
range.
Overinflated tires, or tires that
have too much air, can
result in:
(Continued)
Warning (Continued)
.Unusual wear.
.Poor handling.
.Rough ride.
.Needless damage from
road hazards.
The Tire and Loading
Information label on the vehicle
indicates the original equipment
tires and the correct cold tire
inflation pressures. The
recommended pressure is the
minimum air pressure needed to
support the vehicle's maximum
load carrying capacity. See
Vehicle Load Limits 0201.
How the vehicle is loaded
affects vehicle handling and ride
comfort. Never load the vehicle
with more weight than it was
designed to carry.
Page 291 of 371

Chevrolet BOLT EV Owner Manual (GMNA-Localizing-U.S./Canada/Mexico-
12163003) - 2019 - crc - 5/18/18
290 Vehicle Care
If the turn signal lamp does not flash
within 15 seconds after starting to
inflate the tire, the tire fill alert has
not been activated or is not working.
If the hazard warning flashers are
on, the tire fill alert visual feedback
will not work properly.
The TPMS will not activate the tire
fill alert properly under the following
conditions:
.There is interference from an
external device or transmitter.
. The air pressure from the
inflation device is not sufficient
to inflate the tire.
. There is a malfunction in
the TPMS.
. There is a malfunction in the
horn or turn signal lamps.
. The identification code of the
TPMS sensor is not registered to
the system.
. The battery of the TPMS sensor
is low. If the tire fill alert does not operate
due to TPMS interference, move the
vehicle about 1 m (3 ft) back or
forward and try again. If the tire fill
alert feature is not working, use a
tire pressure gauge.
TPMS Sensor Matching
Process
Each TPMS sensor has a unique
identification code. The identification
code needs to be matched to a new
tire/wheel position after rotating the
vehicle’s tires or replacing one or
more of the TPMS sensors. The
TPMS sensor matching process
should also be performed after
replacing a spare tire with a road
tire containing the TPMS sensor.
The malfunction light and the DIC
message should go off at the next
ignition cycle using POWER
O. The
sensors are matched to the tire/
wheel positions, using a TPMS
relearn tool, in the following order:
driver side front tire, passenger side
front tire, passenger side rear tire,
and driver side rear. See your
dealer for service or to purchase a relearn tool. A TPMS relearn tool
can also be purchased. See Tire
Pressure Monitor Sensor Activation
Tool at
www.gmtoolsandequipment.com or
call 1-800-GM TOOLS
(1-800-468-6657).
There are two minutes to match the
first tire/wheel position, and
five minutes overall to match all four
tire/wheel positions. If it takes
longer, the matching process stops
and must be restarted.
The TPMS sensor matching
process is:
1. Set the parking brake.
2. Press POWER
Oto start the
vehicle. See Power Button
0 205.
3. Make sure the Tire Pressure info page option is turned on.
The info pages on the DIC can
be turned on and off through
the Options menu. See Driver
Information Center (DIC) 0143.
Page 307 of 371
Chevrolet BOLT EV Owner Manual (GMNA-Localizing-U.S./Canada/Mexico-
12163003) - 2019 - crc - 5/18/18
306 Vehicle Care
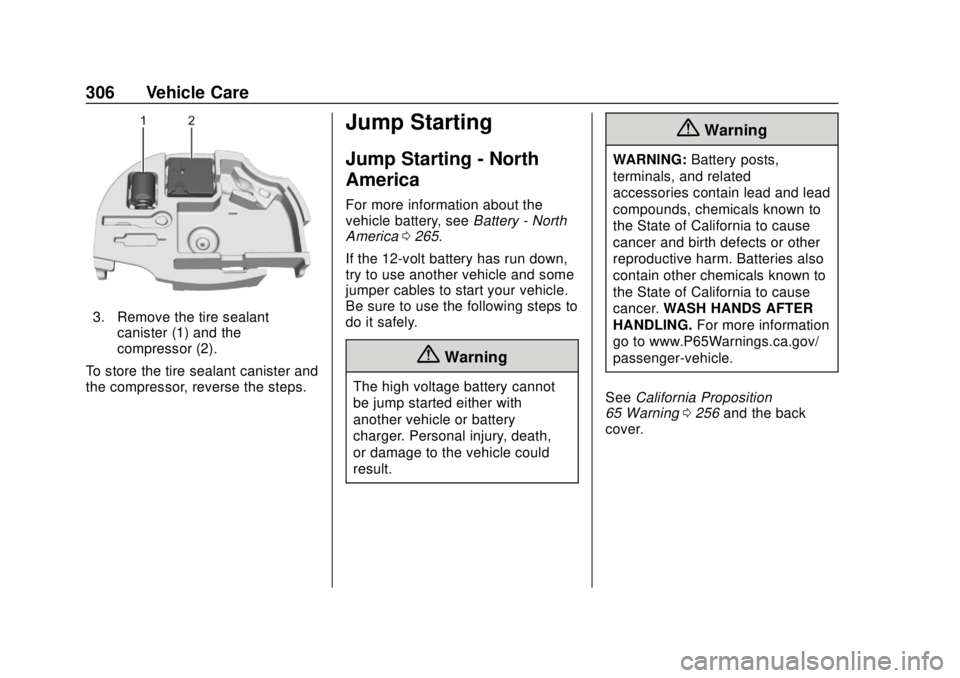
3. Remove the tire sealantcanister (1) and the
compressor (2).
To store the tire sealant canister and
the compressor, reverse the steps.
Jump Starting
Jump Starting - North
America
For more information about the
vehicle battery, see Battery - North
America 0265.
If the 12-volt battery has run down,
try to use another vehicle and some
jumper cables to start your vehicle.
Be sure to use the following steps to
do it safely.
{Warning
The high voltage battery cannot
be jump started either with
another vehicle or battery
charger. Personal injury, death,
or damage to the vehicle could
result.
{Warning
WARNING: Battery posts,
terminals, and related
accessories contain lead and lead
compounds, chemicals known to
the State of California to cause
cancer and birth defects or other
reproductive harm. Batteries also
contain other chemicals known to
the State of California to cause
cancer. WASH HANDS AFTER
HANDLING. For more information
go to www.P65Warnings.ca.gov/
passenger-vehicle.
See California Proposition
65 Warning 0256 and the back
cover.
Page 308 of 371
Chevrolet BOLT EV Owner Manual (GMNA-Localizing-U.S./Canada/Mexico-
12163003) - 2019 - crc - 5/18/18
Vehicle Care 307
{Warning
Batteries can hurt you. They can
be dangerous because:. They contain acid that can
burn you.
. They contain gas that can
explode or ignite.
. They contain enough
electricity to burn you.
If you do not follow these steps
exactly, some or all of these
things can hurt you.
Caution
Ignoring these steps could result
in costly damage to the vehicle
that would not be covered by the
vehicle warranty. Trying to start
the vehicle by pushing or pulling it
will not work, and it could damage
the vehicle.
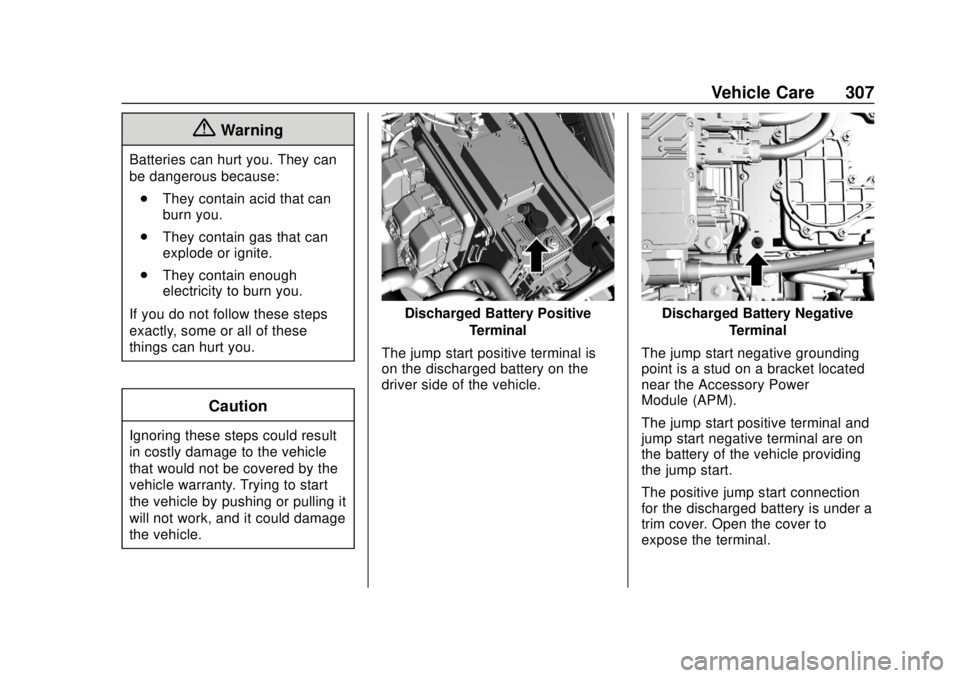
Discharged Battery Positive Terminal
The jump start positive terminal is
on the discharged battery on the
driver side of the vehicle.Discharged Battery Negative Terminal
The jump start negative grounding
point is a stud on a bracket located
near the Accessory Power
Module (APM).
The jump start positive terminal and
jump start negative terminal are on
the battery of the vehicle providing
the jump start.
The positive jump start connection
for the discharged battery is under a
trim cover. Open the cover to
expose the terminal.
Page 309 of 371
Chevrolet BOLT EV Owner Manual (GMNA-Localizing-U.S./Canada/Mexico-
12163003) - 2019 - crc - 5/18/18
308 Vehicle Care
1. Check the other vehicle.It must have a 12-volt battery
with a negative ground system.
Caution
If the other vehicle does not have
a 12-volt system with a negative
ground, both vehicles can be
damaged. Only use a vehicle that
has a 12-volt system with a
negative ground for jump starting.
2. Position the two vehicles so that they are not touching.
3. Set the parking brake and shift into P (Park). See Shifting Into
Park 0208.
Caution
If any accessories are left on or
plugged in during the jump
starting procedure, they could be
damaged. The repairs would not
be covered by the vehicle
(Continued)
Caution (Continued)
warranty. Whenever possible, turn
off or unplug all accessories on
either vehicle when jump starting.
4. Turn the vehicle off. Turn off all lights and accessories in both
vehicles, except the hazard
warning flashers if needed.
{Warning
An electric fan can start up even
when the propulsion system is not
operating and can injure you.
Keep hands, clothing and tools
away from any underhood
electric fan.
{Warning
Using a match near a battery can
cause battery gas to explode.
People have been hurt doing this,
(Continued)
Warning (Continued)
and some have been blinded.
Use a flashlight if you need more
light.
Battery fluid contains acid that
can burn you. Do not get it on
you. If you accidentally get it in
your eyes or on your skin, flush
the place with water and get
medical help immediately.
{Warning
Fans or other moving propulsion
system parts can injure you badly.
Keep your hands away from
moving parts once the propulsion
system is operating.
5. Connect one end of the red positive (+) cable to the
positive (+) terminal on the
discharged battery.
Page 310 of 371
Chevrolet BOLT EV Owner Manual (GMNA-Localizing-U.S./Canada/Mexico-
12163003) - 2019 - crc - 5/18/18
Vehicle Care 309
6. Connect the other end of thered positive (+) cable to the
positive (+) terminal of the
good battery.
7. Connect one end of the black negative (–) cable to the
negative (–) terminal of the
good battery.
8. Connect the other end of the black negative (–) cable to the
negative (–) grounding point for
the discharged battery.
9. Start the vehicle with the good battery.
10. Try to start the vehicle with the dead battery. If it will not start
after a few tries, it probably
needs service.Caution
If the jumper cables are
connected or removed in the
wrong order, electrical shorting
may occur and damage the
vehicle. The repairs would not be
covered by the vehicle warranty.
Always connect and remove the
jumper cables in the correct order,
making sure that the cables do
not touch each other or other
metal.
Jumper Cable Removal
Reverse the sequence exactly when
removing the jumper cables.
Towing the Vehicle
Caution
Incorrectly towing a disabled
vehicle may cause damage. The
damage would not be covered by
the vehicle warranty. Do not lash
or hook to suspension
components. Use the proper
straps around the tires to secure
the vehicle. Do not drag a locked
wheel/tire while loading the
vehicle. Do not use a sling type
lift to tow the vehicle. This could
damage the vehicle.
GM recommends a flatbed tow truck
to transport a disabled vehicle. Use
ramps to help reduce approach
angles, if necessary. A towed
vehicle should have its drive wheels
off the ground. Contact Roadside
Assistance or a professional towing
service if the disabled vehicle must
be towed.
Page 314 of 371
Chevrolet BOLT EV Owner Manual (GMNA-Localizing-U.S./Canada/Mexico-
12163003) - 2019 - crc - 5/18/18
Vehicle Care 313
2. Shift the transmission toP (Park). See Shifting Into Park
0 208.
3. Set the parking brake.
4. Secure the vehicle to the dolly.
5. Follow the dolly manufacturer's instructions for preparing the
vehicle and dolly for towing.
6. Release the parking brake.
7. Turn the vehicle off.
8. Open the hood.
9. Wait two minutes.
10. Disconnect the negative (-) terminal connector from the
12-volt battery.
11. Close and latch the hood.
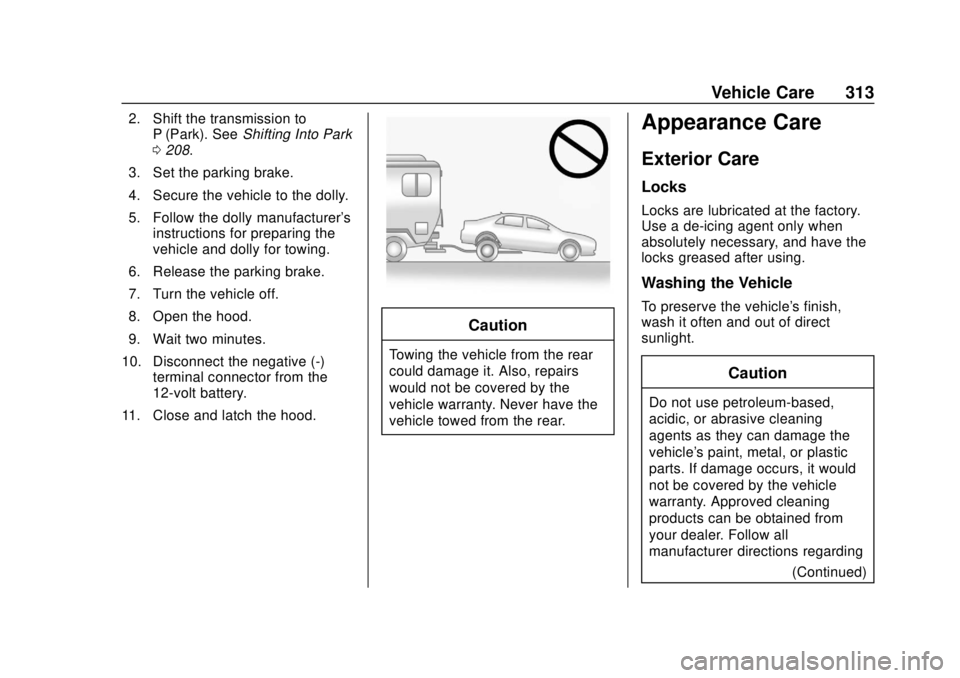
Caution
Towing the vehicle from the rear
could damage it. Also, repairs
would not be covered by the
vehicle warranty. Never have the
vehicle towed from the rear.
Appearance Care
Exterior Care
Locks
Locks are lubricated at the factory.
Use a de-icing agent only when
absolutely necessary, and have the
locks greased after using.
Washing the Vehicle
To preserve the vehicle's finish,
wash it often and out of direct
sunlight.
Caution
Do not use petroleum-based,
acidic, or abrasive cleaning
agents as they can damage the
vehicle's paint, metal, or plastic
parts. If damage occurs, it would
not be covered by the vehicle
warranty. Approved cleaning
products can be obtained from
your dealer. Follow all
manufacturer directions regarding (Continued)
Page 327 of 371

Chevrolet BOLT EV Owner Manual (GMNA-Localizing-U.S./Canada/Mexico-
12163003) - 2019 - crc - 5/18/18
326 Service and Maintenance
Additional
Maintenance and Care
Your vehicle is an important
investment and caring for it properly
may help to avoid future costly
repairs. To maintain vehicle
performance, additional
maintenance services may be
required. It is recommended that
your dealer perform these services
—their trained dealer technicians
know your vehicle best. Your dealer
can also perform a thorough
assessment with a multi-point
inspection to recommend when your
vehicle may need attention. The
following list is intended to explain
the services and conditions to look
for that may indicate services are
required.
Battery
The battery supplies power to
operate any additional electrical
accessories.
. To avoid break-down or failure,
maintain a battery with full
power. .
Trained dealer technicians have
the diagnostic equipment to test
the battery and ensure that the
connections and cables are
corrosion-free.
Brakes
Brakes stop the vehicle and are
crucial to safe driving.
. Signs of brake wear may include
chirping, grinding, or squealing
noises, or difficulty stopping.
. Trained dealer technicians have
access to tools and equipment
to inspect the brakes and
recommend quality parts
engineered for the vehicle.
Fluids
Proper fluid levels and approved
fluids protect the vehicle’s systems
and components. See
Recommended Fluids and
Lubricants 0328 for GM approved
fluids.
. Keep the windshield washer fluid
reservoir filled. .
Instrument cluster lights may
come on to indicate that fluids
may be low and need to be
filled.
Hoses
Hoses transport fluids and should
be regularly inspected to ensure
that there are no cracks or leaks.
With a multi-point inspection, your
dealer can inspect the hoses and
advise if replacement is needed.
Lamps
Properly working headlamps,
taillamps, and brake lamps are
important to see and be seen on
the road.
. Signs that the headlamps need
attention include dimming, failure
to light, cracking, or damage.
The brake lamps need to be
checked periodically to ensure
that they light when braking.
. With a multi-point inspection,
your dealer can check the lamps
and note any concerns.