2018 VOLVO V90 CROSS COUNTRY warning
[x] Cancel search: warningPage 453 of 662
STARTING AND DRIVING
* Option/accessory.451
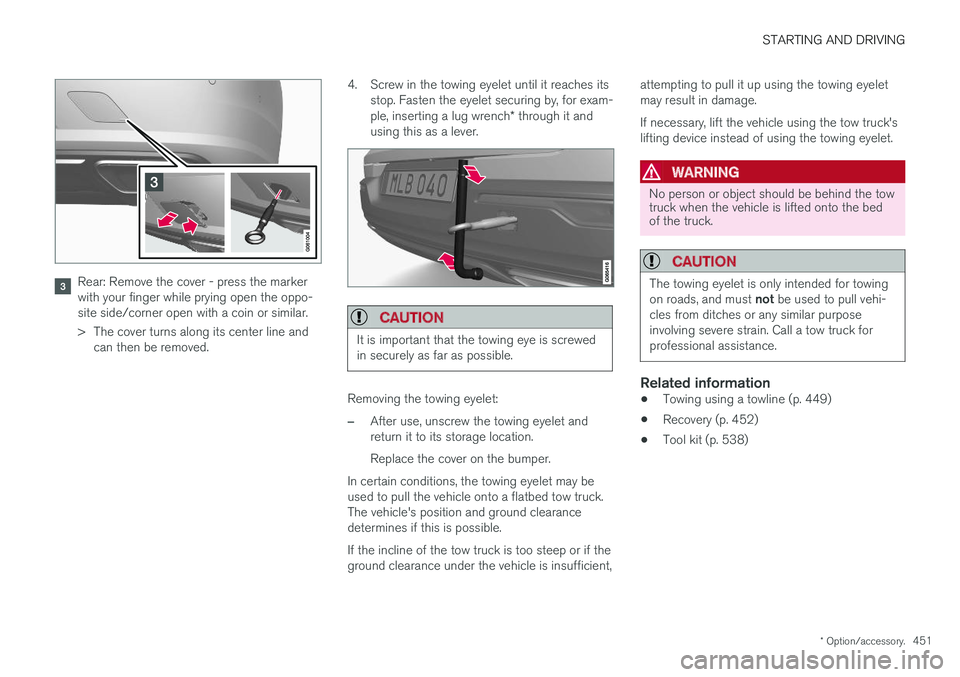
Rear: Remove the cover - press the marker with your finger while prying open the oppo-site side/corner open with a coin or similar.
> The cover turns along its center line and
can then be removed. 4. Screw in the towing eyelet until it reaches its
stop. Fasten the eyelet securing by, for exam- ple, inserting a lug wrench * through it and
using this as a lever.
CAUTION
It is important that the towing eye is screwed in securely as far as possible.
Removing the towing eyelet:
–After use, unscrew the towing eyelet and return it to its storage location. Replace the cover on the bumper.
In certain conditions, the towing eyelet may be used to pull the vehicle onto a flatbed tow truck.The vehicle's position and ground clearancedetermines if this is possible. If the incline of the tow truck is too steep or if the ground clearance under the vehicle is insufficient, attempting to pull it up using the towing eyeletmay result in damage. If necessary, lift the vehicle using the tow truck's lifting device instead of using the towing eyelet.
WARNING
No person or object should be behind the tow truck when the vehicle is lifted onto the bedof the truck.
CAUTION
The towing eyelet is only intended for towing on roads, and must
not be used to pull vehi-
cles from ditches or any similar purpose involving severe strain. Call a tow truck forprofessional assistance.
Related information
• Towing using a towline (p. 449)
• Recovery (p. 452)
• Tool kit (p. 538)
Page 454 of 662
STARTING AND DRIVING
* Option/accessory.
452
Recovery
This section refers to transporting the vehicle with a tow truck or similar vehicle.
Call a professional towing service for assistance. In certain conditions, the towing eyelet can be used to pull the vehicle onto a flatbed tow truck. For vehicles equipped with leveling control *:
If the vehicle is equipped with pneumatic suspen- sion, this feature must be turned off before thevehicle is lifted onto a tow truck. Turning off thefunction in the center display. 1. Tap
Settings in the Top view.
2. Tap
My CarParking Brake and
Suspension.
3. Select
Disable Leveling Control.
The vehicle's location and ground clearance determine if it can be lifted onto a tow truck. Ifthe incline of the tow truck is too steep or if theground clearance under the vehicle is insufficient,attempting to pull it up may result in damage. Inthis case, the vehicle should only be lifted withthe tow truck's lifting equipment.
WARNING
No person or object should be behind the tow truck when the vehicle is lifted onto the bedof the truck.
CAUTION
The towing eyelet is only intended for towing on roads, and must not be used to pull vehi-
cles from ditches or any similar purpose involving severe strain. Call a tow truck forprofessional assistance.
CAUTION
Note that the vehicle must always be towed with the wheels rolling forward.
Related information
• Attaching and removing the towing eyelet (p. 450)
HomeLink®
*12
HomeLink ®
13
is a programmable remote control,
integrated in the vehicle electrical system, that can control up to three different devices (e.g.garage door opener, alarm system, outdoor andindoor lighting, etc.) and thereby replace theremote controls for these.
General
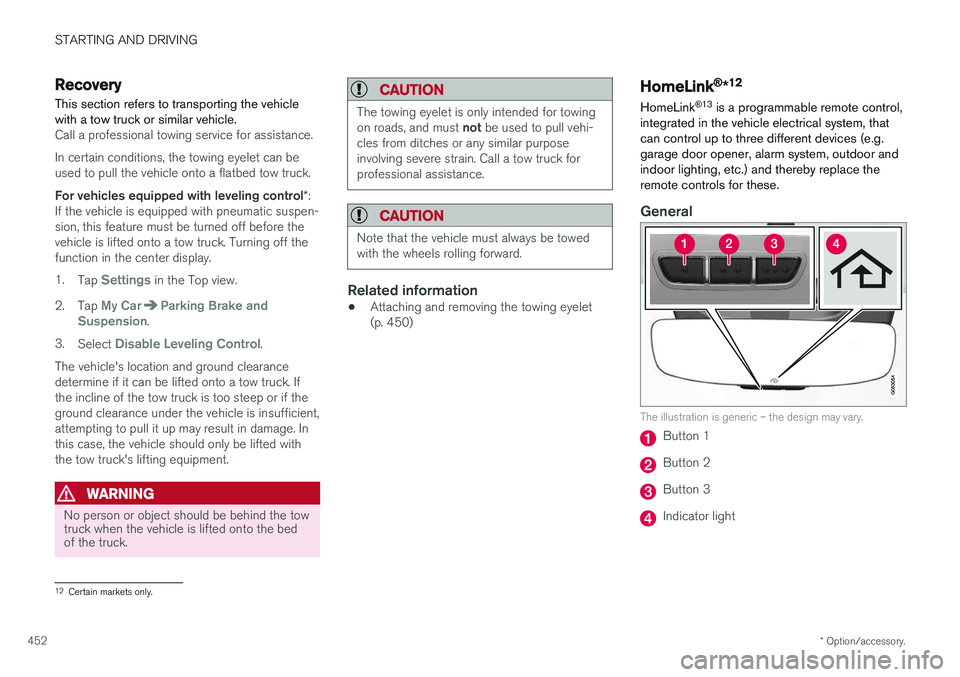
The illustration is generic – the design may vary.
Button 1
Button 2
Button 3
Indicator light
12 Certain markets only.
Page 455 of 662
STARTING AND DRIVING
}}
* Option/accessory.453
HomeLink
®
is delivered integrated in the rearview
mirror. The HomeLink ®
panel consists of three
programmable buttons and an indicator light in the mirror. For more information about HomeLink ®
, please
visit www.HomeLink.com, www.youtube.com/ HomeLinkGentex or call 1-800-355-3515. Save the original remote controls for future pro- gramming (e.g. for use in another vehicle). It isalso advisable to delete the button programmingif the vehicle is sold.
Related information
• Using HomeLink (p. 454)
• Programming HomeLink ®
* (p. 453)
• Type approval for HomeLink ®
* (p. 455)
Programming HomeLink®
*14
Follow these instructions to program HomeLink ®
, reset all programming, or program
individual buttons.
NOTE
In some vehicles, the ignition must be on or in the "accessory position" before HomeLink ®
can be programmed or used. It can be a good idea to put new batteries in the remote con- trol being replaced by HomeLink ®
for faster
programming and better radio signal trans-mission. The HomeLink ®
buttons should be
reset before programming.
WARNING
While HomeLink ®
is being programmed, the
garage door or gate being programmed may be activated. Make sure that no one is nearthe door or gate during programming. Whenprogramming a garage door opener, it isadvised to park outside of the garage. 1.
Point the remote control at the HomeLink ®
button to be programmed and hold it about 2-8 cm (1-3 inches) from the button. Do not obstruct the HomeLink ®
indicator light.
Note: Some remote controls are more effec-
tive at programming HomeLink ®
from a dis-
tance of about 15-20 cm (6-12 inches). Try moving the remote control closer or furtheraway if you are experiencing any difficultiesprogramming.
2. Press and hold both the remote control but- ton and the HomeLink ®
button to be pro-
grammed.
3. Do not release the buttons until the indicator light has stopped flashing slowly (about oncea second) and either flashes quickly (about10 times a second) or glows steadily. >Steady glow: Indication that program-
ming is complete. Press the programmed button twice to activate. Flashing quickly: The device being pro-
grammed with HomeLink ®
may have a
security function that requires an extra step. Try pressing the programmed buttontwice to see whether the programmingworks. Otherwise, continue with the fol-lowing steps.
13 HomeLink and the HomeLink house symbol are registered trademarks of Gentex Corporation.
14 Certain markets only.
Page 457 of 662
STARTING AND DRIVING
* Option/accessory.455
WARNING
•If you use HomeLink ®
to open a garage
door or gate, be sure no one is near the gate or door while it is in motion.
• Do not use HomeLink ®
with any garage
door opener that lacks safety stop andreverse features as required by US fed-eral safety standards (this includes anygarage door opener model manufacturedbefore April 1, 1982). A garage door thatcannot detect an object - signaling thedoor to stop and reverse - does not meetcurrent U.S. federal safety standards. Formore information, contact HomeLink at:www.homelink.com.
Related information
• HomeLink ®
* (p. 452)
• Programming HomeLink ®
* (p. 453)
• Type approval for HomeLink ®
* (p. 455)
Type approval for HomeLink®
*16
FCC (USA) and IC (Canada)This device complies with FCC rules part 15 and Industry Canada RSS-210. Operation is subjectto the following two conditions: (1) This devicemay not cause harmful interference, and (2) Thisdevice must accept any interference that may bereceived including interference that may causeundesired operation.
WARNING
The transmitter has been tested and complies with FCC and IC rules. Changes or modifica-tions not expressly approved by the partyresponsible for compliance could void the user's authority to operate the device. 17
Type approval for EUGentex Corporation hereby declares that HomeLink®
Model UAHL5 complies with the
Radio equipment directive 2014/53/EU. Wavelengths within which the radio equipment operates:
• 433.05MHz-434.79MHz <10mW E.R.P.
• 868.00MHz-868.60MHz <25mW E.R.P.
• 868.70MHz-868.20MHz <25mW E.R.P.
• 869.40MHz-869.65MHz <25mW E.R.P. •
869.70MHz-870.00MHz <25mW E.R.P.
Certificate holder address: Gentex Corporation,600 North Centennial Street, Zeeland MI 49464,USA For more information, see support.volvocars.com.
Related information
• HomeLink ®
* (p. 452)
16
Certain markets only.
17 The term "IC:" before the certification/registration number only signifies that Industry Canada technical specifications were met.
Page 526 of 662
WHEELS AND TIRES
524
Tires
The function of the tires is to carry loads, provide traction on road surfaces, reduce vibrations andprotect the wheels from wear.
The tires significantly influence the vehicle's driv- ing characteristics. The type, dimensions, tirepressure and speed rating have a considerableimpact on how the vehicle performs. Your vehicle is equipped with tires according to the vehicle's tire information placard on the B-pil-lar (the structural member at the side of the vehi-cle, at the rear of the driver's door opening).
WARNING
A damaged tire could cause the driver to lose control of the vehicle.
CAUTION
Some Volvo models are equipped with an Ultra High Performance tire and wheel com-bination designed to provide maximum drypavement performance with consideration forhydroplaning resistance. They may be moresusceptible to road hazard damage and,depending on driving conditions, may achievea tread life of less than 30,000 km (20,000miles). Even if this vehicle is equipped withVolvo's advanced AWD or stability system,these tires are not designed for winter driving,and should be replaced with winter tires whenweather conditions dictate.
The tires have good road holding characteristics and offer good handling on dry and wet surfaces.It should be noted however that the tires havebeen developed to give these features on snow/ice-free surfaces. Most models are equipped with "all-season" tires, which provide a somewhat higher degree of road-holding on slippery road surfaces than tires with-out the "all-season" rating. However, for optimalroadholding on icy or snow-covered roads, werecommend snow tires on all four wheels. When replacing tires, be sure that the new tires are the same size designation, type (radial) andpreferably from the same manufacturer, on all four wheels. Otherwise there is a risk of alteringthe vehicle's roadholding and handling characte-ristics.
Recommended tiresOn delivery, the car is equipped with Volvo origi- nal tires that have the VOL
1
marking on the side
of the tires. These tires have been designed spe- cifically for your vehicle. It is therefore importantwhen replacing tires that the new tires have thissame marking to help maintain the vehicle's driv-ing characteristics, comfort and fuel consumption.
New tires
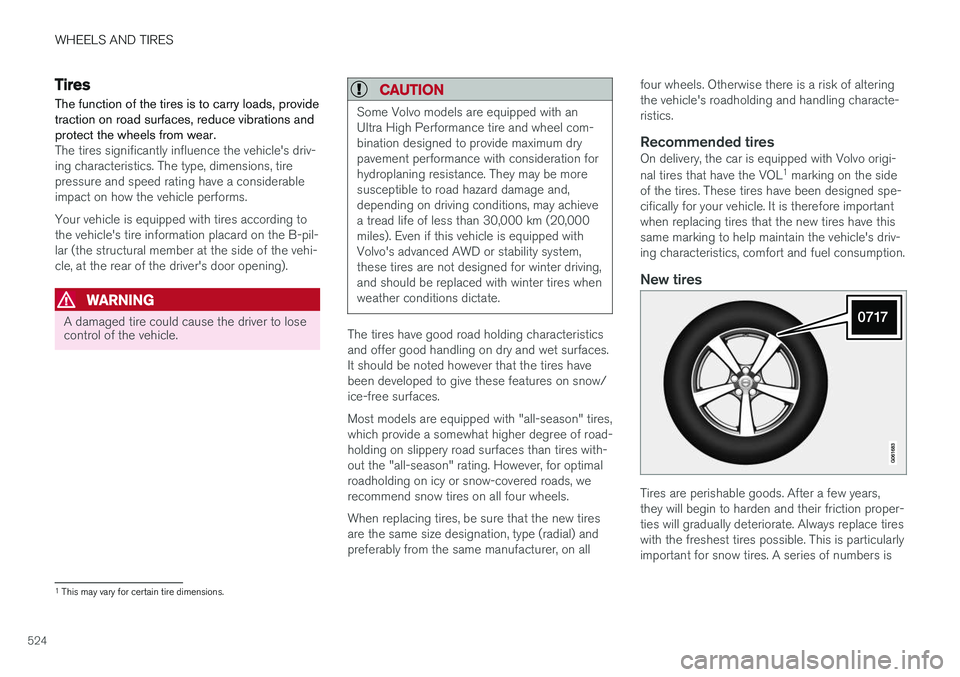
Tires are perishable goods. After a few years, they will begin to harden and their friction proper-ties will gradually deteriorate. Always replace tireswith the freshest tires possible. This is particularlyimportant for snow tires. A series of numbers is
1 This may vary for certain tire dimensions.
Page 528 of 662
||
WHEELS AND TIRES
* Option/accessory.
526
WARNING
• The wheel and tire sizes for your Volvo are specified to meet stringent stabilityand handling requirements. Unapprovedwheel/tire size combinations can nega-tively affect your vehicle's stability andhandling.
• Any damage caused by installation ofunapproved wheel/tire size combinationswill not be covered by your new vehiclewarranty. Volvo assumes no responsibilityfor death, injury, or expenses that mayresult from such installations.
Related information
•Checking tire pressure (p. 531)
• Tire direction of rotation (p. 526)
• Tread wear indicator (p. 527)
• Tire pressure monitoring system
* (p. 533)
• Tire sealing system (p. 546)
• Uniform Tire Quality Grading (p. 530)
• Tire terminology (p. 527)
• Tire sidewall designations (p. 528)
• Loading recommendations (p. 561)
Tire direction of rotation
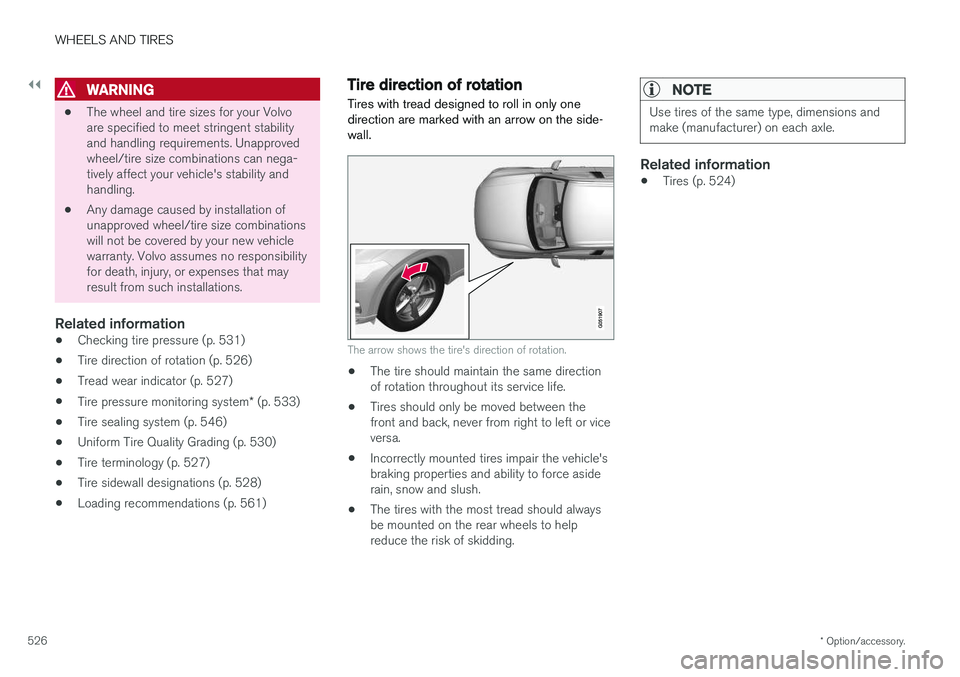
Tires with tread designed to roll in only one direction are marked with an arrow on the side-wall.
The arrow shows the tire's direction of rotation.
• The tire should maintain the same direction of rotation throughout its service life.
• Tires should only be moved between thefront and back, never from right to left or viceversa.
• Incorrectly mounted tires impair the vehicle'sbraking properties and ability to force asiderain, snow and slush.
• The tires with the most tread should alwaysbe mounted on the rear wheels to helpreduce the risk of skidding.
NOTE
Use tires of the same type, dimensions and make (manufacturer) on each axle.
Related information
•Tires (p. 524)
Page 529 of 662
WHEELS AND TIRES
}}
527
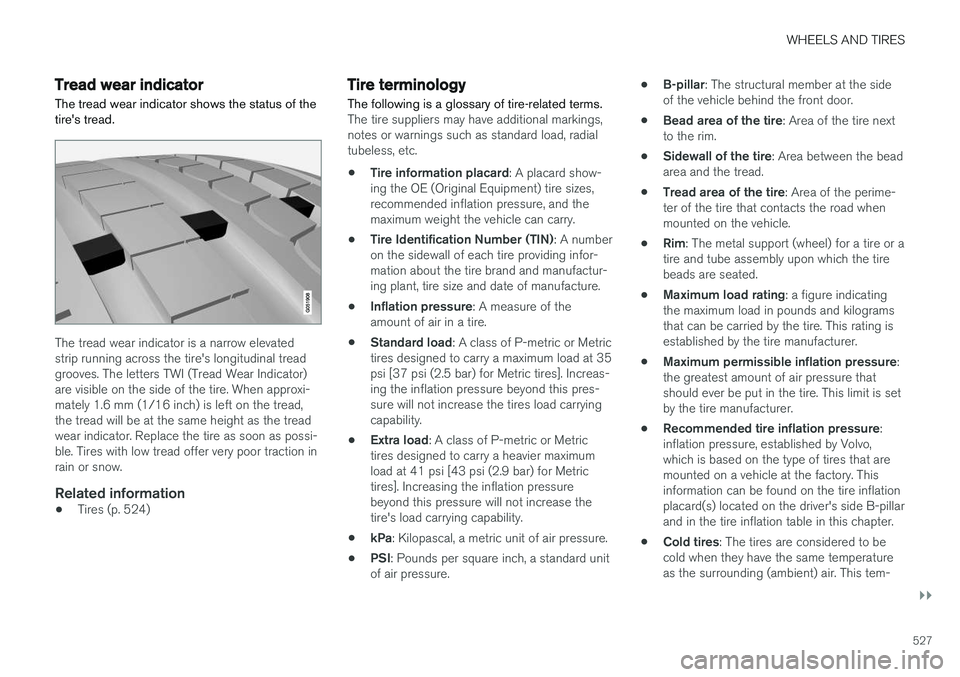
Tread wear indicatorThe tread wear indicator shows the status of the tire's tread.
The tread wear indicator is a narrow elevated strip running across the tire's longitudinal treadgrooves. The letters TWI (Tread Wear Indicator)are visible on the side of the tire. When approxi-mately 1.6 mm (1/16 inch) is left on the tread,the tread will be at the same height as the treadwear indicator. Replace the tire as soon as possi-ble. Tires with low tread offer very poor traction inrain or snow.
Related information
• Tires (p. 524)
Tire terminology The following is a glossary of tire-related terms.
The tire suppliers may have additional markings, notes or warnings such as standard load, radialtubeless, etc.
• Tire information placard
: A placard show-
ing the OE (Original Equipment) tire sizes,recommended inflation pressure, and themaximum weight the vehicle can carry.
• Tire Identification Number (TIN)
: A number
on the sidewall of each tire providing infor-mation about the tire brand and manufactur-ing plant, tire size and date of manufacture.
• Inflation pressure
: A measure of the
amount of air in a tire.
• Standard load
: A class of P-metric or Metric
tires designed to carry a maximum load at 35psi [37 psi (2.5 bar) for Metric tires]. Increas-ing the inflation pressure beyond this pres-sure will not increase the tires load carryingcapability.
• Extra load
: A class of P-metric or Metric
tires designed to carry a heavier maximumload at 41 psi [43 psi (2.9 bar) for Metrictires]. Increasing the inflation pressurebeyond this pressure will not increase thetire's load carrying capability.
• kPa
: Kilopascal, a metric unit of air pressure.
• PSI
: Pounds per square inch, a standard unit
of air pressure. •
B-pillar
: The structural member at the side
of the vehicle behind the front door.
• Bead area of the tire
: Area of the tire next
to the rim.
• Sidewall of the tire
: Area between the bead
area and the tread.
• Tread area of the tire
: Area of the perime-
ter of the tire that contacts the road whenmounted on the vehicle.
• Rim
: The metal support (wheel) for a tire or a
tire and tube assembly upon which the tirebeads are seated.
• Maximum load rating
: a figure indicating
the maximum load in pounds and kilogramsthat can be carried by the tire. This rating isestablished by the tire manufacturer.
• Maximum permissible inflation pressure
:
the greatest amount of air pressure thatshould ever be put in the tire. This limit is setby the tire manufacturer.
• Recommended tire inflation pressure
:
inflation pressure, established by Volvo,which is based on the type of tires that aremounted on a vehicle at the factory. Thisinformation can be found on the tire inflationplacard(s) located on the driver's side B-pillarand in the tire inflation table in this chapter.
• Cold tires
: The tires are considered to be
cold when they have the same temperatureas the surrounding (ambient) air. This tem-
Page 531 of 662
WHEELS AND TIRES
529
NOTE
The tire's load index and speed rating may not appear on the sidewall because they arenot required by law.
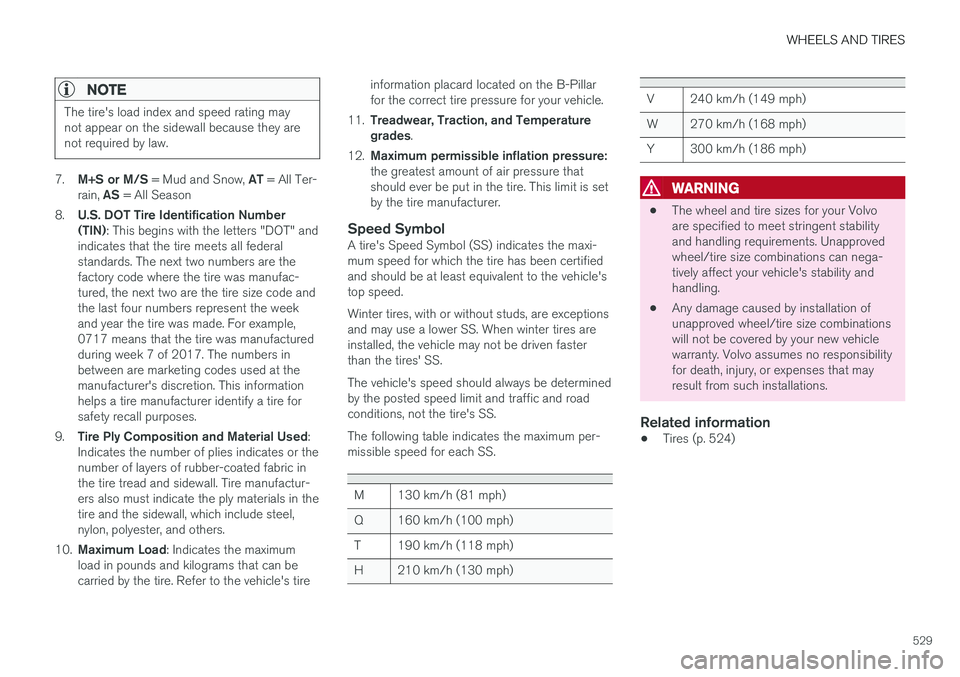
7.M+S or M/S = Mud and Snow, AT = All Ter-
rain, AS = All Season
8. U.S. DOT Tire Identification Number (TIN) : This begins with the letters "DOT" and
indicates that the tire meets all federalstandards. The next two numbers are thefactory code where the tire was manufac-tured, the next two are the tire size code andthe last four numbers represent the weekand year the tire was made. For example,0717 means that the tire was manufacturedduring week 7 of 2017. The numbers inbetween are marketing codes used at themanufacturer's discretion. This informationhelps a tire manufacturer identify a tire forsafety recall purposes.
9. Tire Ply Composition and Material Used :
Indicates the number of plies indicates or thenumber of layers of rubber-coated fabric inthe tire tread and sidewall. Tire manufactur-ers also must indicate the ply materials in thetire and the sidewall, which include steel,nylon, polyester, and others.
10. Maximum Load : Indicates the maximum
load in pounds and kilograms that can becarried by the tire. Refer to the vehicle's tire information placard located on the B-Pillarfor the correct tire pressure for your vehicle.
11. Treadwear, Traction, and Temperaturegrades .
12. Maximum permissible inflation pressure: the greatest amount of air pressure that should ever be put in the tire. This limit is setby the tire manufacturer.
Speed SymbolA tire's Speed Symbol (SS) indicates the maxi-mum speed for which the tire has been certifiedand should be at least equivalent to the vehicle'stop speed. Winter tires, with or without studs, are exceptions and may use a lower SS. When winter tires areinstalled, the vehicle may not be driven fasterthan the tires' SS. The vehicle's speed should always be determined by the posted speed limit and traffic and roadconditions, not the tire's SS. The following table indicates the maximum per- missible speed for each SS.
M 130 km/h (81 mph)
Q 160 km/h (100 mph)
T 190 km/h (118 mph)
H 210 km/h (130 mph)
V 240 km/h (149 mph)
W 270 km/h (168 mph)
Y 300 km/h (186 mph)
WARNING
• The wheel and tire sizes for your Volvo are specified to meet stringent stabilityand handling requirements. Unapprovedwheel/tire size combinations can nega-tively affect your vehicle's stability andhandling.
• Any damage caused by installation ofunapproved wheel/tire size combinationswill not be covered by your new vehiclewarranty. Volvo assumes no responsibilityfor death, injury, or expenses that mayresult from such installations.
Related information
•
Tires (p. 524)