2018 VOLVO V90 CROSS COUNTRY warning
[x] Cancel search: warningPage 565 of 662
LOADING, STORAGE AND PASSENGER COMPARTMENT
* Option/accessory.563
Under the floor hatch *
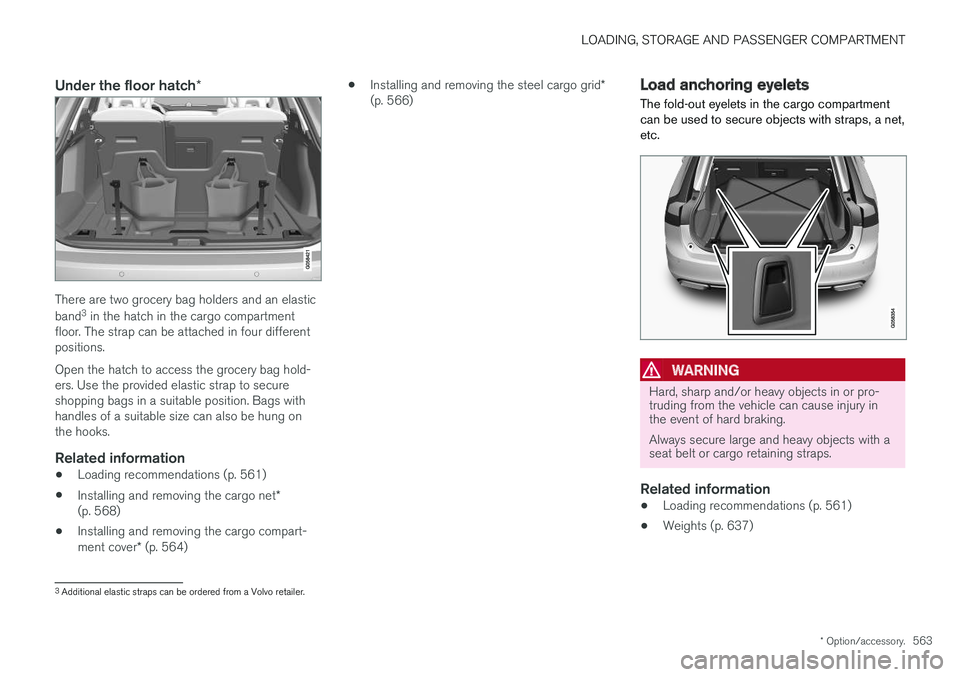
There are two grocery bag holders and an elastic band3
in the hatch in the cargo compartment
floor. The strap can be attached in four different positions. Open the hatch to access the grocery bag hold- ers. Use the provided elastic strap to secureshopping bags in a suitable position. Bags withhandles of a suitable size can also be hung onthe hooks.
Related information
• Loading recommendations (p. 561)
• Installing and removing the cargo net
*
(p. 568)
• Installing and removing the cargo compart- ment cover
* (p. 564) •
Installing and removing the steel cargo grid
*
(p. 566)
Load anchoring eyelets
The fold-out eyelets in the cargo compartment can be used to secure objects with straps, a net,etc.
WARNING
Hard, sharp and/or heavy objects in or pro- truding from the vehicle can cause injury inthe event of hard braking. Always secure large and heavy objects with a seat belt or cargo retaining straps.
Related information
• Loading recommendations (p. 561)
• Weights (p. 637)
3
Additional elastic straps can be ordered from a Volvo retailer.
Page 568 of 662
||
LOADING, STORAGE AND PASSENGER COMPARTMENT
* Option/accessory.
566 In vehicles equipped with the automatic cargo compartment cover
*, the cover will retract from
the fully open position to the partially retracted position every time the tailgate is opened, and willreturn to the fully open position when the tailgateis closed. The cover will detect if anythingobstructs its movement and automatically retract.
WARNING
Be aware of the risk of injury when opening and closing the electrically operated * cargo
compartment cover.
CAUTION
Do not place objects on top of the cargo compartment cover.
CAUTION
If large or bulky objects are placed in the cargo compartment, put the automatic * cargo
compartment cover in the fully retracted posi- tion to help prevent it from coming into con-tact with the object.
NOTE
Automatic operation of the cargo compart- ment cover may not be possible at low pas-senger compartment temperatures.
Retracting the cover
1. From the fully opened position:
Lift the cover's handle and pull it rearward to release the cover's attaching pins from thegrooves. Let the cover retract. From the partially retracted position:Grasp the handle and pull the cover out of the groves to the fully open position. Lift thehandle and pull it rearward to release thecover's attaching pins from the grooves. Letthe cover retract.
2. Let the cover retract with its attaching pins above the side panels until it stops in thefully retracted position.
Keep in mind that a retracted cover could reducerearward visibility.
Related information
• Installing and removing the cargo compart- ment cover
* (p. 564)
Installing and removing the steel
cargo grid *
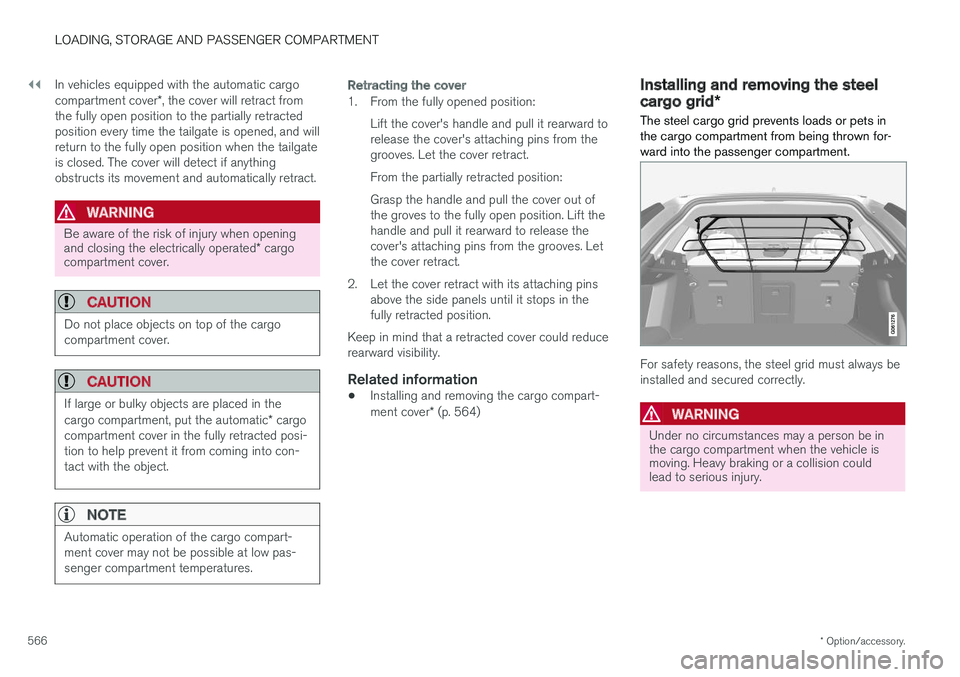
The steel cargo grid prevents loads or pets in the cargo compartment from being thrown for-ward into the passenger compartment.
For safety reasons, the steel grid must always be installed and secured correctly.
WARNING
Under no circumstances may a person be in the cargo compartment when the vehicle ismoving. Heavy braking or a collision couldlead to serious injury.
Page 570 of 662
LOADING, STORAGE AND PASSENGER COMPARTMENT
* Option/accessory.
568
Installing and removing the cargo
net *
The cargo net helps prevent objects in the cargo compartment from entering the passenger com-partment in the event of a sudden stop or hardbraking.
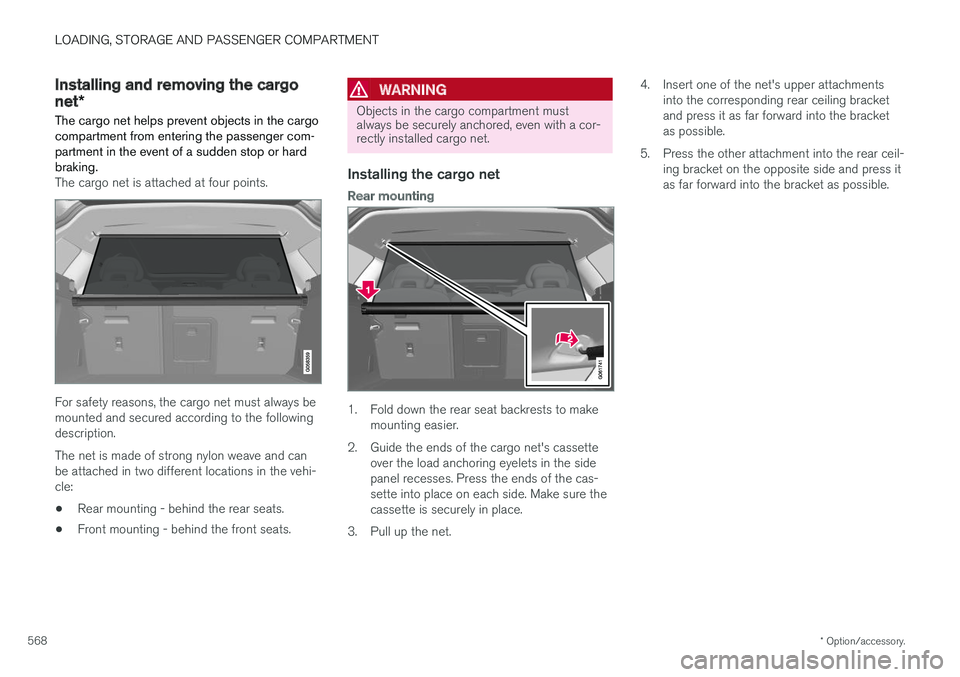
The cargo net is attached at four points.
For safety reasons, the cargo net must always be mounted and secured according to the followingdescription. The net is made of strong nylon weave and can be attached in two different locations in the vehi-cle:
• Rear mounting - behind the rear seats.
• Front mounting - behind the front seats.
WARNING
Objects in the cargo compartment must always be securely anchored, even with a cor-rectly installed cargo net.
Installing the cargo net
Rear mounting
1. Fold down the rear seat backrests to make
mounting easier.
2. Guide the ends of the cargo net's cassette over the load anchoring eyelets in the side panel recesses. Press the ends of the cas-sette into place on each side. Make sure thecassette is securely in place.
3. Pull up the net. 4. Insert one of the net's upper attachments
into the corresponding rear ceiling bracketand press it as far forward into the bracketas possible.
5. Press the other attachment into the rear ceil- ing bracket on the opposite side and press itas far forward into the bracket as possible.
Page 576 of 662
||
MAINTENANCE AND SERVICE
574
Related information
•Vehicle status (p. 576)
• Scheduling service and repairs (p. 576)
• Connecting equipment to the vehicle's data link connector (p. 36)
• Technician certification (p. 37)
• Climate control system service (p. 582)
• Maintenance of the brake system (p. 407)
• Engine compartment overview (p. 583)
Data transfer between vehicle andworkshop over Wi-Fi
Volvo workshops have a designated Wi-Fi net- work for secure data transfer between your vehi-cle and the workshop. Your visit to the workshopwill be easier and more effective when diagnos-tics information and software can be transferredover the workshop's network.
When you arrive at the workshop, your technician can connect your vehicle to the workshop's Wi-Finetwork to perform troubleshooting and down-load software. For this type of communication,the vehicle only connects to the workshop's net-work. The vehicle can only be connected to thedesignated workshop networks, not to any othernetwork, e.g. your home network.
Manual connection to workshop Wi-FiManual connection is usually performed by aservice technician. Because the technician usesthe buttons on your remote key to connect thevehicle, it is important that you bring a key withbuttons when taking the vehicle in to a workshop.Pressing the lock button on the remote key threetimes will connect the vehicle to the workshop'sWi-Fi network. When the car is connected to a Wi-Fi network, the
symbol appears in the center display.
WARNING
The vehicle may not be driven when it is con- nected to the workshop's networks and sys-tems.
Related information
• Handling system updates via Download Cen- ter (p. 575)
• Scheduling service and repairs (p. 576)
Page 581 of 662
MAINTENANCE AND SERVICE
}}
* Option/accessory.579
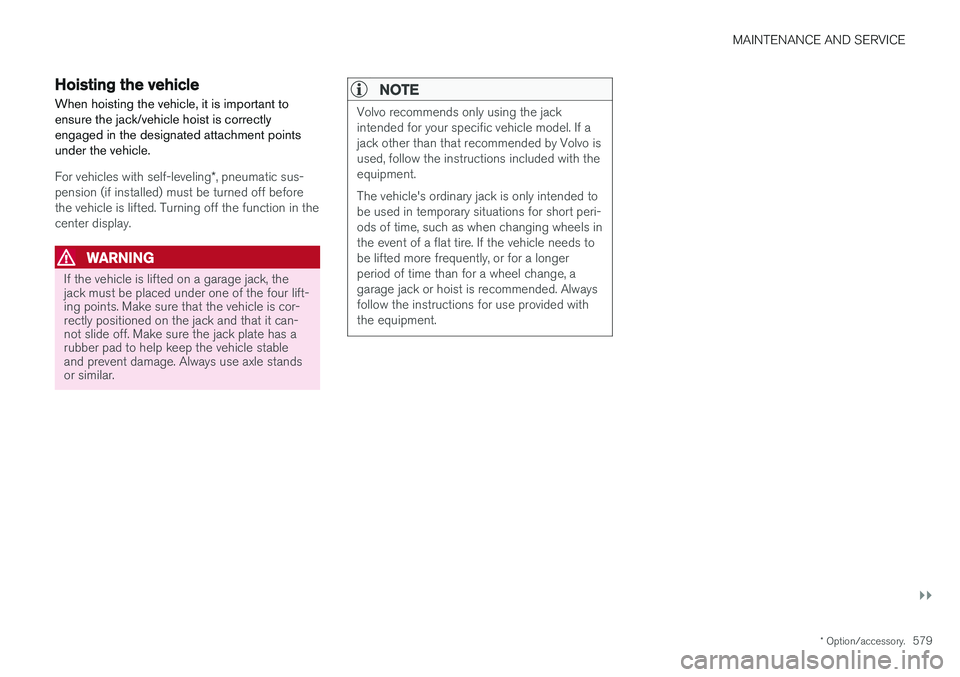
Hoisting the vehicle When hoisting the vehicle, it is important to ensure the jack/vehicle hoist is correctlyengaged in the designated attachment pointsunder the vehicle.
For vehicles with self-leveling *, pneumatic sus-
pension (if installed) must be turned off before the vehicle is lifted. Turning off the function in thecenter display.
WARNING
If the vehicle is lifted on a garage jack, the jack must be placed under one of the four lift-ing points. Make sure that the vehicle is cor-rectly positioned on the jack and that it can-not slide off. Make sure the jack plate has arubber pad to help keep the vehicle stableand prevent damage. Always use axle standsor similar.
NOTE
Volvo recommends only using the jack intended for your specific vehicle model. If ajack other than that recommended by Volvo isused, follow the instructions included with theequipment. The vehicle's ordinary jack is only intended to be used in temporary situations for short peri-ods of time, such as when changing wheels inthe event of a flat tire. If the vehicle needs tobe lifted more frequently, or for a longerperiod of time than for a wheel change, agarage jack or hoist is recommended. Alwaysfollow the instructions for use provided withthe equipment.
Page 583 of 662
MAINTENANCE AND SERVICE
}}
581
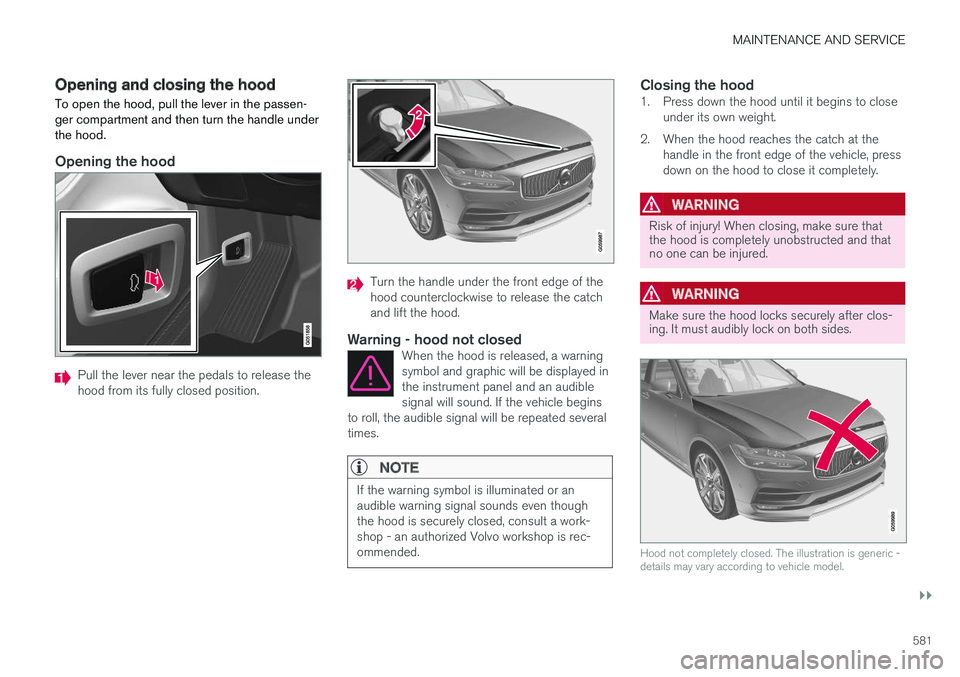
Opening and closing the hood To open the hood, pull the lever in the passen- ger compartment and then turn the handle underthe hood.
Opening the hood
Pull the lever near the pedals to release the hood from its fully closed position.
Turn the handle under the front edge of the hood counterclockwise to release the catchand lift the hood.
Warning - hood not closedWhen the hood is released, a warningsymbol and graphic will be displayed inthe instrument panel and an audiblesignal will sound. If the vehicle begins
to roll, the audible signal will be repeated severaltimes.
NOTE
If the warning symbol is illuminated or an audible warning signal sounds even thoughthe hood is securely closed, consult a work-shop - an authorized Volvo workshop is rec-ommended.
Closing the hood1. Press down the hood until it begins to close under its own weight.
2. When the hood reaches the catch at the handle in the front edge of the vehicle, press down on the hood to close it completely.
WARNING
Risk of injury! When closing, make sure that the hood is completely unobstructed and thatno one can be injured.
WARNING
Make sure the hood locks securely after clos- ing. It must audibly lock on both sides.
Hood not completely closed. The illustration is generic - details may vary according to vehicle model.
Page 584 of 662
||
MAINTENANCE AND SERVICE
* Option/accessory.
582
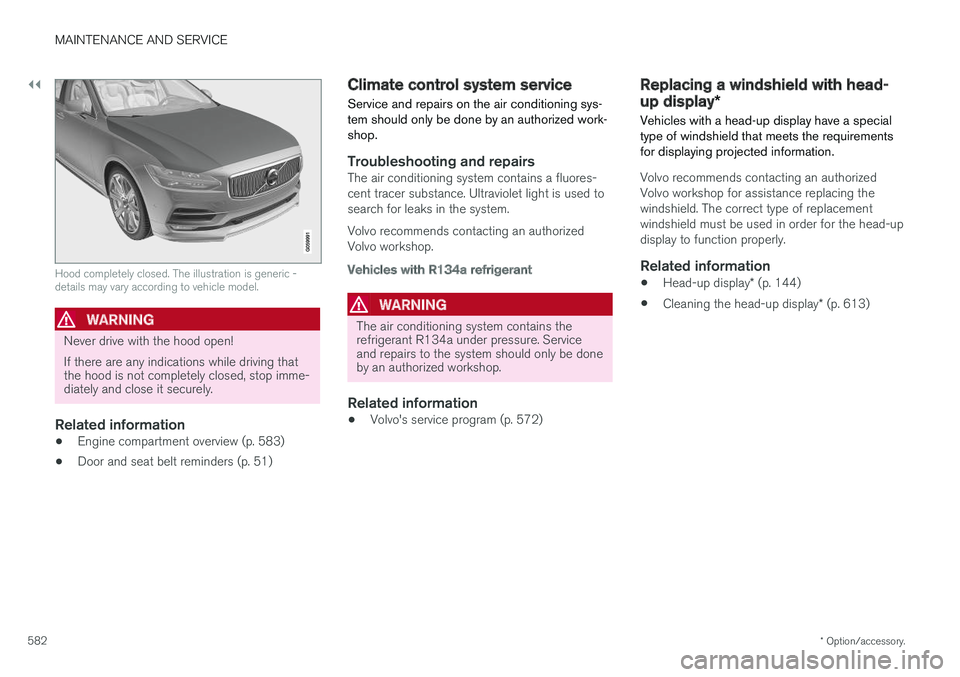
Hood completely closed. The illustration is generic - details may vary according to vehicle model.
WARNING
Never drive with the hood open! If there are any indications while driving that the hood is not completely closed, stop imme-diately and close it securely.
Related information
• Engine compartment overview (p. 583)
• Door and seat belt reminders (p. 51)
Climate control system service Service and repairs on the air conditioning sys- tem should only be done by an authorized work-shop.
Troubleshooting and repairsThe air conditioning system contains a fluores- cent tracer substance. Ultraviolet light is used tosearch for leaks in the system. Volvo recommends contacting an authorized Volvo workshop.
Vehicles with R134a refrigerant
WARNING
The air conditioning system contains the refrigerant R134a under pressure. Serviceand repairs to the system should only be doneby an authorized workshop.
Related information
•Volvo's service program (p. 572)
Replacing a windshield with head-
up display
*
Vehicles with a head-up display have a special type of windshield that meets the requirementsfor displaying projected information.
Volvo recommends contacting an authorized Volvo workshop for assistance replacing thewindshield. The correct type of replacementwindshield must be used in order for the head-updisplay to function properly.
Related information
• Head-up display
* (p. 144)
• Cleaning the head-up display
* (p. 613)
Page 585 of 662
MAINTENANCE AND SERVICE
}}
583
Engine compartment overview
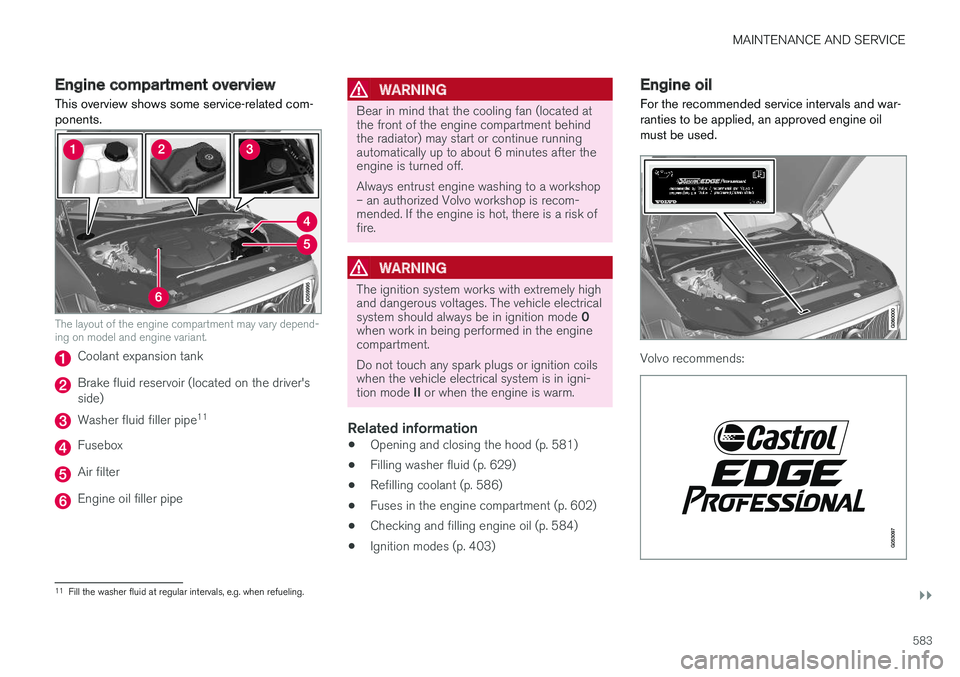
This overview shows some service-related com- ponents.
The layout of the engine compartment may vary depend- ing on model and engine variant.
Coolant expansion tank
Brake fluid reservoir (located on the driver's side)
Washer fluid filler pipe 11
Fusebox
Air filter
Engine oil filler pipe
WARNING
Bear in mind that the cooling fan (located at the front of the engine compartment behindthe radiator) may start or continue runningautomatically up to about 6 minutes after theengine is turned off. Always entrust engine washing to a workshop – an authorized Volvo workshop is recom-mended. If the engine is hot, there is a risk offire.
WARNING
The ignition system works with extremely high and dangerous voltages. The vehicle electrical system should always be in ignition mode
0
when work in being performed in the engine compartment. Do not touch any spark plugs or ignition coils when the vehicle electrical system is in igni- tion mode II or when the engine is warm.
Related information
• Opening and closing the hood (p. 581)
• Filling washer fluid (p. 629)
• Refilling coolant (p. 586)
• Fuses in the engine compartment (p. 602)
• Checking and filling engine oil (p. 584)
• Ignition modes (p. 403)
Engine oil
For the recommended service intervals and war- ranties to be applied, an approved engine oilmust be used.
Volvo recommends:
11 Fill the washer fluid at regular intervals, e.g. when refueling.