Page 161 of 396

LOCKS AND ALARM
159
Unlocking
The vehicle can be unlocked from inside the vehi- cle in two ways:• By pressing the unlock button
.
• The
front doors can be unlocked and
opened by pulling the door handle once. The rear doors can be unlocked by pulling the
door handle once and opened by pulling the handle again.
Locking
• Press the lock button after the front
doors have been closed.
• Press the lock button
: all of the doors
that are closed will lock.
• Each door can be locked individually with the lock button on the respective doors. The doormust be closed first.
Indicator light in the lock buttons
There are two versions of the central locking sys- tem that affect the indicator light in the driver'sdoor central locking button. If
only the driver's door has a central locking but-
ton:
• If the light is on, this indicates that all of the doors are locked.
If there are central locking buttons in both front
doors and electric lock buttons in the rear sidedoors: •
If a light is on in one of the buttons, thismeans that only that door is locked. Whenthe lights are on in all of the buttons, all ofthe doors are locked.
Lock buttons in the rear side doors
The indicator light in the button is on when the door is locked
The button in each of the rear side doors locks that door only. To unlock the door:
• The door can be unlocked by pulling the door handle once and opened by pulling the han-dle again.
Automatic relockingIf the doors are unlocked, the locks will automati-cally reengage (re-lock) and the alarm will re-armafter 2 minutes unless a door or the trunk hasbeen opened.
Automatic lockingWhen the vehicle starts to move, the doors andtrunk can be locked automatically. This feature can be turned on or off by pressing
MY CAR and
going to
Car settingsLock settingsAutomatic door locking.
Related information
• Locking/unlocking – from the outside (p. 157)
• Alarm – general information (p. 162)
• Remote key – functions (p. 147)
Page 162 of 396

LOCKS AND ALARM
160
Locking/unlocking – glove compartment
The glove compartment can only be locked and unlocked using the detachable key blade in theremote key. For information on removing the keyblade from the remote key, see Detachable keyblade – detaching/reinserting (p. 149).
Insert the key blade in the glove compart- ment lock.
Turn the key blade 90 degrees clockwise.
Remove the key blade from the lock.
Locking/unlocking – trunk The trunk can be locked, unlocked and opened in several ways.
Trunk unlock button on the remote key
–Press the trunk unlock button on the remote key.
Press once: This unlocks but does not open the
trunk. The trunk can then be opened by pressingthe rubber plate near the trunk lock. If the trunk isnot opened within two minutes it will automati-cally relock and the alarm will be rearmed. Press twice: This both unlocks the trunk and
pops it open slightly.
NOTE
Any excess weight (snow, etc.) on the trunk lid may prevent it from opening.
The alarm indicator (p. 162) light on the dash- board will stop flashing to indicate that the alarmis not monitoring the entire vehicle. When the trunk is closed again (which has to be done manually), it will have to be relocked andthe alarm rearmed by pressing the lock button onthe remote key.
Unlocking/opening the trunk from the passenger compartment
–Press the button on the lighting panel (1) to unlock and pop open the trunk
NOTE
The taillights will illuminate automatically for a short period when the trunk has beenopened.
Page 163 of 396

LOCKS AND ALARM
161
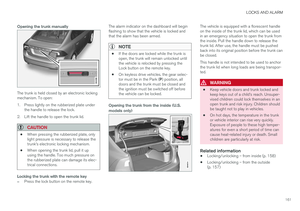
Opening the trunk manually
The trunk is held closed by an electronic locking mechanism. To open:
1. Press lightly on the rubberized plate underthe handle to release the lock.
2. Lift the handle to open the trunk lid.
CAUTION
• When pressing the rubberized plate, only light pressure is necessary to release thetrunk's electronic locking mechanism.
• When opening the trunk lid, pull it upusing the handle. Too much pressure onthe rubberized plate can damage its elec-trical connections.
Locking the trunk with the remote key
–Press the lock button on the remote key. The alarm indicator on the dashboard will begin flashing to show that the vehicle is locked andthat the alarm has been armed.
NOTE
•
If the doors are locked while the trunk is open, the trunk will remain unlocked untilthe vehicle is relocked by pressing theLock button on the remote key.
• On keyless drive vehicles, the gear selec- tor must be in the Park (
P) position, all
doors and the trunk must be closed and the ignition must be switched off beforethe vehicle can be locked.
Opening the trunk from the inside (U.S. models only)
The vehicle is equipped with a florescent handle on the inside of the trunk lid, which can be usedin an emergency situation to open the trunk fromthe inside. Pull the handle down to release thetrunk lid. After use, the handle must be pushedback into its original position before the trunk canbe closed. This handle is not intended to be used to anchor the trunk lid when long loads are being transpor-ted.
WARNING
• Keep vehicle doors and trunk locked and keep keys out of a child
Page 164 of 396

LOCKS AND ALARM
162
Alarm – general information
The alarm system provides a warning if an attempt is made to break into the vehicle. The alarm is automatically armed (p. 163) whenever the vehicle is locked with the remotekey. When armed, the alarm continuously monitors a number of points on the vehicle. The followingconditions will trigger the alarm:
• The hood is forced open.
• The trunk is forced open
• A door is forced open.
• The ignition slot is tampered with.
• An attempt is made to start the vehicle with a non-approved key (a key not coded to thecar's ignition).
• The battery is disconnected (while the alarmis armed).
• The siren is disconnected when the alarm isdisarmed.
A message will appear in the information displayif a fault should occur in the alarm system. Con-tact a trained and qualified Volvo service techni-cian.
NOTE
Do not attempt to repair any of the compo- nents in the alarm system yourself. This couldaffect the insurance policy on the vehicle.
Related information
• Alarm – turning off (p. 164)
• Alarm signal (p. 163)
• Alarm indicator (p. 162)
Alarm indicator
The status of the alarm system is indicated by the red indicator light on the dashboard (seeillustration):
• Indicator light off: the alarm is not armed (p. 163)
• The indicator light flashes at one-secondintervals: the alarm is armed
• The indicator light flashes rapidly before theremote key is inserted in the ignition slot and the ignition is put in mode
I: the alarm has
been triggered.
Related information
• Alarm – general information (p. 162)
• Alarm – turning off (p. 164)
• Alarm signal (p. 163)
Page 165 of 396

LOCKS AND ALARM
163
Alarm – arming/disarming The alarm system provides a warning if an attempt is made to break into the vehicle.
Arming the alarm
–Press the Lock button on the remote key. One long flash of the turn signals will confirmthat the alarm (p. 162) is armed.
Alarm confirmation settings can be changed in MY CAR , under
Car settingsLock settings
Keyless entry. For a description of the menu
system, see My Car – introduction (p. 71).
USA FCC ID: MAYDA 5823(3) This device complies with part 15 of the FCC rules. Operation is subject to the following condi-tions: (1) This device may not cause harmfulinterference, and (2) this device must accept anyinterference received, including interference thatmay cause undesired operation.
Canada IC: 4405A-DA 5823(3)
This device is subject to the following conditions:(1) this device may not cause interference, and(2) this device must accept any interference,including interference that may cause undesiredoperation of the device.
Disarming the alarm
–Press the Unlock button on the remote key.
> Two short flashes from the car's direction indicators confirm that the alarm has been deactivated and that all doors areunlocked.
Related information
• Alarm indicator (p. 162)
• Alarm signal (p. 163)
• Alarm – turning off (p. 164)
• Alarm-related functions (p. 164)
Alarm signal
An audible (p. 162) signal is given by a battery powered siren. The alarm cycle lasts for 30 sec-onds.
The visual alarm signal is given by flashing all turn signals for approximately 5 minutes or untilthe alarm is turned off.
Related information
• Alarm indicator (p. 162)
• Alarm – arming/disarming (p. 163)
• Alarm – turning off (p. 164)
Page 166 of 396

LOCKS AND ALARM
164
Alarm – turning off
The alarm system provides a warning if an attempt is made to break into the vehicle.
If the alarm is sounding, it can be stopped by pressing the Unlock button on the remote key orby inserting the remote key in the ignition slot.Two short flashes from the car's turn signals con-firm that the alarm has been turned off.
Related information
• Alarm indicator (p. 162)
• Alarm – arming/disarming (p. 163)
• Remote key – replacing the battery (p. 151)
Alarm-related functions
The following is general information regarding the alarm system in your vehicle.
Automatic re-armingIf the doors are unlocked, the locks will automati- cally re-engage (re-lock) and the alarm will re-arm after 2 minutes unless a door or the trunkhas been opened.
Remote key not functioningIf the remote key is not functioning properly, thealarm can be turned off and the vehicle can bestarted as follows:
1. Open the driver's door with the key blade.
>This will trigger the alarm.
2. To turn off the alarm, insert the remote key
into the ignition slot (also on vehicles with the optional keyless drive). 3. Start the engine.
Related information
•
Detachable key blade – unlocking (p. 150)
• Detachable key blade – general information(p. 149)
• Starting the engine (p. 250)
Page 167 of 396
D R I V E R S U P P O R T
Page 168 of 396

DRIVER SUPPORT
166
Stability system – introduction The Electronic Stability Control (ESC) system consists of a number of functions designed tohelp reduce wheel spin, counteract skidding andto generally help improve directional stability.
A pulsating sound will be audible when the system is actively operating and isnormal. Acceleration will also beslightly slower than normal.
WARNING
•The stability system (ESC) is intended to help improve driving safety but cannotdeal with all situations, or traffic, road andweather conditions. Speed and drivingstyle should always be adapted to thecurrent driving situation.
• ESC supplements, but can never replace,the driver's judgment and responsibilitywhen operating the vehicle. The driver isalways responsible for operating the vehi-cle in a safe manner in accordance withapplicable traffic regulations.
ESC consists of the following functions:
• Traction control
• Spin control
• Active Yaw Control
• Engine Drag Control •
Corner Traction Control
Traction Control (TC)
This function is designed to help reduce wheel spin at low speeds by transferring power from adrive wheel that begins to lose traction to thewheel on the opposite side of the vehicle (on thesame axle).
Spin Control (SC)
The SC function is designed to help prevent the drive wheels from spinning while the vehicle isaccelerating.
Active Yaw Control (AYC)
This function helps maintain directional stability, for example when cornering, by braking one ormore of the wheels if the vehicle shows a ten-dency to skid or slide laterally.
Corner Traction Control (CTC)
CTC compensates for understeering and helps provide additional stability when acceleratingthrough a curve by preventing the inside wheelfrom spinning. This is particularly useful whenaccelerating on a curving highway on-ramp. CTC is most effective if the stability system's Sport
mode is selected. See the section about
Sport mode.
Engine Drag Control (EDC)
EDC helps keep the engine running if the wheels show a tendency to lock, e.g., when shifting downin the Geartronic manual shifting mode or whileusing the engine's braking function on a slipperysurface. If the engine were to stop, power steer- ing would not function, making the vehicle moredifficult to steer.
Trailer Stability Assist (TSA)
The TSA helps stabilize a vehicle that is towing a trailer when the vehicle and trailer have begun tosway. See Trailer Stability Assist (TSA) (p. 285)for more information. This system is automatically deactivated if the driver selects
Sport mode.
Related information
•Stability system – operation (p. 167)
• Stability system – symbols and messages (p. 168)
• Trailer Stability Assist (TSA) (p. 285)