2018 VOLVO S60 INSCRIPTION on call
[x] Cancel search: on callPage 157 of 396
LOCKS AND ALARM
}}
* Option/accessory.155
Keyless drive * – key memory
When you leave the vehicle with a remote key in your possession and lock any door, the position of the driver's seat 2
and door mirrors will be
stored in the remote key's memory.
The next time a door is opened by a person with the same remote key in his/her possession, the
driver's seat and door mirrors will automatically move to the position that they were in when thedoor was most recently locked.
NOTE
If several people carrying remote keys approach the vehicle at the same time, thedriver's seat and door mirrors will assume thepositions they were in for the person whoopens the driver's door.
See also power seats (p. 76) for information on adjusting and storing the seat's position in theseat memory.
NOTE
If the vehicle is locked by pressing the button on one of the door handles or by pressing thelock button on the remote key, or if it is leftunlocked for more than 30 minutes, the keymemory function will be deactivated. To reactivate the key's memory:
• Unlock the vehicle by pulling a door han- dle with the remote key in your posses-sion or by pressing the unlock button onthe remote key.
Related information
•
Keyless drive
*– locking/unlocking (p. 153)
• Remote key – functions (p. 147)
Keyless drive
* – messages
If all of the remote keys are removed from the vehicle while the engine is running or if the igni-tion modes (p. 74) is in mode II and all of the
doors are closed, a message will appear in theinstrument panel display and an audible signalwill sound.
When at least one remote key has been returned to the car, the message will be erased in the dis-play and the audible signal will stop when:
• A door has been opened and closed
• The remote key has been inserted in theignition slot
• The
OK button has been pressed. For the
location of this button, see Information dis-play – menu controls (p. 108)
2 Power seats only
Page 161 of 396
LOCKS AND ALARM
159
Unlocking
The vehicle can be unlocked from inside the vehi- cle in two ways:• By pressing the unlock button
.
• The
front doors can be unlocked and
opened by pulling the door handle once. The rear doors can be unlocked by pulling the
door handle once and opened by pulling the handle again.
Locking
• Press the lock button after the front
doors have been closed.
• Press the lock button
: all of the doors
that are closed will lock.
• Each door can be locked individually with the lock button on the respective doors. The doormust be closed first.
Indicator light in the lock buttons
There are two versions of the central locking sys- tem that affect the indicator light in the driver'sdoor central locking button. If
only the driver's door has a central locking but-
ton:
• If the light is on, this indicates that all of the doors are locked.
If there are central locking buttons in both front
doors and electric lock buttons in the rear sidedoors: •
If a light is on in one of the buttons, thismeans that only that door is locked. Whenthe lights are on in all of the buttons, all ofthe doors are locked.
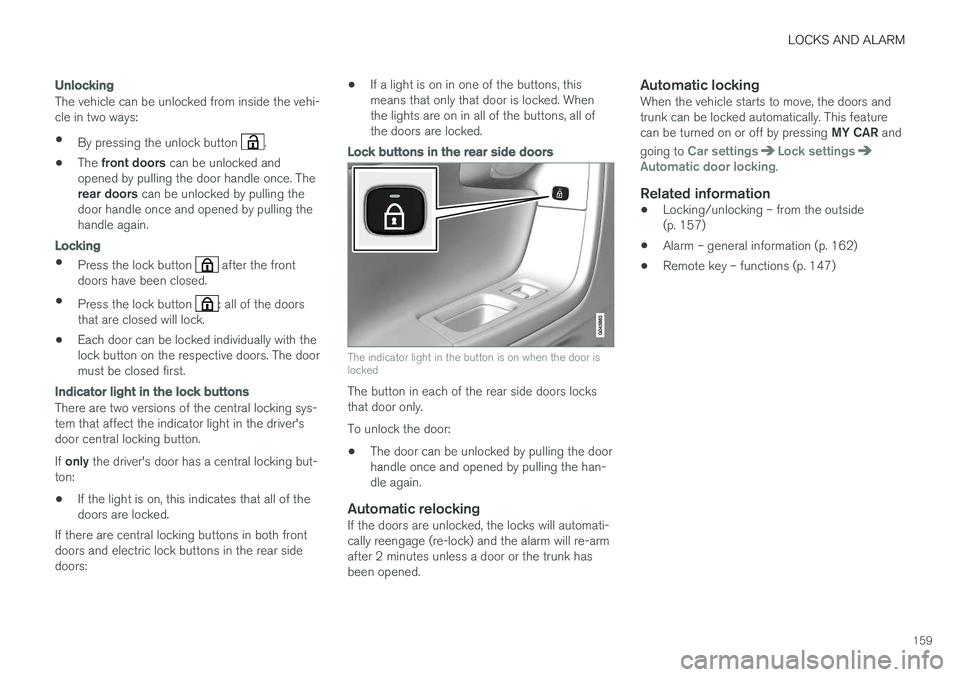
Lock buttons in the rear side doors
The indicator light in the button is on when the door is locked
The button in each of the rear side doors locks that door only. To unlock the door:
• The door can be unlocked by pulling the door handle once and opened by pulling the han-dle again.
Automatic relockingIf the doors are unlocked, the locks will automati-cally reengage (re-lock) and the alarm will re-armafter 2 minutes unless a door or the trunk hasbeen opened.
Automatic lockingWhen the vehicle starts to move, the doors andtrunk can be locked automatically. This feature can be turned on or off by pressing
MY CAR and
going to
Car settingsLock settingsAutomatic door locking.
Related information
• Locking/unlocking – from the outside (p. 157)
• Alarm – general information (p. 162)
• Remote key – functions (p. 147)
Page 162 of 396
LOCKS AND ALARM
160
Locking/unlocking – glove compartment
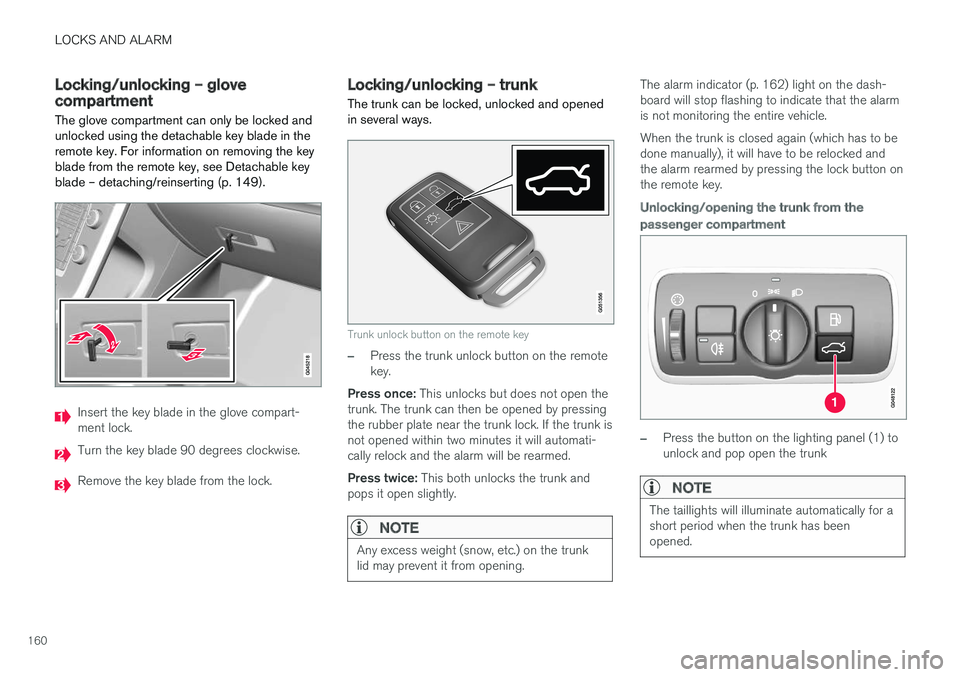
The glove compartment can only be locked and unlocked using the detachable key blade in theremote key. For information on removing the keyblade from the remote key, see Detachable keyblade – detaching/reinserting (p. 149).
Insert the key blade in the glove compart- ment lock.
Turn the key blade 90 degrees clockwise.
Remove the key blade from the lock.
Locking/unlocking – trunk The trunk can be locked, unlocked and opened in several ways.
Trunk unlock button on the remote key
–Press the trunk unlock button on the remote key.
Press once: This unlocks but does not open the
trunk. The trunk can then be opened by pressingthe rubber plate near the trunk lock. If the trunk isnot opened within two minutes it will automati-cally relock and the alarm will be rearmed. Press twice: This both unlocks the trunk and
pops it open slightly.
NOTE
Any excess weight (snow, etc.) on the trunk lid may prevent it from opening.
The alarm indicator (p. 162) light on the dash- board will stop flashing to indicate that the alarmis not monitoring the entire vehicle. When the trunk is closed again (which has to be done manually), it will have to be relocked andthe alarm rearmed by pressing the lock button onthe remote key.
Unlocking/opening the trunk from the passenger compartment
–Press the button on the lighting panel (1) to unlock and pop open the trunk
NOTE
The taillights will illuminate automatically for a short period when the trunk has beenopened.
Page 164 of 396
LOCKS AND ALARM
162
Alarm – general information
The alarm system provides a warning if an attempt is made to break into the vehicle. The alarm is automatically armed (p. 163) whenever the vehicle is locked with the remotekey. When armed, the alarm continuously monitors a number of points on the vehicle. The followingconditions will trigger the alarm:
• The hood is forced open.
• The trunk is forced open
• A door is forced open.
• The ignition slot is tampered with.
• An attempt is made to start the vehicle with a non-approved key (a key not coded to thecar's ignition).
• The battery is disconnected (while the alarmis armed).
• The siren is disconnected when the alarm isdisarmed.
A message will appear in the information displayif a fault should occur in the alarm system. Con-tact a trained and qualified Volvo service techni-cian.
NOTE
Do not attempt to repair any of the compo- nents in the alarm system yourself. This couldaffect the insurance policy on the vehicle.
Related information
• Alarm – turning off (p. 164)
• Alarm signal (p. 163)
• Alarm indicator (p. 162)
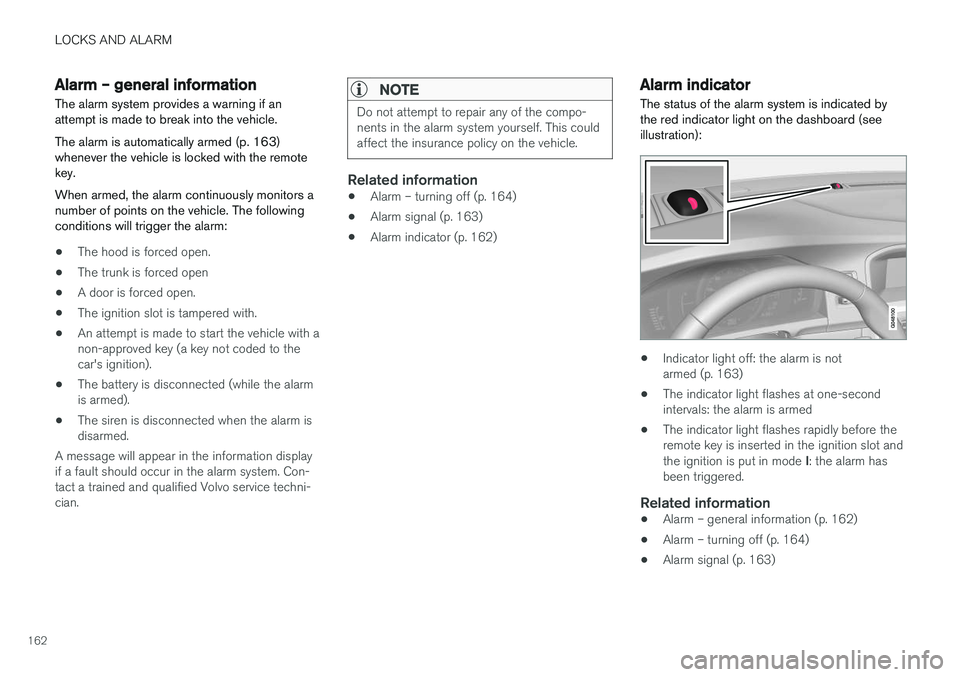
Alarm indicator
The status of the alarm system is indicated by the red indicator light on the dashboard (seeillustration):
• Indicator light off: the alarm is not armed (p. 163)
• The indicator light flashes at one-secondintervals: the alarm is armed
• The indicator light flashes rapidly before theremote key is inserted in the ignition slot and the ignition is put in mode
I: the alarm has
been triggered.
Related information
• Alarm – general information (p. 162)
• Alarm – turning off (p. 164)
• Alarm signal (p. 163)
Page 166 of 396

LOCKS AND ALARM
164
Alarm – turning off
The alarm system provides a warning if an attempt is made to break into the vehicle.
If the alarm is sounding, it can be stopped by pressing the Unlock button on the remote key orby inserting the remote key in the ignition slot.Two short flashes from the car's turn signals con-firm that the alarm has been turned off.
Related information
• Alarm indicator (p. 162)
• Alarm – arming/disarming (p. 163)
• Remote key – replacing the battery (p. 151)
Alarm-related functions
The following is general information regarding the alarm system in your vehicle.
Automatic re-armingIf the doors are unlocked, the locks will automati- cally re-engage (re-lock) and the alarm will re-arm after 2 minutes unless a door or the trunkhas been opened.
Remote key not functioningIf the remote key is not functioning properly, thealarm can be turned off and the vehicle can bestarted as follows:
1. Open the driver's door with the key blade.
>This will trigger the alarm.
2. To turn off the alarm, insert the remote key
into the ignition slot (also on vehicles with the optional keyless drive). 3. Start the engine.
Related information
•
Detachable key blade – unlocking (p. 150)
• Detachable key blade – general information(p. 149)
• Starting the engine (p. 250)
Page 168 of 396

DRIVER SUPPORT
166
Stability system – introduction The Electronic Stability Control (ESC) system consists of a number of functions designed tohelp reduce wheel spin, counteract skidding andto generally help improve directional stability.
A pulsating sound will be audible when the system is actively operating and isnormal. Acceleration will also beslightly slower than normal.
WARNING
•The stability system (ESC) is intended to help improve driving safety but cannotdeal with all situations, or traffic, road andweather conditions. Speed and drivingstyle should always be adapted to thecurrent driving situation.
• ESC supplements, but can never replace,the driver's judgment and responsibilitywhen operating the vehicle. The driver isalways responsible for operating the vehi-cle in a safe manner in accordance withapplicable traffic regulations.
ESC consists of the following functions:
• Traction control
• Spin control
• Active Yaw Control
• Engine Drag Control •
Corner Traction Control
Traction Control (TC)
This function is designed to help reduce wheel spin at low speeds by transferring power from adrive wheel that begins to lose traction to thewheel on the opposite side of the vehicle (on thesame axle).
Spin Control (SC)
The SC function is designed to help prevent the drive wheels from spinning while the vehicle isaccelerating.
Active Yaw Control (AYC)
This function helps maintain directional stability, for example when cornering, by braking one ormore of the wheels if the vehicle shows a ten-dency to skid or slide laterally.
Corner Traction Control (CTC)
CTC compensates for understeering and helps provide additional stability when acceleratingthrough a curve by preventing the inside wheelfrom spinning. This is particularly useful whenaccelerating on a curving highway on-ramp. CTC is most effective if the stability system's Sport
mode is selected. See the section about
Sport mode.
Engine Drag Control (EDC)
EDC helps keep the engine running if the wheels show a tendency to lock, e.g., when shifting downin the Geartronic manual shifting mode or whileusing the engine's braking function on a slipperysurface. If the engine were to stop, power steer- ing would not function, making the vehicle moredifficult to steer.
Trailer Stability Assist (TSA)
The TSA helps stabilize a vehicle that is towing a trailer when the vehicle and trailer have begun tosway. See Trailer Stability Assist (TSA) (p. 285)for more information. This system is automatically deactivated if the driver selects
Sport mode.
Related information
•Stability system – operation (p. 167)
• Stability system – symbols and messages (p. 168)
• Trailer Stability Assist (TSA) (p. 285)
Page 170 of 396

DRIVER SUPPORT
168
Stability system – symbols and messages
Symbols and messages in the maininstrument panel
A text message can be erased by pressing briefly the OK button on the turn signal lever.
Symbol Message Description
ESC Temporarily OFFThe ESC system function has been temporarily reduced due to high brake disc temperature. The function reacti- vates automatically when the brakes have cooled.
ESC Service requiredThe ESC system is not functioning properly.
• Stop the vehicle in a safe place, turn off the engine and restart it.
• If the message is still displayed when the engine has restarted, drive to an authorized Volvo workshop to have the system inspected.
and
"Message"Read the message in the instrument panel.
Steady glow for 2 seconds. The system is performing a self-diagnostic test.
Page 176 of 396
||
DRIVER SUPPORT
1742. Press and hold one of these buttons to
increase/decrease the speed in 1-mph or 1- km/h increments. Release the button whenyou have reached the desired speed.
NOTE
• A temporary increase in speed by press- ing the accelerator pedal, for less than1 minute (e.g. when passing another car),does not affect the current cruise controlsetting. The vehicle will automaticallyreturn to the previously set speed whenthe accelerator pedal is released.
• If one of the cruise control buttons iskept depressed for more than approx.1 minute cruise control is disengaged.The engine must then be switched off inorder to reset cruise control.
Related information
•Cruise control (CC) – introduction (p. 172)
• Cruise control (CC) – deactivating (p. 175)
Toggling between ACC and CC (standard Cruise Control)
Adaptive Cruise Control (ACC) helps the driver maintain a safe distance/time interval to the vehi-cle ahead.
Switching from ACC to CCThis may be useful if, for example, the radar sen- sor is obstructed in some way. See AdaptiveCruise Control – limitations (p. 185) for addi-tional information.
• Press and hold the
button; the symbol in
the instrument panel will switch from
to
.
> This activates the standard cruise control function (see Cruise control (CC) – introduc- tion (p. 172)).
WARNING
Switching from ACC to CC means that:
• Your vehicle will
no longer automatically
maintain a set distance to a vehicle ahead.
• Only the set speed will be maintained andthe driver will have to apply the brakeswhen needed.
Switching from CC to ACC
Switch off cruise control by pressing once or
twice as needed according to the instructions in the previous section "Turning ACC off com- pletely." The next time the system is switched on,ACC will be reactivated.
Related information
•
Adaptive Cruise Control – introduction(p. 175)
• Adaptive Cruise Control – function (p. 177)