2018 VOLVO S60 INSCRIPTION on call
[x] Cancel search: on callPage 263 of 396
STARTING AND DRIVING
* Option/accessory.261
Start/Stop – function
Function and use
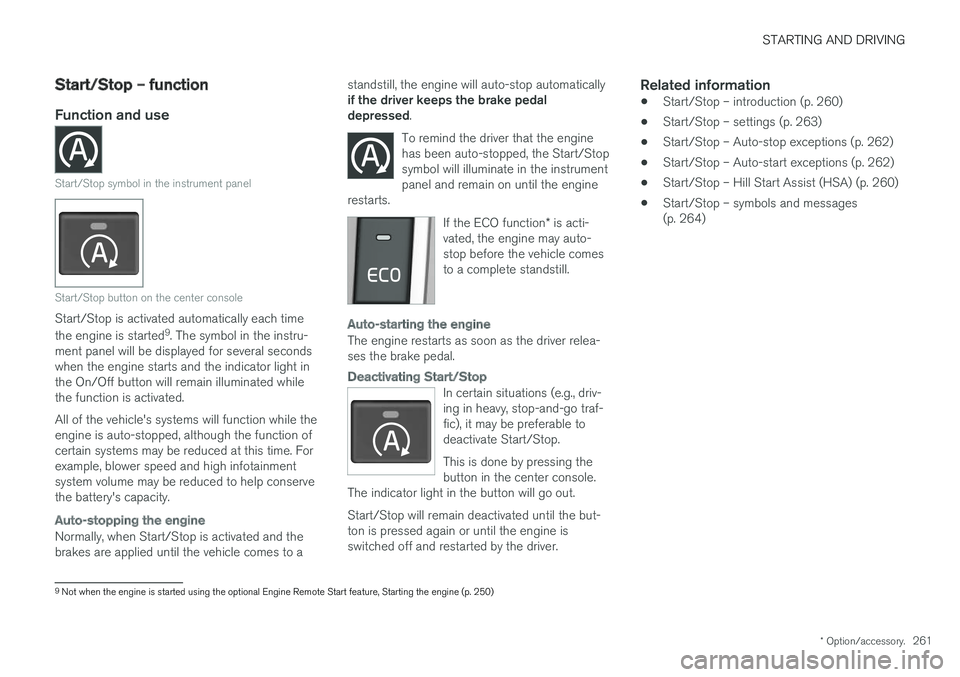
Start/Stop symbol in the instrument panel
Start/Stop button on the center console
Start/Stop is activated automatically each time the engine is started 9
. The symbol in the instru-
ment panel will be displayed for several seconds when the engine starts and the indicator light inthe On/Off button will remain illuminated whilethe function is activated. All of the vehicle's systems will function while the engine is auto-stopped, although the function ofcertain systems may be reduced at this time. Forexample, blower speed and high infotainmentsystem volume may be reduced to help conservethe battery's capacity.
Auto-stopping the engine
Normally, when Start/Stop is activated and the brakes are applied until the vehicle comes to a standstill, the engine will auto-stop automatically if the driver keeps the brake pedal depressed
.
To remind the driver that the enginehas been auto-stopped, the Start/Stopsymbol will illuminate in the instrumentpanel and remain on until the engine
restarts.
If the ECO function * is acti-
vated, the engine may auto- stop before the vehicle comesto a complete standstill.
Auto-starting the engine
The engine restarts as soon as the driver relea- ses the brake pedal.
Deactivating Start/Stop
In certain situations (e.g., driv- ing in heavy, stop-and-go traf-fic), it may be preferable todeactivate Start/Stop. This is done by pressing the button in the center console.
The indicator light in the button will go out. Start/Stop will remain deactivated until the but- ton is pressed again or until the engine isswitched off and restarted by the driver.
Related information
• Start/Stop – introduction (p. 260)
• Start/Stop – settings (p. 263)
• Start/Stop – Auto-stop exceptions (p. 262)
• Start/Stop – Auto-start exceptions (p. 262)
• Start/Stop – Hill Start Assist (HSA) (p. 260)
• Start/Stop – symbols and messages (p. 264)
9
Not when the engine is started using the optional Engine Remote Start feature, Starting the engine (p. 250)
Page 267 of 396
STARTING AND DRIVING
}}
* Option/accessory.265
ECO*
Eco is a function 10
developed by Volvo to give
the driver the opportunity to actively drive more economically and to help reduce fuel consump-tion.
IntroductionWhen Eco is activated, the fol- lowing functions are modified:
• The automatic transmission's shifting points
• The engine management system and accel- erator pedal response
• Stop/stop function (Start/Stop – introduction(p. 260)): the engine can auto-stop beforethe vehicle has come to a full stop
• Eco Coast functionality is activated: enginebraking is disabled
• Climate system settings: certain functions(e.g., air conditioning) will be temporarilyreduced or deactivated
NOTE
When Eco is activated, several climate system parameters are changed and the function ofcertain current-consuming systems will bereduced. Some of these functions can be restarted manually but full functionality will not berestored until Eco is deactivated.
Function
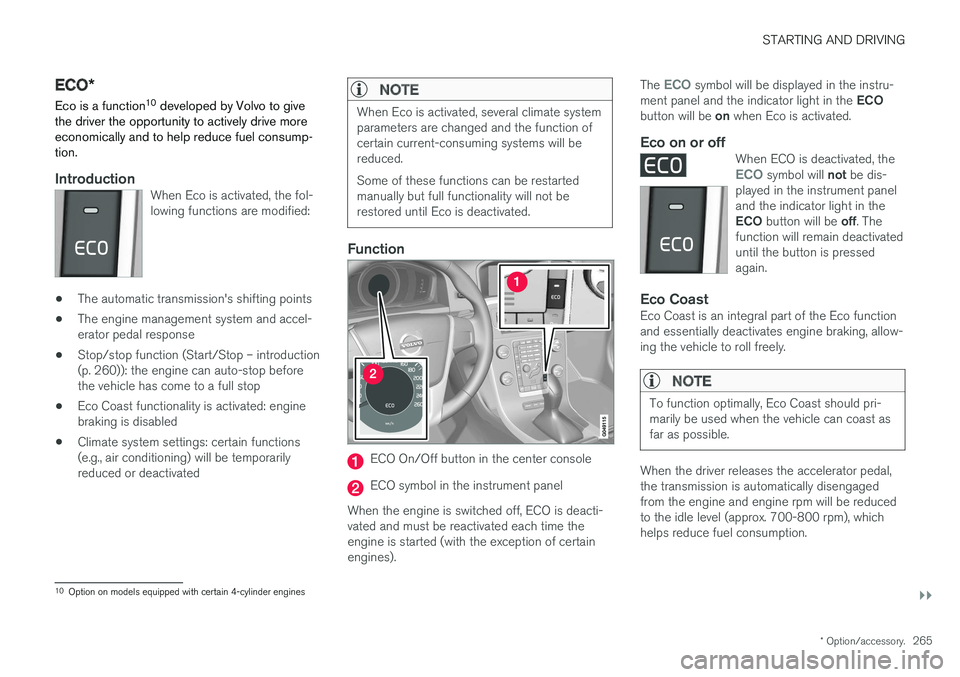
ECO On/Off button in the center console
ECO symbol in the instrument panel
When the engine is switched off, ECO is deacti- vated and must be reactivated each time theengine is started (with the exception of certainengines). The
ECO symbol will be displayed in the instru-
ment panel and the indicator light in the ECO
button will be on when Eco is activated.
Eco on or offWhen ECO is deactivated, theECO symbol will not be dis-
played in the instrument panel and the indicator light in the ECO button will be off. The
function will remain deactivated until the button is pressedagain.
Eco CoastEco Coast is an integral part of the Eco function and essentially deactivates engine braking, allow-ing the vehicle to roll freely.
NOTE
To function optimally, Eco Coast should pri- marily be used when the vehicle can coast asfar as possible.
When the driver releases the accelerator pedal, the transmission is automatically disengagedfrom the engine and engine rpm will be reducedto the idle level (approx. 700-800 rpm), whichhelps reduce fuel consumption.
10 Option on models equipped with certain 4-cylinder engines
Page 269 of 396

STARTING AND DRIVING
}}
267
All Wheel Drive (AWD)Your Volvo can be equipped with permanent All Wheel Drive, which means that power is distrib-uted automatically between the front and rearwheels.
Under normal driving conditions, most of the engine's power is directed to the front wheels.However, if there is any tendency for the frontwheels to spin, an electronically controlled cou-pling distributes power to the wheels that havethe best traction.
NOTE
The message AWD disabled Service
required will be appear in the information
display if an electrical fault should occur in the AWD system. A warning light will also illu-minate in the instrument panel. If this occurs,have the system checked by a trained andqualified Volvo service technician.
Related information
• Transmission – general information (p. 255)
Brakes – general The brake system is a hydraulic system consist- ing of two separate brake circuits. If a problemshould occur in one of these circuits, it is stillpossible to stop the vehicle with the other brakecircuit.
If the brake pedal must be depressed farther than normal and requires greater foot pressure,the stopping distance will be longer. A warning light in the instrument panel will light up to warn the driver that a fault has occurred. If this light comes on while driving or braking, stop immediately and check the brake fluid levelin the reservoir.
NOTE
Press the brake pedal hard and maintain pressure on the pedal – do not pump thebrakes.
WARNING
If the fluid level is below the
MIN mark in the
reservoir or if a brake system message is shown in the information display: DO NOT
DRIVE . Have the vehicle towed to a trained
and qualified Volvo service technician and have the brake system inspected.
Page 271 of 396
STARTING AND DRIVING
269
vehicle has been washed. Do this by braking gen- tly for a short period while the vehicle is moving.
Related information
•
Parking brake – general information (p. 271)
• Emergency Brake Assistance (EBA) (p. 270)
• Brakes – general (p. 267)
• Anti-lock braking system (ABS) (p. 269)
Brakes – symbols
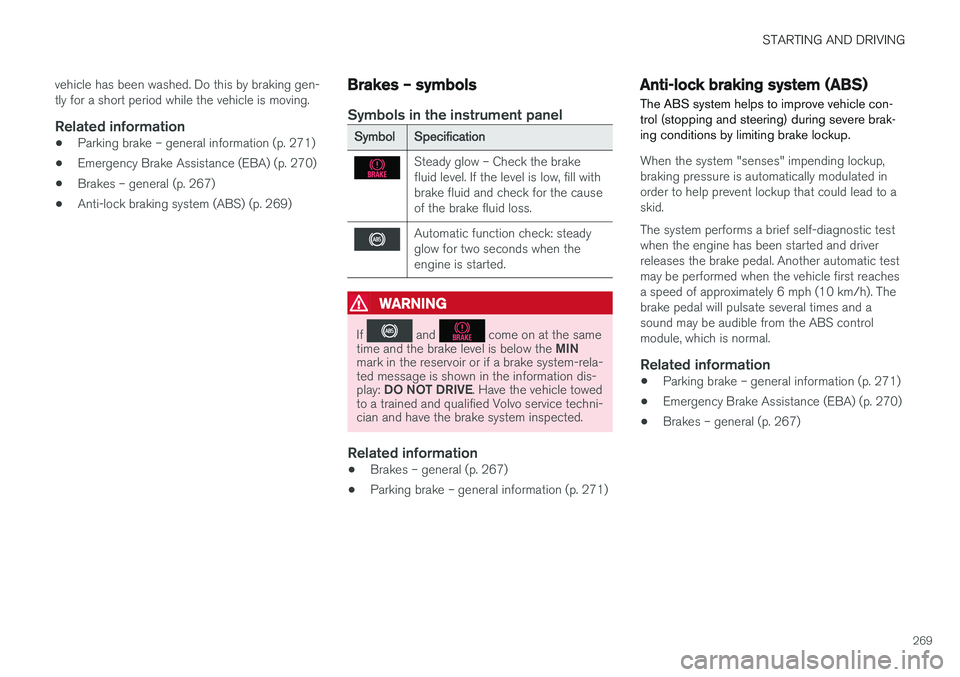
Symbols in the instrument panel
Symbol
Specification
Steady glow – Check the brake fluid level. If the level is low, fill withbrake fluid and check for the causeof the brake fluid loss.
Automatic function check: steady glow for two seconds when theengine is started.
WARNING
If and come on at the same
time and the brake level is below the MIN
mark in the reservoir or if a brake system-rela- ted message is shown in the information dis- play: DO NOT DRIVE . Have the vehicle towed
to a trained and qualified Volvo service techni- cian and have the brake system inspected.
Related information
• Brakes – general (p. 267)
• Parking brake – general information (p. 271)
Anti-lock braking system (ABS) The ABS system helps to improve vehicle con- trol (stopping and steering) during severe brak-ing conditions by limiting brake lockup.
When the system "senses" impending lockup, braking pressure is automatically modulated inorder to help prevent lockup that could lead to askid. The system performs a brief self-diagnostic test when the engine has been started and driverreleases the brake pedal. Another automatic testmay be performed when the vehicle first reachesa speed of approximately 6 mph (10 km/h). Thebrake pedal will pulsate several times and asound may be audible from the ABS controlmodule, which is normal.
Related information
• Parking brake – general information (p. 271)
• Emergency Brake Assistance (EBA) (p. 270)
• Brakes – general (p. 267)
Page 272 of 396
STARTING AND DRIVING
270
Brake lights The brake lights come on automatically when the brakes are applied.
Adaptive brake lights
The adaptive brake lights activate in the event of sudden braking or if the ABS system is activated.This function causes an additional taillight oneach side of the vehicle to illuminate to help alertvehicles traveling behind. The adaptive brake lights activate if:• The ABS system activates for more than approximately a half second
• In the event of sudden braking while thevehicle is moving at speeds above approxi-mately 6 mph (10 km/h).
When the vehicle has come to a stop, the brakelights and additional taillights remain on for aslong as the brake pedal is depressed or untilbraking force on the vehicle is reduced.
Related information
• Brakes – general (p. 267)
• Parking brake – general information (p. 271)
Emergency Brake Assistance (EBA)
EBA is designed to provide full brake effect immediately in the event of sudden, hard brak-ing.
Emergency Brake AssistanceThe EBA system is activated by the speed with which the brake pedal is depressed. When the EBA system is activated, the brake pedal will go down and pressure in the brake sys-tem immediately increases to the maximum level.Maintain full pressure on the brake pedal in orderto utilize the system completely. EBA is automati-cally deactivated when the brake pedal isreleased.
NOTE
• When the EBA system is activated, the brake pedal will go down and pressure inthe brake system immediately increasesto the maximum level. You must maintainfull pressure on the brake pedal in orderto utilize the system completely. Therewill be no braking effect if the pedal isreleased. EBA is automatically deacti-vated when the brake pedal is released.
• When the vehicle has been parked forsome time, the brake pedal may sinkmore than usual when the engine isstarted. This is normal and the pedal willreturn to its usual position when it isreleased.
Related information
• Parking brake – general information (p. 271)
• Brakes – general (p. 267)
• Anti-lock braking system (ABS) (p. 269)
Page 280 of 396
||
STARTING AND DRIVING
278cle inspection programs will make detection of misfueling easier, possibly resulting in emissiontest failure for misfueled vehicles.
NOTE
Some U.S. and Canadian gasolines contain an octane enhancing additive called methyl-cyclopentadienyl manganese tricarbonyl(MMT). If such fuels are used, your EmissionControl System performance may be affected,and the Check Engine Light (malfunctionindicator light) located on your instrumentpanel may light. If this occurs, please returnyour vehicle to a trained and qualified Volvoservice technician for service.
Gasoline containing alcohol and ethers, "Oxygenated fuels"
Some fuel suppliers sell gasoline containing "oxygenates" which are usually alcohols orethers. In some areas, state or local laws requirethat the service pump be marked indicating useof alcohols or ethers. However, there are areas inwhich the pumps are unmarked. If you are notsure whether there is alcohol or ethers in thegasoline you buy, check with the service stationoperator. To meet seasonal air quality standards,some areas require the use of "oxygenated" fuel. Volvo allows the use of the following "oxygen- ated" fuels; however, the octane ratings (p. 278)listed must still be met.
Alcohol – Ethanol
Fuels containing up to 10% ethanol by volume may be used. Ethanol may also be referred to asEthyl alcohol, or "Gasohol". Ethers – MTBE: Fuels containing up to 15% MTBE may be used.
MethanolDo not use gasolines containing methanol(methyl alcohol, wood alcohol). This practice canresult in vehicle performance deterioration andcan damage critical parts in the fuel system. Suchdamage may not be covered under the NewVehicle Limited Warranty.
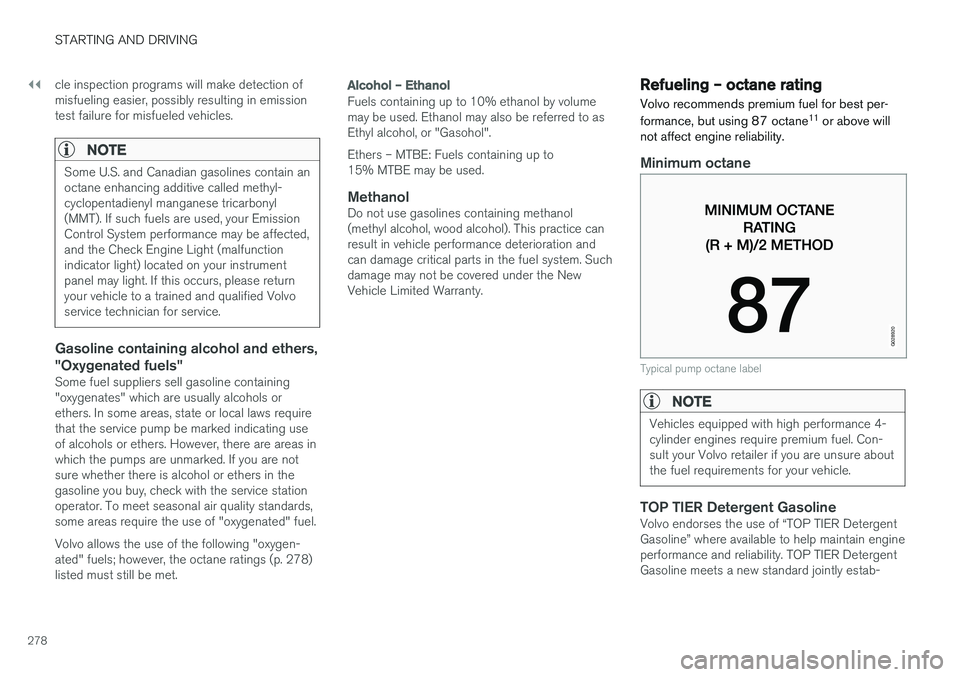
Refueling – octane rating Volvo recommends premium fuel for best per- formance, but using 87 octane
11
or above will
not affect engine reliability.
Minimum octane
G028920
Typical pump octane label
NOTE
Vehicles equipped with high performance 4- cylinder engines require premium fuel. Con-sult your Volvo retailer if you are unsure aboutthe fuel requirements for your vehicle.
TOP TIER Detergent GasolineVolvo endorses the use of “TOP TIER Detergent Gasoline” where available to help maintain engineperformance and reliability. TOP TIER DetergentGasoline meets a new standard jointly estab-
Page 284 of 396

||
STARTING AND DRIVING
* Option/accessory.
282 nents, altering emission system components or location or removing components, and/orrepeated use of leaded fuel.
NOTE
Unleaded fuel is required for vehicles with three-way catalytic converters.
Heated oxygen sensorsThe heated oxygen sensors monitor the oxygen content of the exhaust gases. Readings are fedinto a control module that continuously monitorsengine functions and controls fuel injection. Theratio of fuel to air into the engine is continuouslyadjusted for efficient combustion to help reduceharmful emissions.
Related information
•
Information displays – warning symbols(p. 69)
• Engine and cooling system (p. 275)
Economical driving
Better driving economy may be obtained by thinking ahead, avoiding rapid starts and stopsand adjusting the speed of your vehicle to imme-diate traffic conditions.
Economical driving conserves natural
resources
Observe the following rules: • Bring the engine to normal operating tem- perature as soon as possible by driving witha light foot on the accelerator pedal for thefirst few minutes of operation. A cold engineuses more fuel and is subject to increasedwear.
• Whenever possible, avoid using the vehiclefor driving short distances. This does notallow the engine to reach normal operatingtemperature.
• Drive carefully and avoid rapid accelerationand hard braking.
• Use the transmission's Drive (
D) position as
often as possible and avoid using kick-down.
• Using the transmission's Sport mode 13
may
increase fuel consumption somewhat. Use the transmission's Drive ( D) position as often
as possible. For additional information about Sport mode, see Transmission – Geartronic(p. 257). •
Using the engine's optional Eco function canhelp improve fuel economy. For additional information, see ECO
* (p. 265).
• Do not exceed posted speed limits.
• Avoid carrying unnecessary items (extra load) in the vehicle.
• Maintain correct tire pressure. Check tirepressure regularly (when tires are cold).
• Remove snow tires when threat of snow orice has ended.
• Note that roof racks, ski racks, etc, increaseair resistance and also fuel consumption.
• At highway driving speeds, fuel consumptionwill be lower with the air conditioning on andthe windows closed than with the air condi-tioning off and the windows open.
• Using the onboard trip computer's fuel con-sumption modes can help you learn how todrive more economically.
Other factors that decrease gas mileage are:
• Dirty air cleaner
• Dirty engine oil and clogged oil filter
• Dragging brakes
• Incorrect front end alignment
13
Certain models only.
Page 289 of 396

STARTING AND DRIVING
}}
287
Attaching the towing eyeletThe towing eyelet is located under the floor of the trunk. This eyelet must be screwedinto the positions provided on the right sidesof either the front or rear bumper (see illus-tration).
There are two different types of covers over the openings for the towing eyelet and theyhave to be opened differently.
• If the cover has a notch, insert a coin, etc.,into the notch and pry open the edge ofthe cover. Open the cover completely andremove it.
• If the cover has a mark along one edge orin a corner, press the mark while pryingout the opposite side/corner using a coin,etc. Open the cover and remove it.
Screw the towing eyelet in place, first by handand then using the tire iron until it is securely inplace. After the vehicle has been towed, the eyelet should be removed and returned to its storagelocation. Press the cover for the attachment point back into position.
WARNING
• When the vehicle is being towed, the igni- tion should be in mode
II (in mode I, all of
the vehicle's airbags are deactivated). For more information, see Ignition modes(p. 74)
• Never remove the remote key from theignition slot when the vehicle is beingtowed. For vehicles with keyless drive, theremote key must remain inside the vehi-cle.
• The power brakes and power steering willnot function when the engine is not run-ning. Approximately 5 times more pres-sure will be required on the brake pedaland the steering wheel will be considera-bly harder to turn.
• The towing eyelets must not be used forpulling the vehicle out of a ditch or forany similar purpose involving severestrain.
Related information
•Towing the vehicle (p. 286)
• Towing by tow truck (p. 287)
Towing by tow truck
When necessary, call for professional help from an authorized towing company. Volvo recom-mends the use of flat bed equipment.
CAUTION
In certain conditions, the towing eyelet may be used to pull the vehicle onto aflatbed tow truck.
• The vehicle's position and ground clear-ance determine if it can be pulled up ontoa flatbed tow truck using the towing eye-let.
• If the angle of the tow truck