Page 563 of 632

5638-2. Steps to take in an emergency
8
When trouble arises
YARIS_HV_OM_Europe_OM52J66E
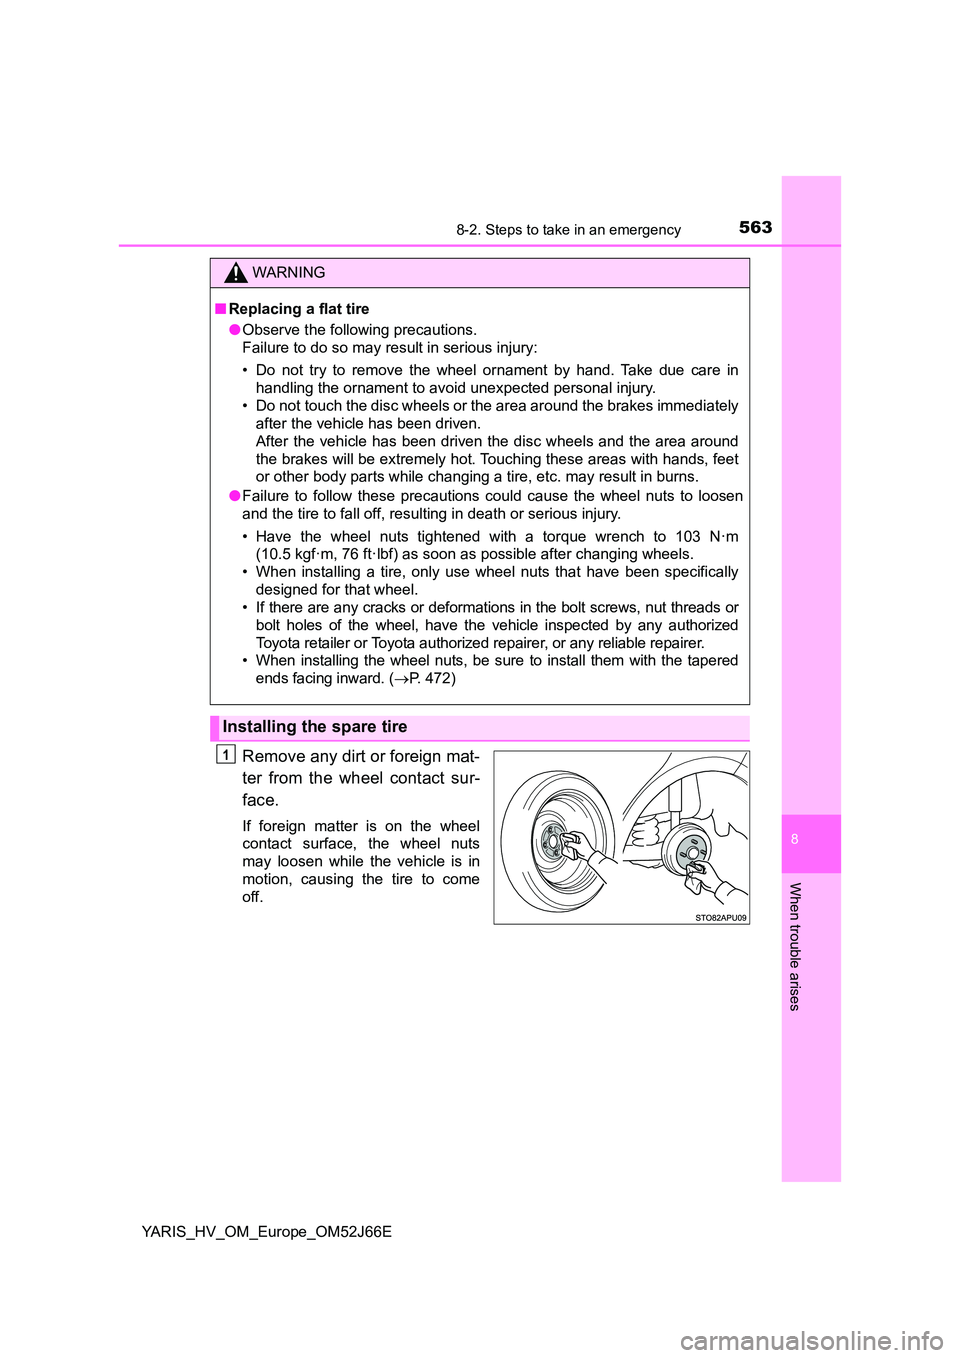
Remove any dirt or foreign mat-
ter from the wheel contact sur-
face.
If foreign matter is on the wheel
contact surface, the wheel nuts
may loosen while the vehicle is in
motion, causing the tire to come
off.
WARNING
■ Replacing a flat tire
● Observe the following precautions.
Failure to do so may result in serious injury:
• Do not try to remove the wheel ornament by hand. Take due care in
handling the ornament to avoid unexpected personal injury.
• Do not touch the disc wheels or the area around the brakes immediately
after the vehicle has been driven.
After the vehicle has been driven the disc wheels and the area around
the brakes will be extremely hot. Touching these areas with hands, feet
or other body parts while changing a tire, etc. may result in burns.
● Failure to follow these precautions could cause the wheel nuts to loosen
and the tire to fall off, resulting in death or serious injury.
• Have the wheel nuts tightened with a torque wrench to 103 N·m
(10.5 kgf·m, 76 ft·lbf) as soon as possible after changing wheels.
• When installing a tire, only use wheel nuts that have been specifically
designed for that wheel.
• If there are any cracks or deformations in the bolt screws, nut threads or
bolt holes of the wheel, have the vehicle inspected by any authorized
Toyota retailer or Toyota authorized repairer, or any reliable repairer.
• When installing the wheel nuts, be sure to install them with the tapered
ends facing inward. ( P. 4 7 2 )
Installing the spare tire
1
Page 564 of 632
5648-2. Steps to take in an emergency
YARIS_HV_OM_Europe_OM52J66E
Install the tire and loosely tighten each wheel nut by hand by
approximately the same amount.
When replacing a steel wheel
with a steel wheel (including a
compact spare tire), tighten the
wheel nuts until the tapered
portion comes into loose con-
tact with the disc wheel seat.
When replacing an aluminum
wheel with a compact spare
tire, tighten the wheel nuts until
the tapered portion comes into
loose contact with the disc
wheel seat.
When replacing an aluminum
wheel with an aluminum wheel,
turn the wheel nuts until the
washers come into contact with
the disc wheel.
2
Disc wheel seat
Tapered portion
Disc wheel seat
Tapered portion
Disc wheel
Washer
Page 565 of 632
5658-2. Steps to take in an emergency
8
When trouble arises
YARIS_HV_OM_Europe_OM52J66E
Lower the vehicle.
Firmly tighten each wheel nut
two or three times in the order
shown in the illustration.
Tightening torque:
103 N·m (10.5 kgf·m, 76 ft·lbf)
Do not use other tools or any addi-
tional leverage other than your
hands, such as a hammer, pipe or
your foot.
Vehicles with steel wheels (except vehicles with tire pressure warn-
ing system or compact spare tire)
Reinstall the wheel ornament.
Align the cutout of the wheel orna-
ment with the valve stem as
shown.
3
4
5
Page 566 of 632

5668-2. Steps to take in an emergency
YARIS_HV_OM_Europe_OM52J66E
Vehicles with aluminum wheels
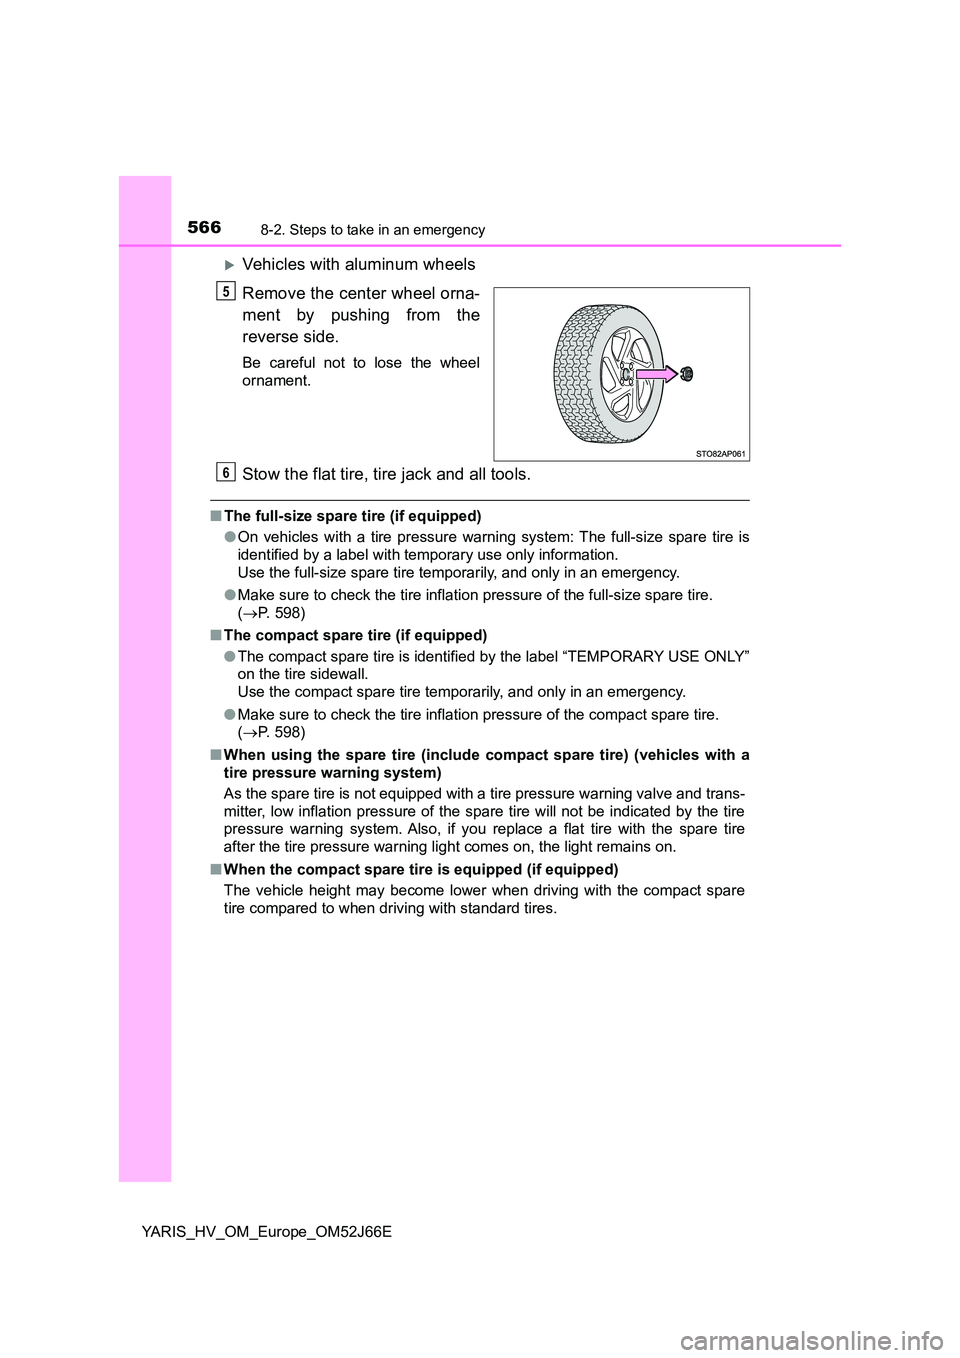
Remove the center wheel orna-
ment by pushing from the
reverse side.
Be careful not to lose the wheel
ornament.
Stow the flat tire, tire jack and all tools.
■ The full-size spare tire (if equipped)
● On vehicles with a tire pressure warning system: The full-size spare tire is
identified by a label with temporary use only information.
Use the full-size spare tire temporarily, and only in an emergency.
● Make sure to check the tire inflation pressure of the full-size spare tire.
( P. 598)
■ The compact spare tire (if equipped)
● The compact spare tire is identified by the label “TEMPORARY USE ONLY”
on the tire sidewall.
Use the compact spare tire temporarily, and only in an emergency.
● Make sure to check the tire inflation pressure of the compact spare tire.
( P. 598)
■ When using the spare tire (include compact spare tire) (vehicles with a
tire pressure warning system)
As the spare tire is not equipped with a tire pressure warning valve and trans-
mitter, low inflation pressure of the spare tire will not be indicated by the tire
pressure warning system. Also, if you replace a flat tire with the spare tire
after the tire pressure warning light comes on, the light remains on.
■ When the compact spare tire is equipped (if equipped)
The vehicle height may become lower when driving with the compact spare
tire compared to when driving with standard tires.
5
6
Page 567 of 632
5678-2. Steps to take in an emergency
8
When trouble arises
YARIS_HV_OM_Europe_OM52J66E
■ If you have a flat front tire on a road covered with snow or ice (vehicles
with compact spare tire)
Install the compact spare tire on one of the rear wheels of the vehicle. Per-
form the following steps and fit tire chains to the front tires:
Replace a rear tire with the compact spare tire.
Replace the flat front tire with the tire removed from the rear of the vehicle.
Fit tire chains to the front tires.
1
2
3
Page 570 of 632

5708-2. Steps to take in an emergency
YARIS_HV_OM_Europe_OM52J66E
NOTICE
■Do not drive the vehicle with a flat tire
Do not continue driving with a flat tire.
Driving even a short distance with a flat tire can damage the tire and the
wheel beyond repair.
■ Be careful when driving over bumps with the compact spare tire
installed on the vehicle (if equipped)
The vehicle becomes lower when driving with the compact spare tire com-
pared to when driving with standard tires. Be careful when driving over
uneven road surfaces.
■ Driving with tire chains and the compact spare tire (if equipped)
Do not fit tire chains to the compact spare tire.
Tire chains may damage the vehicle body and adversely affect driving per-
formance.
■ When replacing the tires (vehicles with a tire pressure warning system)
When removing or fitting the wheels, tire s or the tire pressure warning valve
and transmitter, contact any authorized Toyota retailer or Toyota authorized
repairer, or any reliable repairer as the tire pressure warning valve and
transmitter may be damaged if not handled correctly.
■ To avoid damage to the tire pressure warning valves and transmitters
(if equipped)
When a tire is repaired with liquid sealants, the tire pressure warning valve
and transmitter may not operate properly. If a liquid sealant is used, contact
any authorized Toyota retailer or Toyota authorized repairer, or any reliable
repairer or other qualified service shop as soon as possible.
Make sure to replace the tire pres sure warning valve and transmitter when
replacing the tire. ( P. 453)
Page 599 of 632
5999-1. Specifications
9
Vehicle specifications
YARIS_HV_OM_Europe_OM52J66E
16-inch tires
Compact spare tires
Tire size195/50R16 84V
Tire inflation pressure
(Recommended cold
tire inflation pressure)
Vehicle speed
Front wheel
kPa (kgf/cm2
or bar, psi)
Rear wheel
kPa (kgf/cm2 or
bar, psi)
160 km/h
(99 mph) or
less
220 (2.2, 32)200 (2.0, 29)
More than
160 km/h
(99 mph)
240 (2.4, 35)210 (2.1, 30)
Wheel size16 6J
Wheel nut torque103 N·m (10.5 kgf·m, 76 ft·lbf)
Tire sizeT125/70D16 96M
Tire inflation pressure
(Recommended cold
tire inflation pressure)
420 kPa (4.2 kgf/cm2 or bar, 60 psi)
Wheel size16 4T
Wheel nut torque103 N·m (10.5 kgf·m, 76 ft·lbf)
Page 628 of 632

628Alphabetical index
YARIS_HV_OM_Europe_OM52J66E
Side mirrors.............................. 196
Adjusting and folding............. 196
Heaters ................................. 390
Side turn signal lights ............. 236
Replacing light bulbs ............. 494
Turn signal lever ................... 236
Wattage................................. 600
Smart entry & start system ..... 164
Antenna location ................... 164
Entry functions .............. 152, 159
Starting the engine ................ 220
Warning lights ....................... 521
Warning messages ............... 166
Snow tires................................. 313
Spare tire .................................. 556
Inflation pressure .................. 598
Storage location .................... 557
Spark plug ................................ 596
Specifications .......................... 590
Speedometer .................... 114, 117
Steering lock .................... 218, 226
Steering wheel ......................... 191
Adjustment ............................ 191
Audio switches ...................... 322
Meter control switches .......... 126
Telephone switches .............. 360
“TRIP” switch ........................ 118
Stop lights
Emergency brake signal ....... 304
Replacing light bulbs ..... 496, 502
Wattage................................. 600
Storage feature ........................ 400
Stuck
If the vehicle becomes
stuck ................................... 587
Sun visors ................................ 407
Switches
Audio remote control
switches.............................. 322
Automatic High Beam
switch ................................. 287
Cruise control switch............. 299
Door lock switch.................... 156
Emergency flashers switch ... 506
EV drive mode switch ........... 229
Fog light switch ..................... 244
Hazard switch ....................... 506
Ignition switch ............... 216, 220
LDA (Lane Departure
Alert) switch ........................ 280
Light switch ........................... 238
Meter control switches .......... 126
Outside rear view mirror
switches.............................. 196
PCS (Pre-Crash Safety
system) switch .................... 266
Power door lock switch ......... 156
Power switch................. 216, 220
Power window switches ........ 199
Rear window defogger
switch ................................. 390