Page 420 of 672

4206-1. Using the air conditioning system
■Change the airflow mode
To change the airflow, press .
Air outlets are adjusted each time the button is pressed.
■
Other functions
● Switching between outside air and recirculated air modes
( P. 421)
● Defogging the windshield ( P. 4 2 1 )
● Defogging the back window (CrewMax models) ( P. 421)
● Defogging the outside rear view mirrors (if equipped) ( P. 421)
● Windshield wiper de-icer (if equipped) ( P. 4 2 2 )
Press .
Adjust the temperature setting.
To stop the operation, press .
■Automatic mode indicator
If the fan speed setting or air flow modes are operated, the au to-
matic mode indicator goes off. However, automatic mode for func -
tions other than that o perated are maintained.
■Adjusting the temperature for driver and passenger seats sep-
arately (“SYNC” mode)
The air conditioning system swi tches between individual and sim ul-
taneous mode each ti me is pressed.
Simultaneous mode (the i ndicator on is on):
The driver’s side temperature control dial can be used to adjus t the
temperature for driver’s and fr ont passenger’s side. At this ti me,
operate the front passenger’s side temperature control dial to enter
individual mode.
Individual mode (the indicator on is off):
The temperature for the driver’s and front passenger’s side can be
adjusted separately.
Using by automatic mode
1
2
3
Page 421 of 672

4216-1. Using the air conditioning system
6
Interior features
■Switching between outside air and recirculated air modes
Press .
The mode switches between outside air mode (introduces air from
outside the vehicle) (indicator off) and recirculated air mode (recy-
cles air inside the vehicle) (in dicator on) each time the butto n is
pressed.
■Defogging the windshield
Defoggers are used to defog the windshield and front side win-
dows.
Press .
Set the outside/recirculated air mode button to outside air mod e if the recir-
culated air mode is used. (It may switch automatically.) To def og the wind-
shield and the side windows early, turn the air flow and temper ature up.
To return to the previous mode, press again when the windshield is
defogged.
■
Defogging the back wi ndow (CrewMax models)
Defogger is used to defog the back window.
Press .
The defogger will automatically turn off after approximately 15 minutes.
■
Defogging the outside rear v iew mirrors (if equipped)
Defogger is used to defog to remove raindrops, dew and frost fr om
the outside rear view mirrors.
Press or .
The defogger will automatically turn off after approximately 15 minutes.
CrewMax models: Turning the back window defogger on will turn t he out-
side rear view mirror defoggers on.
Other functions
Page 422 of 672
4226-1. Using the air conditioning system
■Windshield wiper de -icer (if equipped)
This feature is used to prevent ice from building up on the win d-
shield and wiper blades.
Press or .
The defogger will automatically turn off after approximately 15 minutes.
Double Cab models: Turning the outside rear view mirror defogge rs on will
turn the windshield wiper de-icer on.
CrewMax models: Turning the back window defogger on will turn t he wind-
shield wiper de-icer on.
■
Location of a ir outlets
Air outlets and air volume
changes according to the
selected airflow mode.
*: CrewMax models
■
Adjusting the position of and opening and closing the air out-
lets
Front
Direct air flow to the left or right,
up or down.
Air outlets
*
Page 425 of 672

4256-1. Using the air conditioning system
6
Interior features
■Ventilation and air conditioning odors
●To let fresh air in, set the air conditioning system to the out side air mode.
● During use, various odors from inside and outside the vehicle m ay enter into
and accumulate in the air conditioning system. This may then ca use odor to
be emitted from the vents.
● To reduce potential odors from occurring:
• It is recommended that the air conditioning system be set to o utside air
mode prior to turning the vehicle off.
• The start timing of the blower may be delayed for a short peri od of time
immediately after the air conditioning system is started in aut omatic
mode.
■ Air conditioning filter
P. 513
WARNING
■To prevent the windshield from fogging up
● Do not use
during cool air operation in extremely humid weather.
The difference between the temperature of the outside air and t hat of the
windshield can cause the outer surface of the windshield to fog up, block-
ing your vision.
■ To prevent burns (vehicles with rear view mirror defoggers and wind-
shield wiper de-icer)
● Do not touch the rear view mirror surfaces when the outside rear view mir-
ror defoggers are on.
● Do not touch the glass at lower part of the windshield or to th e side of the
front pillars, when the windshield wiper de-icer is on.
NOTICE
■ To prevent battery discharge
Do not leave the air conditioning system on longer than necessa ry when the
engine is stopped.
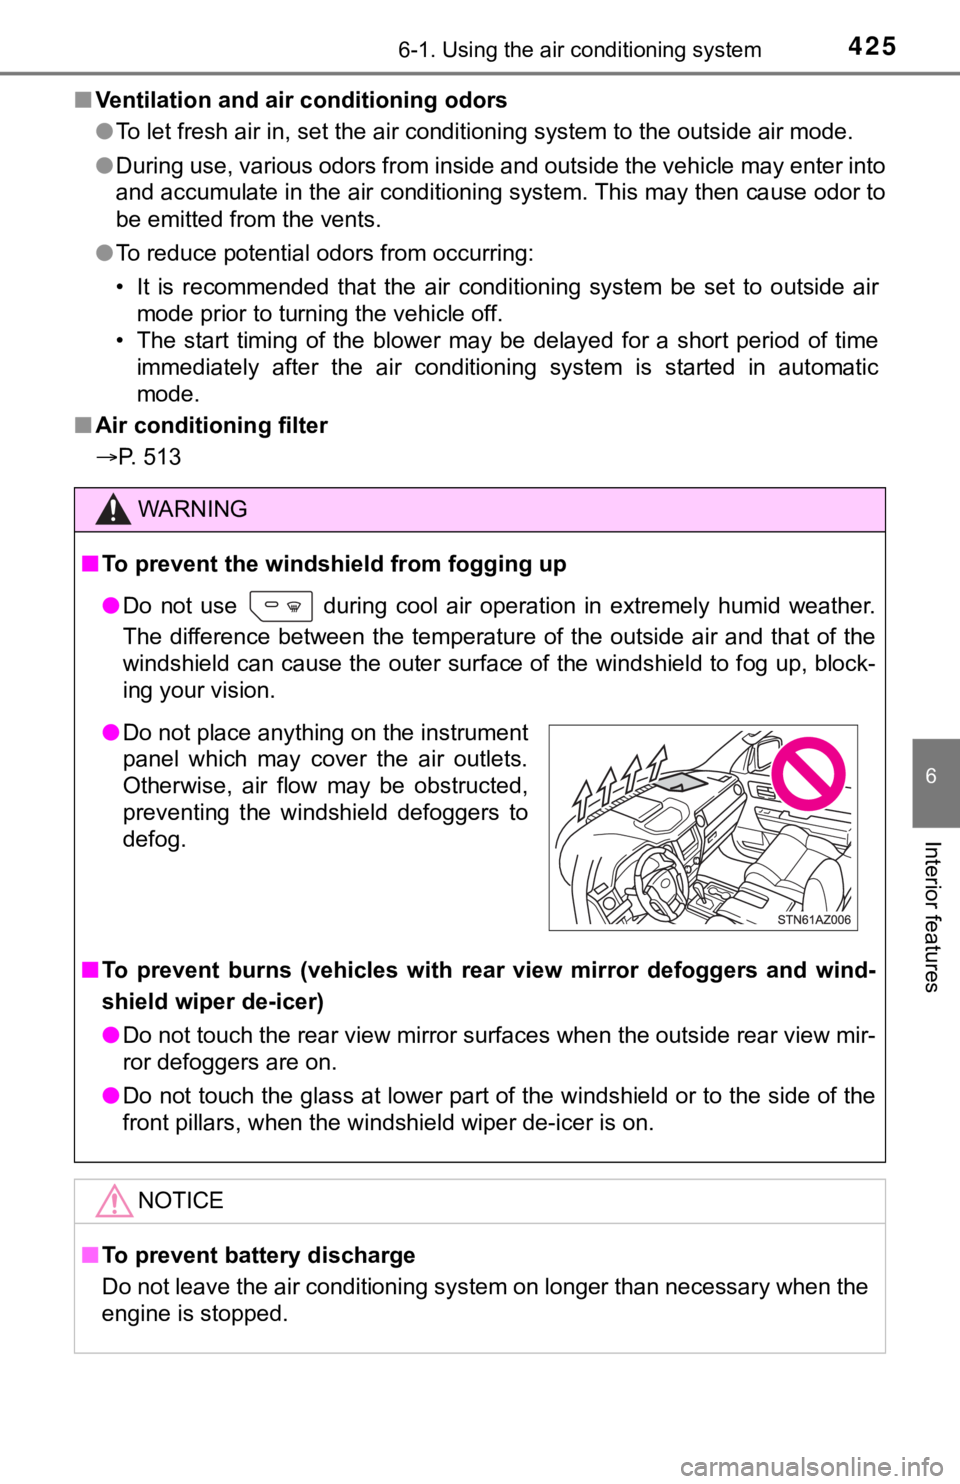
● Do not place anything on the instrument
panel which may cover the air outlets.
Otherwise, air flow may be obstructed,
preventing the windshield defoggers to
defog.
Page 457 of 672

4576-4. Using the other interior features
6
Interior features
■Programming the HomeLink®
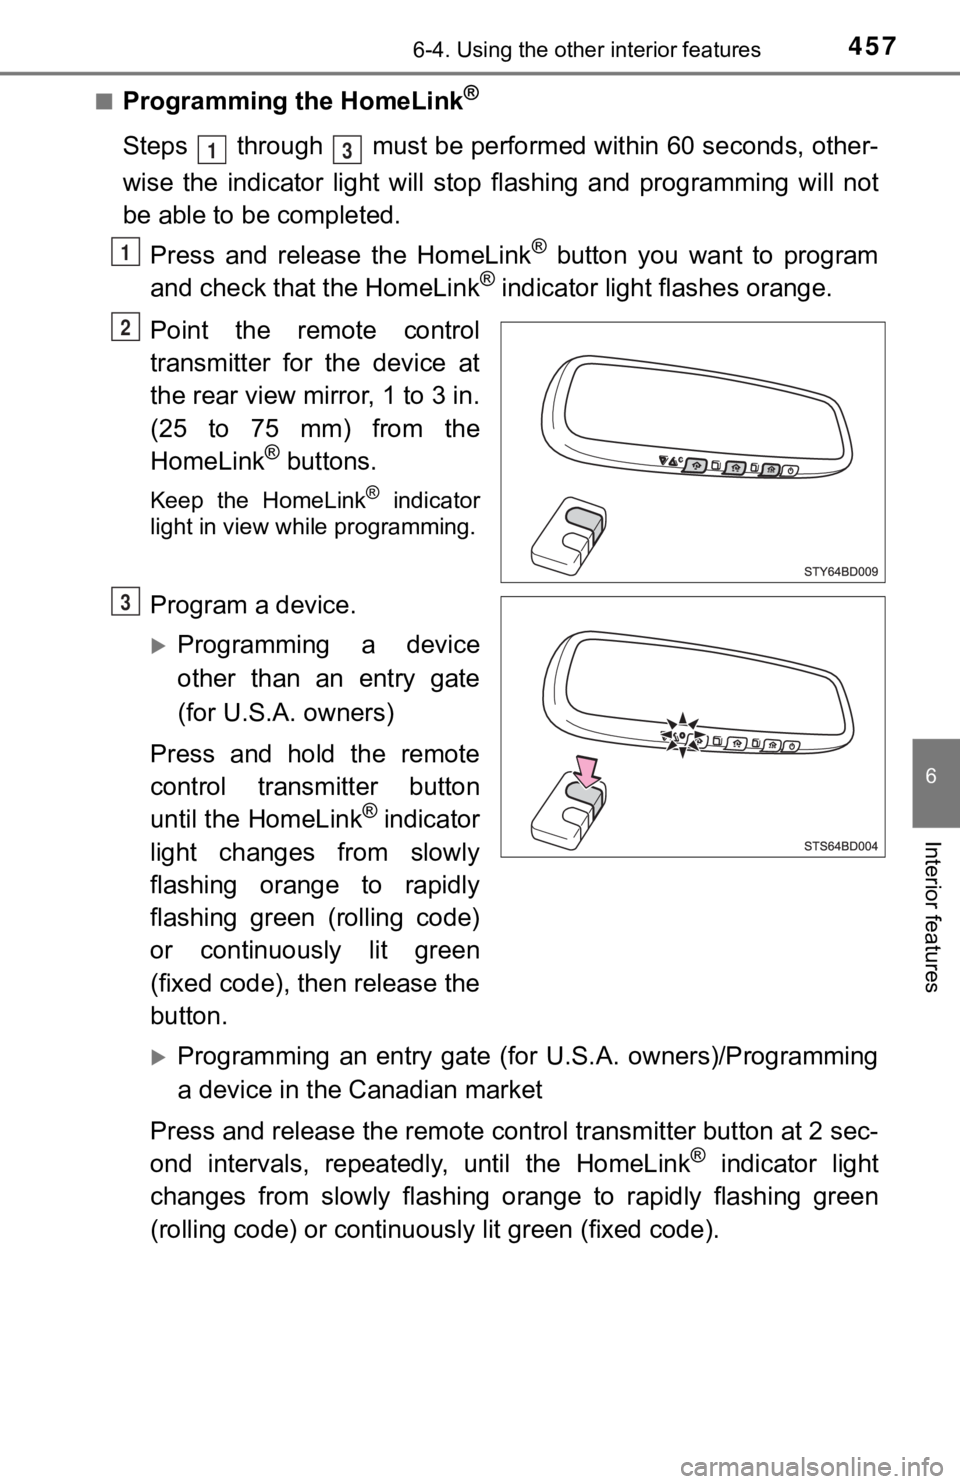
Steps through must be performed within 60 seconds, other-
wise the indicator light will st op flashing and programming wil l not
be able to be completed.
Press and release the HomeLink
® button you want to program
and check that the HomeLink® indicator light flashes orange.
Point the remote control
transmitter for the device at
the rear view mirror, 1 to 3 in.
(25 to 75 mm) from the
HomeLink
® buttons.
Keep the HomeLink® indicator
light in view while programming.
Program a device.
Programming a device
other than an entry gate
(for U.S.A. owners)
Press and hold the remote
control transmitter button
until the HomeLink
® indicator
light changes from slowly
flashing orange to rapidly
flashing green (rolling code)
or continuously lit green
(fixed code), then release the
button.
Programming an entry gate (for U.S.A. owners)/Programming
a device in the Canadian market
Press and release the remote con trol transmitter button at 2 sec-
ond intervals, repeatedly, until the HomeLink
® indicator light
changes from slowly flashing orange to rapidly flashing green
(rolling code) or continuous ly lit green (fixed code).
13
1
2
3
Page 465 of 672
4656-4. Using the other interior features
6
Interior features
Compass
To turn the compass on or off,
press and hold the button for 3
seconds.
: If equipped
The compass on the inside rear view mirror indicates the direc-
tion in which the vehicle is heading.
Operation
Displays and directions
DisplayDirection
NNorth
NENortheast
EEast
SESoutheast
SSouth
SWSouthwest
WWest
NWNorthwest
Page 468 of 672
4686-4. Using the other interior features
WARNING
■When driving the vehicle
Do not adjust the display. Be sure to adjust the display only when the vehi-
cle is stopped.
■ When doing the circling calibration
Be sure to secure a wide space, and watch out for people and ve hicles in
the neighborhood. Do not violate any local traffic rules while performing cir-
cling calibration.
NOTICE
■ To avoid the compass malfunctions
Do not place magnets or any metal objects near the inside rear view mirror.
Doing this may cause a malfunction of the compass sensor.
■ To ensure normal operation of the compass
● Do not perform circling calibration of the compass in a place w here the
earth’s magnetic field is subject to interference by artificial magnetic fields.
● During calibration, do not operate electric systems (moon roof, power win-
dows, etc.) as they may interfere with the calibration.
Page 659 of 672

659Alphabetical index
Installing CRS with top tether strap ........ 67, 70
Child safety ................................ 55
Airbag precautions .................. 42
Battery precautions ............... 584
Child restraint system ............. 56
How your child should wear the seat belt ................. 34
Installing child restraints ......... 60
Moon roof precautions .......... 157
Power back window precautions ......................... 153
Power window lock switch .... 147
Power window precautions ... 149
Rear door child-protector ...... 116
Removed wireless remote
control battery
precautions ......................... 517
Seat belt extender
precautions ........................... 37
Seat belt precautions .............. 59
Seat heater precautions........ 427
Child-protectors....................... 116
Cleaning ........................... 470, 473 Aluminum wheels.................. 471
Exterior ................................. 470
Interior................................... 473
Seat belts .............................. 474
Clock ......................................... 451
Compass .................................. 465
Condenser ................................ 490
Console box ............................. 435
Coolant ..................................... 488 Capacity ................................ 604
Checking ............................... 488
Preparing and checking before winter....................... 312
Cooling system ........................ 488 Engine overheating ............... 585
CRS ............................................. 56 Cruise control
Cruise control ....................... 266
Dynamic radar cruise control ...................... 252
Cup holders ............................. 442
Curtain shield airbags............... 39
Customizable features ............ 624
Daytime running light system.................................... 209
Deck hooks .............................. 449
Defogger Back window................. 414, 421
Outside rear view mirrors ........................ 414, 421
Windshield .................... 414, 421
Differential................................ 605
Dimensions .............................. 592
Dinghy towing.......................... 194
Display Drive information .................. 101
Dynamic radar
cruise control ...................... 252
LDA
(Lane Departure Alert) ....... 244
Multi-information display ....... 100
Trip information..................... 100
Warning message................. 555
Do-it-yourself maintenance .... 482
D