2018 TOYOTA PROACE eco
[x] Cancel search: ecoPage 326 of 516
 to unclip it.F Screw the towing eye in fully.F Install the towing arm.F Switch on the hazard warning lamps on the towed vehicle.F Move off")
326
F On the front bumper, press the cover (as shown above) to unclip it.F Screw the towing eye in fully.F Install the towing arm.F Switch on the hazard warning lamps on the towed vehicle.F Move off gently and drive slowly over a short distance only.
Towing your vehicle
F On the rear bumper, press the cover (as shown above) to unclip it.F Screw the towing eye in fully.F Install the towing arm.F Switch on the hazard warning lamps on the towed vehicle.F Move off gently and drive slowly over a short distance only.
Towing another vehicleGeneral
recommendations
Observe the legislation in force in your c o unt r y.Ensure that the weight of the towing vehicle is higher than that of the towed vehicle.The driver must remain at the wheel of the towed vehicle and must have a valid driving licence.When towing a vehicle with all four wheels on the ground, always use an approved towing arm; rope and straps are prohibited.The towing vehicle must move off gently.When towing a vehicle with the engine off, there is no longer any power assistance for braking or steering.In the following cases, you must always call on a professional recovery service:- vehicle broken down on a motor way or fast road,- four-wheel drive vehicle,- when it is not possible to put the gearbox into neutral, unlock the
steering, or release the parking brake,- towing with only two wheels on the
ground,- where there is no approved towing arm available...
In the event of a breakdown
Page 327 of 516

327
On vehicles fitted with Diesel engines, the fuel system must be primed if you run out of fuel.For all versions other than with AdBlue, refer to the corresponding engine compartment view.
Running out of fuel (Diesel)
For more information on Diesel misfuel prevention, refer to the corresponding section.
F Add at least five litres of Diesel fuel to the tank.F Open the bonnet.F If necessary, unclip the styling cover for access to the priming pump.F Squeeze and release the priming pump repeatedly until resistance is felt (there may be resistance at the first press).F Operate the starter to start the engine (if the engine does not start at the first attempt, wait around 15 seconds before trying again).F If the engine does not start after a few attempts, operate the priming pump again then start the engine.F Refit the styling cover and clip it in place.F Close the bonnet.
1.6 D engine
(except AdBlue)
If the engine does not start first time, don't keep trying but start the procedure again from the beginning.
AdBlue engine
F Fill the fuel tank with at least five litres of Diesel.F Switch on the ignition (without starting the engine).F Wait around 6 seconds and switch off the ignition.F Repeat the operation 10 times.F Operate the starter to run the engine.
Other engines
F Add at least five litres of Diesel fuel to the tank.F Open the bonnet.F If necessary, unclip the styling cover for access to the priming pump.F Squeeze and release the priming pump repeatedly until resistance is felt (there
may be resistance at the first press).F Operate the starter to start the engine (if the engine does not start at the first attempt, wait around 15 seconds before trying again).F If the engine does not start after a few attempts, operate the priming pump again then start the engine.F Refit the styling cover and clip it in place.F Close the bonnet.
8
In the event of a breakdown
Page 332 of 516
 for your vehicle are given in the registration document, as well as")
332
Engines
Engine characteristics
The engine characteristics (capacity, maximum power, maximum power speed, fuel, CO2 emissions...) for your vehicle are given in the registration document, as well as in sales brochures.These characteristics correspond to the values type-approved on a test bed, under conditions defined in European legislation (Directive 1999/99/EC).For more information, contact an authorized Toyota dealer or repairer, or another duly qualified and equipped professional.
Weights
The kerb weight is equal to the unladen weight + driver (75 kg).The GTW and towed load values indicated apply up to a maximum altitude of 1 000 metres; the towed load mentioned must be reduced by 10 % for every additional 1 000 metres.The weight of the braked trailer can be increased, within the GTW limit, on condition that the GV W of the towing vehicle is reduced by the same amount.The recommended nose weight is the vertical load on the towbar ball (removable with or without tools).
High ambient temperatures may result in a reduction in the per formance of the vehicle to protect the engine; when the ambient temperature is higher than 37 °C, limit the towed weight.
If the ambient temperature is high, it is recommended that the engine be allowed to idle for 1 to 2 minutes after the vehicle comes to a stop, to facilitate its cooling.
Towing with a lightly loaded vehicle can adversely affect roadholding.Braking distances are increased when towing a trailer.Never exceed 60 mph (100 km/h) when towing (comply with the legislation in force in your country).
GV W: gross vehicle weight, the maximum authorised vehicle weight.GT W: gross train weight, the maximum authorised weight of vehicle plus trailer.
Weights and towed
loads
The maximum weights and towed loads for your vehicle are given are given in the registration document, as well as in sales brochures.These values are also present on the manufacturer's plate or label.For more information, contact an authorized Toyota dealer or repairer, or another duly qualified and equipped professional.
Technical data
Page 338 of 516

If an impact is detected by the airbag control unit, and independently of the deployment of any airbags, an emergency call is made automatically.
Lo")
338
ERA-GLONASS emergency call system (if equipped)
If an impact is detected by the airbag control unit, and independently of the deployment of any airbags, an emergency call is made automatically.
Localised Emergency Call
In an emergency, press this button for more than 2 seconds.Flashing of the green indicator lamp and a voice message confirm that the call has
been made to the "Localised Emergency Call"* centre.
Pressing this button again immediately cancels the call.The green indicator lamp goes off.At any time, pressing this button for more than 8 seconds cancels the call.
The green indicator lamp remains on (without flashing) when communication is established.It goes off at the end of the call.
This call is dealt with by the "Localised Emergency Call" centre, which receives locating information from the vehicle and can send a detailed alert to the appropriate emergency services.In countries in which a centre is not operational, or when the locating service has been expressly declined, the call is dealt with directly by the emergency services (112) without the vehicle location.* These services are subject to conditions and availability.
Consult a Toyota dealer.
Audio and Telematics
Page 339 of 516
339
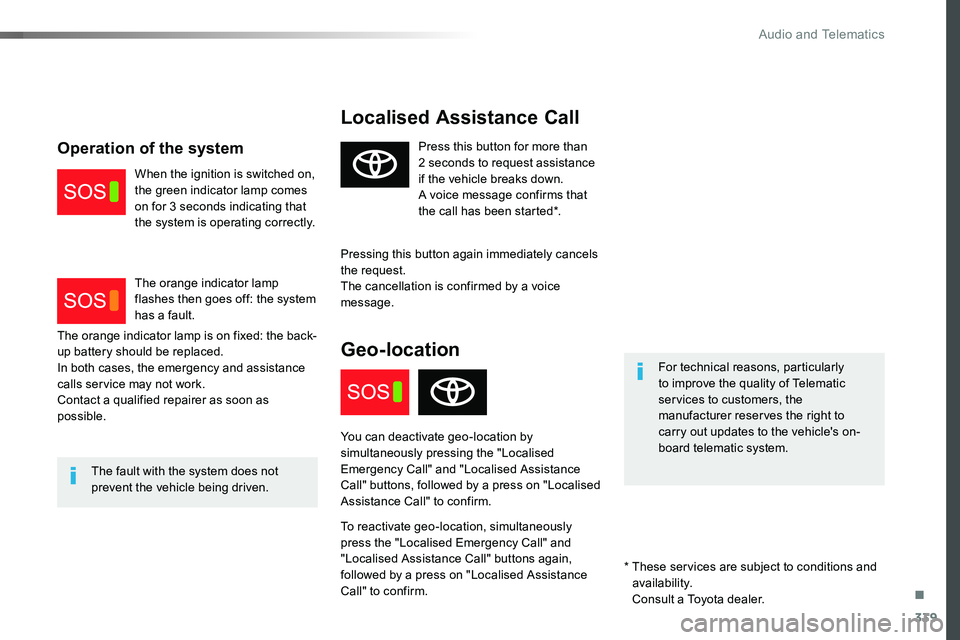
Localised Assistance Call
For technical reasons, particularly to improve the quality of Telematic services to customers, the manufacturer reserves the right to
carry out updates to the vehicle's on-board telematic system.
The fault with the system does not prevent the vehicle being driven.
Press this button for more than 2 seconds to request assistance if the vehicle breaks down.A voice message confirms that the call has been started*.
Pressing this button again immediately cancels the request.The cancellation is confirmed by a voice message.
Geo-location
You can deactivate geo-location by simultaneously pressing the "Localised Emergency Call" and "Localised Assistance Call" buttons, followed by a press on "Localised Assistance Call" to confirm.
To reactivate geo-location, simultaneously press the "Localised Emergency Call" and "Localised Assistance Call" buttons again, followed by a press on "Localised Assistance Call" to confirm.
The orange indicator lamp is on fixed: the back-up battery should be replaced.In both cases, the emergency and assistance calls service may not work.Contact a qualified repairer as soon as possible.
Operation of the system
When the ignition is switched on, the green indicator lamp comes on for 3 seconds indicating that the system is operating correctly.
The orange indicator lamp flashes then goes off: the system has a fault.
* These services are subject to conditions and availability.
Consult a Toyota dealer.
.
Audio and Telematics
Page 341 of 516

341
Toyota Pro Touch with navigation system
GPS satellite navigation - Connectivity - Multimedia audio - Bluetooth® telephone
ContentsFirst steps 342
Steering mounted controls 344
Menus 345
Voice commands 346
Navigation 352
Connected navigation 368
Connectivity 378
Radio Media 388
Telephone 400
Settings 412
Frequently asked questions 422
The system is protected in such a way that it will only operate in your vehicle.As a safety measure and because it requires sustained attention by the driver, the pairing of a Bluetooth mobile telephone with the Bluetooth hands-free system of your audio system must be done with the vehicle stationary and the ignition on.The display of the energy economy mode message signals that a change to standby is imminent. For more information on the Energy economy mode refer to the corresponding section.
.
Audio and Telematics
Page 342 of 516

342
FM/87.5 MHz
87.5MHz 12:13
23 °C 87.5 MHz
First steps
With the engine running, a press mutes the sound.With the ignition off, a press turns the system on.
Volume.
Use the buttons either side of the touch screen for access to the menus, then press the virtual buttons in the touch screen. All of the touch areas of the screen are white.Each menu is displayed in one or two pages (primary page and secondary page).
Secondary pagePrimary page
The touch screen is of the "capacitive" type.To clean the screen, use a soft, non-abrasive cloth (spectacles cloth) with no additional product.Do not use sharp objects on the screen.Do not touch the screen with wet hands.
Audio and Telematics
Page 346 of 516

346
Voice commands
First stepsSteering mounted controlsInformation - Using the system
Press the Push To Talk button and tell me what you'd like after the tone. Remember you can interrupt me at any time by pressing this button. If you
press it again while I'm waiting for you to speak, it'll end the conversation. If you need to start over, say "cancel". If you want to undo something, say "undo". And to get information and tips at any time, just say "help". If you ask to me do something and there's some information missing that I need, I'll give you some examples or take you through it step by step. There's more information available in "novice" mode. You can set the dialogue mode to "expert" when you feel comfortable.
To ensure that voice commands are always recognised by the system, please observe the following recommendations:- speak in a normal tone without breaking up words or raising your voice.- always wait for the "beep" (audible signal) before speaking.- for best operation, it is recommended that the windows and opening roof (if fitted) be closed to avoid inter ference from extraneous noises.- before making a voice command, ask other passengers to not speak.
The voice commands, with a choice of 12 languages (English, French, Italian, Spanish, German, Dutch, Portuguese, Polish, Turkish, Russian, Arabic, Brazilian), are made using the language previously chosen and set in the system.
The voice commands in Arabic for: "Navigate to address" and "Display POI in the city", are not available.
Example of a "voice command" for navigation:"Navigate to address 11 Regent Street, London".
Example of a "voice command" for
the radio and media:"Play ar tist Madonna".
Example of a "voice command" for the telephone:"Call David Miller".
Pressing this button activates the voice commands function.
Audio and Telematics