2018 SUBARU CROSSTREK ECU
[x] Cancel search: ECUPage 262 of 474
(271,1)
北米Model "A1320BE-C" EDITED: 2017/ 10/ 10
!Refueling
Only one person should be involved in
refueling. Do not allow others to approach
the area of the vehicle near the fuel filler
pipe while refueling is in progress.
Be sure to observe any other precautions
that are posted at the service station.
1. Stop the vehicle and turn the ignition
switch to the“LOCK”/“OFF”position and
turn off all the other electrical components.
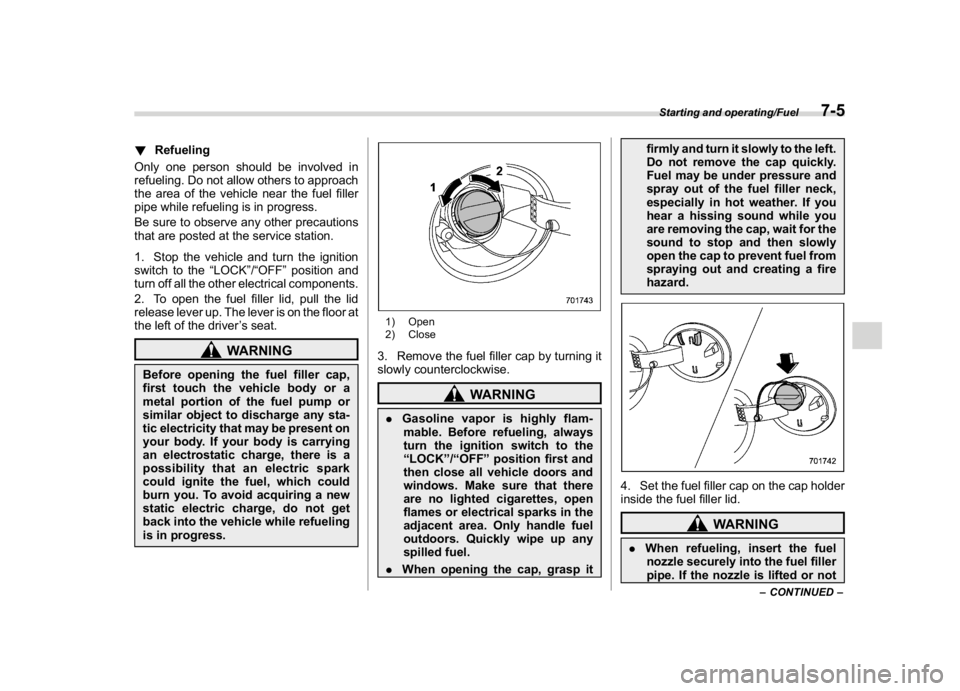
2. To open the fuel filler lid, pull the lid
release lever up. The lever is on the floor at
the left of the driver’s seat.
WARNING
Before opening the fuel filler cap,
first touch the vehicle body or a
metal portion of the fuel pump or
similar object to discharge any sta-
tic electricity that may be present on
your body. If your body is carrying
an electrostatic charge, there is a
possibility that an electric spark
could ignite the fuel, which could
burn you. To avoid acquiring a new
static electric charge, do not get
back into the vehicle while refueling
is in progress.
1) Open
2) Close3. Remove the fuel filler cap by turning it
slowly counterclockwise.
WARNING
.Gasoline vapor is highly flam-
mable. Before refueling, always
turn the ignition switch to the
“LOCK”/“OFF”position first and
then close all vehicle doors and
windows. Make sure that there
are no lighted cigarettes, open
flames or electrical sparks in the
adjacent area. Only handle fuel
outdoors. Quickly wipe up any
spilled fuel.
.When opening the cap, grasp itfirmly and turn it slowly to the left.
Do not remove the cap quickly.
Fuel may be under pressure and
spray out of the fuel filler neck,
especially in hot weather. If you
hear a hissing sound while you
are removing the cap, wait for the
sound to stop and then slowly
open the cap to prevent fuel from
spraying out and creating a fire
hazard.
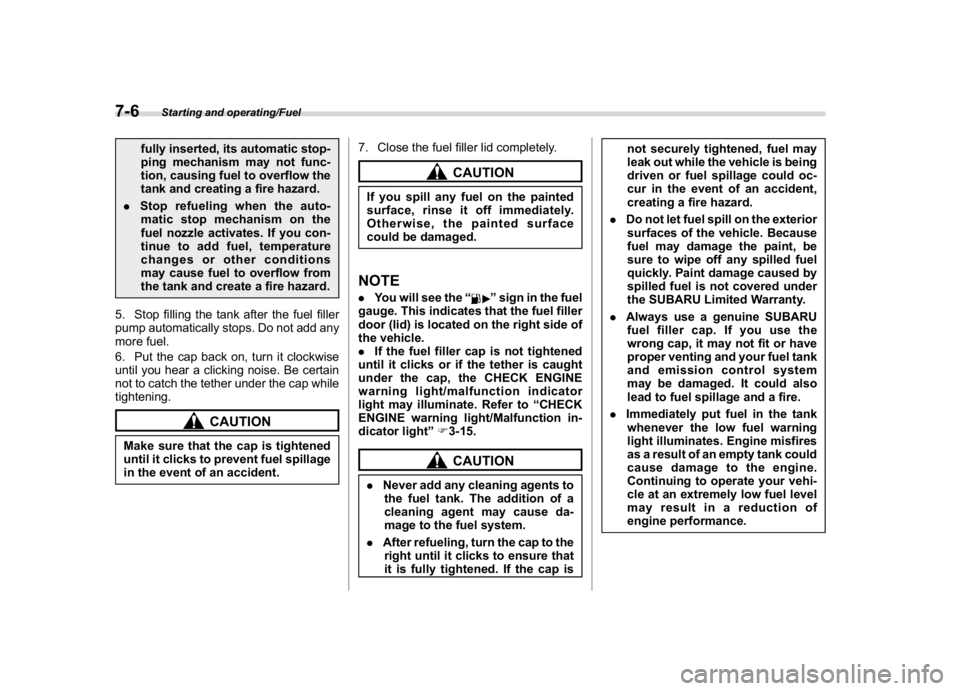
4. Set the fuel filler cap on the cap holder
inside the fuel filler lid.
WARNING
.When refueling, insert the fuel
nozzle securely into the fuel filler
pipe. If the nozzle is lifted or not
–CONTINUED–
Starting and operating/Fuel
7-5
7
Page 263 of 474
(272,1)
北米Model "A1320BE-C" EDITED: 2017/ 10/ 10
fully inserted, its automatic stop-
ping mechanism may not func-
tion, causing fuel to overflow the
tank and creating a fire hazard.
.Stoprefuelingwhentheauto-
matic stop mechanism on the
fuel nozzle activates. If you con-
tinue to add fuel, temperature
changes or other conditions
may cause fuel to overflow from
the tank and create a fire hazard.
5. Stop filling the tank after the fuel filler
pump automatically stops. Do not add any
more fuel.
6. Put the cap back on, turn it clockwise
until you hear a clicking noise. Be certain
not to catch the tether under the cap while
tightening.
CAUTION
Make sure that the cap is tightened
until it clicks to prevent fuel spillage
in the event of an accident.7. Close the fuel filler lid completely.
CAUTION
If you spill any fuel on the painted
surface, rinse it off immediately.
Otherwise, the painted surface
could be damaged.NOTE.You will see the“
”sign in the fuel
gauge. This indicates that the fuel filler
door (lid) is located on the right side of
the vehicle.
.If the fuel filler cap is not tightened
until it clicks or if the tether is caught
under the cap, the CHECK ENGINE
warning light/malfunction indicator
light may illuminate. Refer to“CHECK
ENGINE warning light/Malfunction in-
dicator light”F3-15.
CAUTION
.Never add any cleaning agents to
the fuel tank. The addition of a
cleaning agent may cause da-
mage to the fuel system.
.After refueling, turn the cap to the
right until it clicks to ensure that
it is fully tightened. If the cap isnot securely tightened, fuel may
leak out while the vehicle is being
driven or fuel spillage could oc-
cur in the event of an accident,
creating a fire hazard.
.Do not let fuel spill on the exterior
surfaces of the vehicle. Because
fuel may damage the paint, be
sure to wipe off any spilled fuel
quickly. Paint damage caused by
spilled fuel is not covered under
the SUBARU Limited Warranty.
.Always use a genuine SUBARU
fuel filler cap. If you use the
wrong cap, it may not fit or have
proper venting and your fuel tank
and emission control system
may be damaged. It could also
lead to fuel spillage and a fire.
.Immediately put fuel in the tank
whenever the low fuel warning
light illuminates. Engine misfires
as a result of an empty tank could
cause damage to the engine.
Continuing to operate your vehi-
cle at an extremely low fuel level
may result in a reduction of
engine performance.
Starting and operating/Fuel
7-6
Page 269 of 474
(278,1)
北米Model "A1320BE-C" EDITED: 2017/ 10/ 10
CAUTION
.When the operation indicator on
the push-button ignition switch is
flashing in orange, there may be a
malfunction with the vehicle.
Contact a SUBARU dealer imme-
diately.
.If the indicator on the push-but-
ton ignition switch is flashing in
green after the engine has
started, it means that the steering
is still locked. Depress the brake
pedal while moving the steering
wheel to the right and left, and
press the push-button ignition
switch.
.Do not continue pushing the
push-button ignition switch for
more than 10 seconds. Doing so
could cause a malfunction. If the
engine does not start, stop push-
ing the push-button ignition
switch. Instead, press the push-
button ignition switch without
depressing the brake pedal to
switch the power status to
“OFF”. Wait 10 seconds, and then
push the push-button ignition
switch to start the engine.
NOTE.For a short time after the engine has
started, the engine speed is kept high.
When the warm-up is completed, the
engine speed lowers automatically.
.When the push-button ignition
switch is pressed while depressing
the clutch pedal (MT models) or the
brake pedal (CVT models), the engine
starter operates for a maximum of 10
seconds and after starting the engine,
the starter stops automatically.
.When the push-button ignition
switch is pressed while depressing
the clutch pedal (MT models) or the
brake pedal (CVT models), the engine
can be started regardless of the status
of the push-button ignition switch.
.If the security indicator light illumi-
nates when you attempt to start the
engine but the engine does not start,
press the push-button ignition switch
to switch the power to“OFF”and then
try to start the engine again.
.If the engine does not start, press the
push-button ignition switch without
depressing the clutch pedal (MT mod-
els) or the brake pedal (CVT models) to
switch the power to“OFF”. Then, while
depressing the clutch pedal (MT mod-
els) or the brake pedal (CVT models)
more forcefully, press the push-buttonignition switch.
.The engine start procedures may not
function depending on the radio wave
conditions around the vehicle. In such
a case, refer to“Starting engine”F9-
18.
.If the vehicle battery is discharged,
the steering cannot be unlocked.
Charge the battery.
.Do not shift the select lever while the
starter is cranking.
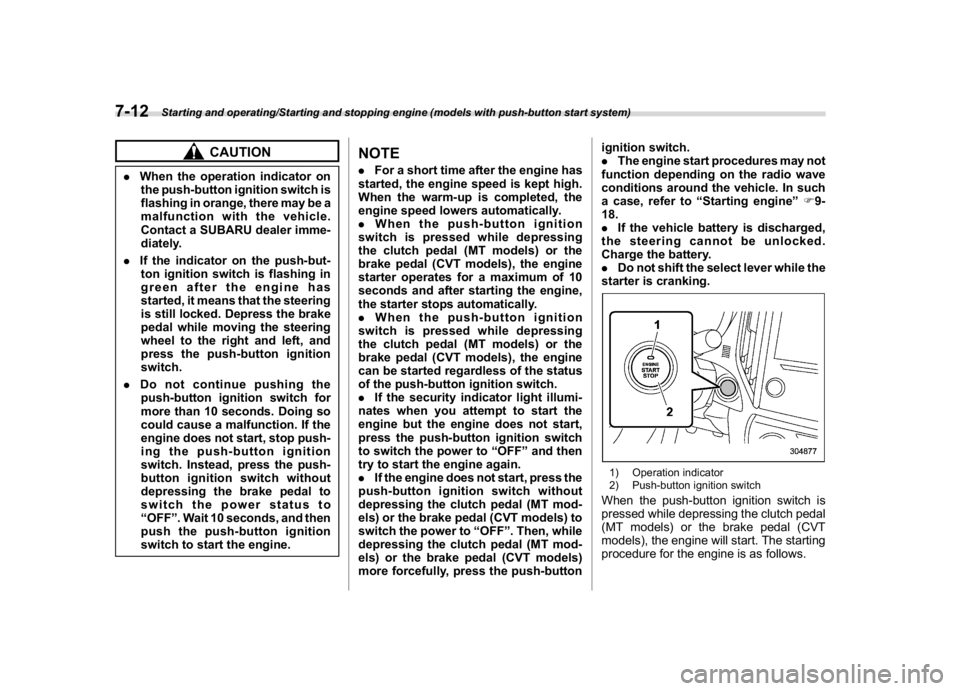
1) Operation indicator
2) Push-button ignition switchWhen the push-button ignition switch is
pressed while depressing the clutch pedal
(MT models) or the brake pedal (CVT
models), the engine will start. The starting
procedure for the engine is as follows.
Starting and operating/Starting and stopping engine (models with push-button start system)
7-12
Page 273 of 474
(282,1)
北米Model "A1320BE-C" EDITED: 2017/ 10/ 10
!Remote start safety features
For safety and security reasons, the
remote engine start system will prevent
starting (or stop the engine if running) and
sound the horn twice if any of the following
conditions is detected. In addition, the fob
will flash and beep 3 times.
.The total run-time has exceeded 20
minutes
.The brake pedal is depressed
.A key is in the ignition switch
.The engine hood is open
.The engine idle speed exceeds 3,500
RPM
.The security alarm is triggered
.The select lever is not in the“P”position
(CVT models)
If the system detects any door (including
the rear gate) open during operation, it will
prevent starting or stop the engine, and
sound the horn and flash side marker
lights, tail lights, and parking lights 6 times.
In addition to the items above, if the
vehicle’s engine management system
determines there is a safety risk due to a
vehicle-related problem, the vehicle will
power down and the horn will sound 3
times.
NOTE.If the alarm system is armed at the
time of remote engine starter activation
(the security indicator light on the
combination meter is flashing), the
alarm system will remain armed
throughout the remote start run cycle.
.If the alarm system is disarmed at
the time of remote engine starter acti-
vation (the security indicator light on
the combination meter is not flashing),
the alarm system will remain disarmed
throughout the remote start run cycle.
!Remote start operation - fob con-
firmation
Your remote engine starter fob is a
bidirectional transceiver that can confirm
system operation with several different
visual and audible indications. The fob’s
LED-backlit button and internal piezo
buzzer will indicate status of the system
using the following flash and beep se-
quences, provided the fob is within opera-
tional range of the system.
Starting and operating/Remote engine start system (dealer option)
7-16
Page 281 of 474

(290,1)
北米Model "A1320BE-C" EDITED: 2017/ 10/ 10
Continuously variable trans-
mission
WARNING
Do not shift from the“P”or“N”
position into the“D”or“R”position
while depressing the accelerator
pedal. This may cause the vehicle
to jump forward or backward.
CAUTION
.Shift into the“P”or“R”position
only after the vehicle is comple-
tely stopped. Shifting while the
vehicle is moving may cause
damage to the transmission.
.Do not race the engine for more
than 5 seconds in any position
except the“N”or“P”position
when the brake is applied or
when chocks are used in the
wheels. This may cause the
transmission fluid to overheat.
.Never move the vehicle rearward
by inertia with the select lever set
in a forward driving position or
move the vehicle forward by
inertia with the select lever setin the“R”position. Doing so may
result in an unexpected accident
or malfunction.
.Do not shift from the“D”position
into the“R”position or vice versa
until the vehicle has completely
stopped. Such shifting may
cause damage to the transmis-
sion.
.When parking the vehicle, first
securely apply the parking brake
and then place the select lever in
the“P”position. Do not park for a
long time with the select lever in
any other position as doing so
could result in a dead battery.
&Continuously variable trans-
mission featuresThe continuously variable transmission is
electronically controlled and provides an
infinite number of forward speeds and 1
reverse speed. For some models, it also
has a manual mode or an“L”position.NOTE.When the engine coolant tempera-
ture is still low, the transmission will
upshift or downshift at higher engine
speeds than when the coolant tempera-
ture is sufficiently high in order toshorten the warm-up time and improve
driveability. The gearshift timing will
automatically shift to the normal timing
after the engine has warmed up.
.Immediately after transmission fluid
is replaced, you may feel that the
transmission operation is somewhat
unusual. This results from invalidation
of data which the on-board computer
has collected and stored in memory to
allow the transmission to shift at the
most appropriate times for the current
condition of your vehicle. Optimized
shifting will be restored as the vehicle
continues to be driven for a while.
.When driving a CVT model under
continuous heavy load conditions such
as when towing a camper or climbing a
long, steep hill, the engine speed or the
vehicle speed may automatically be
reduced. This is not a malfunction. This
phenomenon results from the engine
control function maintaining the cool-
ing performance of the vehicle. The
engine and vehicle speed will return to
a normal speed when the engine is able
to maintain the optimum cooling per-
formance after the heavy load de-
creases. Driving under a heavy load
must be performed with extreme care.
Do not try to pass a vehicle in front
when driving on an uphill slope while
towing.
Starting and operating/Continuously variable transmission
7-24
Page 333 of 474
(344,1)
北米Model "A1320BE-C" EDITED: 2017/ 10/ 10
Off road driving
WARNING
.Always maintain a safe driving
speed according to the road and
weather conditions in order to
avoid having an accident on a
sharp turn, during sudden brak-
ing or under other similar condi-
tions.
.Always use the utmost care in
driving–overconfidence be-
cause you are driving an All-
Wheel Drive model could easily
lead to a serious accident.
CAUTION
Frequent driving of an AWD model
under hard-driving conditions such
as rough roads or off roads will
necessitate more frequent replace-
ment of the following items than that
specified in the maintenance sche-
dule described in the“Warranty and
Maintenance Booklet”.
.Engine oil
.Brake fluid
Remember that damage done toyour SUBARU while operating it off-
road and not using common sense
precautions such as those listed
here is not eligible for warranty
coverage.
Because of the AWD feature and higher
ground clearance, you can drive your
SUBARU on ordinary roads or off-road.
But please keep in mind that an AWD
SUBARU is a passenger car and is neither
a conventional off-road vehicle nor an all-
terrain vehicle. If you do take your
SUBARU off-road, certain common sense
precautions such as those in the following
list should be taken.
&Before driving.Make certain that you and all of your
passengers are wearing seatbelts.
.Carry some emergency equipment,
such as a towing rope or chain, a shovel,
wheel blocks, first aid kit and cell phone or
citizens band radio.
.Secure all cargo carried inside the
vehicle and make certain that it is not piled
higher than the seatbacks. During sudden
stops or jolts, unsecured cargo could be
thrown around in the vehicle and cause
injury. Do not pile heavy loads on the roof.
Those loads raise the vehicle’s center of
gravity and make it more prone to tip over..Never equip your vehicle with tires
larger than those specified in this manual.
&During drivingGeneral precautions:
.Drive carefully. Do not take unneces-
sary risks by driving in dangerous areas or
over rough terrain.
.Slow down and employ extra caution at
all times. When driving off-road, you will
not have the benefit of marked traffic
lanes, banked curves, traffic signs and
the like.
.Do not drive across steep slopes.
Instead, drive either straight up or straight
down the slopes. A vehicle can much more
easily tip over sideways than it can end
over end. Avoid driving straight up or down
slopes that are too steep.
.Avoid sharp turning maneuvers, espe-
cially at higher speeds.
.Do not grip the inside or spokes of the
steering wheel. A bad bump could jerk the
wheel and injure your hands. Instead,
drive with your fingers and thumbs on the
outside of the rim.
.Do not drive or park over or near
flammable materials such as dry grass or
fallen leaves, as they may burn easily. The
exhaust system is very hot while the
engine is running and right after the engine
Driving tips/Off road driving
8-6
Page 339 of 474
(350,1)
北米Model "A1320BE-C" EDITED: 2017/ 10/ 10
WARNING
.When you carry something inside
the vehicle, secure it whenever
you can to prevent it from being
thrown around inside the vehicle
during sudden stops, sharp turns
or in an accident.
.Do not pile heavy loads on the
roof. These loads raise the vehi-
cle’s center of gravity and make it
more prone to tip over.
.Secure lengthy items properly to
prevent them from shooting for-
ward and causing serious injury
during a sudden stop.
.Never exceed the maximum load
limit. If you do, some parts on
your vehicle can break, or it can
change the way your vehicle
handles. This could result in loss
of control and cause personal
injury. Also, overloading can
shorten the life of your vehicle.
.Do not place anything on the
extended cargo area cover. Such
items could tumble forward in the
event of a sudden stop or a
collision. This could cause ser-
ious injury.
CAUTION
Do not carry spray cans, containers
with flammable or corrosive liquids
or any other dangerous items inside
the vehicle.NOTEFor better fuel economy, do not carry
unneeded cargo.&Vehicle capacity weight
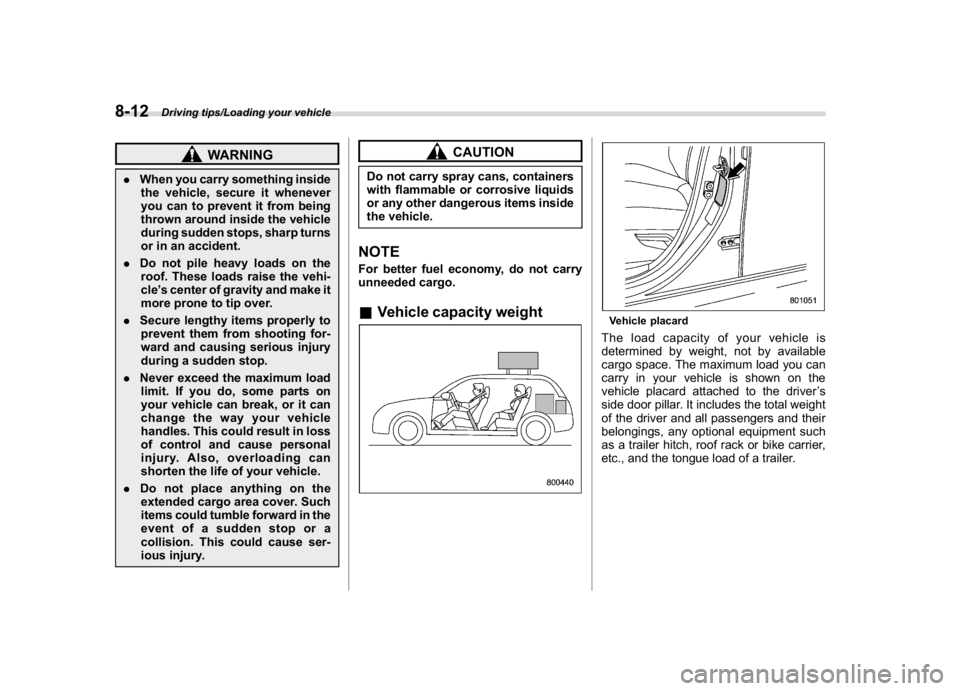
Vehicle placardThe load capacity of your vehicle is
determined by weight, not by available
cargo space. The maximum load you can
carry in your vehicle is shown on the
vehicle placard attached to the driver’s
side door pillar. It includes the total weight
of the driver and all passengers and their
belongings, any optional equipment such
as a trailer hitch, roof rack or bike carrier,
etc., and the tongue load of a trailer.
Driving tips/Loading your vehicle
8-12
Page 340 of 474
(351,1)
北米Model "A1320BE-C" EDITED: 2017/ 10/ 10
&GVWR and GAWR (Gross Ve-
hicle Weight Rating and
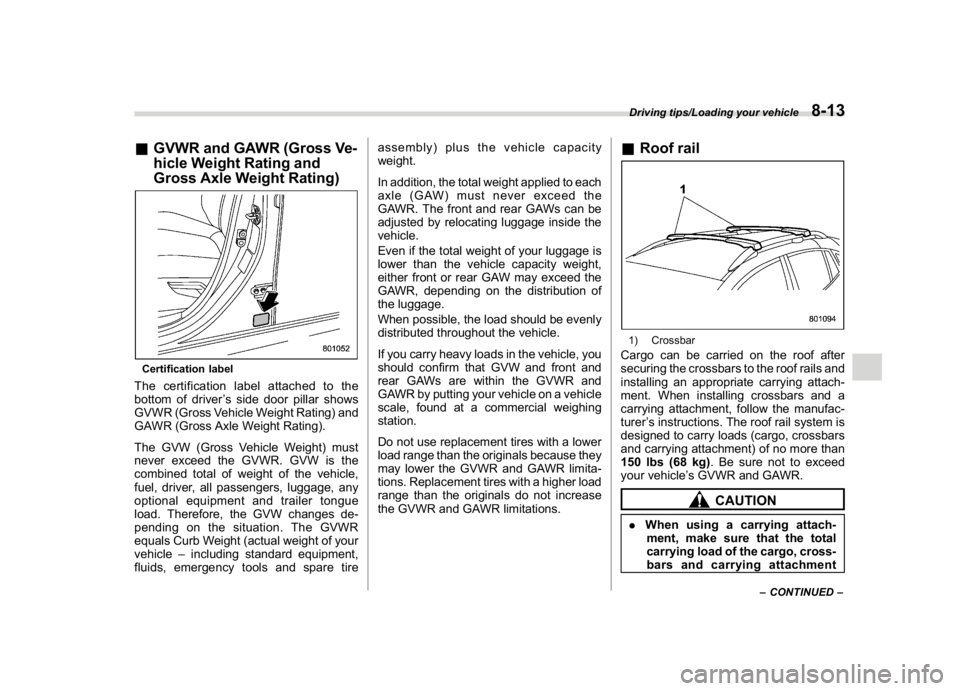
Gross Axle Weight Rating)Certification labelThe certification label attached to the
bottom of driver’s side door pillar shows
GVWR (Gross Vehicle Weight Rating) and
GAWR (Gross Axle Weight Rating).
The GVW (Gross Vehicle Weight) must
never exceed the GVWR. GVW is the
combined total of weight of the vehicle,
fuel, driver, all passengers, luggage, any
optional equipment and trailer tongue
load. Therefore, the GVW changes de-
pending on the situation. The GVWR
equals Curb Weight (actual weight of your
vehicle–including standard equipment,
fluids, emergency tools and spare tireassembly) plus the vehicle capacity
weight.
In addition, the total weight applied to each
axle (GAW) must never exceed the
GAWR. The front and rear GAWs can be
adjusted by relocating luggage inside the
vehicle.
Even if the total weight of your luggage is
lower than the vehicle capacity weight,
either front or rear GAW may exceed the
GAWR, depending on the distribution of
the luggage.
When possible, the load should be evenly
distributed throughout the vehicle.
If you carry heavy loads in the vehicle, you
should confirm that GVW and front and
rear GAWs are within the GVWR and
GAWR by putting your vehicle on a vehicle
scale, found at a commercial weighing
station.
Do not use replacement tires with a lower
load range than the originals because they
may lower the GVWR and GAWR limita-
tions. Replacement tires with a higher load
range than the originals do not increase
the GVWR and GAWR limitations.
&Roof rail1) CrossbarCargo can be carried on the roof after
securing the crossbars to the roof rails and
installing an appropriate carrying attach-
ment. When installing crossbars and a
carrying attachment, follow the manufac-
turer’s instructions. The roof rail system is
designed to carry loads (cargo, crossbars
and carrying attachment) of no more than
150 lbs (68 kg). Be sure not to exceed
your vehicle’s GVWR and GAWR.
CAUTION
.When using a carrying attach-
ment, make sure that the total
carrying load of the cargo, cross-
barsandcarryingattachment
–CONTINUED–
Driving tips/Loading your vehicle
8-13
8