2018 SUBARU CROSSTREK turn signal
[x] Cancel search: turn signalPage 163 of 474
(168,1)
北米Model "A1320BE-C" EDITED: 2017/ 10/ 10
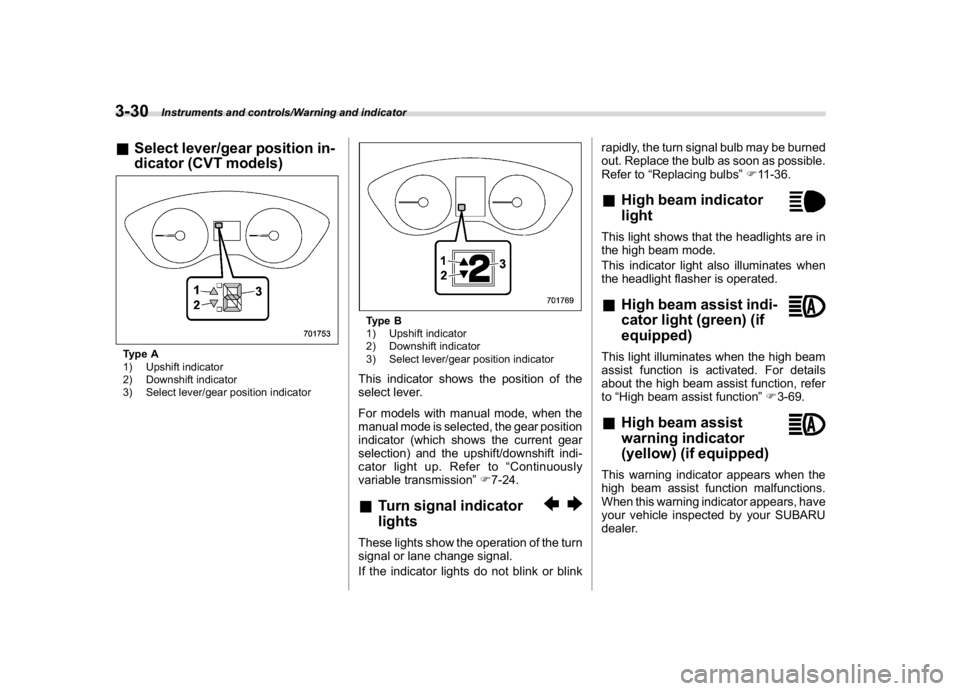
&Select lever/gear position in-
dicator (CVT models)Type A
1) Upshift indicator
2) Downshift indicator
3) Select lever/gear position indicator
Type B
1) Upshift indicator
2) Downshift indicator
3) Select lever/gear position indicatorThis indicator shows the position of the
select lever.
For models with manual mode, when the
manual mode is selected, the gear position
indicator (which shows the current gear
selection) and the upshift/downshift indi-
cator light up. Refer to“Continuously
variable transmission”F7-24.&Turn signal indicator
lightsThese lights show the operation of the turn
signal or lane change signal.
If the indicator lights do not blink or blinkrapidly, the turn signal bulb may be burned
out. Replace the bulb as soon as possible.
Refer to“Replacing bulbs”F11-36.
&High beam indicator
lightThis light shows that the headlights are in
the high beam mode.
This indicator light also illuminates when
the headlight flasher is operated.&High beam assist indi-
cator light (green) (if
equipped)This light illuminates when the high beam
assist function is activated. For details
about the high beam assist function, refer
to“High beam assist function”F3-69.&High beam assist
warning indicator
(yellow) (if equipped)This warning indicator appears when the
high beam assist function malfunctions.
When this warning indicator appears, have
your vehicle inspected by your SUBARU
dealer.
Instruments and controls/Warning and indicator
3-30
Page 174 of 474

(179,1)
北米Model "A1320BE-C" EDITED: 2017/ 10/ 10
By operating the“
”or“
”switch on the
steering wheel, you can select the menu.
Pull the“
/SET”switch to enter the
selected menu.
NOTEIf you enter the“Go Back”menu, the
system will return to the previous
screen.
!Screen Settings
After entering the“Screen Settings”menu,
select one of the following menus.
!Welcome Screen
The welcome screen can be activated or
deactivated.
!Good-bye Screen
The good-bye screen can be activated or
deactivated.
!Gauge Initial Movement
The movement of the meter needles and
gauge needles that occurs when the
ignition switch is turned to the“ON”
position can be activated or deactivated.
!Units
Changes the units displayed in the combi-
nation meter display (color LCD), the type
A multi-function display (black and white)
and the type B multi-function display (colorLCD).
!Tire Pressure Units (if equipped)
Changes the units displayed in the Tire
Pressure Monitoring system.
!Languages
Changes the language displayed in the
combination meter display (color LCD)
and the multi-function display (color LCD).
!Warning Volume (if equipped)
Sets the EyeSight warning volume, the
BSD/RCTA warning volume and the RAB
warning volume.
!EyeSight (models with EyeSight
system)
NOTEFor models with the EyeSight system,
refer to the Owner’s Manual supple-
ment for the EyeSight system.
!RAB (models with EyeSight system)
The Sonar Audible Alarm can be set to on
or off.NOTEFor models with Reverse Automatic
Braking system, refer to“Reverse
Automatic Braking System”F7-61.!Sonar Audible Alarm
When the Reverse Automatic Braking
system is in operation, the warning sound
to notify that an obstacle is detected in the
rear can be activated or deactivated.
!Vehicle Setting
After entering the“Vehicle Setting”menu,
select one of the following menus.
!Keyless Entry System
Sets the settings used when the keyless
access function was operated.
.Audible Signal (if equipped)
Sets the electronic chirp that sounds when
the door is locked or unlocked.
.Hazard Warning Flasher
Sets the operation of the hazard warning
flasher that blinks when the door is locked
or unlocked.
.Security Relocking (if equipped)
The automatic locking operation period
can be set or customized. Select the
preferred seconds to customize the opera-
tion period.
.Driver Door Unlock (if equipped)
Select only the driver’s door to unlock or all
doors to unlock simultaneously when the
driver’s door is unlocked.
.Rear Gate/Trunk Unlock (if equipped)
Select only the rear gate to unlock or all
–CONTINUED–
Instruments and controls/Combination meter display (color LCD)
3-41
3
Page 186 of 474
(191,1)
北米Model "A1320BE-C" EDITED: 2017/ 10/ 10
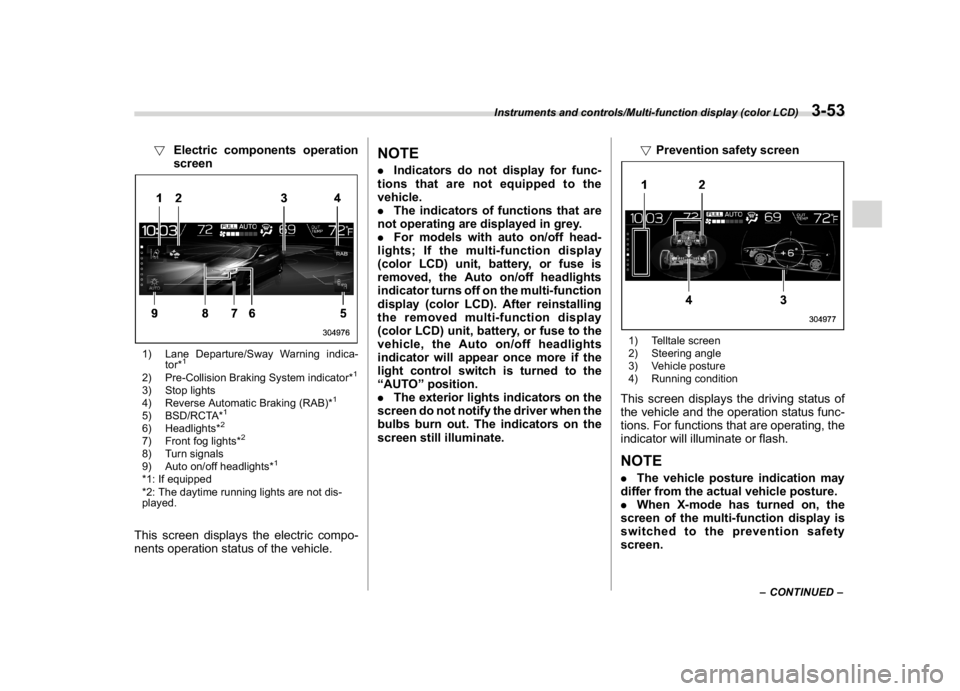
!Electric components operation
screen1) Lane Departure/Sway Warning indica-
tor*
1
2) Pre-Collision Braking System indicator*
1
3) Stop lights
4) Reverse Automatic Braking (RAB)*
1
5) BSD/RCTA*
1
6) Headlights*
2
7) Front fog lights*
2
8) Turn signals
9) Auto on/off headlights*
1
*1: If equipped
*2: The daytime running lights are not dis-
played.This screen displays the electric compo-
nents operation status of the vehicle.
NOTE.Indicators do not display for func-
tions that are not equipped to the
vehicle.
.The indicators of functions that are
not operating are displayed in grey.
.For models with auto on/off head-
lights; If the multi-function display
(color LCD) unit, battery, or fuse is
removed, the Auto on/off headlights
indicator turns off on the multi-function
display (color LCD). After reinstalling
the removed multi-function display
(color LCD) unit, battery, or fuse to the
vehicle, the Auto on/off headlights
indicator will appear once more if the
light control switch is turned to the
“AUTO”position.
.The exterior lights indicators on the
screen do not notify the driver when the
bulbs burn out. The indicators on the
screen still illuminate.!Prevention safety screen
1) Telltale screen
2) Steering angle
3) Vehicle posture
4) Running conditionThis screen displays the driving status of
the vehicle and the operation status func-
tions. For functions that are operating, the
indicator will illuminate or flash.NOTE.The vehicle posture indication may
differ from the actual vehicle posture.
.When X-mode has turned on, the
screen of the multi-function display is
switched to the prevention safety
screen.
–CONTINUED–
Instruments and controls/Multi-function display (color LCD)
3-53
3
Page 199 of 474
(204,1)
北米Model "A1320BE-C" EDITED: 2017/ 10/ 10
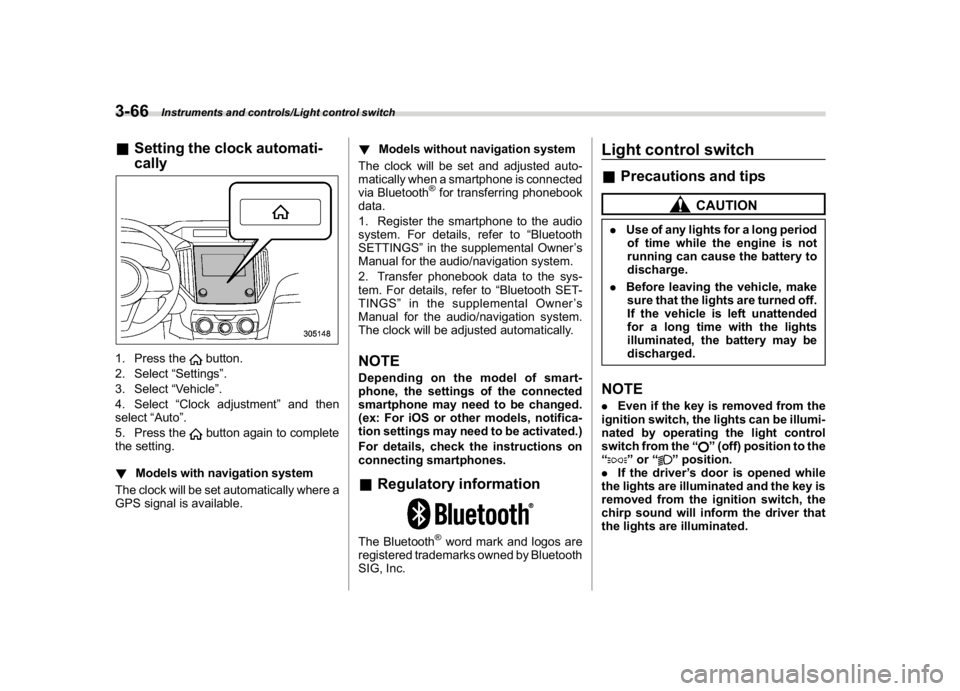
&Setting the clock automati-
cally1. Press the
button.
2. Select“Settings”.
3. Select“Vehicle”.
4. Select“Clock adjustment”and then
select“Auto”.
5. Press thebutton again to complete
the setting.
!Models with navigation system
The clock will be set automatically where a
GPS signal is available.!Models without navigation system
The clock will be set and adjusted auto-
matically when a smartphone is connected
via Bluetooth
®for transferring phonebook
data.
1. Register the smartphone to the audio
system. For details, refer to“Bluetooth
SETTINGS”in the supplemental Owner’s
Manual for the audio/navigation system.
2. Transfer phonebook data to the sys-
tem. For details, refer to“Bluetooth SET-
TINGS”in the supplemental Owner’s
Manual for the audio/navigation system.
The clock will be adjusted automatically.
NOTEDepending on the model of smart-
phone, the settings of the connected
smartphone may need to be changed.
(ex: For iOS or other models, notifica-
tion settings may need to be activated.)
For details, check the instructions on
connecting smartphones.&Regulatory informationThe Bluetooth
®word mark and logos are
registered trademarks owned by Bluetooth
SIG, Inc.
Light control switch&Precautions and tips
CAUTION
.Use of any lights for a long period
of time while the engine is not
running can cause the battery to
discharge.
.Before leaving the vehicle, make
sure that the lights are turned off.
If the vehicle is left unattended
for a long time with the lights
illuminated, the battery may be
discharged.NOTE.Even if the key is removed from the
ignition switch, the lights can be illumi-
nated by operating the light control
switch from the“
”(off) position to the
“
”or“
”position.
.If the driver’s door is opened while
the lights are illuminated and the key is
removed from the ignition switch, the
chirp sound will inform the driver that
the lights are illuminated.
Instruments and controls/Light control switch
3-66
Page 200 of 474
(205,1)
北米Model "A1320BE-C" EDITED: 2017/ 10/ 10
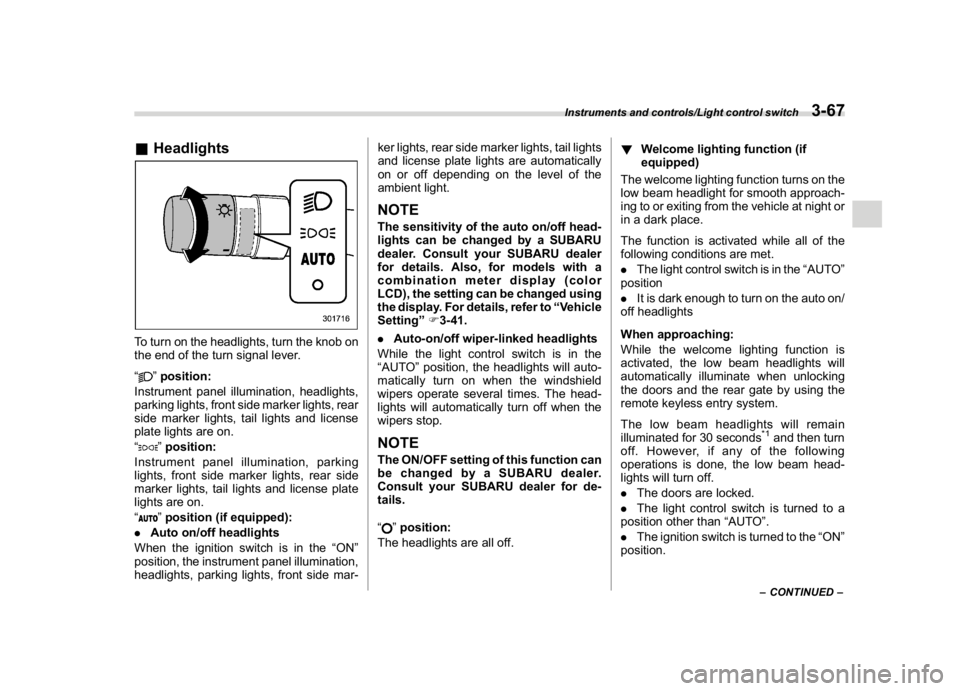
&HeadlightsTo turn on the headlights, turn the knob on
the end of the turn signal lever.
“
”position:
Instrument panel illumination, headlights,
parking lights, front side marker lights, rear
side marker lights, tail lights and license
plate lights are on.
“”position:
Instrument panel illumination, parking
lights, front side marker lights, rear side
marker lights, tail lights and license plate
lights are on.
“”position (if equipped):
.Auto on/off headlights
When the ignition switch is in the“ON”
position, the instrument panel illumination,
headlights, parking lights, front side mar-ker lights, rear side marker lights, tail lights
and license plate lights are automatically
on or off depending on the level of the
ambient light.
NOTEThe sensitivity of the auto on/off head-
lights can be changed by a SUBARU
dealer. Consult your SUBARU dealer
for details. Also, for models with a
combination meter display (color
LCD), the setting can be changed using
the display. For details, refer to“Vehicle
Setting”F3-41.
.Auto-on/off wiper-linked headlights
While the light control switch is in the
“AUTO”position, the headlights will auto-
matically turn on when the windshield
wipers operate several times. The head-
lights will automatically turn off when the
wipers stop.NOTEThe ON/OFF setting of this function can
be changed by a SUBARU dealer.
Consult your SUBARU dealer for de-
tails.
“
”position:
The headlights are all off.!Welcome lighting function (if
equipped)
The welcome lighting function turns on the
low beam headlight for smooth approach-
ing to or exiting from the vehicle at night or
in a dark place.
The function is activated while all of the
following conditions are met.
.The light control switch is in the“AUTO”
position
.It is dark enough to turn on the auto on/
off headlights
When approaching:
While the welcome lighting function is
activated, the low beam headlights will
automatically illuminate when unlocking
the doors and the rear gate by using the
remote keyless entry system.
The low beam headlights will remain
illuminated for 30 seconds
*1and then turn
off. However, if any of the following
operations is done, the low beam head-
lights will turn off.
.The doors are locked.
.The light control switch is turned to a
position other than“AUTO”.
.The ignition switch is turned to the“ON”
position.
–CONTINUED–
Instruments and controls/Light control switch
3-67
3
Page 202 of 474

(207,1)
北米Model "A1320BE-C" EDITED: 2017/ 10/ 10
&Headlight flasher
CAUTION
Do not hold the lever in the flashing
position for more than just a few
seconds.
To flash the headlights, pull the lever
toward you and then release it. The high
beam will stay on for as long as you hold
the lever.
When the headlights are on high beam, the
high beam indicator light“
”on the
combination meter also illuminates.
&High beam assist function (if
equipped)
NOTE.The high beam assist function uti-
lizes the stereo camera installed at the
position of the front map lights.
.For details on how to handle the
stereo camera, refer to the Owner’s
Manual supplement for the EyeSight
system.
The high beam assist function automati-
cally changes the headlight from high
beam to low beam (or vice versa).
When all of the following conditions are
met, the headlight will change to high
beam.
.When the vehicle speed increases to or
above 20 mph (32 km/h).
.There is no preceding or oncoming
vehicle.
.The forward area of the vehicle is dark.
.The road does not have a sharp curve.
When any of the following conditions is
met, the headlight will change to low beam.
.When the vehicle speed decreases to
or below 10 mph (16 km/h).
.When the forward area of the vehicle is
bright.
.When there is a preceding or oncomingvehicle.
.When the EyeSight system is malfunc-
tioning or is temporarily stopped.
NOTEThe factory setting (default setting) for
this function is set as“operational”.
This setting can be changed to OFF
(non-operation) at SUBARU dealers.
For more details, contact a SUBARU
dealer.
!How to use the high beam assist
function
The high beam assist function will be
activated when all the following conditions
are met.
.The light control switch is in the“AUTO”
position and the low beam headlights are
on automatically.
.The turn signal lever is pushed forward.
–CONTINUED–
Instruments and controls/Light control switch
3-69
3
Page 203 of 474
(208,1)
北米Model "A1320BE-C" EDITED: 2017/ 10/ 10
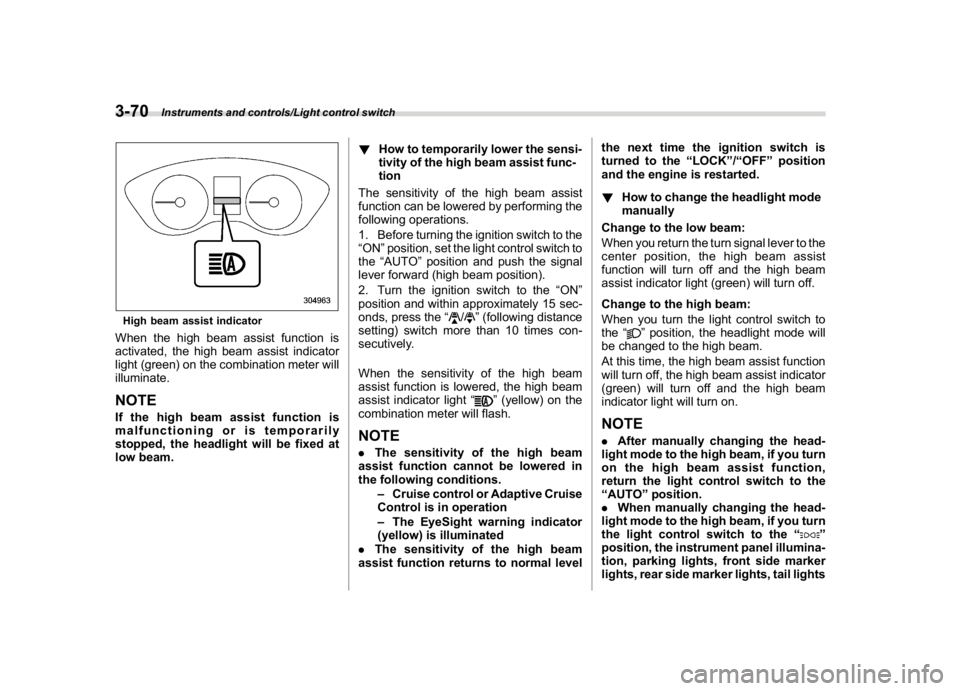
High beam assist indicatorWhen the high beam assist function is
activated, the high beam assist indicator
light (green) on the combination meter will
illuminate.NOTEIf the high beam assist function is
malfunctioning or is temporarily
stopped, the headlight will be fixed at
low beam.!How to temporarily lower the sensi-
tivity of the high beam assist func-
tion
The sensitivity of the high beam assist
function can be lowered by performing the
following operations.
1. Before turning the ignition switch to the
“ON”position, set the light control switch to
the“AUTO”position and push the signal
lever forward (high beam position).
2. Turn the ignition switch to the“ON”
position and within approximately 15 sec-
onds, press the“
/
”(following distance
setting) switch more than 10 times con-
secutively.
When the sensitivity of the high beam
assist function is lowered, the high beam
assist indicator light“
”(yellow) on the
combination meter will flash.
NOTE.The sensitivity of the high beam
assist function cannot be lowered in
the following conditions.
–Cruise control or Adaptive Cruise
Control is in operation
–The EyeSight warning indicator
(yellow) is illuminated
.The sensitivity of the high beam
assist function returns to normal levelthe next time the ignition switch is
turned to the“LOCK”/“OFF”position
and the engine is restarted.
!How to change the headlight mode
manually
Change to the low beam:
When you return the turn signal lever to the
center position, the high beam assist
function will turn off and the high beam
assist indicator light (green) will turn off.
Change to the high beam:
When you turn the light control switch to
the“
”position, the headlight mode will
be changed to the high beam.
At this time, the high beam assist function
will turn off, the high beam assist indicator
(green) will turn off and the high beam
indicator light will turn on.
NOTE.After manually changing the head-
light mode to the high beam, if you turn
on the high beam assist function,
return the light control switch to the
“AUTO”position.
.When manually changing the head-
light mode to the high beam, if you turn
the light control switch to the“
”
position, the instrument panel illumina-
tion, parking lights, front side marker
lights, rear side marker lights, tail lights
Instruments and controls/Light control switch
3-70
Page 208 of 474
(213,1)
北米Model "A1320BE-C" EDITED: 2017/ 10/ 10
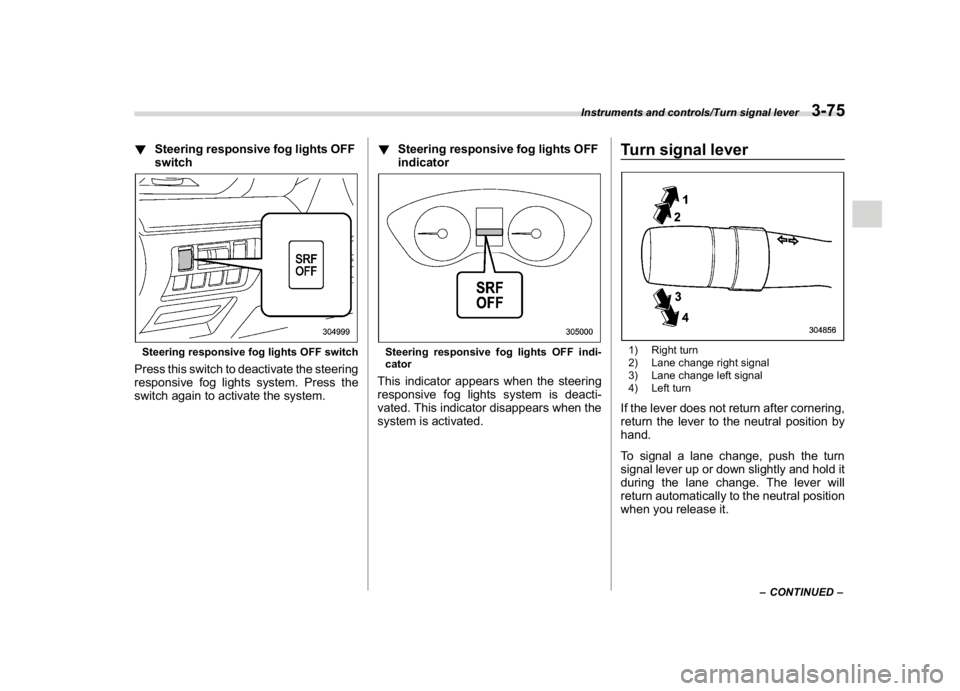
!Steering responsive fog lights OFF
switchSteering responsive fog lights OFF switchPress this switch to deactivate the steering
responsive fog lights system. Press the
switch again to activate the system.!Steering responsive fog lights OFF
indicator
Steering responsive fog lights OFF indi-
catorThis indicator appears when the steering
responsive fog lights system is deacti-
vated. This indicator disappears when the
system is activated.
Turn signal lever1) Right turn
2) Lane change right signal
3) Lane change left signal
4) Left turnIf the lever does not return after cornering,
return the lever to the neutral position by
hand.
To signal a lane change, push the turn
signal lever up or down slightly and hold it
during the lane change. The lever will
return automatically to the neutral position
when you release it.
–CONTINUED–
Instruments and controls/Turn signal lever
3-75
3