2018 SUBARU CROSSTREK remote control
[x] Cancel search: remote controlPage 218 of 474

(223,1)
北米Model "A1320BE-C" EDITED: 2017/ 10/ 10
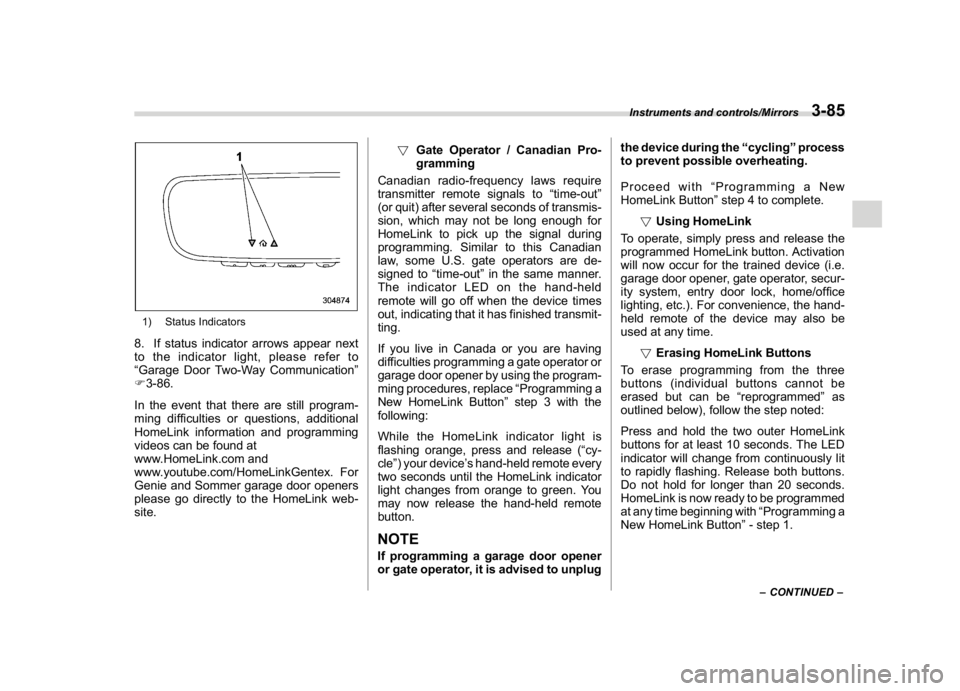
1) Status Indicators8. If status indicator arrows appear next
to the indicator light, please refer to
“Garage Door Two-Way Communication”
F3-86.
In the event that there are still program-
ming difficulties or questions, additional
HomeLink information and programming
videos can be found at
www.HomeLink.com and
www.youtube.com/HomeLinkGentex. For
Genie and Sommer garage door openers
please go directly to the HomeLink web-
site.!Gate Operator / Canadian Pro-
gramming
Canadian radio-frequency laws require
transmitter remote signals to“time-out”
(or quit) after several seconds of transmis-
sion, which may not be long enough for
HomeLink to pick up the signal during
programming. Similar to this Canadian
law, some U.S. gate operators are de-
signed to“time-out”in the same manner.
The indicator LED on the hand-held
remote will go off when the device times
out, indicating that it has finished transmit-
ting.
If you live in Canada or you are having
difficulties programming a gate operator or
garage door opener by using the program-
ming procedures, replace“Programming a
New HomeLink Button”step 3 with the
following:
While the HomeLink indicator light is
flashing orange, press and release (“cy-
cle”) your device’s hand-held remote every
two seconds until the HomeLink indicator
light changes from orange to green. You
may now release the hand-held remote
button.
NOTEIf programming a garage door opener
or gate operator, it is advised to unplugthe device during the“cycling”process
to prevent possible overheating.
Proceed with“Programming a New
HomeLink Button”step 4 to complete.
!Using HomeLink
To operate, simply press and release the
programmed HomeLink button. Activation
will now occur for the trained device (i.e.
garage door opener, gate operator, secur-
ity system, entry door lock, home/office
lighting, etc.). For convenience, the hand-
held remote of the device may also be
used at any time.
!Erasing HomeLink Buttons
To erase programming from the three
buttons (individual buttons cannot be
erased but can be“reprogrammed”as
outlined below), follow the step noted:
Press and hold the two outer HomeLink
buttons for at least 10 seconds. The LED
indicator will change from continuously lit
to rapidly flashing. Release both buttons.
Do not hold for longer than 20 seconds.
HomeLink is now ready to be programmed
at any time beginning with“Programming a
New HomeLink Button”- step 1.
–CONTINUED–
Instruments and controls/Mirrors
3-85
3
Page 221 of 474

(226,1)
北米Model "A1320BE-C" EDITED: 2017/ 10/ 10
WARNING
.When programming the
HomeLink
®Wireless Control Sys-
tem, you may be operating a
garage door opener or other
device. Make sure that people
and objects are out of the way of
the garage door or other device
to prevent potential harm or da-
mage.
.Do not use the HomeLink
®Wire-
less Control System with a gar-
age door opener that lacks the
safety stop and reverse feature
as required by applicable safety
standards. A garage door opener
which cannot detect an object,
signaling the door to stop and
reverse, does not meet these
safety standards. Using a garage
door opener without these fea-
tures increases risk of serious
injury or death. For more infor-
mation, consult the HomeLink
®
website at www.homelink.com or
call 1-800-355-3515.
&Outside mirrors!Convex mirror (passenger side)
WARNING
Objects look smaller in a convex
mirror and farther away than when
viewed in a flat mirror. Do not use the
convex mirror to judge the distance
of vehicles behind you when chan-
ging lanes. Use the inside mirror (or
glance backwards) to determine the
actual size and distance of objects
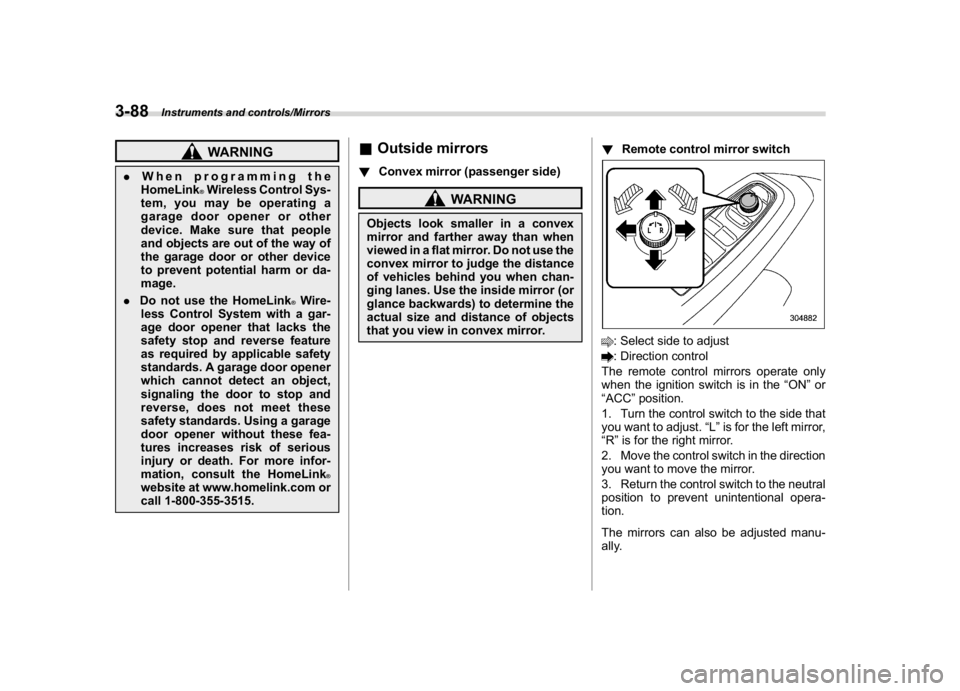
that you view in convex mirror.!Remote control mirror switch
: Select side to adjust: Direction control
The remote control mirrors operate only
when the ignition switch is in the“ON”or
“ACC”position.
1. Turn the control switch to the side that
you want to adjust.“L”is for the left mirror,
“R”is for the right mirror.
2. Move the control switch in the direction
you want to move the mirror.
3. Return the control switch to the neutral
position to prevent unintentional opera-
tion.
The mirrors can also be adjusted manu-
ally.
Instruments and controls/Mirrors
3-88
Page 258 of 474

(267,1)
北米Model "A1320BE-C" EDITED: 2017/ 10/ 10
Fuel..........................................................................7-3
Fuel requirements.................................................. 7-3
Fuel filler lid and cap............................................. 7-4
State emission testing (U.S.only).........................7-7
Preparing to drive...................................................7-8
Starting and stopping the engine
(models without push-button startsystem)...... 7-9
Starting engine...................................................... 7-9
Stopping the engine.............................................. 7-11
Starting and stopping engine
(models with push-button startsystem).......... 7-11
Safety precautions................................................ 7-11
Operating range for push-button start system....... 7-11
Starting engine..................................................... 7-11
Stopping engine....................................................7-13
When access key fob does not operate properly ... 7-14
Remote engine start system(dealer option)...... 7-14
Remote engine starter transceiver (fob) .................7-15
Alternate operation method for models with
“keyless access with push-button start
system”..............................................................7-18
Entering the vehicle while it is running via
remote start........................................................7-18
Entering the vehicle following remote engine
start shutdown....................................................7-19
Pre-heating or pre-cooling the interior of
the vehicle..........................................................7-19
Remote transmitter program
(Remote engine starter transceiver).....................7-19
System maintenance.............................................7-19
Certification for remote engine starter...................7-21
Manual transmission............................................7-21
Shifting speeds....................................................7-22
Driving tips...........................................................7-23
Continuously variable transmission...................7-24
Continuously variable transmission features.........7-24
Select lever..........................................................7-25
Selection of manual mode (if equipped)................7-26
Selection of“L”(if equipped) ................................7-28
Shift lock function................................................7-28
Driving tips...........................................................7-30
Power steering......................................................7-30
Power steering warning light ................................7-30
Power steering system features............................7-30
Braking..................................................................7-31
Braking tips..........................................................7-31
Brake system.......................................................7-31
Disc brake pad wear warning indicators................7-32
ABS (Anti-lock BrakeSystem).............................7-33
ABS self-check.....................................................7-33
ABS warning light.................................................7-33
Electronic Brake Force Distribution (EBD)
system................................................................7-34
Steps to take if EBD system malfunctions .............7-34
Vehicle Dynamics Controlsystem......................7-35
Safety precautions................................................7-35
System features....................................................7-36
Vehicle Dynamics Control system monitor ............7-37
Vehicle Dynamics Control OFF switch...................7-37
X-mode (if equipped)............................................7-38
To activate/deactivate the X-mode.........................7-39
Starting and operating
7
Page 266 of 474

(275,1)
北米Model "A1320BE-C" EDITED: 2017/ 10/ 10
Starting and stopping the en-
gine (models without push-
button start system)
CAUTION
Do not operate the starter motor
continuously for more than 10 sec-
onds. If the engine fails to start after
operating the starter for 5 to 10
seconds, wait for 10 seconds or
more before trying again.NOTEIt may be difficult to start the engine
when the battery has been discon-
nected and reconnected (for mainte-
nance or other purposes). This diffi-
culty is caused by the electronically
controlled throttle’s self-diagnosis
function. To overcome it, keep the
ignition switch in the“ON”position
for approximately 10 seconds before
starting the engine.
&Starting engine!General precautions when starting
engine
WARNING
.Never start the engine from out-
side the vehicle (except when
using the remote engine start
system). It may result in an acci-
dent.
.Do not leave the engine running
in locations with poor ventilation,
such as a garage and indoors.
The exhaust gas may enter the
vehicle or indoors, and it may
result in carbon monoxide poi-
soning.
.Do not start the engine near dry
foliage, paper, or other flammable
substances. The exhaust pipe
and exhaust emissions can cre-
ate a fire hazard at high tempera-
tures.
CAUTION
.If the engine is stopped during
driving, the catalyst may over-
heat and burn..When starting the engine, be sure
to sit in the driver’s seat (except
when using the remote engine
start system).
NOTE.Avoid rapid racing and rapid accel-
eration immediately after the engine
has started.
.For a short time after the engine has
started, the engine speed is kept high.
When the warm-up is completed, the
engine speed lowers automatically.
.On rare occasions, it may be difficult
to start the engine depending on the
fuel and the usage condition (repeated
driving of a distance in which the
engine has not warmed up sufficiently).
In such a case, it is recommended that
you change to a different brand of fuel.
.On rare occasions, transient knock-
ing may be heard from the engine when
the accelerator is operated rapidly such
as a rapid start-up and a rapid accel-
eration. This is not a malfunction.
.The engine starts more easily when
the headlights, air conditioner and rear
window defogger are turned off.
.Do not shift the select lever (CVT
models) or shift lever (MT models)
while the starter is cranking.
–CONTINUED–
Starting and operating/Starting and stopping the engine (models without push-button start system)
7-9
7
Page 276 of 474

(285,1)
北米Model "A1320BE-C" EDITED: 2017/ 10/ 10
and turn to the“START”position to restart
the engine.&Entering the vehicle following
remote engine start shut-
downAn alarm trigger may occur if the vehicle is
opened by the remote keyless entry
transmitter within a few seconds immedi-
ately following remote engine start shut-
down.&Pre-heating or pre-cooling
the interior of the vehicleBefore exiting the vehicle, set the tem-
perature controls to the desired setting and
operation. After the system starts the
engine, the heater or air conditioning will
activate and heat or cool the interior to
your setting.&Remote transmitter program
(Remote engine starter
transceiver)New transmitters can be programmed to
the remote engine start system in the
event that a transmitter is lost, stolen,
damaged or additional transmitters are
desired (the system will accept up to eight
transmitters). New remote engine start
transmitters can be programmed accord-ing to the following procedure.
1. Open the driver’s door (the driver’s
door must remain opened throughout the
entire process).
2. Depress and hold the brake pedal.
3. Turn the ignition switch to“ON”then
“LOCK”/“OFF”, back to“ON”then“LOCK”/
“OFF”, back to“ON”then“LOCK”/“OFF”,
then back to“ON”again and leave the
ignition“ON”throughout the programming
process.
4. The system will flash the side marker
lights, tail lights and parking lights and
honk the horn three times, indicating that
the system has entered the transmitter
learn mode.
5. Press and release the“
”button on
the transmitter that you want to program.
6. The system will flash the side marker
lights, tail lights and parking lights and
honk the horn one time, indicating that the
system has learned the transmitter. Upon
successful programming, the remote start
confirmation transmitter button will flash
one time.
7. Repeat step 5 for any additional
transmitters (the system will accept up to
eight transmitters).
8. The system will exit the transmitter
learn mode if the key is turned to the
“LOCK”/“OFF”position, the door is closedor after 2 minutes.
&System maintenance
NOTEFor remote engine starter transceiver:
In the event that the vehicle’s battery is
replaced, discharged or disconnected,
it will be necessary to start the vehicle a
minimum of one time using the key
prior to activating the remote engine
start system. This is required to allow
the vehicle electronic systems to re-
synchronize.
!Changing the battery
CAUTION
.Do not let dust, oil or water get on
or in the remote engine start
transmitter when replacing the
battery.
.Be careful not to damage the
printed circuit board in the re-
mote engine start transmitter
when replacing the battery.
.Be careful not to allow children to
touch the battery and any re-
moved parts; children could
swallow them.
.There is a danger of explosion if
–CONTINUED–
Starting and operating/Remote engine start system (dealer option)
7-19
7
Page 277 of 474

(286,1)
北米Model "A1320BE-C" EDITED: 2017/ 10/ 10
an incorrect replacement battery
is used. Replace only with the
same or equivalent type of bat-
tery.
.Battery should not be exposed to
excessive heat such as sunshine,
fire or the like.
For models with“keyless access with
push-button start system”:
Perform the procedure described in“Re-
placing battery of access key fob”F11-43.
For remote engine starter transceiver:
The 3-volt lithium battery (model CR-2450)
supplied in your remote engine start
transmitter should last approximately one
year, depending on usage. When the
battery begin to weaken, you will notice a
decrease in range (distance from the
vehicle that your remote control operates).
Follow the instructions below to change
the remote engine start transmitter battery.
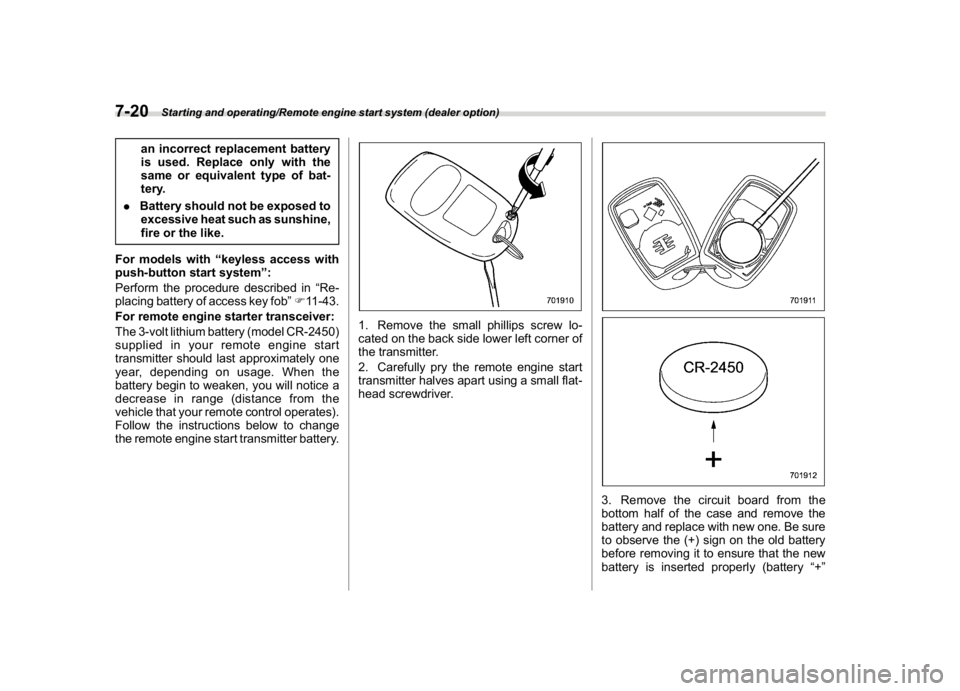
1. Remove the small phillips screw lo-
cated on the back side lower left corner of
the transmitter.
2. Carefully pry the remote engine start
transmitter halves apart using a small flat-
head screwdriver.
3. Remove the circuit board from the
bottom half of the case and remove the
battery and replace with new one. Be sure
to observe the (+) sign on the old battery
before removing it to ensure that the new
battery is inserted properly (battery“+”
Starting and operating/Remote engine start system (dealer option)
7-20