Page 87 of 416
85
Steering wheel
adjustment
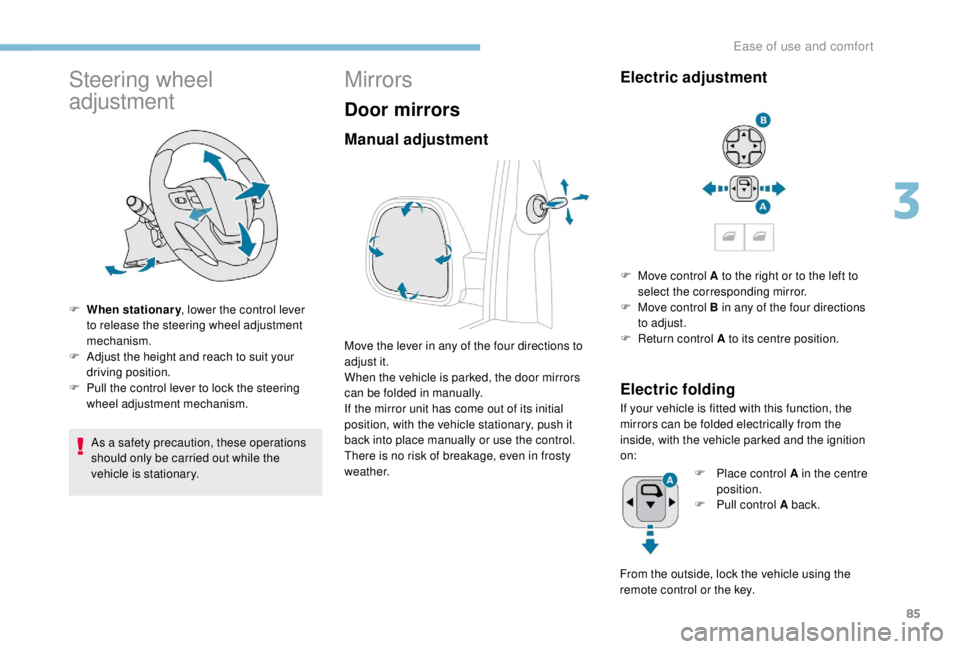
F When stationary, lower the control lever
to release the steering wheel adjustment
mechanism.
F
A
djust the height and reach to suit your
driving position.
F
P
ull the control lever to lock the steering
wheel adjustment mechanism.
As a safety precaution, these operations
should only be carried out while the
vehicle is stationary.
Mirrors
Door mirrors
Manual adjustment
Move the lever in any of the four directions to
adjust it.
When the vehicle is parked, the door mirrors
can be folded in manually.
If the mirror unit has come out of its initial
position, with the vehicle stationary, push it
back into place manually or use the control.
There is no risk of breakage, even in frosty
weather.
Electric adjustment
F Move control A to the right or to the left to select the corresponding mirror.
F
M
ove control B in any of the four directions
to adjust.
F
R
eturn control A to its centre position.
Electric folding
If your vehicle is fitted with this function, the
mirrors can be folded electrically from the
inside, with the vehicle parked and the ignition
on: F
P
lace control A in the centre
position.
F
P
ull control A back.
From the outside, lock the vehicle using the
remote control or the key.
3
Ease of use and comfort
Page 88 of 416

86
Heated mirrors
If your vehicle is so equipped:or
F
P
ress the heated mirror button.
As a safety measure, the mirrors should
be adjusted to reduce the blind spots.
The objects obser ved are, in reality, closer
than they appear.
Take this into account in order to
correctly judge the distance of vehicles
approaching from behind.
F
P
ress the heated rear window
button.
Electric unfolding
Door mirrors are unfolded electrically with
the remote control or key when the vehicle is
unlocked. Unless folding was selected with
control A , pull the control backwards in the
centre position.
Folding/unfolding during locking/unlocking
can be disabled. Contact a PEUGEOT
dealer or a qualified workshop.
If necessary, the mirrors can be folded in
manually. For more information on Rear
screen demist - defrost, refer to the
corresponding section.
Rear view mirror
Equipped with an anti-dazzle system, which
darkens the mirror glass and reduces the
nuisance to the driver caused by the sun,
headlamps from other vehicles, etc.
Manual model
Adjustment
F
A djust the mirror so that the glass is
directed correctly in the "day" position.
Day/night position
F
P
ull the lever to change to the "night"
anti-dazzle position.
F
P
ush the lever to change to the normal
"day" position.
Ease of use and comfort
Page 130 of 416
128
Automatic operation
The front courtesy lamp comes on when the
key is removed from the ignition switch.
All of the courtesy lamps come on when
the vehicle is unlocked, when one of the
corresponding doors is opened and for location
of the vehicle using the remote control.
They go off gradually after the ignition is
switched on and when the vehicle is locked.Permanently on, ignition on.Lights up when one of the front
or rear doors is opened.
Permanently off.
Take care not to put anything in contact
with the courtesy lamps.
Courtesy lamps
Front
Rear
Courtesy lamp(s)
Front
Rear
Ease of use and comfort
Page 131 of 416
129
Automatic operation
The front courtesy lamp comes on when the
key is removed from the ignition switch.
All of the courtesy lamps come on when
the vehicle is unlocked, when one of the
corresponding doors is opened and for location
of the vehicle using the remote control.
They go off gradually after the ignition is
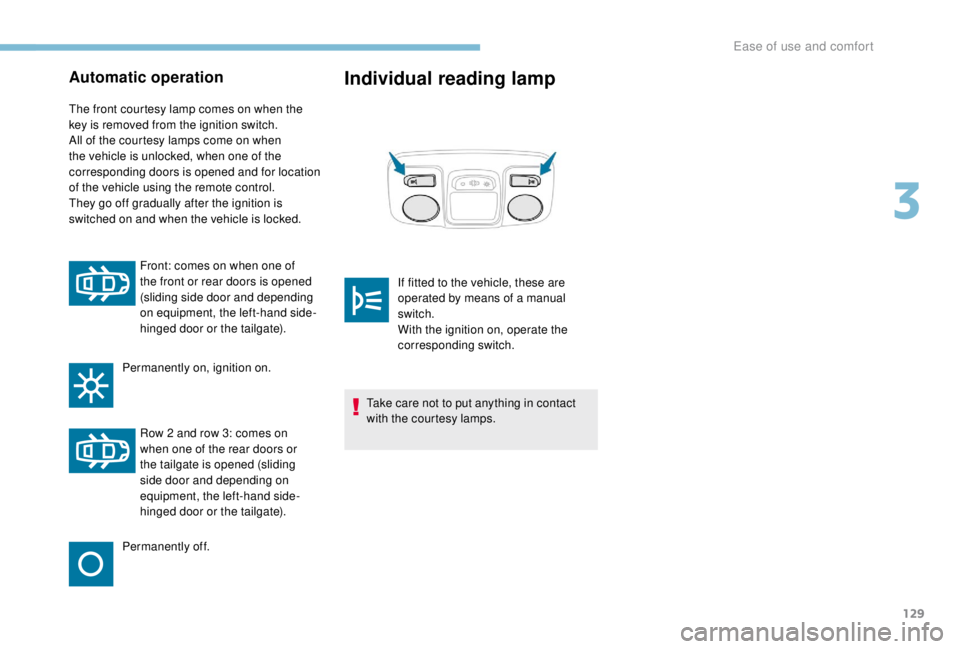
switched on and when the vehicle is locked.Front: comes on when one of
the front or rear doors is opened
(sliding side door and depending
on equipment, the left-hand side-
hinged door or the tailgate).
Permanently on, ignition on.
Row 2
and row 3: comes on
when one of the rear doors or
the tailgate is opened (sliding
side door and depending on
equipment, the left-hand side-
hinged door or the tailgate).
Permanently off.
Individual reading lamp
Take care not to put anything in contact
with the courtesy lamps. If fitted to the vehicle, these are
operated by means of a manual
switch.
With the ignition on, operate the
corresponding switch.
3
Ease of use and comfort
Page 136 of 416
134
Programming
The activation, deactivation and selection of
the duration of the guide-me-home lighting can
be configured.
With audio system
In the "Personalisation-
configuration " menu, activate/
deactivate " Guide-me-home
lighting ".
With touch screen
In the "Driving/Vehicle " menu,
activate/deactivate " Guide-me-
home lighting ".
Exterior welcome lighting
The remote control operation of the lighting
makes your approach to the vehicle easier
in poor light. It is activated when the lighting
control is in the " AUTO" position and the level
of light detected by the sunshine sensor is low.
Switching on
Press the open padlock on the
remote control or one of the front
door handles with the Keyless Entry
and Starting system.
The dipped beam headlamps and the
sidelamps come on; your vehicle is also
unlocked.
Switching off
The exterior welcome lighting switches off
automatically after a set time, when the ignition
is switched on or on locking the vehicle.
Programming
The activation, deactivation and selection of
the of the welcome lighting duration can be
configured.
With audio system
In the " Personalisation-
configuration " menu, activate/
deactivate " Welcome lighting ".
With touch screen
In the "Driving/Vehicle " menu,
activate/deactivate " Welcome
lighting ".
Cornering lighting
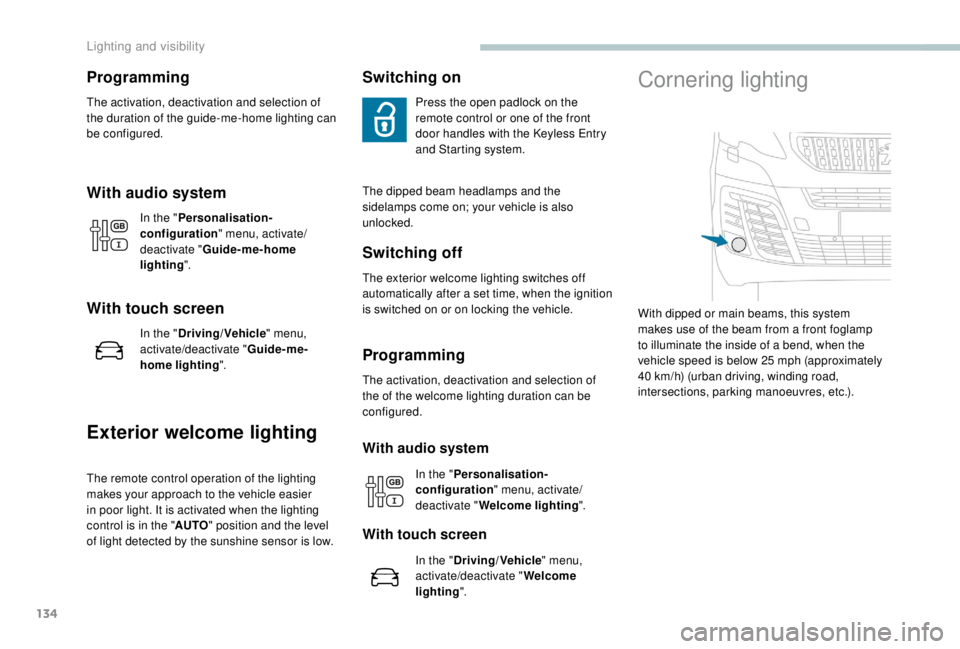
With dipped or main beams, this system
makes use of the beam from a front foglamp
to illuminate the inside of a bend, when the
vehicle speed is below 25
mph (approximately
40
km/h) (urban driving, winding road,
intersections, parking manoeuvres, etc.).
Lighting and visibility
Page 162 of 416
160
Deactivation
F With the ignition off, insert the key in the
passenger airbag deactivation switch.
F
T
urn it to the OFF position.
F
R
emove the key, leaving the switch in this
position. When the ignition is switched on,
this warning lamp comes on in the
seat belt warning display screen.
It stays on while the airbag is
deactivated.
To ensure the safety of your child,
the passenger front airbag must be
deactivated when you install a rear ward
facing child seat on the front passenger
seat.
Other wise, there is a risk of serious or
fatal injury to the child if the airbag is
deployed.
Reactivation
When you remove the child seat, with the
ignition off , turn the switch to the ON position
to reactivate the airbag and so assure the
safety of your front passenger(s) in the event of
an impact.
When the ignition is switched on,
this warning lamp comes on in the
seat belt warning display screen for
approximately one minute to signal
that the front airbag is activated.
Safety
Page 168 of 416
166
Remove and stow the head restraint
before installing a child seat on a
passenger seat.
Refit the head restraint once the child seat
has been removed.
(a)
Universal child seat: child seat which can
be installed in all vehicles using the seat
belt.
(b) Group 0: from birth to 10
kg. Infant car
seats and "car cots" cannot be installed
on the front passenger seat(s) or the
seats in row 3.
(c) Refer to the legislation in force in your
country before carrying your child in this
seating position.
(d) To install a child seat at the rear, for ward
facing or rear ward facing, move the seats
in front for ward, then straighten their
backrests to allow sufficient room for the
child seat and the child's legs.
(e) The seat can be installed centrally in the
vehicle; it then prevents the use of the
outer seats.
(f ) When a "rear ward facing" child seat
is placed on the front passenger seat,
the front passenger airbag must be
deactivated. Otherwise, the child could
face severe injury or death if the airbag
were deployed.
U Seating position suitable for the
installation of a child seat secured using
the seat belt and universally approved
"rearward facing" and/or "forward facing". UF
Seat suitable for the installation of a child
seat secured using the seat belt and
universally approved "forward facing".
X Seat position not suitable for installation
of a child seat for the weight class
indicated.
Key"ISOFIX" mountings
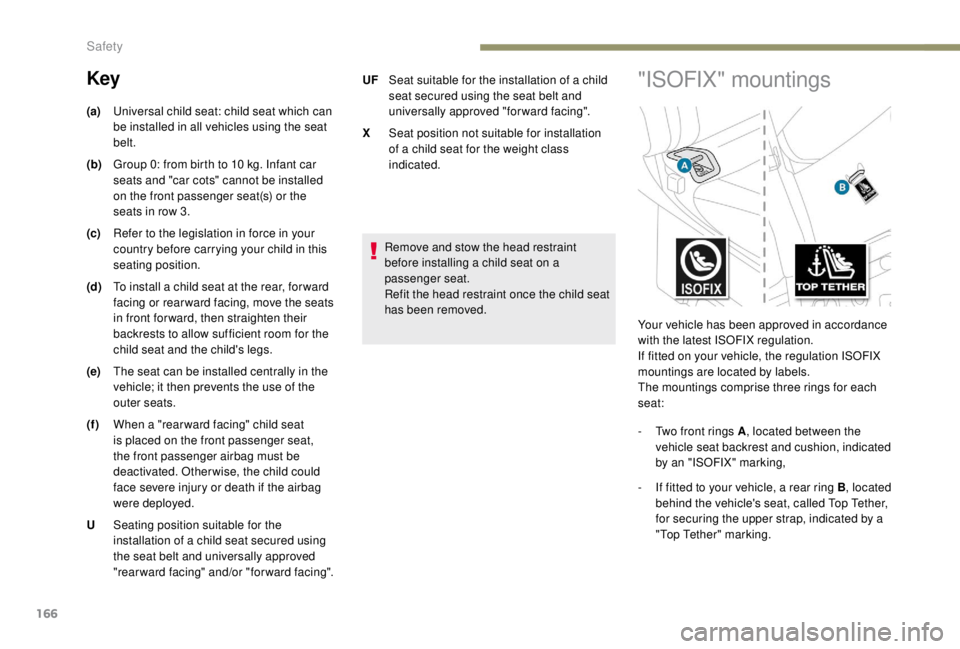
Your vehicle has been approved in accordance
with the latest ISOFIX regulation.
If fitted on your vehicle, the regulation ISOFIX
mountings are located by labels.
The mountings comprise three rings for each
seat:
-
T
wo front rings A , located between the
vehicle seat backrest and cushion, indicated
by an "ISOFIX" marking,
-
I
f fitted to your vehicle, a rear ring B , located
behind the vehicle's seat, called Top Tether,
for securing the upper strap, indicated by a
"Top Tether" marking.
Safety
Page 174 of 416
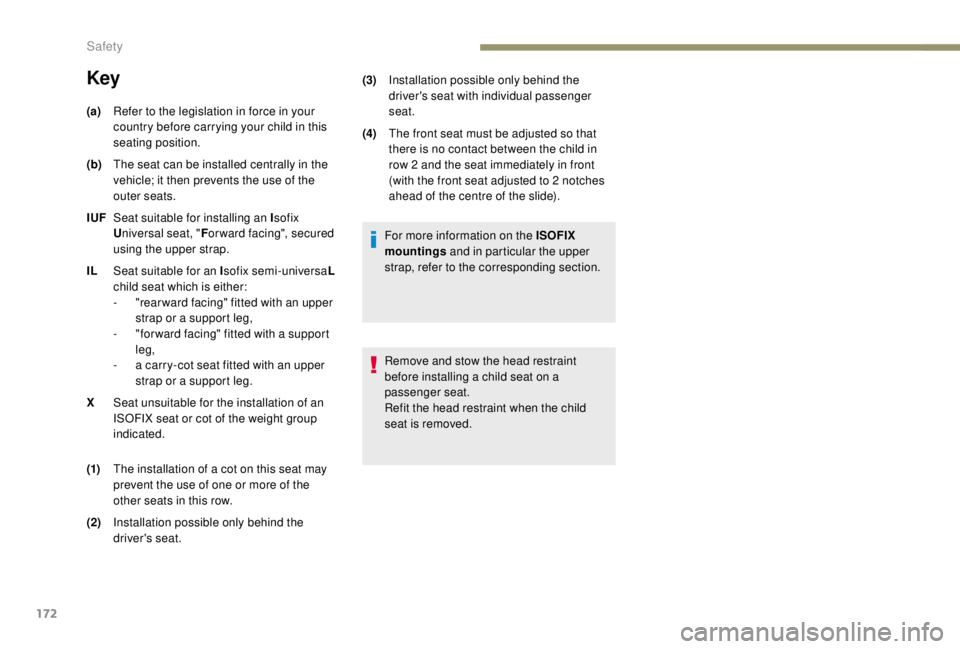
172
(a)Refer to the legislation in force in your
country before carrying your child in this
seating position.
(b) The seat can be installed centrally in the
vehicle; it then prevents the use of the
outer seats.
IUF Seat suitable for installing an I sofix
U niversal seat, " For ward facing", secured
using the upper strap.
IL Seat suitable for an I sofix semi-universaL
child seat which is either:
-
"
rear ward facing" fitted with an upper
strap or a support leg,
-
"
for ward facing" fitted with a support
leg,
-
a c
arry-cot seat fitted with an upper
strap or a support leg.
X Seat unsuitable for the installation of an
ISOFIX seat or cot of the weight group
indicated.
(1) The installation of a cot on this seat may
prevent the use of one or more of the
other seats in this row.
(2) Installation possible only behind the
driver's seat. For more information on the ISOFIX
mountings
and in particular the upper
strap, refer to the corresponding section.
Remove and stow the head restraint
before installing a child seat on a
passenger seat.
Refit the head restraint when the child
seat is removed.
Key(3) Installation possible only behind the
driver's seat with individual passenger
seat.
(4) The front seat must be adjusted so that
there is no contact between the child in
row 2 and the seat immediately in front
(with the front seat adjusted to 2 notches
ahead of the centre of the slide).
Safety