2018 PEUGEOT EXPERT belt
[x] Cancel search: beltPage 170 of 416
168
ISOFIX child seats
recommended by
PEUGEOT
PEUGEOT offers a range of ISOFIX child
seats listed and type approved for your
vehicle.
Also consult the installation notes of the
child seat’s manufacturer to find out how
to install and remove the seat.
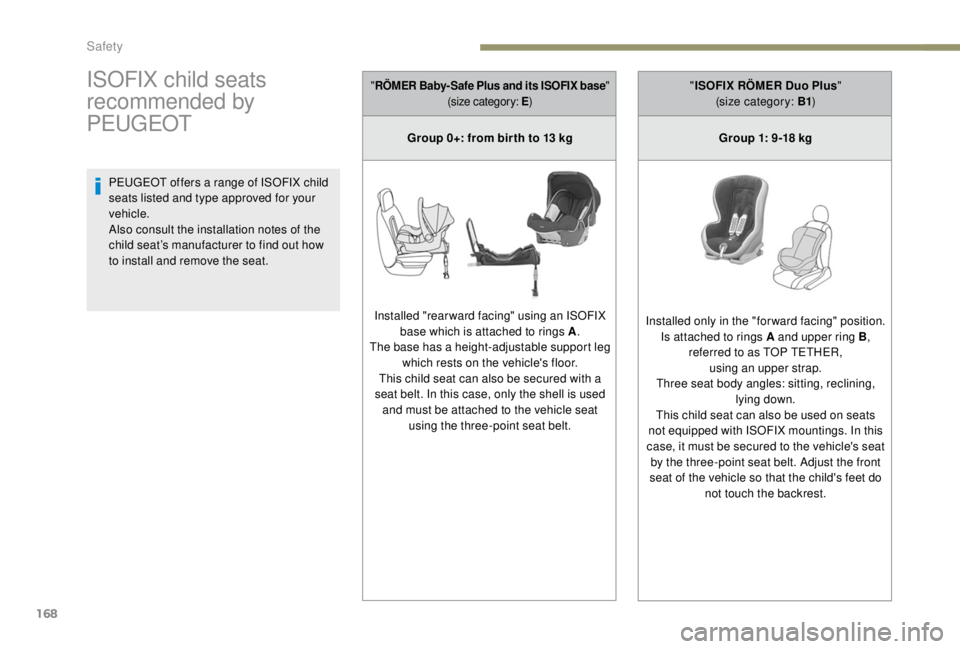
"RÖMER Baby- Safe Plus and its ISOFIX base "
(size category: E )
Group 0+: from bir th to 13 kg
I
nstalled "rearward facing" using an ISOFIX base which is attached to rings A .
The base has a height-adjustable support leg which rests on the vehicle's floor.
This child seat can also be secured with a
seat belt. In this case, only the shell is used and must be attached to the vehicle seat using the three-point seat belt. "
ISOFIX RÖMER Duo Plus "
(size category: B1 )
Group 1: 9-18 kg
Installed only in the "forward facing" position. Is attached to rings A and upper ring B ,
referred to as TOP TETHER, using an upper strap.
Three seat body angles: sitting, reclining, lying down.
This child seat can also be used on seats
not equipped with ISOFIX mountings. In this
case, it must be secured to the vehicle's seat by the three-point seat belt. Adjust the front
seat of the vehicle so that the child's feet do not touch the backrest.
Safety
Page 175 of 416
173
Advice
Child seats
The incorrect installation of a child seat in a
vehicle compromises the child's protection in
the event of an accident.
Ensure that there is no seat belt or seat belt
buckle under the child seat, as this could
destabilise it.
Remember to fasten the seat belts or the
child seat harnesses keeping the slack
relative to the child's body to a minimum,
even for short journeys.
When installing a child seat using the seat
belt, ensure that the seat belt is tightened
correctly on the child seat and that it secures
the child seat firmly on the seat of your
vehicle. If your passenger seat is adjustable,
move it for wards if necessary.
At rear seating positions, always leave
sufficient space between the front seat and:
-
a r
ear ward facing child seat,
-
t
he child's feet for a child seat fitted
forward facing.
To do this, move the front seat for wards
and, if necessary, move its backrest into the
upright position. For optimal installation of the forward-facing
child seat, verify that its backrest is as close
as possible to the backrest of the vehicle
seat, or if possible in contact with it.
You must remove the head restraint before
installing a child seat with backrest to a
passenger seat.
Ensure that the head restraint is stored or
attached securely to prevent it from being
thrown around the vehicle in the event of
sharp braking.
Refit the head restraint once the child seat
has been removed.
Children in front
The legislation on carrying children on the
front passenger seat is specific to each
country. Refer to the legislation in force in the
country in which you are driving.
Deactivate the passenger's front airbag when
a rear ward facing child seat is installed on
the front passenger seat. Otherwise, the child
risks being seriously injured or killed if the
airbag were deployed.
Installing a booster seat
The chest part of the seat belt must be
positioned on the child's shoulder without
touching the neck.
Ensure that the lap part of the seat belt
passes correctly over the child's thighs.
PEUGEOT recommends using a booster seat
with a backrest equipped with a belt guide at
shoulder level.
As a safety precaution, do not leave:
-
a c
hild or children alone and unattended in
a vehicle,
-
a c
hild or an animal in a vehicle under the
sun, with the windows closed,
-
t
he keys within the reach of children inside
the vehicle.
To prevent accidental opening of the doors,
use the child lock.
Take care not to open the rear windows by
more than one third.
To protect young children from the rays of the
sun, fit side blinds on the rear windows.
5
Safety
Page 200 of 416
198
Stop & Start
The Stop & Start system puts the engine
temporarily into standby – STOP mode – during
stops in traffic (red lights, traffic jams, etc.). The
engine restarts automatically – START mode –
as soon as you want to move off.
The restart takes place instantly, quickly and
silently.
Per fect for urban use, the Stop & Start system
reduces fuel consumption and exhaust
emissions as well as the noise level when
stationary.
Going into engine
STOP mode
For your convenience during parking
manoeuvres, STOP mode is not available
for a few seconds after coming out of
reverse gear.
The Stop & Start does not affect the
functionality of the vehicle, such as for
example, braking, power steering, etc.
A slight delay between the vehicle
stopping and the engine cutting out may
be noticed.Never refuel with the engine in STOP
mode; you must switch off the ignition.
With a manual gearbox , when vehicle speed
is below 12 mph (20 km/h) or the vehicle is
stationary (depending on engine), the Stop &
Start warning lamp comes on in the instrument
panel and the engine goes into standby
automatically when you place the gear lever in
neutral and you release the clutch pedal.
With an automatic gearbox , vehicle
stationary, the Stop & Start warning lamp
on the instrument panel comes on and the
engine goes into standby automatically when
you press the brake pedal or place the gear
selector in position N .
With an electronic gearbox , vehicle speed
below 5 mph (8 km/h), the Stop & Start warning
lamp on the instrument panel comes on and the
engine goes into standby automatically when
you press the brake pedal or place the gear
selector in position N .
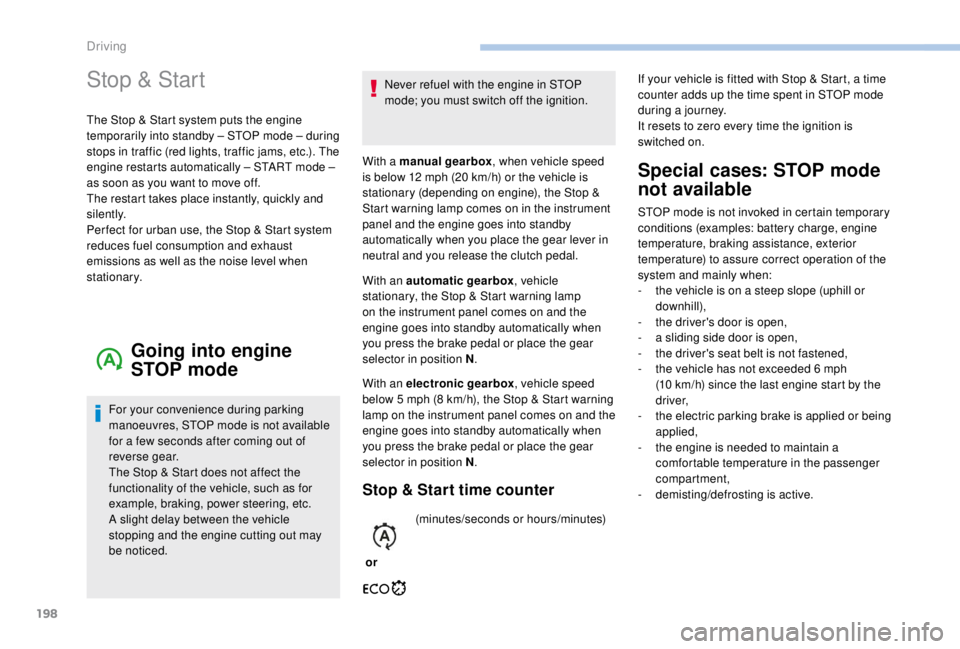
Stop & Start time counter
or(minutes/seconds or hours/minutes)
Special cases: STOP mode
not available
STOP mode is not invoked in certain temporary
conditions (examples: battery charge, engine
temperature, braking assistance, exterior
temperature) to assure correct operation of the
system and mainly when:
-
t
he vehicle is on a steep slope (uphill or
downhill),
-
t
he driver's door is open,
-
a s
liding side door is open,
-
t
he driver's seat belt is not fastened,
-
t
he vehicle has not exceeded 6 mph
(10
km/h) since the last engine start by the
driver,
-
t
he electric parking brake is applied or being
applied,
-
t
he engine is needed to maintain a
comfortable temperature in the passenger
compartment,
-
d
emisting/defrosting is active.
If your vehicle is fitted with Stop & Start, a time
counter adds up the time spent in STOP mode
during a journey.
It resets to zero every time the ignition is
switched on.
Driving
Page 201 of 416
199
In this case, this warning lamp
flashes for a few seconds then goes
of f.
Going into engine
START mode
With a manual gearbox, the Stop & Start
warning lamp goes off on the instrument panel
and the engine restarts automatically when you
press the clutch pedal fully down to the floor.
With an automatic gearbox , the Stop & Start
warning lamp on the instrument panel goes off
and the engine restarts automatically when:
-
y
ou release the brake pedal with the gear
selector in position D or M ,
-
y
ou are in position N with the brake pedal
released and you move the gear selector to
position D or M,
-
y
ou engage reverse.
This operation is perfectly normal.
With an electronic gearbox
, the Stop & Start
warning lamp on the instrument panel goes off
and the engine restarts automatically when:
-
y
ou release the brake pedal with the gear
selector in position A or M ,
-
y
ou are in position N with the brake pedal
released and you move the gear selector to
position A or M,
-
y
ou engage reverse.
Special cases: START mode
activated automatically
START mode is invoked automatically in
certain temporary conditions (examples:
battery charge, engine temperature, braking
assistance, air conditioning setting) to assure
correct operation of the system and mainly
when:
-
y
ou open the driver's door,
-
y
ou open a sliding side door,
-
y
ou unfasten the driver's seat belt,
-
t
he speed of the vehicle exceeds 16 mph
(25
km/h) or 2 mph (3 km/h) (depending on
the engine) with a manual gearbox,
-
t
he speed of the vehicle exceeds 2 mph
(3
km/h) with an automatic gearbox.In this case, this warning lamp
flashes for a few seconds then goes
of f.
Deactivation/Activation
With/Without audio system
This operation is perfectly normal.
With touch screen
In the " Driving/Vehicle " menu,
activate/deactivate " Stop & Star t
system".
If the system has been deactivated
in STOP mode, the engine restarts
immediately.
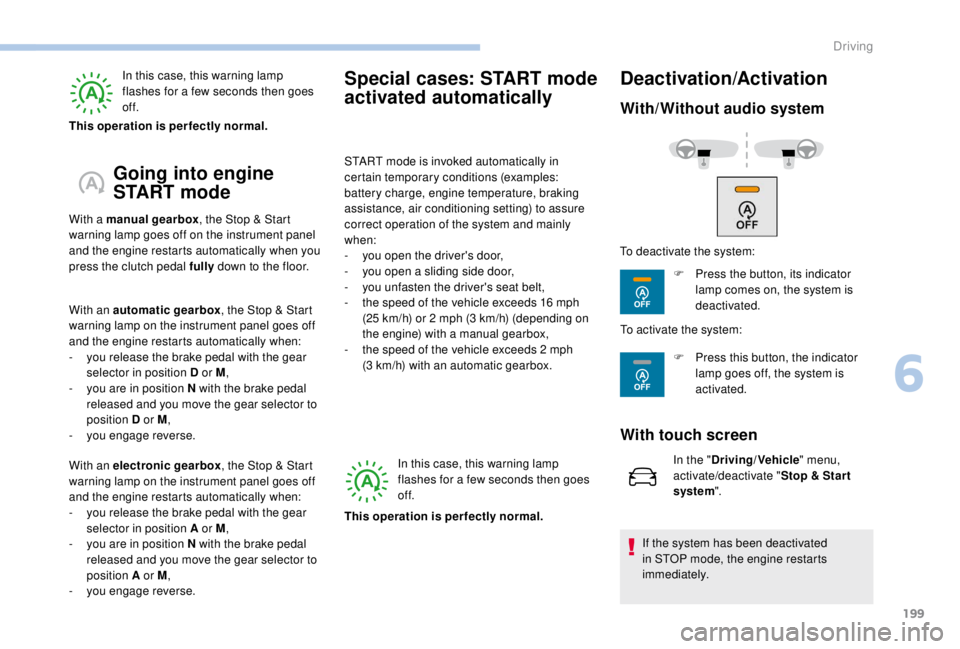
To deactivate the system:
F
P
ress the button, its indicator
lamp comes on, the system is
deactivated.
To activate the system:
F
P
ress this button, the indicator
lamp goes off, the system is
activated.
6
Driving
Page 220 of 416
218
The system does not act on the braking
system, but works only with engine
braking.
The regulation range is limited: there will
no longer be any adjustment of speed if
the difference between the programmed
speed setting and the speed of the vehicle
in front becomes too high.
If the difference between the programmed
speed setting and the speed of the
vehicle in front is too great, the speed
cannot be adjusted: the cruise control is
automatically deactivated.
Collision Risk Alert and
Active Safety BrakeConditions for operation
The Collision Risk Alert system only
operates:
-
w
ith a vehicle pointing in the same direction,
moving or stationary,
-
w
ith pedestrians,
-
a
bove 4 mph (7 km/h) (and deactivates at
3
mph (5 km/h)).
The Active Safety Brake system only
operates:
-
b
etween 3 and 87 mph (5 and 140 km/h), in
the case of a moving vehicle,
-
a
t a speed below 50 mph (80 km/h), in the
case of a stationary vehicle,
-
a
t a speed below 37 mph (60 km/h), in the
case of a pedestrian,
-
i
f the passenger seat belts are fastened,
-
i
f the vehicle is not accelerating sharply,
-
i
f the vehicle is not in a tight corner.
The Active Safety Brake system does not
operate:
-
i
f the front bumper is damaged,
-
i
f the system has been triggered in the last
10
seconds,
-
i
f the electronic stability control system has
a fault.
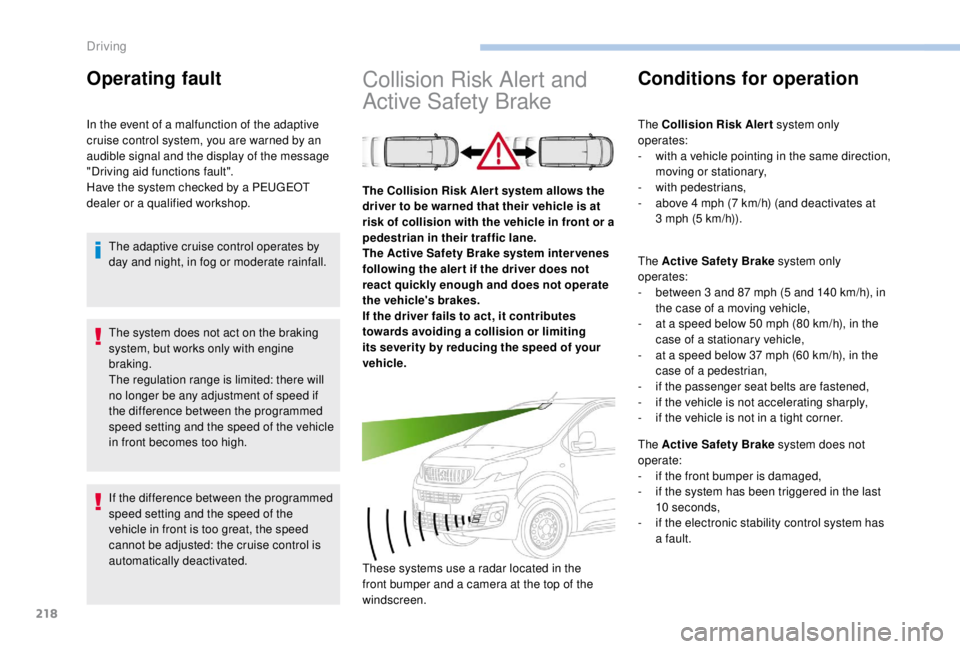
The Collision Risk Aler t system allows the
driver to be warned that their vehicle is at
risk of collision with the vehicle in front or a
pedestrian in their traffic lane.
The Active Safety Brake system inter venes
following the aler t if the driver does not
react quickly enough and does not operate
the vehicle's brakes.
If the driver fails to act, it contributes
towards avoiding a collision or limiting
its severity by reducing the speed of your
vehicle.
These systems use a radar located in the
front bumper and a camera at the top of the
windscreen.
Operating fault
In the event of a malfunction of the adaptive
cruise control system, you are warned by an
audible signal and the display of the message
"Driving aid functions fault".
Have the system checked by a PEUGEOT
dealer or a qualified workshop.
The adaptive cruise control operates by
day and night, in fog or moderate rainfall.
Driving
Page 225 of 416
223
Fatigue detection system
It is recommended that you take a break as
soon as you feel tired or at least every two
hours.The system cannot in any circumstances
replace the need for vigilance on the part
of the driver.
Do not take the wheel if you are tired.
Driving time warning
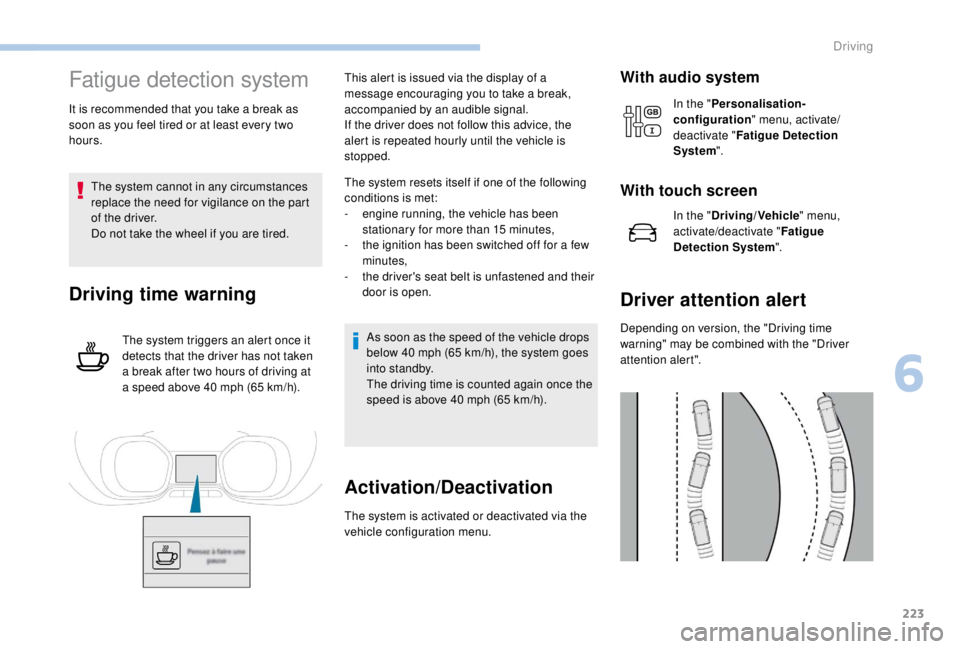
The system triggers an alert once it
detects that the driver has not taken
a break after two hours of driving at
a speed above 40
mph (65 km/h).This alert is issued via the display of a
message encouraging you to take a break,
accompanied by an audible signal.
If the driver does not follow this advice, the
alert is repeated hourly until the vehicle is
stopped.
The system resets itself if one of the following
conditions is met:
-
e
ngine running, the vehicle has been
stationary for more than 15
minutes,
-
t
he ignition has been switched off for a few
minutes,
-
t
he driver's seat belt is unfastened and their
door is open.
As soon as the speed of the vehicle drops
below 40 mph (65 km/h), the system goes
into standby.
The driving time is counted again once the
speed is above 40
mph (65 km/h).
Activation/Deactivation
The system is activated or deactivated via the
vehicle configuration menu.
With audio system
In the "Personalisation-
configuration " menu, activate/
deactivate " Fatigue Detection
System ".
With touch screen
In the "Driving/Vehicle " menu,
activate/deactivate " Fatigue
Detection System ".
Driver attention alert
Depending on version, the "Driving time
warning" may be combined with the "Driver
attention alert".
6
Driving
Page 287 of 416
285
FuseN° Rating
(A) Functions
F1 10Electric power steering, clutch switch.
F4 15Horn.
F5 20Front/rear screenwash pump.
F6 20Front/rear screenwash pump.
F7 10Rear 12
V accessory socket.
F8 20Single or double rear wipers.
F10/F11 30Internal/external locks, front and rear.
F13 10Front air conditioning controls, audio system controls, gear lever,
head-up display.
F14 5Alarm, emergency and assistance calls.
F17 5Instrument panel.
F19 3Steering mounted controls.
F21 3
K
eyless Entry and Starting or anti-theft system.
F22 3Rain and sunshine sensor, multifunction detection camera.
F23 5Seat belt unfastened or not fastened display screen.
F24 5Touch screen, reversing camera and parking sensors.
F25 5Airbags.
F29 20Audio system, touch screen, CD player, navigation.
F31 15Audio system (+ battery).
F32 15Front 12
V accessory socket.
F34 5Blind spot monitoring system, door mirror electric controls.
F35 5Heated washer jets, headlamp beam height control.
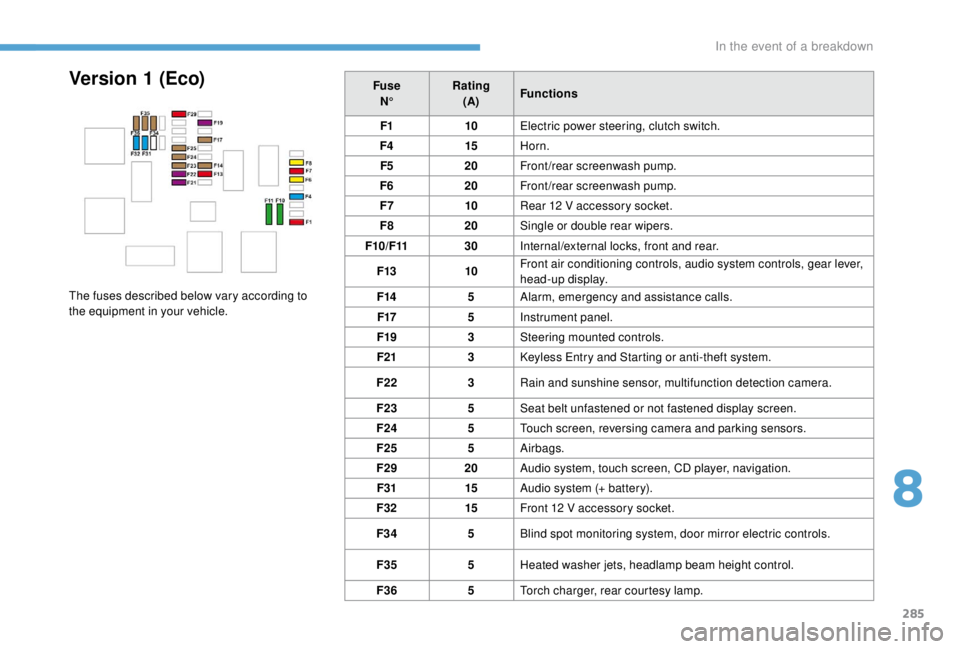
F36 5Torch charger, rear courtesy lamp.Version 1 (Eco)
The fuses described below vary according to
the equipment in your vehicle.
8
In the event of a breakdown
Page 288 of 416
286
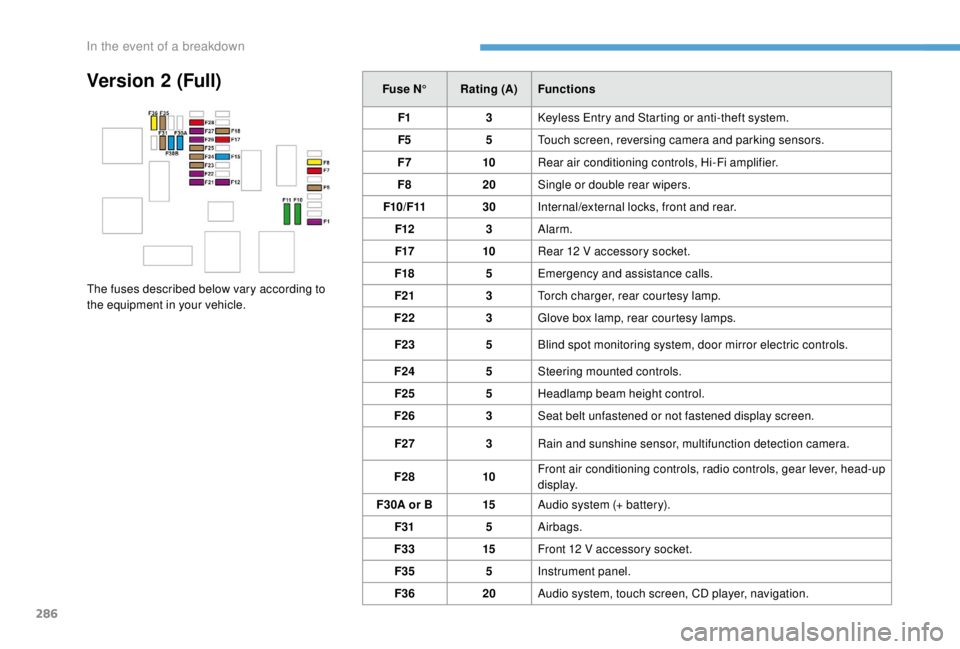
Version 2 (Full)Fuse N°Rating (A) Functions
F1 3
K
eyless Entry and Starting or anti-theft system.
F5 5Touch screen, reversing camera and parking sensors.
F7 10Rear air conditioning controls, Hi-Fi amplifier.
F8 20Single or double rear wipers.
F10/F11 30Internal/external locks, front and rear.
F12 3Alarm.
F17 10Rear 12
V accessory socket.
F18 5Emergency and assistance calls.
F21 3Torch charger, rear courtesy lamp.
F22 3Glove box lamp, rear courtesy lamps.
F23 5Blind spot monitoring system, door mirror electric controls.
F24 5Steering mounted controls.
F25 5Headlamp beam height control.
F26 3Seat belt unfastened or not fastened display screen.
F27 3Rain and sunshine sensor, multifunction detection camera.
F28 10Front air conditioning controls, radio controls, gear lever, head-up
display.
F30A or B 15Audio system (+ battery).
F31 5Airbags.
F33 15Front 12
V accessory socket.
F35 5Instrument panel.
F36 20Audio system, touch screen, CD player, navigation.
The fuses described below vary according to
the equipment in your vehicle.
In the event of a breakdown